
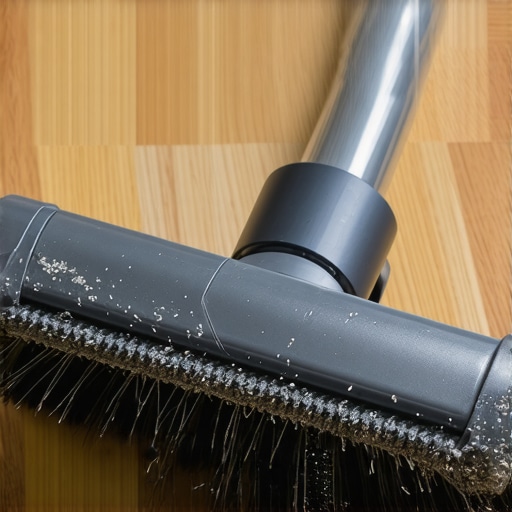
I remember it vividly. It was a Tuesday afternoon, and the sun was streaming through the bay window at just the perfect angle. I looked down and saw them: hundreds of tiny, swirling battle scars etched into my beautiful white oak. My heart sank. I’d spent thousands on these floors and hours perfecting my house cleaning strategies for a sparkling home today, only to realize my trusty vacuum was actually a wood-eating monster. I had been so diligent about my cleaning, yet I was literally grinding the finish off my own house. I made the classic mistake of thinking that the stiff, spinning bristles meant a deeper clean. I was wrong. Today, I am going to show you exactly why that beater bar is your floor’s worst enemy and how you can save your home’s value before it is too late.
Stop Using the Carpet Setting on Your Wood
For the longest time, I assumed that if the vacuum felt like it was grabbing the floor, it was working. I even used the highest suction and the brush roll on my oak floors because I wanted to get every speck of dust out of the grain. Little did I know, those stiff nylon bristles are designed to agitate carpet fibers, not caress delicate wood. When they spin at thousands of rotations per minute, they act like high-speed sandpaper. This is a primary reason why your wood floors are losing their shine over time. According to the National Wood Flooring Association, using a vacuum with a beater bar can cause significant abrasive damage to the floor’s protective finish. I learned this the hard way, almost reaching the point where I needed to strip floor wax without damaging the original wood finish just to start over. Have you noticed those weird circular marks or a sudden dullness on your floors lately?
Can a simple vacuum really do that much damage?
You might be thinking that plastic bristles cannot possibly hurt solid wood. I thought the same thing. I figured wood was tough. But the damage isn’t just from the bristles themselves; it is the grit they trap and drag. If you do not fix water damaged hardwood floors before the wood starts to warp, the finish is already compromised, making it even easier for a brush roll to shred the surface. My mistake was ignoring the subtle dulling until it became a permanent scar. We are going to fix your routine right now so your floors stay flawless.
Flip the Switch Before You Scratch
The very first thing you must do—and I mean before you even plug the machine into the wall—is locate the brush roll switch. Most modern vacuums have a “Hard Floor” or “Suction Only” mode. Think of your wood floor finish like the clear coat on a luxury car. You wouldn’t take a wire grill brush to your car’s hood to get the dust off, would you? That is exactly what a spinning beater bar does to wood. It pounds the surface. If you are following a daily house cleaning routine to maintain perfection, the cumulative damage from that brush is what eventually kills the glow. I remember one Saturday morning when I was rushing through the house. I had just finished the living room rug and zipped right onto the oak hallway without hitting the switch. The sound was horrifying—a rhythmic thwack-thwack-thwack that sounded like a helicopter landing in my house. I stopped immediately, but the damage was done. A faint, hazy line of micro-scratches followed the exact path of my vacuum. It was a painful reminder that “fast” cleaning is often “expensive” cleaning. This mistake is also a big reason why your vacuum is actually spreading more dust around; the brush flickers debris into the air instead of letting the suction pull it in.
Identify Your Vacuum’s Secret Weakness
Flip your vacuum over and look at the bottom. Do you see those stiff, plastic bristles? If they do not retract or stop spinning, you should not let that machine touch your wood. If you are trying to keep things clean for a move, following move-out cleaning strategies to secure your deposit, a scratched floor is the fastest way to lose your money. Instead, use a dedicated floor tool. These are usually wide, flat attachments with soft natural hair bristles or felt strips. They glide. They do not grind.
Why Suction Is Better Than Agitation
On a carpet, you need agitation to shake the dirt loose from the fibers. On wood, the dirt is just sitting there. You do not need a fight; you need a vacuum. If your floor still feels gritty, it is often because you are dragging dirt rather than lifting it. This is similar to why your floors feel sticky even after you finished mopping—the debris is being rearranged, not removed. I have found that using the hose with a soft-bristle attachment is also the best way to handle the edges where the floor meets the wall. It helps you remove scuff marks from baseboards without using chemicals because it pulls the abrasive grit out of the crevices before it can leave a permanent mark.
Master the Lift and Drop Technique
When you encounter a stubborn pile of crumbs or pet hair, do not “scrub” with the vacuum head. This creates friction. Instead, lift the vacuum head slightly and place it directly over the mess. Let the air pressure do the heavy lifting. This is a core part of my sanitizing secrets for a safer house in 2025. By avoiding the scrubbing motion, you prevent the bottom of the vacuum from pressing grit into the wood. I once tried to “scrub” a spill of dried mud off my floor with the vacuum, and I basically sandpapered a circle into my finish. Now, I always use the suction-only method and then a damp microfiber for the residue. It is about working with the material, not against it. If you have any upholstery nearby, remember that the same logic applies—gentle suction is always safer than high-speed friction, as noted in the ultimate upholstery care guide for lasting freshness. Using the right tools for the right surface is the only way to keep your home’s value intact over the long haul.Most people believe that “clean” is a visual state, but when you are deep in the trenches of a daily house cleaning routine to maintain perfection, you realize that the real enemy is microscopic. However, here is where I disagree with the mainstream: the obsession with “deep sanitizing” often leads to the destruction of the materials themselves. I see it all the time with people trying to ensure your deposit refund by over-cleaning. They reach for the steam mop, thinking the heat is killing germs. In reality, you are forcing high-pressure moisture into the seams of your wood. According to a technical report by the Wood Flooring Association of Canada, steam can force its way under the finish, causing the wood to swell and the finish to peel. This is why your steam mop might be damaging your laminate floors and hardwood alike. It is a classic “oops” moment—you think you are being more hygienic, but you are actually shortening the floor’s lifespan by a decade.
The Sanitization Trap That Ruins Fine Wood
The “Oops” factor often comes from the products we use alongside the vacuum. If you have ever used a “shine restorer” after vacuuming, you have likely fallen into the buildup trap. These products often contain oils or waxes that actually attract more dust. This results in floors feeling sticky even after you finished mopping. My effective house cleaning secrets from cleaning experts always emphasize one thing: less is more. If the vacuum did its job with suction alone, you should not need a chemical cocktail to make it look good.
Why does my vacuum still leave a film even after I switch the beater bar off?
This is a question I get from readers who have high-end finishes. The answer usually lies in the filter. If you are not using a sealed HEPA system, your vacuum is essentially a giant aerosol machine. It takes the fine, oily kitchen dust and sprays it back out over your floors. This is why your vacuum is actually spreading more dust around. This film is the hardest thing to tackle when you are following move-out cleaning strategies to secure your deposit. You might think you have cleaned, but the inspector will feel that grit the moment they walk in.
Master the Hidden Geometry of the Room
I have learned that the sequence of cleaning is just as vital as the tools. If you are following the ultimate upholstery care guide for lasting freshness, you know that vacuuming the floor before the couch is a recipe for disaster. The moment you start patting down those cushions, dust rains back onto the floor you just meticulously cleaned without the brush roll. Always work top-to-bottom. If you are applying sanitizing secrets for a safer house in 2025, this also prevents cross-contamination. I once spent four hours cleaning a studio apartment, only to have to redo the floors because I dusted the ceiling fan last. It was a rookie mistake that cost me an entire afternoon. I’ll share another trap: the “one-size-fits-all” microfiber cloth. People think all microfibers are soft, but some are designed for heavy scrubbing and contain polyester hooks that are too aggressive for high-gloss oak. Use only high-GSM cloths meant for delicate surfaces. When you are trying to simplify your transition during a move, grabbing any old rag can lead to permanent damage. Have you ever fallen into this trap where one cleaning step ruins another? Let me know in the comments. I would love to hear your “oops” stories so we can all avoid them together.I have heard those stories time and again. The truth is, even the most expensive equipment in the world won’t save your floors or fabrics if you treat it like a set-it-and-forget-it appliance. If you are serious about your daily house cleaning routine to maintain perfection, you have to look at the health of your tools first. Most people empty the dust bin and think they are done, but that is a dangerous assumption.
Stop Sabotaging Your Effort with Dirty Filters
The heart of your vacuum’s performance is the filtration system. When the HEPA filter becomes saturated with fine particulates, the motor has to work twice as hard, which actually generates more heat and can cause the plastic housing to slightly expand, leading to air leaks. This is why your vacuum filter might be making your allergies worse. When suction drops, you instinctively press the vacuum head harder against the wood or upholstery to compensate. That extra pressure is what leads to those micro-scratches we talked about earlier. According to technical documentation from the Dyson Engineering Lab, airflow resistance increases exponentially as dust cakes onto the filter, reducing the ‘pick-up’ efficiency by up to 50% long before the bin is even full. If you aren’t washing your filters monthly, your vacuum is blowing dust back into the air and grinding it into your expensive white oak. It is just like how you must clean the filter inside your dryer you didn’t know existed to prevent fires; tool maintenance is non-negotiable for a safe home.
Swap Those Plastic Brushes for Genuine Horsehair
If you want to scale your cleaning results to a professional level, you need to stop using the universal plastic attachments that came with your vacuum. I personally use a 12-inch horsehair floor brush for all my hard surfaces. Why? Because horsehair is naturally soft and flexible enough to reach into the grain of the wood without ever being abrasive. It is one of the effective house cleaning secrets from cleaning experts that changes everything. These brushes don’t just ‘push’ dust; they flick it into the suction path. This level of detail is vital when you are implementing upholstery cleaning tips for a fresh home revival because you can use the same soft-bristle logic for delicate sofa fabrics.
How do I maintain my home’s surfaces over the long haul?
Consistency is the only way to prevent the need for aggressive, material-stripping deep cleans. I recommend learning how to schedule a deep clean that actually lasts more than a week by rotating your focus. One week you focus on high-traffic floor areas with suction-only passes, and the next you focus on the vertical surfaces and upholstery. Looking ahead, I predict we will soon see vacuums equipped with real-time laser particle counters that tell you exactly when a surface is ‘biologically clean,’ moving us closer to the sanitizing hacks for safe house transitions used in clinical settings. For now, my best advice is this: I challenge you to go check your vacuum filter right now. If it is grey or brown, wash it with cold water and let it air dry for 24 hours. You will be shocked at how much easier the vacuum glides over your floors tomorrow morning.
The Most Expensive Mistakes I Made So You Don’t Have To
I used to believe that if I couldn’t hear the vacuum ‘working,’ it wasn’t cleaning. That logic cost me a full floor refinish. One major lightbulb moment was realizing that noise is often just friction in disguise. If your vacuum sounds like a jet engine on your oak, it is probably sanding the finish. Another hard truth is that ‘automatic’ sensors on middle-of-the-road vacuums are notoriously unreliable; I stopped trusting them and started manually checking the brush roll every single time. Also, remember that your cleaning sequence matters—if you don’t use why professional cleaners always start at the top of the room as your guide, you’ll just be vacuuming the same dust twice.
My Personal Arsenal for a Truly Healthy Home
When I want to ensure I am using move-out cleaning hacks ensure your deposit refund level quality, I stick to a few non-negotiables. First, I only use high-GSM microfiber cloths for any hand-wiping. They act like magnets for dust without the abrasive qualities of cheap rags. Second, the 12-inch horsehair brush attachment is my best friend; it’s the only tool I trust to glide over my white oak. I also frequently consult the technical bulletins from the National Wood Flooring Association to stay ahead of new finish technologies. These tools are the backbone of my effective house cleaning secrets from cleaning experts and have saved me thousands in potential repairs.
It Is Time to Give Your Floors the Respect They Deserve
Your home is likely your biggest investment, and the floors are its most visible feature. By slowing down, ditching the beater bar, and focusing on suction-only cleaning, you aren’t just tidying up—you are preserving a legacy. Whether you are deep in a daily house cleaning routine to maintain perfection or just trying to simplify your transition to a new space, treat your wood with the same gentleness you’d show a piece of fine furniture. Use sanitizing hacks for safe house transitions to keep your family healthy without compromising the integrity of your wood floors. Have you ever discovered a scratch and realized it was from your own cleaning tools? Let me know in the comments below!