
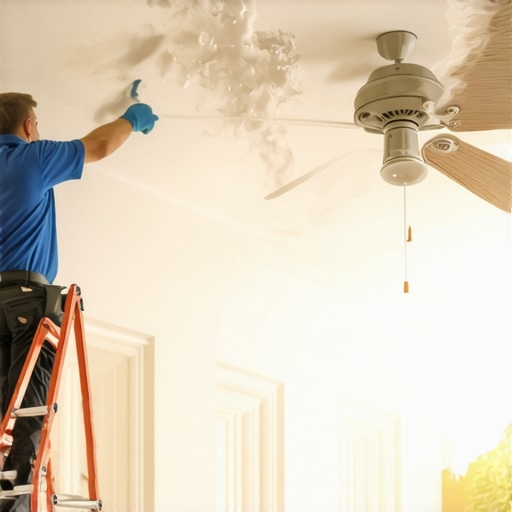
I’ll never forget the Saturday I spent six hours deep-cleaning my living room, only to realize I’d done everything in the exact wrong order. I had just finished scrubbing the baseboards to a mirror shine when I noticed the ceiling fan was caked in grey fuzz. One flick of my duster later, and my pristine floors were covered in a thick snowfall of allergens and pet dander. I wanted to cry. It was a total amateur move, and I felt like I was chasing my own tail for the rest of the afternoon. If you have ever felt that crushing frustration of cleaning the same spot twice, you are in the right place. Today, I am going to show you how to fix your workflow so you can stop working harder and start working smarter. We are diving into the one rule that separates the pros from the exhausted homeowners: the Top-to-Bottom method.
Gravity is Your Biggest Enemy or Your Best Friend
Cleaning isn’t just about soap and water; it is a lesson in physics. When you wipe a surface or scrub a ledge, dust and debris become airborne. Eventually, they obey the laws of gravity and settle on whatever is sitting directly beneath them. This is the core reason why effective house cleaning secrets from cleaning experts always prioritize the highest points first. If you start with the floors, you are basically inviting every crumb from the counters and every cobweb from the corners to ruin your hard work. I used to think I was being efficient by tackling the most visible mess on the rug first, but I was actually just creating a cycle of re-cleaning. According to the American Cleaning Institute, a systematic approach—starting at the ceiling and working toward the floor—is the only way to ensure you aren’t just moving dirt from one shelf to another.
Is This Top-Down Method Actually Worth the Extra Effort?
You might be thinking that reaching for those high corners is a lot of extra stretching for a simple Tuesday afternoon tidy-up. You might even wonder if it really makes that much of a difference in a normal home. Trust me, the alternative is much worse. Have you ever spent twenty minutes getting rid of the sticky film on top of your kitchen cabinets only to realize you have dripped greasy residue all over your freshly sanitized stove? It is soul-crushing. By working from the ceiling down, you ensure that every bit of falling debris is eventually captured by your final sweep or vacuum. Have you ever had to re-mop a kitchen floor because you forgot to dust the blinds after you finished?
Stop Rearranging the Dust in Your Home
One of the biggest mistakes I made early on was using the wrong tools for those high-up spots. I would use a dry rag that just pushed dust into the air, which is a major reason why your vacuum filter might be spreading dust around if you aren’t trapping it properly at the source. Professionals use microfiber or damp cloths to grab and hold the dirt as they move down the room. This ensures that by the time you finally reach the floor, the room is actually clean, not just rearranged. It’s all about creating a path of least resistance for the dirt to follow—right into your dustpan.
Start at the Ceiling and Work Your Way Down
Think of your room like a three-story building. If you start cleaning the lobby first, the construction dust from the penthouse is just going to settle on your new marble. When I was prepping for a major move-out, I spent three hours polishing my kitchen floors, only to decide I should probably wipe the grease off the top of the fridge afterward. Big mistake. Half an hour later, my ‘clean’ floors were a sticky, grey mess of old cooking oil and dust bunnies. To avoid this, your first targets should always be the ceiling fans, crown molding, and those recessed lights. You should also take a moment to clean your lightbulbs every spring because dust buildup can actually dim your room and create a faint burning smell over time. By knocking the dust loose at the highest point, you are ensuring that it lands on surfaces you haven’t touched yet. 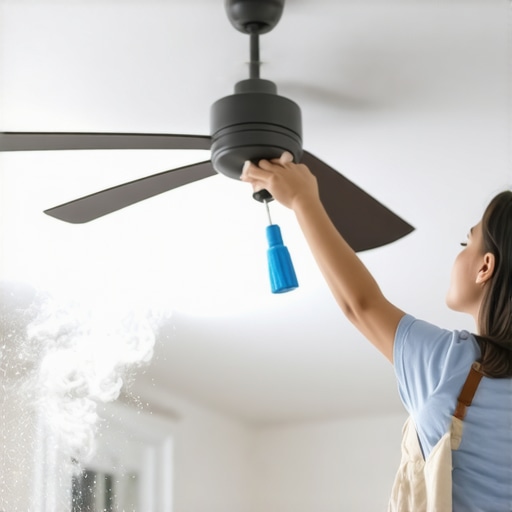
Clear the Mid-Zone Before the Floor Takes the Hit
Once the ceiling is clear, move your focus to the eye-level surfaces. This includes your walls, window treatments, and those annoying window tracks. If you are a renter, you know that landlords have a sixth sense for spotting dirt in the tracks. Instead of struggling with a vacuum attachment that doesn’t fit, you should try the window track hack that uses a sponge and a utility knife to get into those tight grooves. During this phase, it is also critical that you dust your walls before a move-out clean. It sounds overkill, but cobwebs and scuff marks often hide in plain sight until you shine a flashlight on them. If you skip the walls and jump straight to the furniture, you’ll find yourself wiping ‘ghost dust’ off your sofa for the next three days.
Focus on Your Fabric and Furniture Next
Before you even think about plugging in the vacuum, look at your seating. Soft surfaces are like giant magnets for the dust you just knocked down from the ceiling. I remember a client who couldn’t figure out why her living room always smelled faintly of ‘old attic’ despite cleaning daily. It turned out she was cleaning her floors first and then dusting her shelves, which let all that debris settle right into her velvet chairs. To fix this, use upholstery cleaning tips for a fresh home revival to lift trapped allergens out of the fabric before you finish the room. If you have pets, this is the time to be aggressive with the lint roller or a damp rubber glove to grab hair that has drifted down.
Wrap it Up with the Baseboards and Floors
The very last step in the physics of cleaning is the floor. Everything you have brushed, wiped, or shaken loose is now sitting on the ground. This is where the magic happens. Start at the edges. I personally swear by the toothbrush trick for removing pet dander from baseboard crevices because a standard vacuum head just can’t reach that deep-seated grime. When you follow these move-out cleaning strategies to secure your deposit, you are essentially herding the dirt into a corner where it can be sucked up once and for all. By the time your vacuum hits the carpet, you aren’t just cleaning the floor; you are removing the cumulative mess of the entire room.
Now that you have the basic physics down, let’s talk about where most people—even the most dedicated weekend warriors—get it wrong. There is a common belief that if a room smells like a lemon-scented meadow, it must be sanitized. In my years of professional cleaning, I’ve learned that a clean scent is often just a mask for underlying issues. In fact, relying on smell is one of the biggest mistakes you can make. This is especially true for your furniture; it is often the case that your fabric sofa still smells after using store-bought deodorizers because those products only sit on the surface without neutralizing the bacteria trapped deep within the fibers.
Stop Trusting Your Nose to Tell You if a Room is Clean
Real sanitization is about chemistry and patience, not just a quick spray and wipe. Most people don’t realize that disinfectants have a mandatory ‘dwell time.’ If you spray a counter and immediately wipe it dry, you have essentially done nothing to the bacteria. According to the Centers for Disease Control (CDC), most household disinfectants need to remain wet on a surface for several minutes to effectively kill pathogens. When you are looking for sanitizing secrets for a safer house in 2025, the first rule is to read the fine print on the label. You aren’t just cleaning for looks; you are cleaning for health. Have you ever fallen into this trap and wiped your cleaner away too fast? Let me know in the comments.
A Dangerous Trap Most DIY Cleaners Fall Into
While we are being analytical, let’s address the ‘Oops’ factor that can turn a routine clean into a hazard. I have seen homeowners mix products in an attempt to create a ‘super cleaner,’ but this is incredibly dangerous. Specifically, the danger of mixing bleach and vinegar in small bathrooms cannot be overstated—it creates toxic chlorine gas. Beyond chemical safety, you also have to worry about cross-contamination. If you use the same sponge for the kitchen as you do for the bathroom, you are just a moving factory for germs. Keep in mind that your cleaning sponge is the dirtiest object in your house if it isn’t replaced or sanitized frequently. Use color-coded microfiber cloths instead to keep your zones separate and safe.
Does Steam Cleaning Actually Kill Every Germ on Your Furniture?
This is a question I get from homeowners who want to avoid chemicals. Steam is powerful, but it isn’t a magic wand. You have to ask yourself: is steam cleaning enough to kill bacteria on high-touch surfaces without a pre-treatment? The answer is often ‘no’ if the surface has heavy organic soil. Steam works best as a finishing step after the bulk of the grime has been removed. Furthermore, if you are tackling a move-out, don’t forget the hidden zones that landlords always check. Most people lose money because of the sticky film on top of the kitchen fridge or because they ignored why the space behind the oven costs most renters their deposit. These nuances are what separate a ‘tidy’ home from a truly professional-grade clean.
If you are still using a standard upright vacuum you bought on a whim, you might be fighting a losing battle against microscopic invaders. Professionals rely on HEPA-sealed systems for a reason: they trap particles as small as 0.3 microns. If your machine isn’t sealed, your vacuum filter is actually spreading dust around your home rather than removing it. I personally switched to a canister vacuum with a certified HEPA exhaust five years ago, and the difference in the air quality of my living room was immediate. You can literally see fewer dust motes dancing in the sunlight after a session.
Stop Fighting Your Vacuum and Upgrade Your Filtration
Beyond the vacuum, my most recommended tool is high-density microfiber cloths—specifically the ones with a high GSM (grams per square meter). Cheap rags just move dirt; high-quality microfiber lifts it. When you combine the right tools with house cleaning strategies for a sparkling home today, you reduce the physical labor required to keep things looking sharp. In the near future, I predict we will see home sensors that detect dust-load levels in real-time, automatically triggering air purifiers or robotic cleaners before you even notice a mess.
#IMAGE_PLACE_HOLDER_D#
How can I keep my home this clean every single week?
The secret isn’t a grueling eight-hour marathon every Saturday; it is the “Rule of 10.” I live by a daily house cleaning routine to maintain perfection that focuses on high-traffic zones for just ten minutes a night. This prevents the “layering” effect where dust becomes grime and grime becomes a permanent fixture. According to the IICRC S300 Standard for Professional Upholstery Cleaning, soil that is allowed to sit becomes abrasive, acting like sandpaper on your fabric fibers every time you sit down. By performing quick maintenance, you are literally extending the life of your expensive furniture.
Give Your Furniture the Long-Term Care it Deserves
Speaking of furniture, you have to be incredibly careful with how you treat different materials. I once saw a gorgeous velvet sofa ruined because the owner used a water-based cleaner on an “S” coded fabric. You must learn how to treat s-coded upholstery fabric without ruining it, which usually involves dry cleaning solvents rather than a steam mop. For those of you with mixed-material rooms, keeping an ultimate upholstery care guide for lasting freshness handy is the best way to avoid a costly mistake. I challenge you to check the care tag on your sofa tonight—if it says ‘S’, put the soap and water away immediately and switch to a solvent-based approach instead.
Lessons from My Most Humiliating Cleaning Disasters
One of the biggest lightbulb moments in my career was realizing that ‘clean’ is a state of biology, not just a feeling. I spent years thinking a quick swipe with a fragrant wipe was enough, but that is how germs survive. First, never underestimate the power of dwell time; if you aren’t letting your spray sit, you’re just moving bacteria around. Second, the ‘clean smell’ is a lie—real sanitization doesn’t always have a scent. Third, mixing your own solutions is a gamble that rarely pays off and often ruins your finishes. If you want to dive deeper into the science, check out these sanitizing hacks for safe house transitions to ensure your new space is actually healthy and safe for your family.
The Gear I Actually Keep in My Utility Caddy
I don’t believe in buying every gadget on the shelf. I trust high-density microfiber cloths because they trap allergens instead of scattering them. I also swear by a HEPA-sealed vacuum to protect my lungs from microscopic debris. If you are preparing for a big move, having a move-out clean checklist to simplify your transition is more valuable than any ‘magic’ eraser. I also recommend keeping a simple sponge and utility knife in your kit—it’s the only way to truly master those window tracks. These effective house cleaning secrets from cleaning experts are what keep my home running like a well-oiled machine without the usual weekend burnout.
Reclaim Your Weekend by Working with Physics
At the end of the day, cleaning shouldn’t feel like a punishment. It’s an act of self-care for you and your family. When you stop fighting gravity and start using the Top-to-Bottom method, you’ll find you have hours of your life back. Don’t let the invisible messes—like the 3 germ hotspots in your kitchen that soap alone won’t fix—steal your peace of mind or your health. You now have the blueprint to transform your space into a sanctuary. If you ever feel overwhelmed or need a professional touch to get things back to baseline, feel free to contact us for expert advice or services. Have you ever realized halfway through a chore that you were doing it in the completely wrong order? Let me know in the comments below!