
I remember the first time I really looked at my baseboards during a move-out clean. It was noon on a Tuesday, and the sunlight was hitting the hallway at just the right angle to reveal the truth. There they were: dozens of black, rubbery streaks from shoes, vacuum wheels, and the occasional rogue suitcase. In a panic, I grabbed a bottle of heavy-duty industrial degreaser and started scrubbing like my life depended on it. Big mistake. Within seconds, I wasn’t just removing the scuff; I was stripping the semi-gloss finish right off the wood. It was a heart-sinking moment that cost me a chunk of my security deposit and left the hallway looking worse than when I started. Have you ever tried to fix a small cleaning issue only to realize you’ve accidentally created a much bigger project? I’ve been there, and I want to make sure you never have to feel that dread.
Skip the Harsh Sprays and Save Your Paint
I learned the hard way that you don’t need a chemistry lab to get a sparkling home. Those scuff marks are essentially just friction transfers—tiny bits of rubber or plastic that have rubbed off onto your paint surface. If you’re working through a move-out clean checklist, the last thing you want is to damage the property. It turns out that keeping things natural isn’t just better for the environment; it’s often safer for the delicate finishes in your home. A surprising study by the Environmental Working Group (EWG) found that some common household cleaners can emit over 450 different chemicals into the air, many of which aren’t even listed on the label. By sticking to natural methods, you’re protecting your lungs and your paint job at the same time. Whether you are following a daily house cleaning routine or tackling a deep clean, these methods are game-changers.
Is a Chemical-Free Approach Actually Strong Enough?
You might be skeptical. I certainly was. I used to think “natural” was just a polite word for “doesn’t work.” But after experimenting with everything from tennis balls to baking soda, I realized that physical friction is often more effective than chemical melting. When you are looking for effective house cleaning secrets, you’ll find that the best tools are often the simplest ones sitting in your pantry. Tell me, have you ever spent twenty minutes scrubbing a single spot only to realize you were using the wrong tool for the job? We’ve all been there, but today we are going to fix that.
My Biggest Mistake with Microfiber and Scuffs
Early in my cleaning journey, I assumed a soaking wet rag was the answer to every stain. It’s not. In fact, using too much water on certain types of trim can lead to permanent water spots or even wood swelling. It’s actually one of the quickest ways to ruin your baseboards if the water seeps into the cracks. I want to save you from that frustration by sharing what actually lifts the grime without compromising the integrity of your trim. Just like how you’d use a toothbrush for pet dander, sometimes the smallest, most targeted tool is the most powerful. Let’s look at the actual techniques that will get your deposit back and make those white boards look brand new again.
Grab a Tennis Ball for Instant Scuff Removal
You might look a little ridiculous doing this, but I promise it’s one of the most effective house cleaning secrets for light-to-medium rubber marks. Take a standard yellow tennis ball and cut a small ‘X’ into the top. Stick it onto the end of a broom handle so you don’t have to crawl on your hands and knees. The texture of the tennis ball acts like a giant eraser, gripping the rubber transfer and pulling it off the paint without using a drop of liquid. I remember my first studio apartment where the previous tenant had clearly practiced their mountain biking inside; the hallway was covered in black streaks. I spent an hour with the tennis ball on a stick, and it looked like I’d repainted the whole place by the time I was done. It’s a dry friction method that bypasses the risk of liquid damage entirely.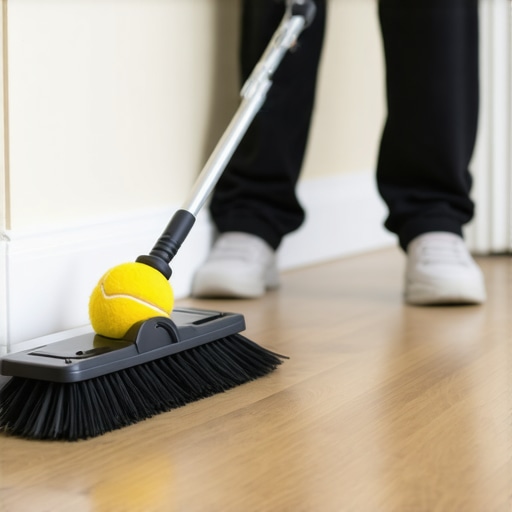
Why Melamine Foam is Your Secret Weapon
If the tennis ball doesn’t budge the mark, it’s time to level up to melamine foam, often known as a Magic Eraser. Think of this material as microscopically fine sandpaper. Because it is abrasive, you have to be incredibly careful with the pressure you apply. If you’re checking off your move-out cleaning hacks, keep in mind that aggressive scrubbing with these sponges will eventually turn your semi-gloss trim into a matte finish. Wet the sponge, wring it out until it’s barely damp, and use light, circular motions. I once got over-excited cleaning a client’s baseboards and scrubbed so hard I could see the grey primer underneath. Always test a small, hidden corner first to ensure the paint stays put while the scuff disappears. This is especially vital when using the move-out hack for getting scuff marks off white walls where the paint is often thinner than on the trim.
Make a Simple Paste for Stubborn Grime
When scuffs are mixed with oily residue—think kitchen grease or pet dander—you need a bit of a cleaning boost. Mixing baking soda with a tiny amount of water creates a non-toxic paste that provides gentle grit. It’s much safer than reaching for a solvent that might melt the finish. Smear a pea-sized amount on the scuff, let it sit for two minutes, and then wipe it away with a soft cloth. This is a fantastic alternative when you’re worried about the quickest way to get crayon marks off the baseboards without resorting to chemicals. The baking soda neutralizes odors while the friction lifts the stain.
Finish with a Dry Microfiber Buff
The step most people skip is the final buff. Any time you use a damp method, you leave behind a microscopic film that attracts new dust almost immediately. Once the scuff is gone, take a clean, dry microfiber cloth and give the area a quick polish. This restores the sheen and ensures that no moisture lingers in the crevices of the wood. It’s the same logic you’d apply to getting grease off kitchen cabinets; the drying phase is what prevents streaks and protects the integrity of the material over time. Just a few seconds of buffing can be the difference between a job that looks ‘clean’ and a job that looks professional.
Most people think they’re germ-killing ninjas when they spray a surface and immediately wipe it dry. In my years of obsessing over effective sanitizing methods for a germ-free home, I’ve realized this is the biggest myth in the cleaning industry. If you don’t let the product sit, you aren’t sanitizing; you’re just giving the bacteria a quick bath. This is especially true when you’re executing sanitizing hacks for safe house transitions. You see, the Environmental Protection Agency (EPA) specifically mandates ‘contact time’—the period a surface must remain visibly wet—to actually kill the pathogens listed on the label. If you wipe it off in three seconds, you’ve basically done nothing but move the dirt around.
The Lethal Myth of Spraying and Wiping
The biggest “oops” factor I see happens when people try to sanitize a surface that is still covered in visible dust or grime. You cannot sanitize dirt. The organic matter acts as a shield, protecting the bacteria underneath from the chemicals. If you are working through move-out cleaning strategies to secure your deposit, you must clean first, then sanitize. It’s a two-step process that most people merge into one, which results in a surface that looks clean but is still biologically active. Have you ever fallen into this trap? Let me know in the comments. It’s a mistake that even seasoned pros made early in their careers.
Why Does Dwell Time Matter More Than the Chemical Itself?
Dwell time is the secret sauce. For most common household disinfectants, that window is between four and ten minutes. If you’re rushing through your daily house cleaning routine, you’re likely not giving the product enough time to break down the cellular walls of the germs. Think about it like marinating meat; the flavor doesn’t soak in the second it touches the surface. I’ve seen people spray down a bathroom and immediately dry it with a towel, which actually increases the risk because you’re now potentially spreading contaminants from the bathroom to the next surface you touch with that same towel.
The Advanced Trap of Heat and Fabric
Another nuance that beginners miss is the relationship between heat and sanitization, particularly with soft surfaces. I often hear people say they’ll just use a steam cleaner for everything. But as we’ve discussed in the ultimate upholstery care guide for lasting freshness, some fabrics will actually shrink or permanently water-spot if exposed to the very heat meant to sanitize them. Before you even think about steam, you should vacuum your mattress before you sanitize it to remove the physical barriers. If you jump straight to the ‘wet’ phase, you’re just creating a warm, damp environment that mold loves. When looking for effective house cleaning secrets, remember that the order of operations—dry, then clean, then sanitize—is non-negotiable for professional results. Using the right upholstery cleaning tips ensures you aren’t trading a few germs for a ruined sofa.
If you want to maintain that ‘just moved in’ sparkle, you have to look at your tools as an investment, not an afterthought. I used to buy the cheapest vacuum on the shelf until I realized it was basically just a dust-recirculation machine. If you’ve ever noticed a musty smell while vacuuming, the motor might be dying, or worse, you’re just spreading allergens. Now, I swear by true HEPA filtration because it traps 99.97% of particles. When you’re doing a move-out clean checklist, the last thing you want is for a fine layer of dust to settle back onto your freshly wiped surfaces ten minutes later. This is why your vacuum is blowing dust back into the air if it lacks a sealed system.
Don’t Settle for a Vacuum That Just Spreads Dust
To scale your cleaning routine from amateur to professional, you need to understand the physics of your equipment. For example, I’ve found that using the two-cloth method for streak-free windows is far more effective than any expensive squeegee if you aren’t trained to use one. It’s about the tool meeting your skill level. In my toolkit, you will always find a high-grammage microfiber cloth. These aren’t the cheap ones from the grocery store; they are split-fiber cloths that physically hook onto bacteria and pull them off the surface. If you are serious about effective sanitizing methods for a germ-free home, the quality of your cloth matters just as much as the liquid you spray. 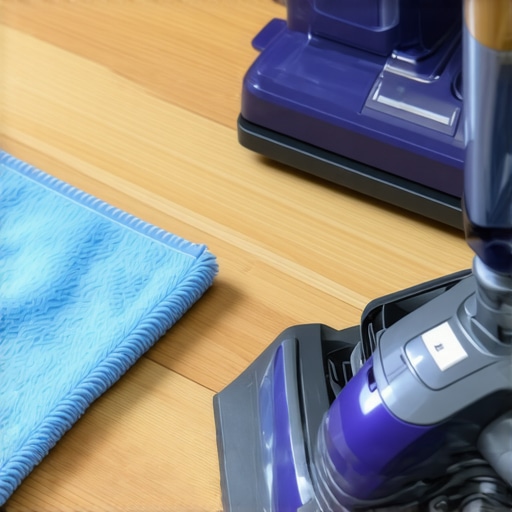
How can I maintain this level of clean without losing my mind?
The secret isn’t a massive cleaning spree once a month; it’s about micro-habits. I recommend starting with the 5-minute daily habit that keeps your entryway mud-free. By stopping the dirt at the door, you reduce the workload for the rest of your house by nearly 40%. When you look at professional standards, such as the IICRC S300 Standard for Professional Upholstery Cleaning, they emphasize that soil suspension and extraction are the keys to longevity. This is why you should always vacuum your mattress before you sanitize it. If you leave the dry soil behind, you’re just creating a muddy slurry when you add liquids.
The Future of Home Sanitization is Microbial
Looking ahead to 2025 and beyond, I predict a massive shift away from harsh bleach and toward probiotic and enzyme-based cleaners. We are starting to see products that leave behind ‘good’ bacteria to keep eating organic waste long after you’ve finished wiping. These sanitizing secrets for a safer house involve creating a balanced microbiome rather than a scorched-earth environment. This is particularly useful for upholstery cleaning tips because enzymes can penetrate deep into fibers where traditional sprays can’t reach. If you are following house cleaning strategies for a sparkling home today, try switching your heavy degreaser for an enzyme-based spray on your kitchen cabinets once. You’ll be shocked at how it melts the grease without that choking chemical smell. Give it a try this weekend and see the difference a professional-grade tool makes in your own home.
The Biggest Lessons I Learned While Chasing a Security Deposit
After years of scrubbing, spraying, and occasionally panicking, I realized that cleaning is more about patience than power. One of the most important effective house cleaning secrets is that your tools should do the work, not your muscles. If you are leaning into a scrub so hard your shoulder hurts, you’re likely using the wrong method or failing to let the product dwell. Another lightbulb moment was realizing that ‘clean’ doesn’t always mean ‘sanitary.’ If you’re following move-out cleaning strategies to secure your deposit, remember that a surface can look perfect but still be biologically dirty. Finally, always work from the cleanest areas to the dirtiest to prevent spreading grime into areas you’ve already finished.
My Must-Have Gear for a Professional Finish
You don’t need a van full of industrial machines to get results like a pro. My personal kit always includes a few key items that I trust implicitly. First, high-quality split-fiber microfiber cloths are essential for effective sanitizing methods for a germ-free home. These cloths physically trap bacteria rather than just pushing it around. I also keep a stash of tennis balls for those stubborn rubber scuffs on baseboards—it’s a dry method that saves the paint every time. Lastly, a HEPA-filtered vacuum is the only way to ensure your vacuum isn’t blowing dust back into the air while you work. Combining these tools with sanitizing secrets for a safer house in 2025 will give you a professional edge.
#IMAGE_PLACEHOLDER_E#
Your Path to a Stress-Free Move-Out
Cleaning your entire home can feel like climbing a mountain, but it’s really just a series of small, manageable steps. By following a solid move-out clean checklist to simplify your transition, you can focus on one room at a time without feeling overwhelmed. Remember, the goal is to leave the space better than you found it, ensuring a smooth handoff and a full refund of your deposit. If you ever feel like a project is too big to handle alone, don’t hesitate to reach out via our contact-us page for expert guidance. You’ve got the knowledge and the techniques—now it’s time to put them into action.
Have you ever found a scuff mark or a stain that felt impossible to remove? Let me know in the comments below!