
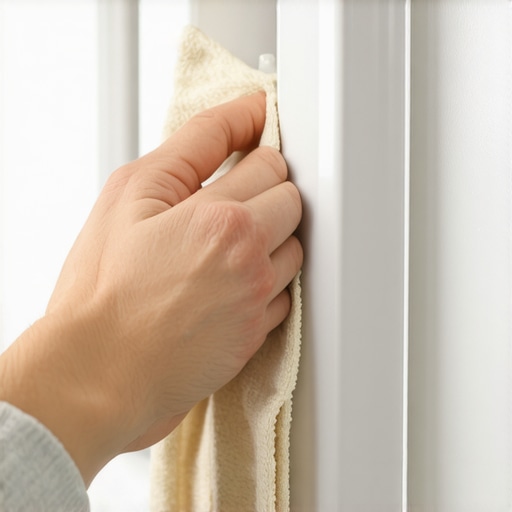
I was reaching for the cream for my coffee when a flash of black caught my eye. Right there, nestled in the accordion folds of my refrigerator door seal, was a fuzzy, dark colony that definitely wasn’t supposed to be part of my morning routine. I felt a wave of pure cleaning shame. I pride myself on having a tight daily house cleaning routine, but I had completely overlooked this hidden crevice for months. It’s one of those 3 germ hotspots in your kitchen that simple wiping alone just won’t fix once the mold takes root. It smelled faint, like a damp basement every time the door cracked open, and it was bothering me more than I cared to admit.
Stop Ignoring the Grimy Seal on Your Refrigerator Door
I spent an entire Saturday afternoon scrubbing that gasket years ago, only to realize I was doing it all wrong. I used a stiff brush and a lot of elbow grease, but the mold kept coming back two weeks later because I hadn’t actually addressed the root of the problem. Today, I want to share the exact process I use now to keep my fridge airtight and mold-free. We’re going to talk about why these seals fail and how a simple household mixture can do more than any expensive chemical spray. My goal is to help you avoid the frustration of a sticky, smelly fridge door. Have you ever dared to pull back that rubber flap and seen what’s lurking inside for yourself? It’s a wake-up call, isn’t it?
Is a Little Bit of Fridge Mold Actually Dangerous?
It is easy to think a few spots of black gunk won’t hurt anyone, but the reality is a bit more concerning for your kitchen’s health. According to the USDA Food Safety and Inspection Service, some molds can produce mycotoxins that are harmful if they contaminate your food, and many species can thrive even in the chilly temperatures of your refrigerator. Early in my DIY cleaning journey, I made the massive mistake of using pure bleach on the rubber. It killed the mold, sure, but it actually caused the gasket to become brittle and crack within a month. I had to replace the entire seal, which was a costly lesson in effective house cleaning secrets. We are going to avoid that disaster today by using much gentler, but more effective, techniques that ensure your fridge stays as clean as a professional move-out clean. Let’s dive into the specifics of why that mold loves your fridge door so much and how to get rid of it once and for all.
Ditch the Harsh Chemicals for a Vinegar Power Wash
To get started, you do not need a hazmat suit or industrial-strength toxins. You simply need a 50/50 mixture of white vinegar and warm water. This is one of those sanitizing secrets for a safer house in 2025 that people often overlook because it seems too simple. Vinegar is acidic enough to penetrate the cell walls of mold and kill it at the source, yet it is gentle enough that it won’t eat through your expensive rubber gasket. I remember the first time I tried this; I was incredibly skeptical. I thought the fridge would just smell like a salad and the mold would stay put. To my surprise, after letting the solution sit for just five minutes, the black gunk that had been haunting my morning coffee routine wiped away with almost zero resistance. It was far more effective than the specialized ‘kitchen cleaners’ I’d wasted money on before. Using this method is a core part of any house cleaning strategies for a sparkling home today because it prioritizes long-term material health over a quick, destructive fix.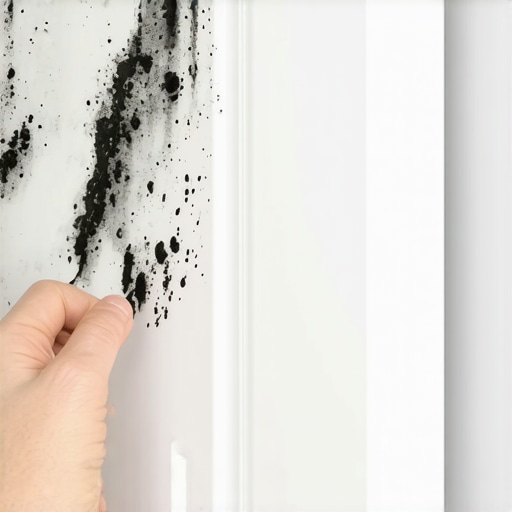
Reach the Hidden Grime Without Tearing the Rubber
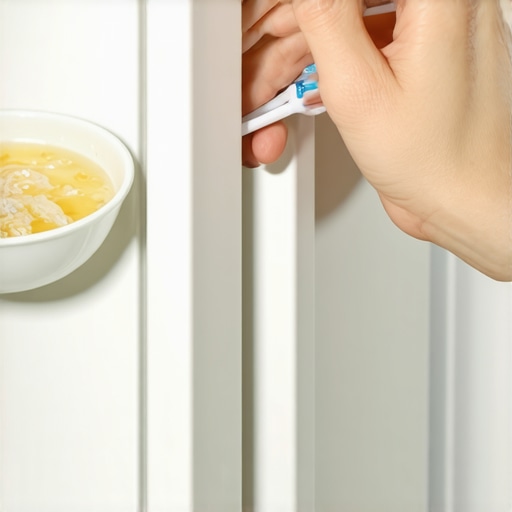
The real challenge isn’t the surface of the seal; it is the deep, accordion-like folds that hide the real nastiness. Think of the gasket like a set of bellows. If you only clean the outside, you are leaving a breeding ground for bacteria just millimeters away. To get deep inside, I adapted the toothbrush trick for removing pet dander from baseboard crevices and put it to work on the fridge. A soft-bristled toothbrush allows you to scrub the internal tracks without the risk of puncturing the rubber. If you tear that seal, you lose the airtight vacuum, your energy bill spikes, and your food spoils faster. Once, I got a bit too aggressive with a butter knife wrapped in a paper towel—don’t do that. I ended up with a small slit in the rubber that hissed every time the compressor kicked on. Now, I stick to the soft brush and a gentle, prying motion with my fingers to expose the tracks. This level of detail is exactly what you would expect from move-out cleaning hacks ensure your deposit refund, where every crevice is inspected.
Keep the Gasket Pliable with This Final Step
After you have scrubbed away the colonies, you must dry the area completely. Moisture is the catalyst for mold, and if you leave the folds damp, you’ll be back at square one by next Tuesday. Use a dry microfiber cloth to soak up every drop. To go the extra mile, apply a very thin layer of food-grade mineral oil or petroleum jelly to the seal. This keeps the rubber supple and prevents it from sticking to the fridge frame, which is the leading cause of tears. I started doing this after noticing my fridge door was becoming hard to pull open. This small maintenance step is as vital as the upholstery cleaning tips for a fresh home revival we use to keep fabric from aging prematurely. If you can smell a funky scent even after cleaning, you might also need to learn how to get rid of the musty odor in your washing machine, as household mold often spreads through shared air and damp environments. A clean seal means a more efficient fridge and a much healthier kitchen environment for your family.
While the fridge seal is a great place to start, it is often just the tip of the iceberg when it comes to the complex world of home maintenance. Most people assume that if something looks clean, it is safe, but that is a dangerous misconception in the world of high-level sanitization. We often fall into the trap of thinking ‘more is better’—more heat, more chemicals, more scrubbing—when in reality, that is how you end up ruining your most expensive investments. I have seen too many people try to tackle a move-out clean with a ‘scorched earth’ policy, only to lose their security deposit because they damaged the very surfaces they were trying to save. Real expertise lies in knowing when to back off and use a more surgical approach.
Stop Assuming Steam Solves Every Fabric Problem
The biggest myth I encounter in the industry is that steam is a universal cleaning miracle. People love to rent a heavy-duty steamer for their sofa, thinking the heat will kill everything and lift every stain. However, this is where you can make a catastrophic mistake. If you have ‘S-coded’ furniture, water-based cleaning (including steam) will cause permanent rings, shrinkage, or even dye bleeding. You must learn how to treat S-coded upholstery fabric without ruining it before you ever pull the trigger on a machine. According to the Institute of Inspection Cleaning and Restoration Certification (IICRC), using excessive heat on protein-based stains—like those from food or pets—can actually ‘cook’ the proteins into the fibers, making the stain permanent. This is a core reason why you should never use a steam cleaner on these specific upholstery fabrics without checking the labels first. It is the difference between a refreshed living room and a ruined three-piece suite.
#IMAGE_PLACE_HOLDER_C#
Why Does Your Furniture Develop a Strange Odor After Cleaning?
If you have ever deep-cleaned your couch only to have it smell like a wet dog three days later, you have fallen into the ‘over-saturation trap.’ Advanced cleaning isn’t just about the detergent; it is about moisture management. When too much water penetrates the foam core of a chair or mattress, it cannot dry fast enough, leading to internal mildew growth that is nearly impossible to remove. This is why upholstery cleaning tips for a fresh home revival always emphasize ‘low-moisture’ techniques. Whether you are dealing with your main sofa or even learning how to sanitize a plush toy that can’t go in the washing machine, the goal is to clean the surface without drowning the interior. In my experience, using a high-quality extractor that pulls 90% of the water back out is far better than any DIY ‘scrub and soak’ method.
The Hidden Checklist That Most Move-Out Guides Miss
When you are preparing to leave a rental, most people focus on the floors and the windows. But if you want to be as thorough as the pros, you have to think about the ‘touch points’ and the hidden mechanics. Are you using effective sanitizing methods for a germ-free home, or are you just moving dirt around? For instance, did you know that landlords often check the electronics for residue? Knowing how to sanitize your TV remote without damaging the electronics or wiping down the internal tracks of the dishwasher are the nuances that define a move-out cleaning strategies to secure your deposit. Even the most basic move-out clean checklist to simplify your transition should include checking for cross-contamination. If you use the same cloth for the bathroom and then the kitchen, you aren’t cleaning; you are relocating bacteria. Have you ever fallen into this trap and realized too late that you were making things worse? Let me know in the comments.
Stop Spreading Dust with the Wrong Filter
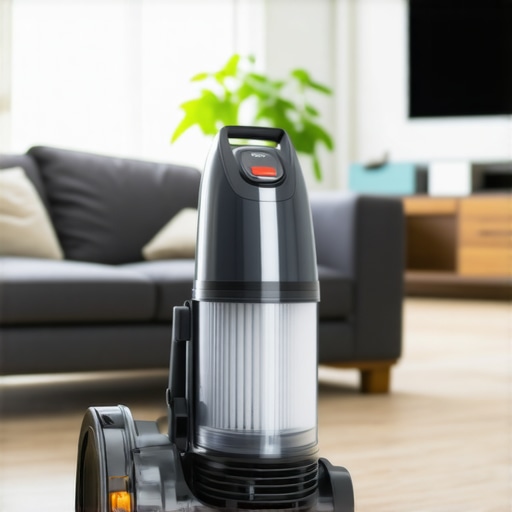
I realized years ago that my cleaning was actually making me sneeze more. It turns out, if your vacuum isn’t fully sealed, it’s just a giant dust-recirculation machine. This is exactly why your vacuum filter might be making your allergies worse. I switched to a Miele with a HEPA 13 filter, and the difference was night and day. According to the Association of Home Appliance Manufacturers (AHAM), a high Clean Air Delivery Rate (CADR) is essential when you’re kicking up dust during a deep clean. If you want to scale your cleaning efforts, you need tools that actually trap the particles rather than just moving them from the carpet to the air. This is one of the most effective house cleaning secrets from cleaning experts that most homeowners ignore because they focus on the suction power alone.
Invest in a Real Upholstery Extractor
For long-term results with your furniture, stop relying on spray bottles and rags. I eventually bought a small, portable heated extractor. Why? Because heat breaks down the oils from our skin that trap dirt in the fibers. Without that heat and a strong vacuum motor, you’re just pushing the grime deeper. This is a pillar of my ultimate upholstery care guide for lasting freshness. When you have the right gear, tasks like learning how to lift old pet stains from a linen ottoman without fading become a ten-minute job rather than a weekend-long struggle. High-quality tools pay for themselves by extending the life of your expensive furniture by years.
How can I maintain this level of sanitization every week?
The secret isn’t a massive cleaning spree every Saturday; it’s about the small, repetitive actions. I highly recommend you learn how to schedule a deep clean that actually lasts more than a week by breaking your home into zones. This prevents the “clean house fatigue” that leads to moldy fridge seals in the first place. You need to integrate a daily house cleaning routine to maintain perfection so that you aren’t constantly fighting fires. When you treat cleaning as a maintenance system rather than a reaction to a mess, you’ll find that your home stays consistently safer.
The Future of Cleaning is Invisible
As we look toward the next few years, I predict we will see a massive shift toward automated sanitization. We are already seeing “smart” appliances that alert you when a filter is clogged, but the next step is integrated UV-C light systems in HVAC and closet spaces. This ties directly into the sanitizing secrets for a safer house in 2025—moving from manual scrubbing to environmental control. For now, the best thing you can do is audit your current tools. Go check your vacuum’s filter right now; if it’s gray and fuzzy, you’re not cleaning, you’re just circulating. Swap it out and feel the difference in the air immediately.
While the fridge seal is a great place to start, it is often just the tip of the iceberg when it comes to the complex world of home maintenance. Most people assume that if something looks clean, it is safe, but that is a dangerous misconception in the world of high-level sanitization. We often fall into the trap of thinking ‘more is better’—more heat, more chemicals, more scrubbing—when in reality, that is how you end up ruining your most expensive investments. I have seen too many people try to tackle a move-out clean with a ‘scorched earth’ policy, only to lose their security deposit because they damaged the very surfaces they were trying to save. Real expertise lies in knowing when to back off and use a more surgical approach.
Stop Assuming Steam Solves Every Fabric Problem
The biggest myth I encounter in the industry is that steam is a universal cleaning miracle. People love to rent a heavy-duty steamer for their sofa, thinking the heat will kill everything and lift every stain. However, this is where you can make a catastrophic mistake. If you have ‘S-coded’ furniture, water-based cleaning (including steam) will cause permanent rings, shrinkage, or even dye bleeding. You must learn how to treat S-coded upholstery fabric without ruining it before you ever pull the trigger on a machine. According to the Institute of Inspection Cleaning and Restoration Certification (IICRC), using excessive heat on protein-based stains—like those from food or pets—can actually ‘cook’ the proteins into the fibers, making the stain permanent. This is a core reason why you should never use a steam cleaner on these specific upholstery fabrics without checking the labels first. It is the difference between a refreshed living room and a ruined three-piece suite.
Why Does Your Furniture Develop a Strange Odor After Cleaning?
If you have ever deep-cleaned your couch only to have it smell like a wet dog three days later, you have fallen into the ‘over-saturation trap.’ Advanced cleaning isn’t just about the detergent; it is about moisture management. When too much water penetrates the foam core of a chair or mattress, it cannot dry fast enough, leading to internal mildew growth that is nearly impossible to remove. This is why upholstery cleaning tips for a fresh home revival always emphasize ‘low-moisture’ techniques. Whether you are dealing with your main sofa or even learning how to sanitize a plush toy that can’t go in the washing machine, the goal is to clean the surface without drowning the interior. In my experience, using a high-quality extractor that pulls 90% of the water back out is far better than any DIY ‘scrub and soak’ method.
The Hidden Checklist That Most Move-Out Guides Miss
When you are preparing to leave a rental, most people focus on the floors and the windows. But if you want to be as thorough as the pros, you have to think about the ‘touch points’ and the hidden mechanics. Are you using effective sanitizing methods for a germ-free home, or are you just moving dirt around? For instance, did you know that landlords often check the electronics for residue? Knowing how to sanitize your TV remote without damaging the electronics or wiping down the internal tracks of the dishwasher are the nuances that define a move-out cleaning strategies to secure your deposit. Even the most basic move-out clean checklist to simplify your transition should include checking for cross-contamination. If you use the same cloth for the bathroom and then the kitchen, you aren’t cleaning; you are relocating bacteria. Have you ever fallen into this trap and realized too late that you were making things worse? Let me know in the comments.
Stop Spreading Dust with the Wrong Filter
I realized years ago that my cleaning was actually making me sneeze more. It turns out, if your vacuum isn’t fully sealed, it’s just a giant dust-recirculation machine. This is exactly why your vacuum filter might be making your allergies worse. I switched to a Miele with a HEPA 13 filter, and the difference was night and day. According to the Association of Home Appliance Manufacturers (AHAM), a high Clean Air Delivery Rate (CADR) is essential when you’re kicking up dust during a deep clean. If you want to scale your cleaning efforts, you need tools that actually trap the particles rather than just moving them from the carpet to the air. This is one of the most effective house cleaning secrets from cleaning experts that most homeowners ignore because they focus on the suction power alone.
Invest in a Real Upholstery Extractor
For long-term results with your furniture, stop relying on spray bottles and rags. I eventually bought a small, portable heated extractor. Why? Because heat breaks down the oils from our skin that trap dirt in the fibers. Without that heat and a strong vacuum motor, you’re just pushing the grime deeper. This is a pillar of my ultimate upholstery care guide for lasting freshness. When you have the right gear, tasks like learning how to lift old pet stains from a linen ottoman without fading become a ten-minute job rather than a weekend-long struggle. High-quality tools pay for themselves by extending the life of your expensive furniture by years.
How can I maintain this level of sanitization every week?
The secret isn’t a massive cleaning spree every Saturday; it’s about the small, repetitive actions. I highly recommend you learn how to schedule a deep clean that actually lasts more than a week by breaking your home into zones. This prevents the “clean house fatigue” that leads to moldy fridge seals in the first place. You need to integrate a daily house cleaning routine to maintain perfection so that you aren’t constantly fighting fires. When you treat cleaning as a maintenance system rather than a reaction to a mess, you’ll find that your home stays consistently safer.
The Future of Cleaning is Invisible
As we look toward the next few years, I predict we will see a massive shift toward automated sanitization. We are already seeing “smart” appliances that alert you when a filter is clogged, but the next step is integrated UV-C light systems in HVAC and closet spaces. This ties directly into the sanitizing secrets for a safer house in 2025—moving from manual scrubbing to environmental control. For now, the best thing you can do is audit your current tools. Go check your vacuum’s filter right now; if it’s gray and fuzzy, you’re not cleaning, you’re just circulating. Swap it out and feel the difference in the air immediately.
Why I Stopped Using Bleach on My Refrigerator Gaskets
One of the biggest lessons I have learned over the years is that ‘powerful’ chemicals often do more harm than good. I once thought bleach was the only way to kill mold, but after seeing it turn my seals brittle and yellow, I realized that acidic vinegar is the real hero. I also learned that the area above the fridge is a silent accomplice; if you do not know how to remove the sticky film on top of the kitchen fridge, that grease eventually migrates down to the door seals, making them a magnet for dust and spores. My lightbulb moment was realizing that home maintenance is about material chemistry, not just brute force scrubbing. When you use the right sanitizing hacks for safe house transitions, you protect both your health and your expensive appliances.
My Essential Toolkit for a Sterile Kitchen
To keep my kitchen truly professional-grade, I rely on a few specific tools. First, a dedicated soft-bristled cleaning brush—it reaches where cloths can’t. Second, I always keep food-grade mineral oil on hand to keep rubber seals supple. Third, a high-quality HEPA vacuum is non-negotiable; otherwise, you’re just blowing allergens around. If you’ve ever wondered why you’re still sneezing after a cleaning session, you should see why your vacuum is actually spreading more dust around. These items, paired with a consistent daily house cleaning routine to maintain perfection, make the difference between a house that looks clean and a house that is actually safe.
Take Back Your Kitchen Sanctuary Today
Eliminating that hidden mold on your refrigerator seal is more than just a chore; it is an act of care for your family’s health. Once you clear away the grime and realize how much fresher your kitchen smells, you will never overlook those hidden crevices again. By mastering these effective house cleaning secrets from cleaning experts, you are taking control of your environment. Your home should be a place where you feel safe and relaxed, and a truly clean fridge is a great place to start. Have you checked your refrigerator seals lately—and were you surprised by what was hiding in the folds? Let me know below.