
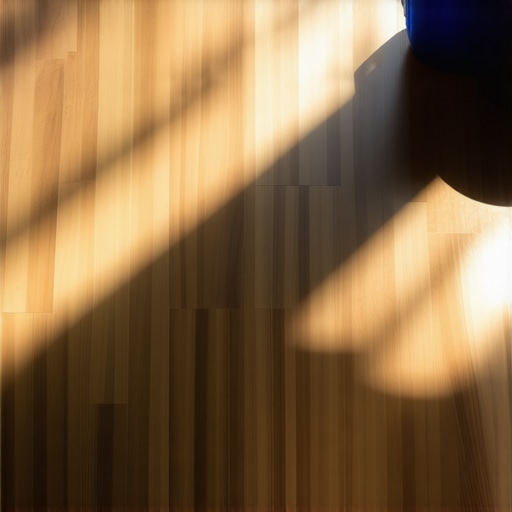
I remember standing in my kitchen last Tuesday, the 4 PM sun streaming through the window, and I actually wanted to cry. I had just spent forty-five minutes on my hands and knees with what I thought was the best equipment. The floor was supposed to be a mirror. Instead, it looked like a skating rink for greasy ghosts. Every single footprint, every swirl of the mop, was immortalized in a hazy, cloudy film that mocked my effort. If you have ever felt that soul-crushing realization that your ‘clean’ floor looks worse than the dirty one, I am right there with you. It is frustrating, it is exhausting, and quite frankly, it feels like a personal failure when you are trying your best to maintain a beautiful home.
That Maddening Haze on Your Clean Wood
For years, I operated under the ‘more is better’ philosophy. More soap meant more clean, right? Wrong. My biggest mistake early on was dumping a generous glug of store-bought cleaner into a bucket and going to town. I didn’t realize that I was essentially painting my floors with a sticky residue that acted like a magnet for dust and oil. The truth is, your mop bucket is often spreading more dirt than it removes because the water becomes a gray soup of grime within minutes. We are going to solve this today by stripping back the myths and getting down to the actual science of wood finishes. Whether you are doing a standard house cleaning or a deep move-out clean, the goal is the same: a crystal-clear reflection without the tacky feel.
Is a streak-free shine actually possible without a professional crew?
I used to be a total skeptic. I thought those gleaming floors in magazines were either photoshopped or the result of a six-man crew with industrial buffers. I even tried a steam mop once, only to find out that steam mops can leave horrific streaks if the pad isn’t changed every few feet. But here is the thing: the secret isn’t in the muscle; it is in the chemistry. According to the National Wood Flooring Association, using excessive water or the wrong pH-balanced cleaner can actually degrade your floor’s finish over time. You don’t need a magic wand; you need to stop the cycle of ‘cleaning’ with dirty water and heavy surfactants. Have you ever spent hours mopping only to see your own footprints follow you across the room five minutes later? I want to hear your horror stories! Today, I am sharing the exact daily house cleaning routine that finally saved my sanity and my oak planks. We are moving past the smudges and into a world where the sun hitting your floor is a highlight, not a headache.
Stop Pushing Around the Grime
Before a single drop of water touches your planks, you have to get rid of the dry grit. Think of dirt like sandpaper; if you mop over it, you’re just grinding those particles into the finish and destroying the sheen. I learned this the hard way when I tried to rush a house cleaning strategy before my mother-in-law visited and ended up with micro-scratches that took years to buff out. You need a high-quality vacuum with a soft-brush attachment or a dedicated microfiber dust mop. If you find that your house still feels dusty even after you just vacuumed, check your filters or the brush roll; a clogged machine just redeposits dust into the air, which then settles right back onto your damp floor as you mop, creating that gritty texture we all hate.
The Mistake of the Over-Saturated Mop
Water is the natural enemy of wood. It causes swelling, cupping, and—most relevant to our streak problem—it carries dirt into the grain and leaves it there as it evaporates. The goal is ‘damp,’ never ‘wet.’ I once thought I was being thorough by letting a puddle sit on a stubborn juice stain near the fridge. By the time I wiped it up, the wood had slightly buckled at the seam, a mistake that taught me a very expensive lesson. Now, I follow the effective house cleaning secrets from cleaning experts: use a spray bottle to mist your mop head rather than dunking it in a bucket of gray water. This controlled moisture prevents the wood from absorbing excess liquid and drying unevenly, which is the secret to that elusive uniform finish.
Pick the Right Liquid for the Job
Commercial ‘glow’ and ‘shine’ products are often the primary culprits behind that cloudy film. They contain waxes and oils that build up layer after layer. If you’ve been using these, you might notice the real reason your floors look cloudy after you mop is actually the residue from the ‘cleaner’ itself. For a truly streak-free finish, stick to a pH-neutral cleaner or a very weak solution of white vinegar and water (about half a cup per gallon). Most importantly, why you should never spray cleaning products directly on surfaces applies here perfectly; spraying the floor creates concentrated spots that are nearly impossible to buff out evenly. Mist the microfiber pad instead.
Move the Mop in an S-Curve
The way you move matters just as much as what you use. Scrubbing back and forth simply moves the dirt from one side of the plank to the other, creating those overlapping ‘tide marks’ you see when the floor dries. Instead, use a continuous ‘S’ motion. This keeps the leading edge of the mop always moving toward the ‘clean’ side, effectively trapping debris in the fibers rather than snowplowing it across the room. I vividly remember trying to clean up after my toddler’s birthday party; I was so exhausted I just shoved the mop back and forth. The next morning, the floor looked like a topographical map of sticky soda spills. Speaking of fibers, ensure your tools are in top shape. If your pads aren’t picking up liquid, it’s likely because your microfiber cloths stopped working due to fabric softener build-up in the wash. I keep a stack of six pads ready for my living room alone, switching to a fresh one the second the current one looks remotely gray. It seems overkill until you see the difference in the light.
The biggest mistake I see—and I have been guilty of it too—is the ‘scorched earth’ approach to cleaning. We have been conditioned to believe that if a cleaner does not smell like a hospital, it is not working. Everyone says you need high-octane disinfectants for a move-out cleaning strategy, but in my experience, the mechanical action of a high-quality microfiber pad is far more important than the liquid in the bottle. In fact, a study by the Cleaning Industry Research Institute (CIRI) highlighted that ‘cleaning’—the physical removal of soil—is often more critical for health and aesthetics than simply ‘sanitizing’ which often involves spraying chemicals on a dirty surface. If you do not remove the dirt first, the germs just hide under the grime, and your disinfectant becomes a sticky, streaky mess that ruins your floor’s shine. Have you ever fallen into this trap? Let me know in the comments!
Is your disinfectant actually making your floor dirtier?
The ‘oops’ factor here is the dwell-time trap. Most people spray a surface and wipe it immediately. However, sanitizing secrets for a safer house in 2025 dictate that most disinfectants need to stay wet on a surface for five to ten minutes to actually be effective. If you are mopping a wood floor with a heavy sanitizer and letting it sit that long, you are likely warping the wood or stripping the finish. This is the most common move-out cleaning mistake that costs renters money—trying to sanitize a delicate surface with the wrong tools and leaving behind a damaged, tacky floor that fails inspection.
The Two-Step Truth for High-Traffic Zones
To avoid the hazy film, you must separate the two tasks of cleaning and disinfecting. Use your pH-neutral cleaner for the soil removal first. If you truly need to disinfect because someone has been sick, do it as a second, very controlled pass with a barely-damp microfiber. This is especially true for sanitizing hacks for safe house transitions. I remember a friend who tried to sanitize her move-in by pouring a diluted bleach solution on her luxury vinyl; she did not just kill germs, she killed the shine permanently. By focusing on mechanical removal first, you ensure the floor is actually clean before you worry about microbes.
Breathe Better by Targeting Soft Surfaces
While we focus on the floors, the air quality and the overall ‘feel’ of a clean room often depend on what we are not mopping. Upholstery cleaning tips for a fresh home revival are the missing link for most people. If you have finished your floors but the room still smells slightly stale, your sofa is likely holding onto months of dust, skin cells, and oils. Remember, the reason why professional cleaners always vacuum the sofa before wiping it is to prevent that fine dust from turning into a permanent mud stain when it hits moisture. Using effective sanitizing methods for a germ-free home means looking at the whole environment. It takes a little more time to do the two-step process on your floors and sofas, but the lack of streaks and the genuine, residue-free freshness are worth every extra minute of effort.
I used to think my cleaning closet was a graveyard for half-baked ideas and overpriced plastic. I had every gadget under the sun, yet my results were always mediocre. It wasn’t until I sat down with a professional restorer that I realized I was focusing on the wrong metrics. We often look for the ‘strongest’ chemical, but the professionals look for the best soil suspension and removal tools. If your gear is failing you, even the most rigorous daily house cleaning routine to maintain perfection will feel like running a race with your shoelaces tied together. I had to learn that maintenance isn’t about working harder; it’s about ensuring your tools aren’t working against you.
The Gear That Actually Earns Its Closet Space
Let’s talk about the vacuum. Most people wait until their machine smells like a wet dog or stops picking up crumbs before they check the filter. But if you’ve noticed why your vacuum isn’t picking up dirt like it used to, it’s likely a loss of suction caused by micro-clogs. I personally swear by a HEPA-sealed system. It’s the difference between actually removing allergens and just rearranging them in the air. For my hard floors, I ditched the standard brush roll for a soft ‘fluffy’ head attachment. It picks up that fine, flour-like dust that a regular vacuum just snowplows forward. This shift in equipment is what transformed my house cleaning strategies for a sparkling home today from a chore into a science.
How do I keep my floors looking professional for years?
Maintenance is a marathon, not a sprint. The secret to longevity, especially if you are following an ultimate upholstery care guide for lasting freshness alongside your floor care, is the ‘dry-buff’ method. Once a week, after my damp mop session, I take a completely dry, high-GSM microfiber pad and go over the floor one last time. This absorbs any microscopic droplets that would otherwise dry into spots. According to the IICRC (Institute of Inspection Cleaning and Restoration Certification), the physical removal of soil is significantly more effective than chemical neutralization alone. By dry-buffing, you are mechanically removing the final traces of residue that cause that dulling build-up over time. If you’re preparing for a transition, these small habits are the core of sanitizing hacks for safe house transitions that actually work.
Enzymes Are the Future of Your Cleaning Cabinet
Looking ahead, the industry is moving away from harsh surfactants and toward bio-enzymatic cleaners. I’ve already started transitioning my own kit. These cleaners use ‘good’ bacteria to eat away at organic soils like grease and pet dander long after you’ve finished mopping. This is a game-changer for maintaining a truly clean environment without the chemical haze. When you combine these modern solutions with effective sanitizing methods for a germ-free home, you’re creating a self-cleaning surface that stays fresh longer. I predict that within five years, we’ll see ‘smart’ microfiber that changes color when it has reached its maximum soil load, taking the guesswork out of when to switch pads. For now, we have to rely on our eyes and our laundry habits. If you ever feel overwhelmed by the technical side of things, don’t hesitate to contact us for a bit of professional guidance. My challenge to you this week: try the ‘dry-buff’ technique on just one room. You’ll be shocked at how much dirt a ‘clean’ floor still has to give up!
The Hard Truths My Streaky Floors Taught Me
After a decade of trial and error, I’ve realized that cleaning isn’t about intensity; it’s about precision. First, I learned that ‘clean-scented’ usually means ‘residue-heavy.’ If you can smell the fake meadow, you can probably feel the film under your feet. Second, the quality of your microfiber is non-negotiable. If you’re using cheap, thin rags, you’re just pushing water around rather than trapping it. Finally, I stopped blaming the age of my floors and started looking at the state of my tools. Most effective house cleaning secrets from cleaning experts boil down to one thing: mechanical removal of soil rather than chemical burial of it.
The Stash That Keeps My Home Guest-Ready
I’ve pared my cleaning closet down to the essentials that actually deliver professional results without the professional price tag. I never start a deep clean without my HEPA-sealed vacuum and a minimum of six high-GSM microfiber pads. If you are preparing for a move, these are the same reliable tools you’ll need for sanitizing hacks for safe house transitions to ensure no grime is left behind. I also keep a dedicated soft horsehair brush for my sofas, as following an ultimate upholstery care guide for lasting freshness ensures the fabric doesn’t pill while you’re lifting embedded dust. These aren’t just gadgets; they are the foundation of sustainable house cleaning strategies for a sparkling home today.
#IMAGE_PLACEHOLDER_E#
Enjoying the Reflection You’ve Earned
There is a unique kind of peace that comes from a truly clean home—the kind where you can walk barefoot across the boards at high noon without feeling a single grain of grit or a hint of stickiness. It takes a little practice to master the ‘damp, not wet’ technique, but once you see that first streak-free sunset hitting your planks, you’ll never go back to the old bucket-and-slop method. You deserve a home that feels as good as it looks. Have you ever tried the ‘dry-buff’ trick after mopping, or did it feel like one step too many? Let me know if it changed your floor game in the comments below!