
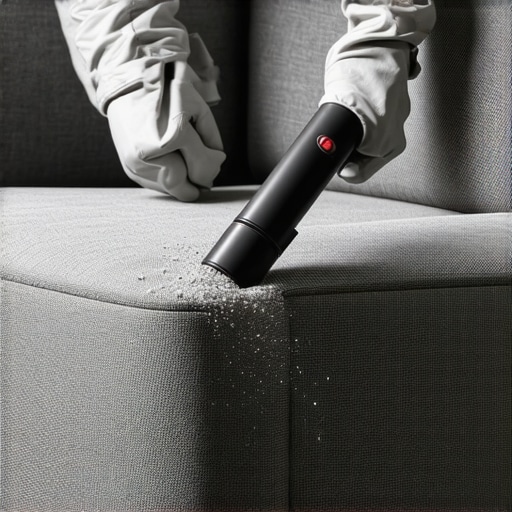
I remember the afternoon I ruined my favorite armchair. I thought a quick wipe-down would brighten it up, but instead, I watched in horror as the dust turned into a dark, smeared sludge. It was a disaster. I had violated the golden rule of fabric care without even knowing it existed. Professionals don’t just vacuum first to be “thorough”—they do it because they know the physics of filth better than we do. Today, I’m going to share exactly why that vacuum nozzle is your sofa’s best friend and how you can avoid the “mud-smear” catastrophe I faced.
Stop Turning Your Sofa Dust Into Permanent Mud
When you look at your sofa, you might see a few crumbs or a stray hair, but what’s actually there is a thick layer of microscopic debris. We’re talking skin cells, fine outdoor dust, and pet dander. If you’ve read my ultimate upholstery care guide for lasting freshness, you know these particles are restless. When you apply a liquid cleaner—or even just a damp cloth—to that dry soil, you create a slurry. This liquid mixture doesn’t just sit on top; it sinks deep into the weave of the fabric, effectively dyeing the fibers with the very dirt you were trying to remove. It’s one of those effective house cleaning secrets from cleaning experts: dry soil removal must come first. According to the Institute of Inspection Cleaning and Restoration Certification (IICRC), up to 79% of the soil in any textile is dry particulate matter. If you skip the vacuum, you are essentially trying to clean with a huge disadvantage. I learned this the hard way when I tried to scrub a coffee spot without vacuuming the rest of the cushion first; I ended up with a clean spot surrounded by a giant, dingy ring of relocated dust. It looked like a topographical map of my own laziness.
Is all that extra suction actually worth the effort?
I get it. Dragging out the vacuum and swapping the attachments feels like a chore when you just want to wipe and be done. You might wonder if it’s really necessary if the sofa “looks” clean. The truth is, those tiny grit particles act like miniature sandpaper. Every time you sit down, you grind that dust against the fabric fibers, causing them to fray and pill over time. If you want to keep your furniture looking new, especially if you’re working on the best method for cleaning a microfiber recliner, that suction is non-negotiable. Another mistake I made early on was thinking that the cleaning solution would just dissolve the dirt. But as I noted in my post about why you should never spray cleaning products directly on surfaces, moisture without extraction is just a recipe for a deeper mess. By vacuuming first, you remove the abrasive elements and the “dye” agents before they have a chance to settle. It makes the actual wiping phase faster, more effective, and much safer for your upholstery. Have you ever noticed that your couch seems to get dirty again almost immediately after you “cleaned” it? That’s often because the leftover soapy residue is trapping the dry dust you missed. Let’s look at how to do this properly so your hard work actually lasts.
Clear the Deck Before You Start Sucking
Strip the sofa down to its bones. I used to just vacuum around the cushions because I was lazy. One Saturday, I finally pulled them off and found a miniature ecosystem of Lego pieces, popcorn, and enough lint to knit a small sweater. More importantly, the dust trapped in those seams was already starting to smell. If you want to know how to get rid of that stale smell in your guest bedroom, start with the couch crevices. Removing the cushions also gives you a chance to see if they need more than just a cleaning; maybe it’s time you learn how to revive your flat couch cushions with this simple technique. Don’t just toss the cushions aside; vacuum every single side of them, including the bottom. This prevents ‘back-soiling,’ where dirt from the underside of a cushion migrates to the top once you sit back down.
Why the Crevice Tool is a Secret Weapon
Think of the crevice tool as a surgical instrument for your living room. Most people use the wide floor attachment, but that doesn’t provide enough concentrated suction for thick upholstery. I remember trying to clean my sister’s couch after her golden retriever spent a week on it. The hair was woven into the fabric like it was part of the design. I had to use the crevice tool to get into the piping and the deep folds where the arms meet the back. If you skip this, you’re just leaving a reservoir of allergens. This is a critical step in upholstery cleaning tips for a fresh home revival. If your machine is struggling, you should investigate why your vacuum isn’t picking up dirt like it used to before you continue. Proper suction is the only way to pull the grit out of the base of the fibers.
Stop Brushing Your Fabric Into Oblivion
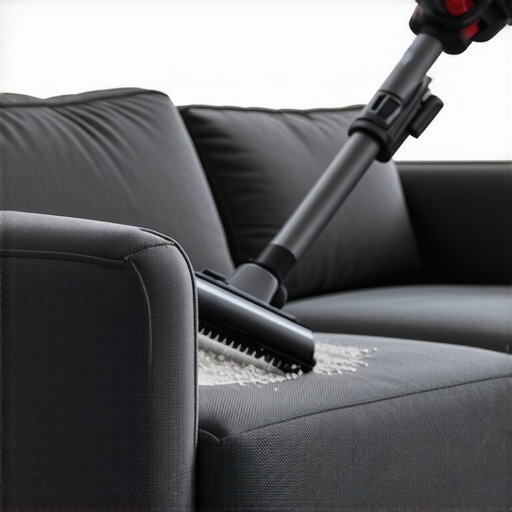
While the soft brush attachment is great for loosening dust, you have to be careful. I once scrubbed a delicate linen chair too hard with a stiff-bristled attachment and actually frayed the threads. If you’re dealing with delicate materials, remember the one thing you should never do when cleaning a velvet couch: never use a rotating brush roll. Use a stationary soft brush and follow the grain of the fabric. This gentler approach is also how I managed to keep my bedroom looking sharp when I was learning how to clean a fabric headboard without getting it too wet. You want to agitate the dust just enough so the suction can grab it, but not so much that you damage the weave.
Master the Overlapping Stroke Technique
Vacuuming a sofa isn’t like mowing a lawn; it’s more like painting a masterpiece. Use short, overlapping strokes. I go vertically first, then horizontally. This ‘grid’ pattern ensures you hit the fibers from every angle. I learned this technique while researching effective sanitizing methods for a germ-free home, and it changed the way I look at my cleaning routine. It’s also a vital part of a daily house cleaning routine to maintain perfection. If you just do one quick pass, you’re leaving about 40% of the soil behind. If you are preparing for a move, this level of detail is exactly what’s required on a move-out clean checklist to simplify your transition. By the time you’re done, the fabric should feel noticeably ‘lighter’ and the colors should look a bit more vibrant, even before a drop of water touches the surface.
But even the best vacuuming job is only half the battle. Let’s dig deeper into the science of what happens when you finally introduce moisture. Most people assume that if they buy a bottle labeled ‘sanitizer,’ they are instantly making their home safer. But here is the contrarian truth: you cannot effectively sanitize a surface that isn’t already chemically clean. In my years of trial and error, I’ve realized that spraying disinfectant on top of residual dust just creates a ‘sanitized’ layer of grime. According to the IICRC S300 Standard for Professional Upholstery Cleaning, organic soil acts as a physical shield for bacteria and viruses. If you haven’t performed a thorough dry-soil removal—the kind we just discussed—your sanitizing efforts are mostly performative. This is one of those sanitizing secrets for a safer house in 2025 that pros rarely share with the public. Have you ever fallen into the trap of thinking a quick spray was enough? Let me know in the comments.
Why Does Your Sofa Feel Sticky After It Dries?
If you’ve ever run your hand across a freshly cleaned cushion and felt a slight tackiness, you’ve fallen victim to the surfactant trap. This is a common hurdle when you’re trying to master move-out cleaning hacks to ensure your deposit refund. We tend to think more soap equals more clean, but excess detergent acts like a magnet for new dirt. It’s similar to why your carpet is still dirty after you shampooed it; the residue left behind is literally ‘sticky.’ To avoid this, always use a dedicated upholstery rinse or a very diluted vinegar solution to neutralize the soap. Learning how to get rid of soap scum without harsh scrubbing on hard surfaces is a great primer for understanding how chemistry works on your fabrics too.
Avoid the Wet-Wicking Trap That Ruins Move-Outs
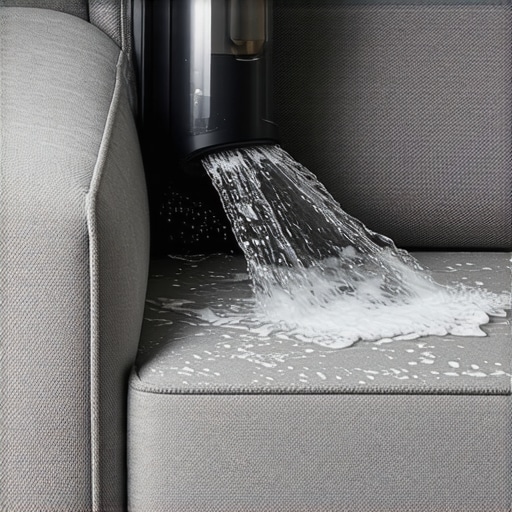
The biggest ‘oops’ factor in upholstery care is over-wetting. When you saturate the fabric, the moisture travels deep into the foam padding. As it dries, it travels back to the surface, bringing buried stains and dirt with it in a process called ‘wicking.’ This is why that old coffee stain often reappears three days after you thought you removed it. If you are working through a move-out clean checklist to simplify your transition, the last thing you want is for a ‘ghost stain’ to pop up right as the landlord arrives for the walkthrough. To prevent this, focus on low-moisture effective sanitizing methods for a germ-free home. Use a foam-based cleaner or a fine mist rather than a heavy pour. By controlling the moisture, you ensure the dirt stays gone and the fabric stays fresh without the risk of mildew or secondary staining. Professionalism isn’t about having the most expensive machine; it’s about understanding how to keep the moisture on the surface where you can actually control it.
Ditch the Generic Handhelds for Real Suction
I used to think any vacuum with a cord was enough to get the job done. I was wrong. When you are serious about upholstery cleaning tips for a fresh home revival, the hardware you choose is the difference between a surface-level spruce-up and a deep-tissue extraction. I personally transitioned to a sealed-system HEPA vacuum because I realized my old cheap unit was just puffing fine dust out of the exhaust and right back onto my clean cushions. If you can smell ‘dust’ while you vacuum, you aren’t cleaning; you’re just redistributing. This is one of those effective house cleaning secrets from cleaning experts that changed my life: invest in a machine that actually traps 99.9% of particles. For move-outs, I rely on a portable spot extractor with a motorized brush head. This tool allows me to apply that necessary low-moisture cleaning without soaking the padding, which is vital for move-out cleaning hacks to ensure your deposit refund. The Carpet and Rug Institute (CRI) maintains that the ‘Seal of Approval’ for vacuums isn’t just a marketing badge; it’s a certification that the machine can remove soil without destroying the textile structure.
How do I keep my fabric looking showroom-fresh for years?
Consistency is the boring answer, but the ‘how’ is where the magic happens. I suggest integrating a deep vacuuming session into your daily house cleaning routine to maintain perfection—or at least a weekly one for high-traffic pieces. This prevents the abrasive grit from ever having the chance to saw through your fabric fibers. I also swear by rotating my cushions every time I clean. It’s the perfect moment to learn how to revive your flat couch cushions with this simple technique by fluffing the internal batting. If you have pets, don’t just rely on suction; use a rubberized lint brush first to pull the hair into clumps. By maintaining the dry soil levels, you ensure that your periodic sanitizing secrets for a safer house in 2025 actually work because the chemical agents can reach the fabric instead of being absorbed by a layer of dog hair.
The Future of Home Textiles is Getting Smarter
I predict that in the next five years, we will see a massive shift toward ‘active’ fabrics. We are already seeing the rise of nanocoatings that reject liquid on a molecular level, but the real game-changer will be built-in sensors that alert your phone when the microbial load on your sofa reaches a level that requires sanitizing. Until then, we have to rely on our own diligence. If you’re moving, remember that a clean sofa isn’t just about looks—it’s about hygiene. Following a move-out clean checklist to simplify your transition ensures you aren’t bringing the old house’s allergens into your new space. I want you to try this right now: take a damp, white microfiber cloth and press it firmly into your couch for ten seconds. If it comes back grey, your current vacuuming routine is failing you, and it’s time to upgrade your nozzle technique or check your filters. It is an eye-opening test that proves exactly how much ‘invisible’ soil is lurking beneath you.
I remember the afternoon I ruined my favorite armchair. I thought a quick wipe-down would brighten it up, but instead, I watched in horror as the dust turned into a dark, smeared sludge. It was a disaster. I had violated the golden rule of fabric care without even knowing it existed. Professionals don’t just vacuum first to be “thorough”—they do it because they know the physics of filth better than we do. Today, I’m going to share exactly why that vacuum nozzle is your sofa’s best friend and how you can avoid the “mud-smear” catastrophe I faced.
Stop Turning Your Sofa Dust Into Permanent Mud
When you look at your sofa, you might see a few crumbs or a stray hair, but what’s actually there is a thick layer of microscopic debris. We’re talking skin cells, fine outdoor dust, and pet dander. If you’ve read my ultimate upholstery care guide for lasting freshness, you know these particles are restless. When you apply a liquid cleaner—or even just a damp cloth—to that dry soil, you create a slurry. This liquid mixture doesn’t just sit on top; it sinks deep into the weave of the fabric, effectively dyeing the fibers with the very dirt you were trying to remove. It’s one of those effective house cleaning secrets from cleaning experts: dry soil removal must come first. According to the Institute of Inspection Cleaning and Restoration Certification (IICRC), up to 79% of the soil in any textile is dry particulate matter. If you skip the vacuum, you are essentially trying to clean with a huge disadvantage. I learned this the hard way when I tried to scrub a coffee spot without vacuuming the rest of the cushion first; I ended up with a clean spot surrounded by a giant, dingy ring of relocated dust. It looked like a topographical map of my own laziness.
Is all that extra suction actually worth the effort?
I get it. Dragging out the vacuum and swapping the attachments feels like a chore when you just want to wipe and be done. You might wonder if it’s really necessary if the sofa “looks” clean. The truth is, those tiny grit particles act like miniature sandpaper. Every time you sit down, you grind that dust against the fabric fibers, causing them to fray and pill over time. If you want to keep your furniture looking new, especially if you’re working on the best method for cleaning a microfiber recliner, that suction is non-negotiable. Another mistake I made early on was thinking that the cleaning solution would just dissolve the dirt. But as I noted in my post about why you should never spray cleaning products directly on surfaces, moisture without extraction is just a recipe for a deeper mess. By vacuuming first, you remove the abrasive elements and the “dye” agents before they have a chance to settle. It makes the actual wiping phase faster, more effective, and much safer for your upholstery. Have you ever noticed that your couch seems to get dirty again almost immediately after you “cleaned” it? That’s often because the leftover soapy residue is trapping the dry dust you missed. Let’s look at how to do this properly so your hard work actually lasts.
Clear the Deck Before You Start Sucking
Strip the sofa down to its bones. I used to just vacuum around the cushions because I was lazy. One Saturday, I finally pulled them off and found a miniature ecosystem of Lego pieces, popcorn, and enough lint to knit a small sweater. More importantly, the dust trapped in those seams was already starting to smell. If you want to know how to get rid of that stale smell in your guest bedroom, start with the couch crevices. Removing the cushions also gives you a chance to see if they need more than just a cleaning; maybe it’s time you learn how to revive your flat couch cushions with this simple technique. Don’t just toss the cushions aside; vacuum every single side of them, including the bottom. This prevents ‘back-soiling,’ where dirt from the underside of a cushion migrates to the top once you sit back down.
Why the Crevice Tool is a Secret Weapon
Think of the crevice tool as a surgical instrument for your living room. Most people use the wide floor attachment, but that doesn’t provide enough concentrated suction for thick upholstery. I remember trying to clean my sister’s couch after her golden retriever spent a week on it. The hair was woven into the fabric like it was part of the design. I had to use the crevice tool to get into the piping and the deep folds where the arms meet the back. If you skip this, you’re just leaving a reservoir of allergens. This is a critical step in upholstery cleaning tips for a fresh home revival. If your machine is struggling, you should investigate why your vacuum isn’t picking up dirt like it used to before you continue. Proper suction is the only way to pull the grit out of the base of the fibers.
Stop Brushing Your Fabric Into Oblivion
While the soft brush attachment is great for loosening dust, you have to be careful. I once scrubbed a delicate linen chair too hard with a stiff-bristled attachment and actually frayed the threads. If you’re dealing with delicate materials, remember the one thing you should never do when cleaning a velvet couch: never use a rotating brush roll. Use a stationary soft brush and follow the grain of the fabric. This gentler approach is also how I managed to keep my bedroom looking sharp when I was learning how to clean a fabric headboard without getting it too wet. You want to agitate the dust just enough so the suction can grab it, but not so much that you damage the weave.
Master the Overlapping Stroke Technique
Vacuuming a sofa isn’t like mowing a lawn; it’s more like painting a masterpiece. Use short, overlapping strokes. I go vertically first, then horizontally. This ‘grid’ pattern ensures you hit the fibers from every angle. I learned this technique while researching effective sanitizing methods for a germ-free home, and it changed the way I look at my cleaning routine. It’s also a vital part of a daily house cleaning routine to maintain perfection. If you just do one quick pass, you’re leaving about 40% of the soil behind. If you are preparing for a move, this level of detail is exactly what’s required on a move-out clean checklist to simplify your transition. By the time you’re done, the fabric should feel noticeably ‘lighter’ and the colors should look a bit more vibrant, even before a drop of water touches the surface.
But even the best vacuuming job is only half the battle. Let’s dig deeper into the science of what happens when you finally introduce moisture. Most people assume that if they buy a bottle labeled ‘sanitizer,’ they are instantly making their home safer. But here is the contrarian truth: you cannot effectively sanitize a surface that isn’t already chemically clean. In my years of trial and error, I’ve realized that spraying disinfectant on top of residual dust just creates a ‘sanitized’ layer of grime. According to the IICRC S300 Standard for Professional Upholstery Cleaning, organic soil acts as a physical shield for bacteria and viruses. If you haven’t performed a thorough dry-soil removal—the kind we just discussed—your sanitizing efforts are mostly performative. This is one of those sanitizing secrets for a safer house in 2025 that pros rarely share with the public. Have you ever fallen into the trap of thinking a quick spray was enough? Let me know in the comments.
Why Does Your Sofa Feel Sticky After It Dries?
If you’ve ever run your hand across a freshly cleaned cushion and felt a slight tackiness, you’ve fallen victim to the surfactant trap. This is a common hurdle when you’re trying to master move-out cleaning hacks to ensure your deposit refund. We tend to think more soap equals more clean, but excess detergent acts like a magnet for new dirt. It’s similar to why your carpet is still dirty after you shampooed it; the residue left behind is literally ‘sticky.’ To avoid this, always use a dedicated upholstery rinse or a very diluted vinegar solution to neutralize the soap. Learning how to get rid of soap scum without harsh scrubbing on hard surfaces is a great primer for understanding how chemistry works on your fabrics too.
Avoid the Wet-Wicking Trap That Ruins Move-Outs
The biggest ‘oops’ factor in upholstery care is over-wetting. When you saturate the fabric, the moisture travels deep into the foam padding. As it dries, it travels back to the surface, bringing buried stains and dirt with it in a process called ‘wicking.’ This is why that old coffee stain often reappears three days after you thought you removed it. If you are working through a move-out clean checklist to simplify your transition, the last thing you want is for a ‘ghost stain’ to pop up right as the landlord arrives for the walkthrough. To prevent this, focus on low-moisture effective sanitizing methods for a germ-free home. Use a foam-based cleaner or a fine mist rather than a heavy pour. By controlling the moisture, you ensure the dirt stays gone and the fabric stays fresh without the risk of mildew or secondary staining. Professionalism isn’t about having the most expensive machine; it’s about understanding how to keep the moisture on the surface where you can actually control it.
Ditch the Generic Handhelds for Real Suction
I used to think any vacuum with a cord was enough to get the job done. I was wrong. When you are serious about upholstery cleaning tips for a fresh home revival, the hardware you choose is the difference between a surface-level spruce-up and a deep-tissue extraction. I personally transitioned to a sealed-system HEPA vacuum because I realized my old cheap unit was just puffing fine dust out of the exhaust and right back onto my clean cushions. If you can smell ‘dust’ while you vacuum, you aren’t cleaning; you’re just redistributing. This is one of those effective house cleaning secrets from cleaning experts that changed my life: invest in a machine that actually traps 99.9% of particles. For move-outs, I rely on a portable spot extractor with a motorized brush head. This tool allows me to apply that necessary low-moisture cleaning without soaking the padding, which is vital for move-out cleaning hacks to ensure your deposit refund. The Carpet and Rug Institute (CRI) maintains that the ‘Seal of Approval’ for vacuums isn’t just a marketing badge; it’s a certification that the machine can remove soil without destroying the textile structure.
How do I keep my fabric looking showroom-fresh for years?
Consistency is the boring answer, but the ‘how’ is where the magic happens. I suggest integrating a deep vacuuming session into your daily house cleaning routine to maintain perfection—or at least a weekly one for high-traffic pieces. This prevents the abrasive grit from ever having the chance to saw through your fabric fibers. I also swear by rotating my cushions every time I clean. It’s the perfect moment to learn how to revive your flat couch cushions with this simple technique by fluffing the internal batting. If you have pets, don’t just rely on suction; use a rubberized lint brush first to pull the hair into clumps. By maintaining the dry soil levels, you ensure that your periodic sanitizing secrets for a safer house in 2025 actually work because the chemical agents can reach the fabric instead of being absorbed by a layer of dog hair.
The Future of Home Textiles is Getting Smarter
I predict that in the next five years, we will see a massive shift toward ‘active’ fabrics. We are already seeing the rise of nanocoatings that reject liquid on a molecular level, but the real game-changer will be built-in sensors that alert your phone when the microbial load on your sofa reaches a level that requires sanitizing. Until then, we have to rely on our own diligence. If you’re moving, remember that a clean sofa isn’t just about looks—it’s about hygiene. Following a move-out clean checklist to simplify your transition ensures you aren’t bringing the old house’s allergens into your new space. I want you to try this right now: take a damp, white microfiber cloth and press it firmly into your couch for ten seconds. If it comes back grey, your current vacuuming routine is failing you, and it’s time to upgrade your nozzle technique or check your filters. It is an eye-opening test that proves exactly how much ‘invisible’ soil is lurking beneath you.
Lessons Bought With the Price of a Ruined Sectional
Looking back at that first ruined chair, I realize my biggest mistake wasn’t lack of tools, but lack of patience. I’ve since learned that dry soil removal is the absolute foundation of every single one of my upholstery cleaning tips for a fresh home revival. If you take anything away from my experience, let it be these three realizations: first, the ‘sandpaper effect’ happens invisibly every time you sit down; second, ‘clean looking’ fabric is often just evenly soiled fabric; and third, your vacuum’s crevice tool is far more important than any expensive chemical spray. Mastering move-out cleaning hacks to ensure your deposit refund always begins with the nozzle, never the bucket.
My Personal Toolkit for Professional Level Results
I don’t gatekeep the gear that actually makes a difference. For truly safe and effective fabric care, I rely on a few specific resources. I always consult IICRC standards because they provide the science-backed reason for every action. I also keep a high-quality horsehair brush in my kit; it is significantly gentler on delicate weaves than standard plastic bristles. When I am refining my daily house cleaning routine to maintain perfection, I prioritize a vacuum with a certified HEPA filter to ensure I am not just puffing allergens back into the room. These tools, combined with sanitizing secrets for a safer house in 2025, turn a simple chore into a long-term preservation strategy.
Transform Your Living Room One Stroke at a Time
It is easy to feel overwhelmed by the technicalities of fabric care, but remember that every careful pass of the vacuum is a major win for your home’s air quality and your furniture’s lifespan. You do not need a professional certification to get professional results—you just need to respect the physics of the fabric. Take it slow, swap your attachments, and never underestimate the power of a dry start. Your upholstery is one of the biggest investments in your home; give it the care it needs to stay vibrant. Have you ever tried the white cloth test on your own sofa to see what is hiding there?