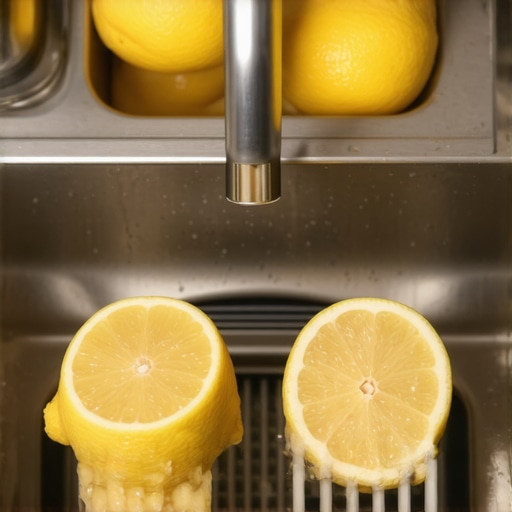
I remember the exact moment I realized my kitchen trash can had become a source of embarrassment. Despite tossing in lemon peels, I still faced that stubborn, foul odor every morning. It was as if my garbage disposal was silently mocking my efforts, refusing to honor my lemon-infused cleaning attempts. That lightbulb moment made me dig deeper, and what I found changed my entire approach to kitchen freshness.
Don’t Let a Stinky Disposal Ruin Your Day
If you’ve been scrubbing, deodorizing, and even tossing in citrus peels only to be met with that persistent smell, you’re not alone. Many homeowners believe that the same trick—using lemons or citrus—is enough to banish odors for good. But the truth is, it’s only part of the solution. In fact, relying solely on citrus peels can inadvertently hide the smell rather than eliminate it entirely.
Is Lemon Deodorizing Overhyped?
Early on, I made the mistake of thinking that a handful of lemon peels was all it took. I’d toss them in, turn on the disposal, and breathe a sigh of relief. But that fresh scent didn’t last. I learned that citrus peels contain natural oils that temporarily mask odors, not eradicate bacteria and grime lurking inside. According to a study by the housecleaning experts, true odor elimination involves addressing the source—germs and residue—rather than just covering it up.
My biggest early mistake was neglecting to clean the disposal itself properly and overlooking the importance of removing trapped debris. If you’re tired of fighting a battle you think you’re winning with citrus but still face that lingering smell, keep reading. I’ll share the proven steps that finally put an end to my disposal woes and keep your kitchen fresh—without unfair expectations or quick fixes that don’t last.
Tackle Disposal Buildup with Regular Maintenance
My first success story came after dedicating time to thoroughly clean the disposal. I turned off the unit, then poured a mix of hot water and a handful of baking soda into the sink. Using a long-handled brush or an old toothbrush, I scrubbed the rubber splash guard and the visible parts of the disposal to remove grime. This process is akin to cleaning the filter in a coffee machine—removing the residues that harbor bacteria—and it dramatically reduced odors. Remember, neglecting this step allows trapped debris and bacteria to persist, causing persistent smells.
Use Natural Deodorizers to Neutralize Odor Molecules
After the initial clean, I introduced natural deodorizers like white vinegar and citrus peels. Pouring half a cup of vinegar down the disposal, followed by running it with cold water for a minute, helps break down lipid buildup and neutralize foul smells. This step is like rinsing a sponge before drying—ensuring no lingering residues. Once the vinegar cycle ends, grinding citrus peels—like lemon or orange—while running cold water acts as an added freshening boost. The oils in citrus peel act as natural scent masks and antimicrobial agents—just don’t rely on these alone. For complete sanitation, combining these with deeper cleaning steps is necessary.
Disinfect with Ice Cubes and Salt for Deep-Scrubbing
Next, I used a simple but effective method: tossing in a handful of ice cubes and coarse sea salt into the disposal. Turning it on and running cold water, I activated a mini-scrubbing session. The ice helps dislodge stuck-on debris inside the grinding chamber, similar to how a handyman uses a wire brush to clean metal tools—abrasion lifts away stubborn buildup. The salt acts as a gentle abrasive, further aiding in loosening grime. This combined approach proved to be one of my most effective tactics in restoring freshness, especially when I noticed lingering residues after basic cleaning.
Maintain Odor-Free Disposal with Routine Checks
Implementing a weekly routine—disinfectant flush, ice-salt scrubs, and citrus freshening—kept odors at bay. Make it a habit to periodically inspect and clean the splash guard and disposal inlet, much like checking air filters in your car—preventative and crucial. Additionally, avoid letting food scraps sit for too long in the waste bin, as fermenting waste can contribute to immediate and long-term odors. Combining regular preventative maintenance with immediate cleaning responses ensures your disposal remains odor-free and hygienic, decreasing the chances of unpleasant surprises each morning.
Many homeowners believe that basic routines—like quick wipe-downs or a single deep clean—are sufficient to keep their homes sparkling. However, there’s a significant misconception about what actually delivers lasting cleanliness and health benefits. For instance, many think that using heavy-duty chemical cleaners alone can sanitize surfaces effectively, but they often overlook the importance of understanding the nuances of different materials and the limitations of these products. According to cleaning experts, proper sanitization involves a combination of mechanical removal of dirt and the right chemical agents, tailored to specific surfaces, which many homeowners don’t fully grasp.
Why is It a Mistake to Rely Solely on Natural Deodorizers for Deep Sanitation?
Many believe that natural solutions like vinegar or citrus peels can replace disinfectants, but this is a common myth. While these agents can mask odors or remove superficial grime, they don’t eliminate bacteria and viruses effectively, especially on high-touch areas or upholstery. For thorough sanitation, integrating proven methods—like effective disinfecting techniques detailed in the sanitizing secrets for a germ-free home—is crucial.
Another mistake many make is neglecting proper cleaning of upholstery. For example, upholstery is often overlooked during regular cleaning routines, leading to the accumulation of allergens and odors. My advice is to follow specific guides to care for your furniture, such as this ultimate upholstery maintenance guide. Many underestimate the impact of deep cleaning on the longevity and freshness of their furniture, but in reality, consistent, targeted cleaning can prevent costly replacements down the line.
What to Avoid When Preparing for Move-Out Cleaning
A common trap is using aggressive chemicals that may damage surfaces or leave residues, jeopardizing your security deposit. Instead, focus on gentle yet effective cleaning methods tailored for each surface—like using eco-friendly solutions on delicate tiles or woodwork. Additionally, neglecting detailed inspections and sticking only to visible spots can lead to missing hidden grime—areas such as behind appliances or inside vents. A thorough checklist, like this move-out cleaning hacks, can help ensure nothing gets missed. Having an eye for the small details and understanding material-specific cleaning techniques—such as those shared in upholstery cleaning tips—will make the process smoother and more effective. To wrap up, mastering house cleanliness requires more than routine scrubbing; it demands a nuanced understanding of materials, the right tools, and proper techniques. Recognizing these common pitfalls and truths can save you time, money, and stress, while keeping your home truly safe and spotless. Have you ever fallen into this trap? Let me know in the comments.
Keep Your Home Running Smoothly with the Right Tools
Maintaining a clean and hygienic living space requires more than just good intentions; it demands the right equipment and methodical routines. One of my go-to tools is a high-quality cordless vacuum with HEPA filtration, which I use daily to quickly remove dust and allergens from upholstery and carpets. Unlike standard vacuums, a model with HEPA filters traps microscopic particles, improving indoor air quality—an essential factor for allergy sufferers. I personally prefer the Dyson V11 Absolute because of its powerful suction and versatile attachments, which make cleaning multiple surfaces efficient and thorough.
For upholstery care, I rely on a dedicated steam cleaner that combines deep cleaning with sanitizing power. I recommend the Bissell CrossWave Steam & Vacuum for its dual functionality. It allows me to refresh fabric furniture and rugs without heavy chemical usage, aligning with health-conscious cleaning standards. Investing in quality tools not only streamlines routine maintenance but also extends the lifespan of your furnishings and surfaces.
Establish a Routine That Lasts
While high-end equipment makes cleaning more effective, developing a consistent routine is equally vital. I carve out 15-minute daily sessions for wiping surfaces, spot-cleaning upholstery, and decluttering. This prevents grime buildup and keeps deep-cleaning sessions manageable. Additionally, I schedule weekly tasks like deep vacuuming, upholstery sanitizing, and a thorough disinfectant application on high-touch surfaces. Using a digital organizer or a dedicated cleaning app helps me stay on top of these tasks. Routine maintenance reduces the need for drastic cleaning overhauls and ensures long-term freshness and hygiene.
Future Trends in Home Maintenance
Looking ahead, I predict smart cleaning devices will become more integrated into our routines, offering automated, app-controlled cleaning cycles with real-time monitoring. For instance, sensors embedded in furniture and carpets could alert you when sanitation is needed, making maintenance even more proactive. Embracing these innovations will allow us to sustain the cleanliness of our homes effortlessly, focusing our energy on more enjoyable activities. Continuing to upgrade our toolkit with advanced technology is the next logical step in ensuring long-lasting cleanliness and health safety in our living environments.
How do I keep a home maintenance system effective over time?
Regularly inspect and calibrate your tools, replace worn-out filters, and update software or firmware when applicable. For upholstery, I recommend consulting the ultimate upholstery care guide to learn about fabric-specific cleaning guidelines, which helps extend furniture lifespan. Establishing a maintenance schedule and sticking to it ensures your equipment continues functioning optimally, saving money and effort in the long run. Try setting monthly reminders to service or troubleshoot your tools, as this proactive approach keeps your home consistently clean and healthy, regardless of how busy life gets.
Hidden Truths That Changed My Approach to Cleanliness
One of the most profound lessons I learned is that superficial cleaning only masks problems rather than solving them. I used to think that quick fixes like spray-on deodorizers or rough scrubbing were enough, but I soon discovered that lasting cleanliness requires understanding the deeper causes—like bacteria buildup and material-specific care techniques. This revelation pushed me to develop routines that target root issues, transforming my home into a healthier, fresher space.
My Top Tools for a Smarter Home Maintenance
Over time, I found that investing in quality tools made all the difference. A cordless vacuum with HEPA filtration, for example, drastically improved my allergy management and overall cleanliness. I also swear by a dedicated upholstery steam cleaner, which is invaluable for deep sanitation, as detailed in our ultimate upholstery care guide. These tools have empowered me to maintain a spotless home without frequent professional help.
Embrace Routine, See the Difference
The secret to long-lasting cleanliness lies in consistency. I set aside even just 15 minutes daily for quick tidying and spot cleaning, complemented by weekly deep cleans that include disinfectant treatments and careful appliance checks. Using digital reminders ensures I stay on track, which minimizes buildup and keeps odors at bay. Remember, a little effort every day creates a home that feels consistently fresh and inviting.
Lessons Hard-Won and Well-Shared
Don’t rely solely on natural deodorizers: They mask odors but don’t eliminate bacteria. Combining vinegar rinses with proper cleaning is essential for true freshness.
Deep cleaning isn’t glamorous: Ice cubes and coarse salt inside the disposal act as a gentle but effective scrub for stubborn grime. It’s a quick step that yields visible results.
Material-specific knowledge matters: Knowing how to care for different upholstery fabrics prevents damage and extends their lifespan. my recommended resources can guide you in this area, like the care guide.
Move-out cleaning is strategic: Avoid harsh chemicals that could damage surfaces. Instead, focus on a detailed checklist to ensure nothing gets overlooked, which often translates into higher security deposit returns.
Tool maintenance pays off: Regularly inspecting and updating your cleaning gear keeps your routines effective and your home safer. Simple steps like changing filters and calibrating equipment go a long way.
Keep Your Home Fresh and Resilient
Implementing these insights has transformed my house from a fleetingly clean space into a sanctuary of hygiene and comfort. Remember, the journey to a spotless home isn’t about perfection but about informed, consistent effort. Your dedication will reward you with a healthier environment and peace of mind—something worth striving for every day.
What’s Your Next Step Toward a Cleaner Home?
Are there specific areas or techniques you’ve been hesitant to try? Share your thoughts below—your experience might be the breakthrough someone else needs!
Why Your Garbage Disposal Still Smells Even After Using Lemons