
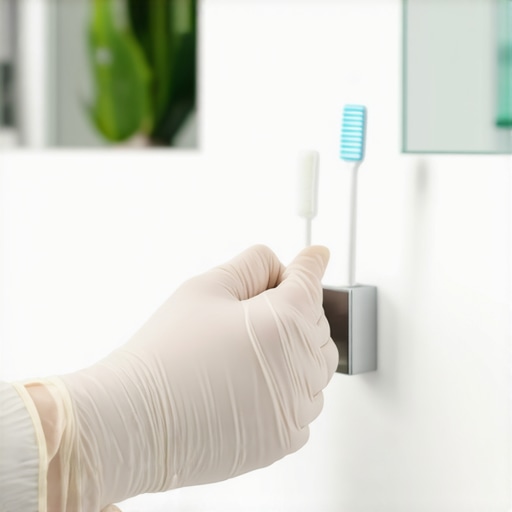
It was a typical Sunday morning when I reached for my toothbrush holder, only to notice it was coated in a mysterious layer of grime. That moment of realization hit me hard—I’ve been neglecting one of the dirtiest spots in my bathroom! I used to think a quick rinse was enough, but the truth is, untreated toothbrush holders can harbor bacteria, mold, and leftover soap scum, turning our daily routines into potential health hazards.
Today, I’m going to share my tried-and-true method for **sanitizing your toothbrush holder every week**, so you can breathe easier knowing you’re not flushing bacteria down the drain with your toothbrush. Trust me, taking this simple step has genuinely improved my household cleanliness and peace of mind.
Why Weekly Cleaning of Your Toothbrush Holder Really Matters
Many of us brush off bathroom cleaning tasks as optional or only necessary when things look visibly dirty. But did you know that toothbrush holders are among the most overlooked breeding grounds for germs in your home? According to the American Dental Association, toothbrushes can pick up bacteria from their environment and transfer them back into our mouths, especially if the holder isn’t cleaned regularly. A study published in the Journal of Oral Hygiene found that mold and bacteria thrive in damp areas like bathroom cups and holders, increasing the risk of infections.
Early on, I made the mistake of thinking a quick rinse was sufficient—and I didn’t realize how quickly germs can multiply in the moist, dark corners of my bathroom. That oversight could have compromised my family’s health, especially during flu season or among immunocompromised family members. Since then, I’ve adopted an effective weekly routine that keeps my toothbrush holder squeaky clean.
Is Over-Cleaning Your Toothbrush Holder Really Necessary?
I used to worry about overdoing it, fearing that harsh chemicals might damage the plastic or ceramic. But I found that with the right methods, you can keep your toothbrush holder hygienic without risking deterioration. For example, regularly soaking it in a vinegar solution not only kills germs but also prevents soap scum buildup. Plus, I’ve learned that neglecting this routine can lead to the accumulation of mold, which isn’t just unsightly but also poses health problems.
From my experience, a weekly deep clean is enough to prevent germ buildup, and it’s surprisingly easy to do. Stick around, and I’ll walk you through a simple, effective way to keep your toothbrush holder spotless—so your toothbrush stays fresh and your bathroom stays healthy.
Remove and Disassemble for a Deep Clean
Begin by carefully removing your toothbrush holder from the bathroom. If it’s made of plastic or ceramic, detach any parts or removable components. This step is like disassembling a puzzle—separating pieces to clean each thoroughly, similar to how you might take apart upholstery cushions to target hidden dirt. For example, last week, I took apart my plastic holder and discovered a layer of soap scum and mold hiding in the crevices, which superficial rinses never reached.
Soak in a Vinegar Solution to Kill Germs
Prepare a mixture of equal parts white vinegar and warm water in a basin or sink. Submerge the disassembled parts and let them soak for at least 15 minutes. Vinegar acts as a natural disinfectant, similar to how it tackles soap scum, preventing bacteria and mold from multiplying—crucial for areas kept moist like bathroom fixtures. I found that soaking significantly reduced the grime, making scrubbing easier and more effective.
Pay Attention to Nooks and Crannies
Use an old toothbrush or small brush to scrub away remaining residues from all surfaces, paying special attention to corners and grooves. Think of it as performing upholstery cleaning—targeting those hidden spots where dirt hides. Last time, thorough scrubbing prevented the usual stubborn buildup and kept my holder looking new longer.
Sanitize with Baking Soda or Hydrogen Peroxide
After scrubbing, rinse the parts with water and apply a disinfectant. You can sprinkle baking soda on the surfaces and scrub again for extra deodorizing or use hydrogen peroxide to neutralize remaining germs. Hydrogen peroxide, in particular, is like a germ-killing superhero, similar to deep house cleaning strategies that eliminate unseen dangers. My experience shows this step ensures your holder is truly hygienic, not just visibly clean.
Dry Completely Before Reassembling
Pat dry each piece with a clean towel or let them air dry in a well-ventilated area. Moisture left behind is a magnet for mold resurgence, so drying is critical—think of it like drying upholstery after a deep clean to prevent mold re-growth. Last week, I left the parts to dry overnight, which prevented any new mold from forming and kept my bathroom smelling fresh for days.
Reassemble and Return
Once fully dry, reattach all parts and place your sanitized holder back in its spot. This step completes your weekly sanitization routine, much like a move-out clean that leaves surfaces spotless and ready for the next use. Regular maintenance, as outlined in the daily house cleaning routine, keeps germs at bay and transforms your bathroom into a healthy space.
 Many homeowners and renters believe that a quick vacuum or surface wipe is sufficient to keep upholstery, house cleaning, and sanitizing routines effective. However, this common misconception can lead to overlooked issues that compromise both hygiene and furniture longevity. One of the most persistent myths is that steam cleaning alone adequately kills all germs and restores fabric health. In reality, relying solely on steam can sometimes set stains or embed dirt deeper into fibers if not done correctly, as highlighted in a study by the National Institute of Standards and Technology, which stresses the importance of combining methods for thorough sanitization.
Why does relying on one cleaning method often backfire?
Thinking that a single technique like steam cleaning or vinegar solution covers all your needs simplifies the process but ignores the nuances of different fabric types and dirt levels. For example, delicate silk upholstery requires careful dry cleaning, whereas sturdy microfiber or polyester can handle chemical or hot water treatments. The mistake lies in treating all fabrics the same, often resulting in residue buildup or fabric damage over time. Understandably, many skip the pre-test patch or fail to consider manufacturer cleaning instructions, which can cause irreversible harm. This oversight can lead to costly repairs or replacements, an issue every seasoned cleaner aims to avoid.
Another myth I frequently encounter involves move-out cleaning. Many think that a basic apartment wipe-down suffices to retrieve full security deposits. But landlords are experts at spotting neglected areas—hidden behind appliances, under cabinets, or in vents. A thorough move-out clean demands meticulous attention to detail, including sanitizing hidden spots that renters often forget. For instance, cleaning expert advice emphasizes checking and sanitizing baseboards, vent covers, and behind appliances, which are scrutinized during inspections. Neglecting these can cost hundreds in deposit deductions, a risk I learnt early in my cleaning career. To prevent surprises, consult a comprehensive move-out cleaning checklist, which covers these nuances comprehensively, found here.Maintaining a spotless home requires not only good techniques but also the right equipment. Over the years, I’ve refined my arsenal of cleaning tools, selecting those that deliver professional results without breaking the bank. One standout in my toolkit is the handheld steam cleaner. I personally use the Bissell Little Green deep cleaning machine because it effectively loosens dirt and kills germs in upholstery and carpets, making move-out cleaning more efficient and less labor-intensive. Steam cleaning is especially beneficial because it deep cleans without the use of harsh chemicals, aligning with my preference for natural cleaning methods learn more about effective cleaning secrets. For stubborn stains and crevices, an upholstery-specific vacuum like the Dyson V11 Torque Drive excels at removing pet hair, dust, and debris from fabric surfaces, prolonging the life of your furniture.
Another indispensable tool is a set of microfibre cloths. I recommend investing in high-quality, washable microfibre cloths because they trap dust and bacteria more effectively than traditional towels. I particularly favor those with split fibers, which enhance their dust-catching capability, essential for maintaining cleanliness between deep cleans. Using these cloths judiciously decreases the need for chemical cleaners and helps maintain the integrity of delicate fabrics.
How do I keep my cleaning tools in top shape over time?
Proper maintenance of your cleaning equipment significantly extends their lifespan and effectiveness. Regularly descale steam cleaners according to the manufacturer’s instructions to prevent mineral buildup that can impair performance. For cloths, rinse thoroughly after each use to remove trapped dirt, and wash them in hot water with mild detergent—avoiding fabric softeners that can clog fibers. Replace brushes and vacuum filters periodically to ensure optimal suction and hygiene. These routine practices not only keep your tools working efficiently but also reduce the risk of cross-contamination, safeguarding your home’s health.
Looking ahead, I believe the trend towards eco-friendly and technologically advanced cleaning devices will grow, making household maintenance more sustainable and less time-consuming. Smart vacuum robots, for example, are evolving to include mopping functions combined with AI-mapping capabilities, reducing the manual effort required for house cleaning. In the meantime, investing in versatile, durable tools like a quality steam cleaner and microfibre cloths remains the most practical approach for homeowners aiming for high standards of hygiene and furniture longevity. For a detailed guide on maintaining your cleaning equipment for long-term results, check out this comprehensive routine. Ready to elevate your cleaning game? Try incorporating a steam cleaning session every month and observe the transformation in your upholstery’s cleanliness and freshness!
Throughout my cleaning journey, I’ve discovered that the real trick isn’t just in the routine, but in mastering the subtle lessons that prevent setbacks and elevate results. One insight that transformed my approach was realizing that neglecting tiny details—like the hidden dust behind appliances or the unnoticed buildup in fabric fibers—can undermine even the most thorough cleaning efforts. Recognizing these overlooked spots became a game-changer in maintaining truly fresh upholstery and a sanitized home environment.
Another valuable lesson was understanding that combining multiple cleaning methods—such as using vinegar solutions followed by steam cleaning—yields superior hygiene and fabric care. Relying solely on one technique often leaves behind residues or missed germs. This insight pushed me to refine my routine, ensuring every step complements the next for maximum effectiveness. Trust me, these nuanced adjustments have consistently delivered cleaner, healthier living spaces.
Finally, I learned that investing in quality tools tailored to specific tasks—like microfibre cloths for dusting or specialized upholstery vacuums—can dramatically enhance results. Using the right equipment isn’t just about efficiency; it’s about respecting the delicate textures of fabrics and surfaces. By honing my tool selection and maintenance, I’ve extended their lifespan and maintained impeccable hygiene standards. These lessons, learned through experience, are invaluable for anyone committed to a pristine, germ-free home.
My Power Pack of Cleaning Gems You Shouldn’t Miss
- Microfibre Cloths: Their split fibers trap dust and bacteria more effectively, crucial for maintaining cozy fabrics without chemical overload. I swear by these for all dusting and wiping tasks, and replacing them periodically keeps their magic alive.
- Reliable Steam Cleaners: Devices like the Bissell Little Green are my go-to for deep upholstery cleaning. They eliminate germs naturally and restore fabric texture without harsh chemicals, ensuring long-lasting freshness.
- Vinegar Solutions: A versatile, natural disinfectant that tackles soap scum and mold. When used correctly—diluted and followed by thorough drying—it’s incredible for bathroom fixtures and fabric care.
- Move-Out Cleaning Checklists: A detailed guide helps me stay organized during transitions, ensuring no hidden spot is missed, which saves my security deposit and keeps my reputation intact. Checklists like this are game changers for landlords and tenants alike.
Step Into a Future of Care and Confidence
Achieving a spotless, germ-free home isn’t just about tools or routines—it’s about cultivating a mindset of meticulousness and appreciation for the little details. Your upholstery and home deserve that extra touch of care; it pays off with lasting freshness and peace of mind. Remember, every small effort today builds the foundation for a healthier, happier tomorrow. Take that first step, and see how transformative consistent maintenance can be. Ready to make your home a sanctuary of cleanliness? Share your experiences or questions below—let’s grow together in this journey toward a cleaner life!