
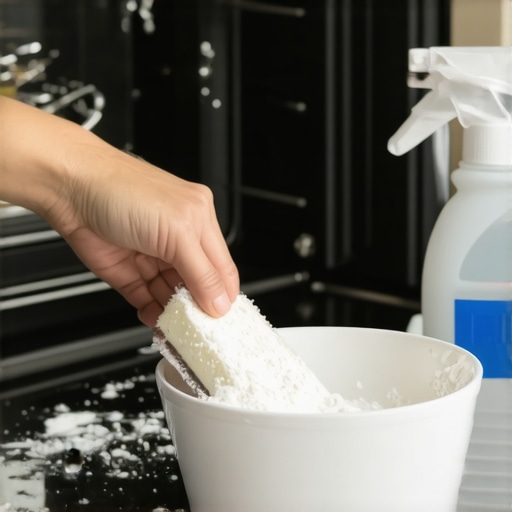
The moving truck was idling in the driveway, and I was sweating through my shirt, staring into the abyss of my oven. It was covered in a thick, black lacquer of burnt lasagna and mystery spills from three years ago. I’d grabbed one of those industrial-strength spray cans from the store, but within two minutes, the fumes were so thick I couldn’t breathe, let alone scrub. I felt like I was failing at adulthood. If I didn’t get this spotless, there went my security deposit. That’s when I tossed the chemicals and went back to basics. I’m telling you, friend, you don’t need a hazmat suit to get a sparkling kitchen. Today, we’re reclaiming your oven using nothing but two ingredients you probably already have in your pantry.
Stop Fearing the Grease in Your Kitchen
Most of us treat oven cleaning like a dental appointment—we avoid it until it’s absolutely painful. I used to be the same way. In fact, one of my biggest early mistakes was thinking I needed to use brute force. I actually took a wire brush to my oven once, which is a massive no-no because it scratches the finish and makes future grease stick even harder (a lesson I also learned the hard way when looking at why you should never use a wire brush on your grill grates). When you’re preparing move-out cleaning strategies to secure your deposit, the kitchen is usually the biggest hurdle. But here’s the secret: baking soda is a powerhouse. According to the American Chemical Society, sodium bicarbonate is a mild alkali that causes dirt and grease to dissolve easily in water. It’s chemistry, not magic! We’re going to use this simple science to melt away that carbonized mess without the toxic clouds.
Can a Little Pantry Powder Really Tackle Thick Carbon Crust?
I get the skepticism. I really do. You’re looking at a brown, crusty mess and thinking a cookie ingredient isn’t going to cut it. But I’ve used this method on everything from grimy oven door windows to neglected racks, and it works every time if you have just a little bit of patience. Have you ever been intimidated by a cleaning project and just avoided it for months? Tell me in the comments—I promise I won’t judge! We’ve all been there. By the time we’re done, you’ll know how to create the perfect paste, how to treat the oven racks naturally, and how to do it all while keeping your home smelling like a home, not a factory. Let’s get into the nitty-gritty of the process.
Mix the Right Consistency for the Job
First, we need the mortar. You want a consistency that’s thicker than pancake batter but thinner than peanut butter. In a small bowl, mix about half a cup of baking soda with a few tablespoons of water. Adjust as needed until it becomes a spreadable paste. If it’s too runny, it’ll just slide down the walls of the oven and pool at the bottom, which is a waste of your time and supplies. This same low-moisture approach is vital for other areas too, similar to how effective sanitizing methods for a germ-free home rely on the right concentrations to be successful.
Apply the Paste Like You’re Frosting a Cake
Once your paste is ready, it’s time to get your hands dirty—or rather, keep them clean by wearing gloves. Remove the racks and set them aside; we’ll handle them later. Using a sponge or a flexible spatula, coat every inch of the oven’s interior. Focus heavily on those dark, carbonized bumps on the floor of the oven. I remember my first apartment in Kansas City; I genuinely thought the interior of the oven was charcoal grey. It wasn’t until I applied this paste and let it sit that I realized the oven was actually a bright, speckled blue. It was a transformation that felt like a magic trick. Just be sure to avoid the heating elements! Getting paste on the coils can cause smoking the next time you cook, much like the caution needed with the trick to cleaning toaster ovens without harsh chemicals. 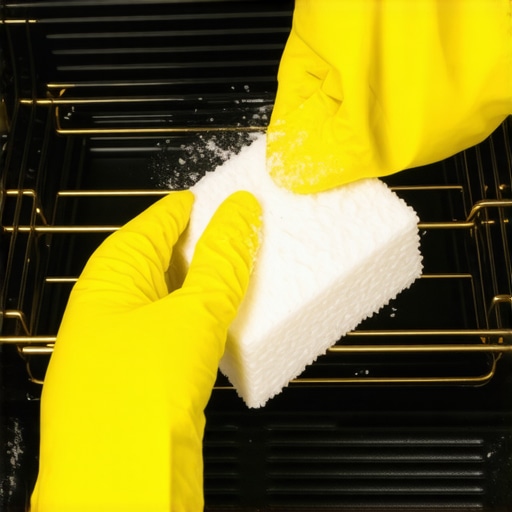
Why Your Oven Needs a Good Night’s Sleep
Here is the part where most people fail: the wait. You cannot rush chemistry. For this to actually break down the molecular bonds of burnt-on grease, it needs at least 12 hours. I usually slather the oven before I go to bed. While the baking soda is working its magic, you can focus on other tasks from the moving day checklist for a spotless kitchen. The paste will likely turn a brownish or yellowish color as it pulls the grime out of the metal pores. This is exactly what you want to see. It means the sodium bicarbonate is doing the heavy lifting so your biceps don’t have to.
The Final Fizz that Wipes Away the Crime
After the long wait, take a damp cloth and wipe out as much of the dried paste as you can. You’ll see big chunks of grease just falling off. For the stubborn white residue that remains, enter the second hero: white vinegar. Put some vinegar in a spray bottle and spritz the remaining bits of baking soda. It will foam up beautifully. This reaction helps lift any final microscopic bits of grit. It’s the same logic behind why vinegar is your best friend for cleaning hard water stains—it reacts with alkaline substances to break them down. Wipe it one last time with a clean, damp microfiber cloth. While you’re in a cleaning groove, don’t forget that the ventilation above needs love too; you can use the secret to cleaning greasy range hood filters with boiling water to finish the job.Once that oven is sparkling, most people think they’ve won the battle. But here is where the ‘clean’ illusion sets in. We often confuse visibility with hygiene. You see a shiny countertop and assume it’s ready for a move-out inspection, but the reality is often different. In my years of handling deep cleans, the biggest contrarian truth I’ve found is that more cleaning product usually leads to a dirtier home. When you over-apply cleaners, you leave behind a microscopic, tacky film that acts like a magnet for dust and bacteria. This is especially true when people are attempting sanitizing secrets for a safer house in 2025.
Why does the counter still feel tacky after you’ve scrubbed it?
This tackiness is the result of surfactant buildup. According to the International Sanitary Supply Association (ISSA), if you don’t properly rinse a surface after using a detergent, you aren’t actually finished. The residue can harbor pathogens and actually protect them from subsequent sanitizing efforts. To avoid this ‘Oops’ factor, always follow your cleaning with a plain water rinse. It sounds like an extra step, but it’s the difference between a surface that looks clean and one that is truly prepared for effective sanitizing methods for a germ-free home.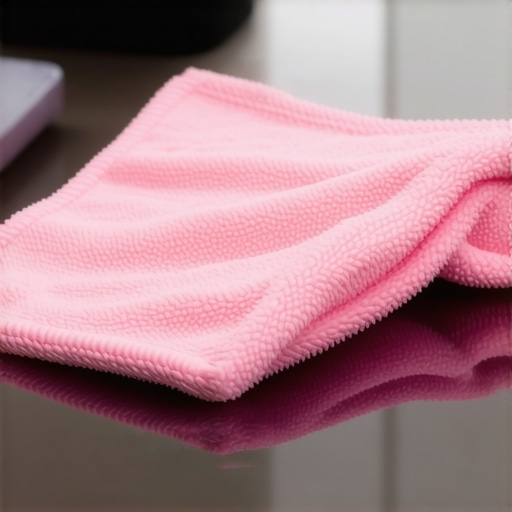
Don’t Let Your Fabric Furniture Ruin Your Security Deposit
Another advanced mistake happens in the living room. People focus so hard on the floors that they neglect the soft surfaces. If you’re following move-out cleaning strategies to secure your deposit, remember that odors trapped in fabric are the first thing an inspector notices. I’ve seen people try to ‘wash’ a sofa with a soaking wet rag, which is a disaster. It pushes dirt deeper and risks mold. Instead, refer to an ultimate upholstery care guide for lasting freshness. A pro tip: always why professional cleaners always vacuum the sofa before wiping it. If you apply liquid to a dusty couch, you just create mud.And please, whatever you do, avoid the urge to scrub. If you see a spot on the carpet or a chair, why you should never scrub a fresh liquid stain because it destroys the fibers. This level of detail is exactly what your move-out inspector is really looking for in the kitchen and beyond. They want to see that you haven’t just masked the mess, but actually maintained the integrity of the home. Have you ever fallen into the trap of using too much product and ending up with a sticky mess? Let me know in the comments—I’ve certainly been there before I learned the science behind it!Your tools are only as good as the care you give them, and this is where most DIY efforts fall apart right at the finish line. I’ve seen people spend hours on a kitchen deep clean only to wipe everything down with a rag that’s effectively a bacteria sponge. If you want to keep that level of shine without the back-breaking labor next time, you have to audit your kit. For instance, why your microfiber cloths stop working and how to fix them is a topic I’m obsessed with because these cloths are the backbone of modern cleaning. According to the Institute of Inspection Cleaning and Restoration Certification (IICRC) S100 standard, the physical structure of a split-fiber microfiber is what allows it to mechanically remove up to 99% of surface bacteria. But the moment you wash them with fabric softener or dry them on high heat, you melt those fibers together, turning a professional tool into a useless piece of plastic. Stop doing that!
Your Vacuum Might Be Sabotaging Your Hardwork
Another specific tool trap involves your vacuum. While it’s great for carpets, why your vacuum brush roll is ruining your hardwood floors is something most homeowners don’t realize until the scratches become visible in the sunlight. I personally use a vacuum with a dedicated ‘hard floor’ setting that completely disengages the beater bar. This ensures you’re lifting the dust—not grinding it into the finish. If you’re moving into a new place and dealing with the only way to clean sticky residue from new appliances, remember that the right mechanical action (like the right vacuum head) is always better than just pouring more chemicals on the problem. 
How can I keep these results without scrubbing every week?
The secret isn’t a massive monthly overhaul; it’s about a daily house cleaning routine to maintain perfection. I predict that over the next few years, we are going to see a massive shift toward enzymatic cleaners that stay ‘active’ on your surfaces long after you’ve stopped wiping. These ‘living’ cleaners will eat away at organic grease and odors in real-time, which is a game-changer for high-traffic areas like kitchens and mudrooms. When you combine these future-tech solutions with proven house cleaning strategies for a sparkling home today, you’re not just cleaning; you’re managing an ecosystem. This is especially vital when implementing sanitizing hacks for safe house transitions. You want a home that stays clean because you’ve removed the ‘food’ for the grime, not just covered it up. My challenge for you today is simple: go check your dryer settings. If you’ve been drying your cleaning rags on the ‘high’ heat setting, stop immediately and switch to ‘low’ or air-dry to save those fibers!
Why the Most Intense Scrubbing Often Backfires
One of the biggest move-out cleaning mistakes that cost renters money is the belief that brute force solves every problem. I once spent four hours scrubbing a kitchen floor only to realize I was just pushing dirty water into the porous grout lines because I didn’t change my mop bucket frequently enough. Real efficiency comes from letting your products work for you while you focus on the move-out clean checklist to simplify your transition. Another hard-earned truth? Never ignore the vertical surfaces. While we obsess over floors, a quick wipe of grimy handprints off painted walls can be the deciding factor for a picky landlord. #IMAGE_PLACEHOLDER_E#
The High-Impact Tools for Your Move-Out Kit
If I were to rebuild my cleaning caddy today, I would keep it incredibly lean. High-quality microfiber is non-negotiable because it picks up what cotton leaves behind. I also swear by a simple spray bottle of distilled white vinegar for a final rinse; it is one of those effective house cleaning secrets from cleaning experts that prevents the sticky residue that attracts dust. For the living areas, a soft-bristled brush is essential for upholstery cleaning tips for a fresh home revival. These tools are not expensive, but they are precise, which is exactly what you need when you are under the pressure of a moving deadline.
Reclaim Your Energy for Your New Space
Moving is inherently stressful, but walking away from a sparkling clean home provides a sense of closure that is hard to beat. You are not just cleaning for a landlord; you are finishing a chapter with pride. By following a daily house cleaning routine to maintain perfection in your new home from day one, you will never have to face another carbonized abyss in your oven again. Take it one room at a time, trust the science of your cleaners, and focus on the exciting transition ahead. Have you ever finished a deep clean only to realize you missed one glaring spot the next morning? Let me know your most frustrating cleaning stories in the comments!