
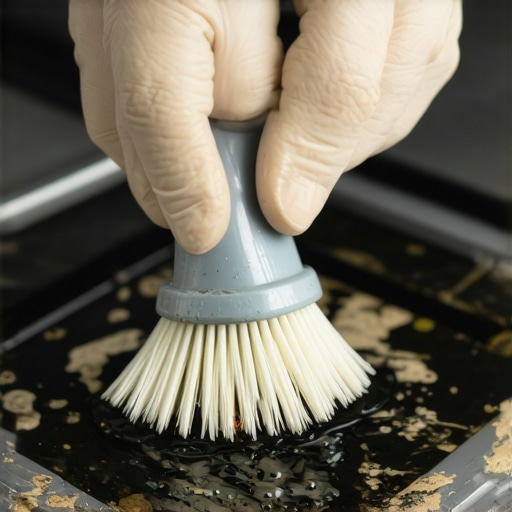
I stood in my kitchen last Tuesday, coffee in hand, staring at a stack of “clean” plates that still felt slightly oily. It didn’t make sense. I buy the expensive detergent, I use rinse aid, and I always scrape my scraps, yet my kitchen had started smelling like a damp basement. When I finally peeled back the rubber seal—the gasket—I saw it. A thick, jet-black sludge was hugging the inner rim of the door. I’d been washing my family’s dinnerware in a machine lined with a literal swamp. If you have ever wondered why your dishwasher is leaving food particles on your plates even after a heavy cycle, this hidden grime is your most likely culprit. Today, I am going to show you how to hunt down this gunk and kill it for good, so you never have to worry about cross-contamination again. [IMAGE_PLACEHOLDER]
Stop Ignoring That Slimy Rubber Seal
For the longest time, I fell into the trap of thinking my dishwasher was a self-cleaning miracle. It uses hot water and high-pressure soap, right? Wrong. I made the massive mistake of ignoring the edges of the tub for nearly three years. By the time I finally checked, the buildup was so thick I felt like I needed a professional restoration crew. This isn’t just about aesthetics; it is a fundamental part of maintaining a healthy home environment. We put so much effort into effective sanitizing methods for a germ-free home, yet we often ignore the one place where we prepare our eating surfaces.
Is that black sludge actually worth the worry?
You bet it is. It is not just old food; it is a complex cocktail of bacteria and fungi. According to a study published in the journal Medical Mycology, nearly 60% of household dishwashers contain fungal colonies like Exophiala dermatitidis and Candida, which thrive in the extreme, moist environments of our cleaning appliances. This “black yeast” is remarkably stubborn and can survive high heat. If you are currently prepping for a transition, knowing these move-out cleaning hacks to ensure your deposit refund includes deep-cleaning these seals, because a savvy landlord will definitely sniff out that mildew smell. Have you ever actually peeled back your gasket to see what is living there? Seriously, go check right now—I will wait!
Your Dishwasher Is Not a Self-Cleaning Appliance
The truth is, the water spray arms rarely hit the very outer edges of the gasket where the door meets the frame. Over time, soap scum, hard water minerals, and tiny food particles get trapped in the folds of the rubber. This creates a buffet for mold. It is the same reason why your kitchen towels smell musty even after a wash—moisture trapped in a dark, warm place is a recipe for disaster. If we do not manually intervene with the right tools, that grime just keeps recirculating, potentially landing back on your “clean” forks.
Grab Your Supplies and Start Scrubbing
To win this war against the black sludge, you do not need a chemistry degree or expensive industrial cleaners. In fact, most of the best effective house cleaning secrets from cleaning experts involve simple tools you already own. Grab an old toothbrush, a bowl of warm water mixed with a few drops of grease-cutting dish soap, and a microfiber cloth. The toothbrush is non-negotiable because its bristles can reach into the accordion-style folds of the rubber that a sponge will simply glide over. Start at the top corner and pull the seal back gently with your fingers. Do not rip it out—most gaskets are pressed into a channel and you do not want to compromise the watertight fit.
Avoid Harsh Chemicals to Save the Rubber
I once made the mistake of thinking pure bleach would be the ultimate solution to my mold problem. I soaked a rag and tucked it into the seal for an hour. While it killed the mold, it also started to dry out the rubber, making it brittle. If that gasket cracks, you are looking at a floor-ruining leak. Instead, stick to mild soap or a 50/50 water and white vinegar solution. This is very similar to how to clean the gaskets in your fridge to prevent mold without causing permanent damage to the appliance.
Sanitize the Deep Folds Where Mold Hides
Once you have scrubbed away the visible gunk, you need to address the microscopic spores. This is where sanitizing secrets for a safer house in 2025 come into play. Dip your toothbrush in white vinegar and run it along the entire length of the gasket. The acidity of the vinegar is a natural enemy to most household molds. I remember the first time I did this after years of neglect; the water in my bowl turned a murky, grayish-black within seconds. It was gross, but seeing that clear rubber emerge was incredibly satisfying. If you are currently following a daily house cleaning routine to maintain perfection, adding a quick wipe-down of this seal once a week will prevent the sludge from ever returning.
Don’t Forget the Bottom Edge
The most overlooked part of the dishwasher is the bottom seal, often hidden behind the lower spray arm. You usually have to get down on your hands and knees and look ‘up’ at the bottom of the door to see it. This is where the heaviest debris collects because gravity pulls all the grease and food bits down there. If you are executing move-out cleaning strategies to secure your deposit, this is the one spot a professional inspector will check to see if you actually cared for the unit.
Why This Matters Beyond the Kitchen
Cleanliness is a holistic endeavor. If you have mastered the kitchen, you might realize that the same attention to detail is needed for your furniture. Just as a dirty gasket ruins your plates, hidden dust in your sofa ruins your air quality. Learning upholstery cleaning tips for a fresh home revival can complement your appliance maintenance, ensuring that every corner of your living space feels truly sanitized. When I finished my dishwasher deep clean, the ‘basement smell’ in my kitchen vanished instantly, proving that the smallest, hidden parts of our homes often have the biggest impact on our comfort.If you think that a quick spray and an immediate wipe with a paper towel is enough to kill bacteria, you are unfortunately mistaken. This is one of the most common effective house cleaning secrets from cleaning experts: the secret is patience, not the chemical itself. Most household disinfectants require a ‘dwell time’—the surface must remain visibly wet for 3 to 10 minutes to actually kill the pathogens listed on the label. When we rush, we are essentially just moving the dirt around without addressing the microscopic reality. This is especially dangerous when you consider why you should never spray cleaning products directly on surfaces like electronics or delicate wood finishes, as the runoff can cause permanent damage while failing to sanitize the area properly.
The Moisture Trap That Ruins Furniture
I see this all the time with DIY upholstery care. People see a small stain and immediately soak the fabric with cleaner. This is a massive ‘oops’ moment because excess moisture is the hidden enemy of foam and padding. When you saturate a cushion, the liquid seeps deep into the core where it cannot dry effectively, leading to a internal mold growth that smells like a locker room. Instead of soaking, you should follow upholstery cleaning tips for a fresh home revival that focus on dry-foam methods or controlled blotting. If you over-wet a sofa, you might end up wondering why your carpet is still dirty after you shampooed it, as the wicking process brings underlying grime back to the surface.
Are you actually following the dwell time rules on the label?
Most of us never read the fine print, but the Environmental Protection Agency (EPA) emphasizes that contact time is the single most important factor in chemical efficacy. If a product claims to kill 99.9% of germs, that efficacy rating usually assumes a 10-minute wet contact time. This is a critical distinction for sanitizing secrets for a safer house in 2025. If you are doing a deep clean to prepare for a move, rushing this step means leaving behind invisible bio-films that the next tenant will inherit.
Master the Nuance of the Move-Out Clean
When it comes to leaving a rental property, the real ‘nuance’ is in the hardware. Most people focus on the broad surfaces like floors and walls, but seasoned inspectors look at the tracks, the filters, and the gaskets. If you want to master move-out cleaning strategies to secure your deposit, you have to think like a professional who is searching for a reason to keep your money. This means learning how to deep clean your window tracks in five minutes and ensuring your appliances are not hiding the same sludge I found in my dishwasher. Have you ever fallen into the trap of ‘spray and wipe’ only to realize you were just spreading the mess? Let me know in the comments below!
The Gear That Actually Does the Heavy Lifting
After years of trial and error, I have learned that the best intention is useless without the right mechanical advantage. In my kit, the one tool I refuse to compromise on is a vacuum with a sealed HEPA system. Most people assume their vacuum is doing its job, but if the filtration is weak, you are just sucking up dust from the floor and venting fine particulates back into the air. This is often why your vacuum isnt picking up dirt like it used to—the internal filters are likely choked with the very microscopic debris they were meant to trap. I personally use a canister model with a dedicated floor brush because it allows me to toggle the brush roll off. This is a critical nuance because why your vacuum brush roll is ruining your hardwood floors is no joke; those stiff bristles can leave micro-scratches that dull your finish over time.
Stop Guessing and Start Measuring Results
When it comes to upholstery, I’ve moved away from the ‘spray and hope’ method. Instead, I follow the technical guidelines set by the IICRC (Institute of Inspection Cleaning and Restoration Certification), specifically the S-300 Standard for Professional Upholstery Cleaning. This standard emphasizes that identifying the fiber type—whether it is protein-based like wool or synthetic like polyester—is the only way to choose the right pH for your cleaning agent. For my own sofa, I use a low-moisture extraction tool that uses high heat but very little water. This ensures I never have to worry about how to revive your flat couch cushions with this simple technique after accidentally soaking the foam. Using a tool with a clear head also gives you the ‘gross-factor’ satisfaction of seeing the brown water leave the fabric, which is the only way to know you’ve actually hit the deep layers of the weave.
How do I maintain a sanitized home without burning out?
The secret is in the rotation. You cannot deep clean every gasket, filter, and cushion every single day. I’ve found that the only way to keep up is to integrate these tasks into a daily house cleaning routine to maintain perfection that focuses on one ‘deep’ zone per week. One Tuesday might be for the dishwasher seal, while the next is for ultimate upholstery care guide for lasting freshness. This prevents the black sludge from ever finding a foothold. If you are currently managing a transition, these sanitizing hacks for safe house transitions will save your sanity by focusing your energy on the high-touch areas first.
The Future of Home Sanitization
I predict that within the next five years, we will see a massive shift away from chemical disinfectants toward residential UV-C and stabilized aqueous ozone systems. We are already seeing people learn how to sanitize your bathroom floor using steam alone, and as tech improves, the need for harsh liquids will diminish. This is great news for our lungs and our furniture finishes. If you want to get ahead of the curve, I highly recommend trying the dwell-time challenge I mentioned earlier. Next time you clean your counters, leave the solution wet for the full 10 minutes. You’ll be shocked at how much more ‘clean’ the surface feels once it actually has time to work.
Hard Truths I Discovered in the Folds of a Rubber Gasket
After years of maintaining appliances, I have realized that the ‘eye test’ is the biggest lie in home maintenance. Just because the front of your machine is stainless steel and shiny doesn’t mean the internal components aren’t harboring a biological experiment. I learned the hard way that a sniff test is often more accurate than a visual one; if your kitchen smells off, do not just light a candle—find the damp corner. Integrating these deep-cleaning checks into your house cleaning strategies for a sparkling home today saves you from the panic of a failed inspection or a surprise repair bill later. Also, remember that ‘clean’ is a feeling, but ‘sanitized’ is a science. If you are preparing to move, adding this specific appliance check to your move-out clean checklist to simplify your transition ensures you leave the home in a state you can be proud of.
The Toolkit That Never Lets Me Down
I do not believe in buying every ‘as seen on TV’ gadget. Instead, I rely on a few proven workhorses that I trust across the entire home. First, the humble soft-bristled toothbrush is my MVP for gaskets, crevices, and window tracks. Second, white vinegar is my go-to because it is safer for the environment and your lungs; I even use it for the vinegar and dish soap trick for spotless window screens. Finally, high-quality, high-gsm microfiber cloths are essential, provided you know how to care for them so you can avoid the frustration of why your microfiber cloths are leaving lint everywhere. These simple, accessible tools are the foundation of any professional-level cleaning result.
Start Your Journey Toward a Truly Healthy Home
Cleaning can feel like an endless cycle, but when you focus on these hidden ‘sludge zones,’ you are doing more than just tidying up—you are protecting your family’s health. Taking ten minutes to scrub a gasket today means one less worry tomorrow. By mastering these sanitizing secrets for a safer house in 2025, you are not just reacting to mess; you are creating a sanctuary that smells as fresh as it looks. Don’t let the hidden grime win. When was the last time you actually peeled back that rubber seal to see what was hiding inside? Let me know what you found—or if you are too scared to look—in the comments below!