
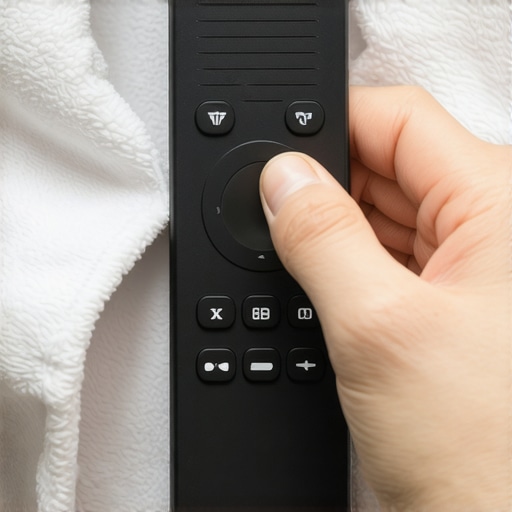
I remember the exact moment I realized my TV remote was a petri dish. It was a Friday night, I had just finished a slice of pepperoni pizza, and as I reached for the volume, I felt that tell-tale “tackiness” between the buttons. My stomach turned. I did what any panicked person would do: I grabbed a bottle of heavy-duty cleaner and gave the whole thing a healthy spritz. Huge mistake. Within ten minutes, my remote was possessed. The volume would only go up, and eventually, the power button just quit entirely. I’d effectively drowned a $50 piece of tech trying to save myself from a few germs. It’s a classic move-out clean blunder too, where people rush to finish a move-out clean checklist to simplify your transition and end up damaging the rental’s property.
Stop Spraying Liquid Directly on Your Clicker
The truth is, most of us are more worried about the visible grime than the microscopic stuff, but both are a problem. I’ve learned the hard way that you can’t treat a circuit board like a kitchen counter. Today, I’m going to walk you through the exact process I use now—one that involves zero “possessed” electronics and 100% germ-killing power. This is part of those sanitizing secrets for a safer house in 2025 that I wish I knew years ago. We often focus on big projects like upholstery cleaning tips for a fresh home revival, but these small hand-held devices are what we touch every single day.
Is it actually possible to kill germs without frying the circuits?
This is the big fear, right? You want a clean home, but you don’t want to break your toys. It’s a valid concern. According to a study by researchers at the University of Virginia, TV remotes are among the top hotspots for germs, often carrying viruses for up to 24 hours. But you don’t need a bucket of bleach. My goal today is to show you that with the right materials, you can have a remote that’s as fresh as a professionally handled germ-free home session without any risk to the hardware.
Why Your Remote is Probably the Dirtiest Thing in the House
Think about it. We touch the remote after eating, after sneezing, and after coming home from work without washing our hands. It’s the ultimate high-touch surface. In my early days of trying to keep a home healthy, I used to just wipe it with a damp rag. That didn’t do squat for the gunk stuck in the cracks. Have you ever looked at your remote under a bright light and felt a little bit of regret? You aren’t alone. We’re going to fix that right now by using the same precision we’d use for how to safely disinfect your remote control without damaging the sensors. To get started, you’ll need a few basics: isopropyl alcohol (at least 70%), some cotton swabs, and a lint-free cloth. This is the same level of care required when you are following a daily house cleaning routine to maintain perfection throughout your entire living space.
Kill the Power Before You Kill the Remote
First things first: you must remove the batteries. It’s a simple step, but it’s the difference between a clean remote and a short-circuited brick. I think of it as the ultimate safety net. Even if a tiny bit of moisture gets where it shouldn’t, there’s no current running through the device to cause a disaster. Once the batteries are out, hold down the power button for a few seconds to drain any residual charge hiding in the capacitors. This is the foundation of how to safely disinfect your remote control without damaging the sensors properly. While you have the compartment open, take a moment to look at the contacts. If you see any white crusty buildup, that is battery acid, and you will need to gently scrape it away with a dry swab before proceeding with the rest of your daily house cleaning routine to maintain perfection throughout your living room electronics.
Choose Your Cleaning Agent Wisely
When selecting your isopropyl alcohol, look specifically for the 70% concentration. While 90% evaporates faster, the 70% version actually contains enough water to slow down the evaporation just enough to penetrate the cell walls of bacteria more effectively. This is a core part of the sanitizing secrets for a safer house in 2025 that many people overlook. It’s counter-intuitive, but the extra water helps the alcohol do its job before it disappears into the air. Do not grab the Windex or the multi-surface spray under the sink. Those often contain chemicals that can strip the protective coating off the buttons or, worse, leave a residue that attracts more dust. Dampen—don’t soak—a lint-free microfiber cloth with the alcohol. If you can wring out a single drop, it’s too wet. Wipe the entire exterior of the remote, applying firm but gentle pressure to lift the initial layer of grime.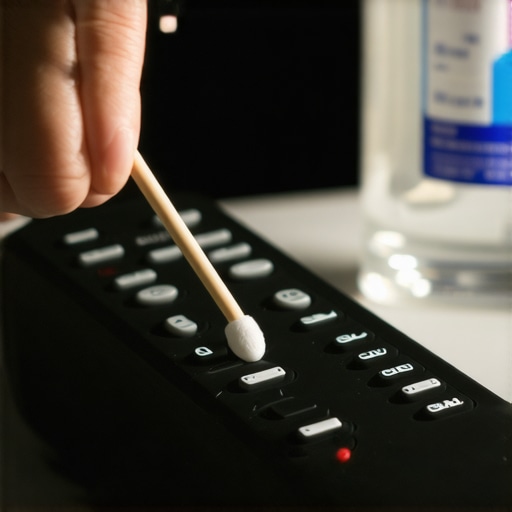
Target the Cracks Without Flooding the Internal Board
Now, let’s talk about the crevices. This is where the real ‘petri dish’ action happens. Dip a cotton swab into the alcohol and then press it against a paper towel so it’s just barely damp. Trace the outline of every single button. It’s tedious, but this is how you get the skin cells and oils that a simple wipe-down misses. Paper towels are actually quite abrasive on a microscopic level and can leave behind tiny fibers that get lodged in the sensors. This is why I always emphasize using a high-quality microfiber cloth or precision swabs, similar to what you’d use for an ultimate upholstery care guide for lasting freshness—it’s all about protecting the surface while removing the dirt. This precision is vital, especially when you are performing effective sanitizing methods for a germ-free home.
The Tiny Tool That Saves Your Sticky Buttons
For those stubborn, sticky bits that refuse to move, I use a dry toothbrush. It sounds odd, but it works exactly like the toothbrush trick for removing pet dander from baseboard crevices. The bristles are flexible enough to get under the lip of the buttons and flick out dried debris. I remember doing this during a particularly stressful move-out clean three years ago. I was trying to follow move-out cleaning hacks ensure your deposit refund and realized the remote in the master bedroom was practically glued together by spilled soda from the previous night’s packing session. A simple swab wasn’t enough; the sugar had crystallized into the casing. I had to use a wooden toothpick to gently pry the ‘gunk’ out, millimetre by millimetre. It took twenty minutes, but that remote looked brand new afterward, and the buttons actually clicked again. It taught me that precision beats power every time when it comes to high-touch electronics.
Wait for the Alcohol to Vanish Completely
Finally, let the remote air dry completely before reassembling it. Isopropyl alcohol evaporates quickly, but you want to be 100% sure the moisture is gone from the internal edges before you put the batteries back in. If you rush this part, you risk trapping moisture inside, which can lead to corrosion over time. I usually give it at least ten minutes on a clean, dry surface. Use this time to wipe down the battery compartment itself with a completely dry cloth to remove any dust. Once dry, your remote will be sanitized and ready for the next movie night without the risk of spreading germs.
Stop Drowning Your Surfaces in Chemical Solutions
Most people assume that if a little cleaner is good, a lot must be better. In my years of obsessing over home maintenance, I’ve found the exact opposite to be true. When you’re tackling a heavy-duty task like a move-out cleaning strategy to secure your deposit, the temptation to saturate every stain is overwhelming. However, excessive soap is the enemy of a truly clean home. This is especially true for carpets and couches. If you don’t rinse out every microscopic bubble, you’re essentially leaving a layer of ‘glue’ that traps dirt the second you walk on it. It’s the primary reason why your floors feel sticky even after you finished mopping.
Why do my floors still feel sticky after a deep clean?
The science behind this is fascinating. According to experts at the Institute of Inspection Cleaning and Restoration Certification (IICRC), surfactants in cleaning agents are designed to attract soil. If those surfactants aren’t fully removed, they continue to do their job—attracting dust and hair to your floor or sofa long after you’ve put the mop away. This is a nuance often missed in a standard daily house cleaning routine to maintain perfection. I always recommend a ‘rinse pass’ with plain water or a very diluted vinegar solution to ensure no residue remains. 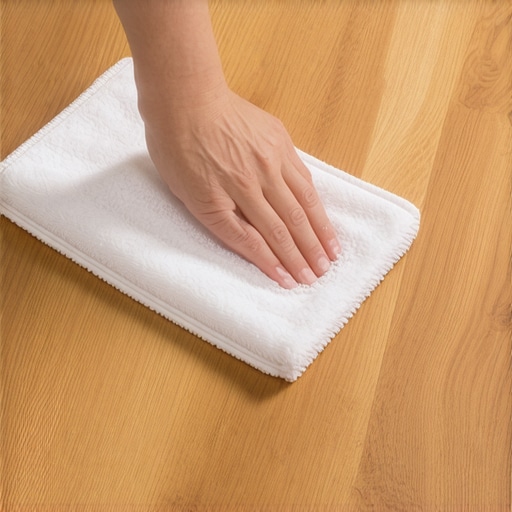
The Steam Cleaner Trap Most People Fall Into
Here is where things get dangerous: the ‘Oops’ factor of heat. We’re taught that heat kills germs, which is true, but heat also sets certain types of damage permanently. I’ve seen homeowners try to be thorough by using a steam cleaner on delicate furniture, only to realize too late that they’ve ruined the piece. You must know how to treat s-coded upholstery fabric without ruining it before you even think about plugging in a steamer. ‘S’ stands for solvent, meaning water will leave permanent rings. It’s a common mistake during a rushed move-out clean checklist to simplify your transition, and it can cost you hundreds in damage fees. For a truly germ-free home, professional-level care requires checking every tag first.
Work From the Ceiling Downward
If you aren’t following the law of gravity, you’re working twice as hard. I see so many people vacuum the floors and then dust the ceiling fans. All that dust just settles right back onto your clean carpet. There is a reason why professional cleaners always start at the top of the room. It’s about efficiency and preventing cross-contamination. This approach is a core part of the effective house cleaning secrets from cleaning experts that I’ve gathered over the years. By starting high, you ensure that any falling debris is caught in the final sweep of the floor. Have you ever fallen into this trap? Let me know in the comments.
Invest in a Real Filter Before You Clean Again
I used to think that as long as the floor looked clear, the job was done. I was wrong. If you aren’t using a vacuum with a certified HEPA filter, you are likely just performing a high-speed redistribution of allergens. I learned this when I started investigating why your vacuum filter might be making your allergies worse. Most standard vacuums trap the big stuff but blast the microscopic irritants right back out the exhaust. When I’m preparing for a major task, like using sanitizing hacks for safe house transitions, I rely on a vacuum that seals the airflow completely. This is a game-changer for maintaining a truly germ-free home.
How can I make a professional deep clean actually last?
The secret isn’t cleaning harder; it’s cleaning smarter with a schedule that prevents the ‘reset’ button from ever being pushed. According to the 2024 Dyson Global Dust Study, nearly 1 in 2 people only clean their vacuum filters once they notice a drop in suction, which is often far too late to prevent air-borne allergen redistribution. To avoid this, I implement house cleaning strategies for a sparkling home today that involve monthly filter inspections and quarterly deep-scrubs of high-touch zones. Learning how to schedule a deep clean that actually lasts more than a week has saved me more time than any single cleaning product ever could. 
The One Brush I Never Leave Behind
When it comes to fabric, I’ve moved away from standard plastic brushes. I now use a horsehair detailing brush for everything from my car seats to my living room sofa. It’s gentle enough not to fray the fibers but stiff enough to lift the deep-set dust that a vacuum nozzle misses. If you’ve been reading my ultimate upholstery care guide for lasting freshness, you know that agitation is the key to longevity. Without it, the dirt just sits at the base of the fabric, acting like sandpaper every time you sit down. This is especially vital when you’re following upholstery cleaning tips for a fresh home revival to keep your furniture looking showroom-ready.
Predicting the Future of Home Sanitization
Looking ahead, I see the industry moving toward ‘probiotic’ cleaning solutions—products that leave behind beneficial bacteria to compete with the harmful ones. It sounds like science fiction, but it’s the logical next step in sanitizing secrets for a safer house in 2025. Instead of just killing everything with harsh chemicals, we will be creating an ecosystem that naturally keeps pathogens at bay. For those of us currently executing move-out cleaning strategies to secure your deposit, this technology will eventually mean less scrubbing and more long-term protection. If you really want to stay ahead of the curve, try the ‘two-filter swap’ this weekend—buy a spare HEPA filter so you can wash one and let it dry for 24 hours while keeping your machine running with the other.
The Hardest Lesson I Learned About Electronics and Moisture
Over the years, I’ve realized that the most dangerous part of cleaning isn’t the germs—it’s the rush. When you try to speed through a deep clean, you stop paying attention to the subtle cues your home gives you. I once thought that more moisture meant more cleanliness, but that single assumption led to three broken remotes and a very soggy armchair. Now, I prioritize precision over power every time. Whether I am applying effective sanitizing methods for a germ-free home or just doing a quick wipe-down, I take a second to breathe and assess the material first. It’s also taught me that your tools are only as good as their upkeep; a dirty cloth or a clogged filter is just moving dirt from one room to another.
Three Tools That Saved My Sanity and My Furniture
If you want to move beyond basic scrubbing, you need a few specialized items that rarely show up in the cleaning aisle. First, always keep high-grade isopropyl alcohol on hand for electronics; it is the cornerstone of how to safely disinfect your remote control without damaging the sensors. Second, I recommend an authentic horsehair detailing brush; it’s a staple in my ultimate upholstery care guide for lasting freshness because it lifts debris without shredding delicate fabrics. Finally, don’t overlook the importance of a high-quality HEPA filter. I trust these because they actually capture the particles that cause irritation, rather than just venting them back out. Understanding why your vacuum filter might be making your allergies worse was the turning point in my own home health journey. #IMAGE_PLACEHOLDER_E#
Start Your Journey Toward a Truly Restored Home
Cleaning shouldn’t feel like a constant battle against an invisible enemy. Once you master the small details—like the right way to handle a remote or the best sequence for dusting—the process becomes much more manageable. By using these sanitizing secrets for a safer house in 2025, you aren’t just tidying up; you’re creating a sanctuary for yourself and your family. Take it one room at a time, and don’t be afraid to slow down and do it right. Have you ever accidentally ‘zapped’ a remote or found a ‘sticky’ controller and wondered how to save it? Share your cleaning horror stories below!