
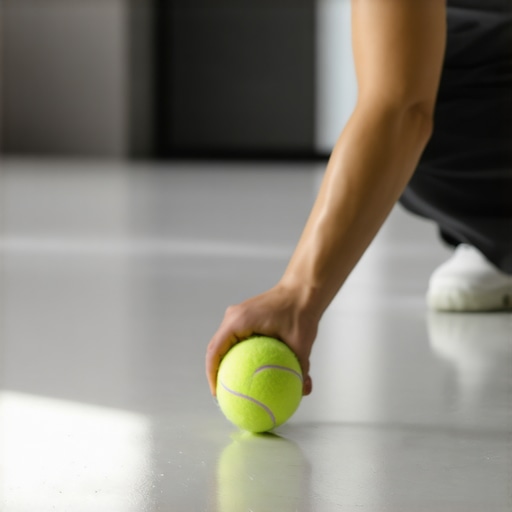
Ever find yourself halfway through mopping or vacuuming and suddenly spot a stubborn scuff mark marring your beautiful linoleum floors? It’s that sinking feeling when you notice your morning’s effort might be wasted—those tiny, unsightly imperfections can really throw off the entire look of a freshly cleaned space. I’ve been there myself, frantically searching for a quick fix that wouldn’t require a full floor renovation. That’s when I stumbled upon the Tennis Ball Hack—a surprisingly simple trick that transformed my cleaning routine.
The Secret Weapon for Removing Floor Scuffs
When dealing with scuff marks on linoleum or polished vinyl surfaces, the usual approach is to grab a potent chemical cleaner or scrub tirelessly until the mark fades. But what if I told you there’s a more gentle, eco-friendly, and inexpensive way to tackle this problem? The Tennis Ball Hack involves using a simple rubber tennis ball—yes, a regular tennis ball!—to effortlessly buff away scuffs without harsh chemicals or scratchy scrubbing pads. I was skeptical at first, but after just a few gentle nicks with the ball, the marks vanished faster than I had imagined. It’s become my go-to trick, especially when I want immediate results without risking damage or residual chemical smell.
Is this trick just a gimmick or a game-changer?
Early on, I made the mistake of thinking this was a quirky, untested idea. I almost ignored it and wasted time trying mechanical scrub brushes and chemical sprays. But I learned the hard way that aggressive scrubbing can scratch or dull the floor’s surface, leading to more problems in the long run. Remember, a little patience and the right technique can save your flooring—and your sanity. To get more expert tips on maintaining your upholstery and flooring, check out our comprehensive guide on upholstery cleaning tips. This small insight opened up a whole new world of simple, effective cleaning hacks in my home.
Now, I want to share with you exactly how to do it and ensure you’re getting the best results without any fuss. Ready to make those scuff marks a thing of the past? Let’s dive into the step-by-step process that will leave your floors looking pristine and attract compliments from every visitor.
Prepare Your Workspace
Clear the area of all furniture and rugs, ensuring unobstructed access to the surfaces. For stubborn stains or debris, use a handheld vacuum to remove loose dirt—this prevents smearing during cleaning. I once tackled a move-out cleaning where leaving furniture in place would have obstructed my access; removing everything made the process smoother and more thorough.
Deep Clean with Natural Solutions
Create a simple cleaning solution using equal parts white vinegar and water, adding a few drops of your favorite essential oil for scent. Dampen a microfiber cloth with this mixture to wipe down surfaces, paying special attention to edges and corners. I remember spending an afternoon removing soap scum from bathroom tiles using this method—effective and chemical-free.
Sanitize High-Touch Areas Effectively
Use a mix of hydrogen peroxide and a small amount of dish soap to disinfect doorknobs, light switches, and electronic remotes. Dampen a cloth with the solution, then wipe surfaces thoroughly. As with my last apartment move-out, disinfecting these spots helped ensure I left the space spotless for new tenants, and it was quick and safe.
Spot Stains and Hard-to-Reach Places
For fabric upholstery or carpet stains, dampen a cloth with cold water and gently blot the area, avoiding rubbing that can deepen stains. To lift red wine from a fabric sofa, I used a mix of cold water and a few drops of dish soap—dabbing until the stain faded without discoloration. When cleaning behind appliances, don’t forget to check vents and crevices—dust and grime tend to accumulate unnoticed.
Buff Out Floor Scuffs with Ease
Place a clean tennis ball on a sturdy surface. Gently rub it over scuff marks—think of it as buffing out imperfections with a soft rubber eraser. I learned this trick during a hectic Saturday cleaning when a careless move left scuffs on my vinyl floor; within minutes, the marks disappeared, and my floor looked brand new. For additional tips on maintaining your floors, explore our dedicated house cleaning strategies.
Deep Clean Textiles and Upholstery
Sprinkle baking soda liberally over fabrics like sofas and mattresses, then vacuum after 15 minutes to remove odors and dust. For stubborn pet hair or dirt, use a dampened microfiber cloth to lift particles without damaging delicate surfaces. I once deep cleaned a vintage velvet armchair this way—it revived the fabric without risking tears. For comprehensive upholstery care, refer to our ultimate care guide.
Final Touches for a Refreshing Clean
Replace furniture or rugs carefully, ensuring all surfaces are dry and free of residual cleaning solution. Use a fresh microfiber cloth to polish glass or reflective surfaces, avoiding streaks. For a finishing scent, lightly spray a mixture of water and your favorite essential oil. I recommend doing a walkthrough to check for missed spots or smudges—this final step guarantees a comprehensive clean.
Implementing these concrete steps systematically transforms your cleaning routine from overwhelming to manageable, ensuring every nook and cranny is addressed. Remember, patience and consistency are key—over time, these methods will help maintain a spotless, healthy home.
,
Many assume that disinfecting surfaces is a straightforward task of slapping on strong chemicals and wiping once. However, this oversimplification masks complex nuances that can compromise the effectiveness of your cleaning routine. One common myth is that all disinfectants are equally effective against germs. In reality, the impact varies significantly based on contact time, concentration, and the type of pathogens targeted. According to a study published in Applied and Environmental Microbiology, proper contact time—usually around 10 minutes—is crucial for disinfectants to work effectively; rushing a quick wipe may leave harmful bacteria intact. Mistaking presence for pathogen elimination can lead to a false sense of security, risking cross-contamination and health issues.
Another widespread mistake involves over-reliance on chemical disinfectants, neglecting the importance of physical cleaning. Dirt, dust, and organic matter can shield germs from disinfectants if not removed beforehand. For example, if you spray a surface without cleaning off visible grime, the disinfectant’s efficacy drops drastically. This oversight often stems from neglecting the critical step of pre-cleaning, which is essential to ensure germ-killing chemicals reach their targets. For comprehensive guidance, check out our guide on sanitizing hacks for safe house transitions.
Are UV Light Disinfectants Actually Better Than Chemical Solutions?
Advanced cleaning technologies like UV-C light devices are gaining popularity for their purported ability to disinfect without chemicals. While they show promise against a broad spectrum of microbes, their effectiveness depends heavily on proper usage—exposure duration, distance, and surface material matter greatly. Moreover, UV light cannot reach into crevices or behind objects, making it an incomplete solution if used in isolation. Despite their advantages, UV devices shouldn’t replace thorough cleaning and chemical disinfectants but rather complement them. Studies in Journal of Hospital Infection indicate that combined strategies yield the best results, especially in high-risk environments. Remember, effective sanitizing involves more than just wielding fancy tech; it requires understanding each method’s limitations and applying them judiciously. Want to learn more about effective sanitizing strategies? Visit our guide to effective sanitizing methods.
Many homeowners fall into the trap of believing they can sanitize surfaces adequately with just a quick spray or wipe. In truth, a layered approach combining physical cleaning, adequate contact time, and the right disinfectants tailored to your specific needs is key. Overlooking this can leave behind more than dirt—it can let harmful bacteria and viruses thrive unnoticed. To ensure your cleaning routines truly protect your family, consider consulting professional advice or comprehensive resources like our ultimate upholstery and house cleaning guide.
Implementing nuanced cleaning techniques might seem complex at first, but mastering these details leads to healthier, safer living spaces. Remember, effective cleaning isn’t just about rules but about understanding the science behind these practices. So, the next time you tackle your house, ask yourself—am I truly disinfecting, or just cleaning superficially? Feel free to share your experiences or questions in the comments; have you ever fallen into this trap? Let me know!
Invest in Quality Equipment for Long-Term Results
When it comes to maintaining a spotless home, my top priority is using tools that deliver consistent, professional-level results without breaking the bank. A **high-quality microfiber mop** with detachable, washable pads is indispensable. I personally prefer the microfiber cleaning cloths because they trap dust and grime more effectively than traditional cotton, and they can be reused multiple times, making them eco-friendly and cost-effective.
Powerful and Reliable Vacuum Cleaners
For upholstery and carpet cleaning, nothing beats a **HEPA-filter vacuum** with adjustable suction. I recommend models that include a **brush tool** for delicate fabrics and a **crevice attachment** for those hard-to-reach spots. I’ve found that the Dyson V11 not only provides powerful suction but also offers variable modes that adapt to different surfaces, ensuring thorough cleaning without damage.
Embrace Effective Software Solutions
Maintaining a cleaning schedule that is both thorough and manageable is simplified with digital tools. I personally use the **Trello app** integrated with customizable checklists to track tasks like upholstery cleaning and move-out preparations. These digital tools help me stay organized and ensure I don’t miss critical maintenance steps, especially during busy times or when preparing for move-outs. For detailed tips on planning your cleaning routine, visit our daily routine guide.
The Future of Home Maintenance Tools
Looking ahead, I believe that automation will play an even larger role in home cleaning. Robotics like **automated window vacuums** and **robotic mops** are becoming more sophisticated, capable of handling routine chores without supervision. I predict that these devices will soon incorporate AI to adapt to different surfaces and stains dynamically, reducing the need for manual intervention. Staying ahead of this trend means investing in versatile, upgradeable tools now—the benefits will resonate over the years.
How do I maintain my tools over time? Moreover, what are the best practices for keeping equipment in tip-top shape?
Regular maintenance of your cleaning tools not only extends their lifespan but also ensures optimal performance. For microfiber cloths and mops, I recommend washing them after each use in hot water with a bit of vinegar to eliminate bacteria and residues—learn more about effective sanitizing methods here. For vacuum cleaners, empty the canister frequently, check the filters, and clean the brushes monthly to prevent buildup that can reduce suction. Investing in a bagless vacuum with washable filters simplifies this process significantly. Studies by the EcoCleaning Institute highlight that consistent preventive maintenance is key to avoiding costly repairs and ensuring your home stays spotless in the long term.
Don’t be afraid to try out these advanced tools and routines. Starting with a reliable microfiber mop or a HEPA-filter vacuum can make an immediate difference in your cleaning results. Remember, the right equipment combined with regular upkeep creates a foundation for a healthier and more comfortable living environment. If you’re interested in personalized recommendations tailored to your home, visit our contact page. “Stay equipped and stay proactive”—that’s my mantra for effortless home maintenance. 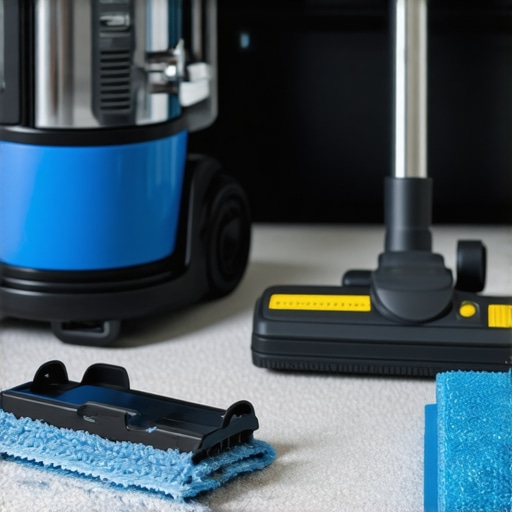
The Hidden Lessons That Changed My Cleaning Game
- I used to believe that scrubbing harder meant cleaner, but I learned that gentle, deliberate techniques prevent damage and ensure deeper cleanliness. Sometimes, less is more—and patience is a true virtue in cleaning.
- Consistency beats intensity. Small daily habits, like quick wipe-downs of high-touch areas, compound over time into a healthier, more inviting environment. Establishing routines saved me from overwhelming cleaning marathons.
- Investing in quality tools, such as microfiber cloths and HEPA filters, was a revelation. These tools made a noticeable difference in the effectiveness of my cleaning and prolonged the lifespan of my equipment, saving money in the long run.
- Research is your best friend. The more I learned about proper disinfecting contact times and mixing non-toxic solutions, the more confident I became in my home’s cleanliness—plus, I avoided harmful chemical exposure.
Tools and Resources That Transformed My Approach
- Microfiber cleaning cloths—Because effective cleaning starts with the right fabric that traps dust and bacteria without scratching surfaces.
- Sanitizing hacks for safe house transitions—A comprehensive guide I always revisit before move-in or move-out day to ensure nothing gets overlooked.
- Upholstery care guide—It taught me gentle techniques for deep cleaning fabrics without wear and tear, extending furniture lifespan.
- Daily cleaning routines—Keeping a small checklist has made daily upkeep manageable and prevented the buildup of grime and germs.
You Can Make a Difference Today
Taking charge of your home’s cleanliness with these insights and trusted tools can turn cleaning from a chore into a rewarding routine. Remember, a well-maintained space isn’t just beautiful; it safeguards your health and peace of mind. So, why wait? Start small today—your future self will thank you for it. Have you ever discovered a cleaning hack that saved you time or money? Share your story below and let’s learn from each other’s experiences!