
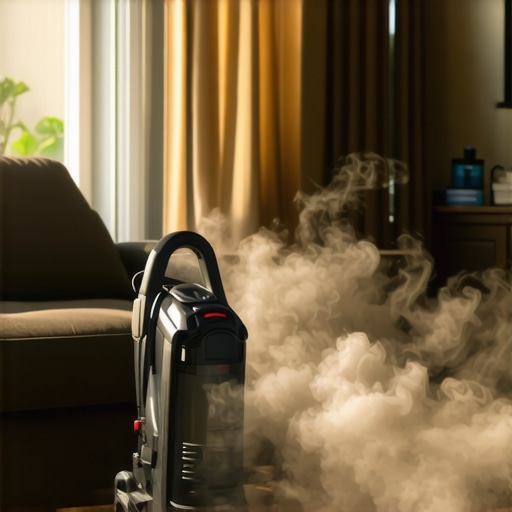
It was late on a rainy Saturday afternoon when I finally decided to give my carpets a good deep clean. I grabbed my vacuum, feeling pretty confident—after all, I’ve done this a hundred times before. But as I finished and opened the windows to get some fresh air, a strange, lingering smell hit me. It wasn’t the fresh scent I expected; instead, it was a dull, musty odor that seemed to cling to the furniture and walls. That was my lightbulb moment: my vacuum cleaner was actually making my house smell worse.
Turning the Vacuum from a Cleaner to a Culprit
Many homeowners don’t realize that their trusted vacuum might be contributing to indoor odors instead of eliminating them. Over time, vacuum bags and filters trap dirt, pet hair, and dust, creating a breeding ground for bacteria and mold if not maintained properly. When you run the vacuum, these particles can get aerosolized and settle back into the air, intensifying smells rather than neutralizing them.
This realization prompted me to dig deeper, and I discovered a staggering fact: studies show that vacuum cleaners can be one of the worst sources of indoor airborne bacteria, especially if filters and bags aren’t replaced regularly (source: EPA). It’s easy to overlook this small appliance, but neglecting its upkeep can turn it into an odor amplifier, making your home smell stale and unwelcoming.
If you’re tired of that musty, damp smell lingering after vacuuming, don’t worry—we’re about to tackle this problem head-on. I’ll share what I’ve learned from personal experience and expert cleaning tips, so you can breathe easy again. The key is understanding how to keep your vacuum in tip-top shape and prevent it from sabotaging your efforts in maintaining a fresh home.
Are you finding that your home smells worse after cleaning? If so, you’re not alone—but there is a solution. First, let’s explore some common mistakes people make that might be turning their vacuum into a smell generator, and how to avoid them.
Regularly Change the Filters and Bags
One of the simplest yet most overlooked steps is replacing your vacuum’s filters and bags on time. Think of filters like the lungs of your vacuum—when clogged, they can’t breathe properly, causing dust and bacteria to escape back into your home. I learned this firsthand when my vacuum started emitting a musty smell after only six months of use. I promptly replaced the filter and bag, which instantly improved air quality and eliminated the odor. To stay ahead, set a schedule to replace filters every three to six months and replace bags when they’re half full.
Clean and Maintain the Vacuum Components
Disassemble your vacuum regularly to clean the brush rollers, filters, and canister. Use a damp cloth to wipe down accessible parts, much like giving your car a quick wash to prevent dirt buildup. During a recent move-out clean, I noticed hair and small debris wrapped around the brush roller, which I removed carefully. This not only improved suction but also prevented dust from being whipped into the air. For best results, check the manufacturer’s instructions for cleaning specific components and do this every few weeks.
Deep Clean the Vacuum Intake and Attachments
The intake port and attachments often harbor hidden dust and bacteria. Use a brush or compressed air to clear out blockages and dust from these parts. In my experience, neglecting this step led to a persistent smell that nothing else could fix. I used compressed air to blow out the dust and washed the attachments with warm, soapy water, ensuring they dried thoroughly before reassembling. Regularly deep cleaning these parts keeps your vacuum working efficiently while preventing odors from recirculating.
Add Odor Absorbers to the Vacuum
Place a few drops of essential oil on a cotton ball and put it inside the vacuum bag or canister. During a recent upholstery cleaning session, this trick added a fresh scent to my carpets and prevented the vacuum from smelling stale. Alternatively, sprinkle baking soda inside the vacuum bag or canister—remember to do this only when the device is turned off and unplugged. Baking soda is well-known for absorbing odors, turning your cleaning routine into a multi-sensory refresh.
Store Your Vacuum Properly
Keep the vacuum in a dry, well-ventilated area to prevent mold and bacteria growth. I once stored mine in a damp closet, which led to a musty smell every time I used it. After moving the vacuum to a sunny corner and allowing it to air out, odors vanished. Making this a habit extends the vacuum’s lifespan and ensures it doesn’t become a source of indoor air pollution.
Incorporate These Practices into Your Cleaning Routine
Setting a regular maintenance schedule is key. For a comprehensive approach, combine filter and bag replacements, component cleanings, and odor absorber use. For more expert tips on effective cleaning routines, visit this resource. Doing so not only keeps your vacuum functioning optimally but also preserves your home’s air quality, making every cleaning session a step toward a fresher, healthier environment.
When it comes to maintaining a spotless home, many homeowners operate under common myths that can hinder true effectiveness. For instance, a prevalent misconception is that using any store-bought disinfectant guarantees a germ-free environment. In reality, not all cleaning products are created equal, and some may leave residues that promote bacterial growth if not chosen carefully. Experts like microbiologist Dr. Susan S. Nathan emphasize selecting EPA-registered disinfectants and following proper contact times for maximum efficacy.
Are All Surfaces Equally Easy to Sanitize?
Many assume that sanitizing countertops and floors suffices, but advanced cleaning reveals that high-touch areas like light switches, door handles, and even remote controls harbor more bacteria than kitchen sinks. Regularly neglecting these spots can result in a false sense of security. To truly uphold hygiene, incorporate targeted disinfection of these often-overlooked areas, as detailed in this comprehensive guide. Additionally, understanding the science behind microbial survival on various surfaces can prevent costly mistakes. For example, porous materials such as upholstery and carpets can trap bacteria and viruses, making regular deep cleaning essential. Many homeowners believe that just vacuuming is enough; however, this overlooks that bacteria can embed deep within fibers. Using appropriate upholstery cleaning techniques and sanitizing agents is crucial for comprehensive hygiene.
What Are The Most Common Mistakes During Move-Out Cleaning?
One trap many renters and homeowners fall into is focusing solely on visible spots, neglecting hidden areas like behind appliances or under furniture. This oversight can jeopardize deposit refunds or leave the new occupants with lingering odors. A well-executed move-out clean involves a strategic checklist—covering nooks and crannies—that ensures no dirt or bacteria remain. For a detailed approach, visit this resource. Furthermore, many underestimate the importance of sanitizing often-forgotten spots such as vent covers, baseboards, and inside drawers. Incorporating high-quality disinfectants and proper techniques in these areas can prevent the spread of germs and reduce the risk of illness. Remember, effective cleaning isn’t just about appearance—it’s about health. Regularly updating your cleaning regimen with insights from industry experts can keep your home truly safe and hygienic. Have you ever fallen into this trap? Let me know in the comments.When it comes to maintaining a spotless home, having the right tools makes all the difference. Personal experience has shown me that investing in high-quality equipment not only saves time but also ensures that cleaning results are consistently professional-looking and hygienic. For example, I swear by my cordless stick vacuum because it combines powerful suction with portability, allowing me to quickly tackle both carpets and hardwood floors without hassle. Additionally, a steam cleaner has become a game-changer for sanitizing upholstery and tiles—relying on hot vapor to kill bacteria without chemical residues.
I also rely heavily on a microfiber mop system equipped with washable pads. Microfiber’s fine fibers trap dust, pet dander, and dirt more effectively than traditional cotton cloths, and being washable means I can reuse them countless times, reducing waste and ongoing costs. For detailed upholstery cleaning, I use a handheld extractor that utilizes hot water and gentle suction, which, as detailed in this guide, helps restore fabric without over-wetting.
To keep my tools in peak condition, I regularly replace filters and check for clogs, following manufacturer recommendations. For instance, maintaining my vacuum’s HEPA filters involves gentle washing and air-drying, which prevents dust recirculation. I also swear by antimicrobial disinfectant sprays that are EPA-registered, ensuring surfaces stay germ-free—a practice recommended by cleaning experts and supported by scientific research.
Predicting the future of residential cleaning tools, I believe smart, connected gadgets will become more prevalent. Imagine vacuums that map your home and schedule cleaning routines autonomously or app-controlled steam cleaners that monitor water levels and filter indicators, optimizing long-term effectiveness.
So, how do I maintain these tools over time? Regular maintenance is essential—cleaning brushes, replacing filters, and sanitizing attachments ensures that your equipment remains efficient and odor-free. For a comprehensive routine, check out this article.
As a practical tip, I recommend trying a spin scrub attachment on your microfiber mop to lift embedded dirt from grout lines or textured flooring. This small upgrade dramatically enhances cleaning outcomes and prolongs the lifespan of your equipment. Remember, investing in quality tools and maintaining them diligently ultimately leads to a cleaner, healthier living environment—so don’t hesitate to give these tips a try today.
What I Didn’t Expect About Vacuuming’s Dark Side
One unexpected insight was realizing that neglecting vacuum maintenance could actually worsen indoor odors, making my home feel stuffy despite my efforts. This lightbulb moment taught me the importance of regular filter and bag replacements, which drastically improved air quality and kept my house smelling clean. It’s a simple step that belies its big impact on overall freshness.
How Small Fixes Can Transform Your Cleaning Routine
I discovered that deep-cleaning vacuum attachments and using natural odor absorbers like baking soda or essential oils can turn an ordinary cleaning session into a scent-sational experience. These tiny adjustments—like cleaning out brush rollers or storing your vacuum in a vented area—prevent buildup and keep your home smelling inviting instead of stale.
Why Your Tools Are Your Best Allies (If Maintained)
Investing in quality cleaning tools, from microfiber mops to steam cleaners, makes a tangible difference—and maintaining them is crucial. Regularly checking, cleaning, and replacing filters on your equipment ensures they serve you well, turning chores into effective, satisfying routines. Trusted resources like this guide have helped me extend the life of my cleaning arsenal.
Unlocking the Secrets to a Germ-Free, Odor-Free Sanctuary
Deep inside your cleaning toolkit lies the power of targeted disinfection, especially on high-touch areas and porous surfaces. Incorporating expert-approved methods, such as sanitizing your sofa with advice from these tips, can dramatically improve your home’s health. Remember, true freshness stems from consistent, informed effort—not just visible sparkle.
It’s Your Turn to Elevate Your Cleaning Game
Moving beyond basic vacuuming and surface wiping to intelligent maintenance and disinfection has been a game-changer for me. Start small—regular filter changes, proper tool care, and natural odor controls—and watch your home transform into a pristine, welcoming environment. A fresh house isn’t just a surface shine; it’s a sanctuary of well-being, waiting for you to claim it.