Imagine this: You just rolled into your new apartment, excited to toss on your favorite throw blanket and relax. As you settle in, you notice stains and spills seem to soak right into your brand-new couch, no matter how much fabric protector you applied. That sinking feeling of disappointment hits hard. I remember the first time I faced this — after spending hours cleaning and protecting my furniture, the fabric still looked stained and dingy. It was a real lightbulb moment that led me down a rabbit hole of discovering why fabric protectors often fall short and what truly works.
Let’s Get Real About Fabric Protectors and Your New Couch
Fabric protectors promise to keep your furniture looking fresh and stain-free. But here’s the truth: they often don’t live up to that hype, especially on new couches. Early on, I made the mistake of thinking just one quick spray would do the trick, assuming that the protector created an impenetrable barrier. Spoiler alert: it doesn’t. The real issue isn’t just applying the product; it’s understanding how your furniture’s material interacts with it and the environment.
Is the Label Just a Marketing Gimmick?
I used to think all fabric protectors are created equal. Turns out, many are more style than substance. Some are designed to repel water but not oil-based stains, which can still soak in and cause lasting damage. Early on, I also neglected to test a small hidden area to see how my couch reacted — a mistake that could have saved me from some awkward stain surprises. According to cleaning experts, skipping this initial patch test can lead to patchy results or even damage to furniture fibers (source).
So, why do some protectors seem to work initially but then lose effectiveness? The answer lies in the surface preparation, the material of your furniture, and how you treat it afterward. And sometimes, the whole thing hinges on applying the protector incorrectly or using the wrong product entirely.
If you’ve ever wondered why your fabric protector isn’t performing as promised, or if you’re tired of stains setting into your new couch, stick around. We’re about to dive into the real reasons behind these problems and, more importantly, how you can fix them for good. Ready to give your furniture the protection it deserves? Let’s get started.
طبیعی
Start with a Thorough Clean
Before applying any fabric protector, clean your couch meticulously. Use a vacuum with an upholstery attachment to remove dust, dirt, and hair from all surfaces. Then, spot clean any stains with an appropriate cleaner to ensure a pristine surface for protection. I once had a stubborn coffee stain, and treating it first prevented it from setting deeper when applying the protector. This initial step is crucial; skipping it can cause the protector to trap existing grime, making stains more noticeable over time.
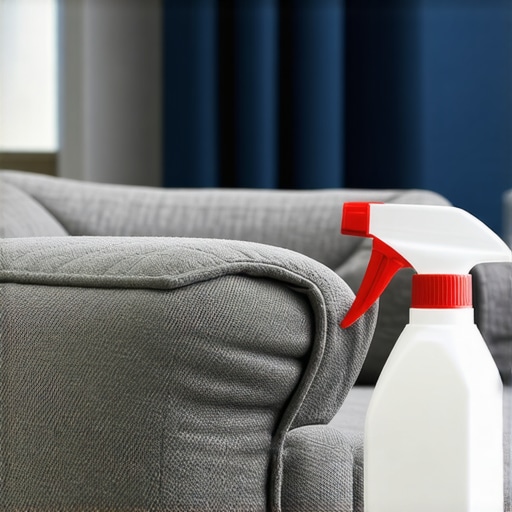
Choose the Right Fabric Protector
Select a high-quality protector specifically designed for your furniture’s material—whether microfiber, leather, or cotton. Read labels carefully; some protectors repel water but not oil-based stains. During my own experience, I mistakenly used a water-repellent spray on an oily fabric, which failed to prevent grease stains. Always check reviews and consult the manufacturer’s guidelines to pick an effective product. An initial patch test in a hidden area helps prevent adverse reactions or discoloration, especially on delicate fabrics.
Apply Protector Correctly for Maximum Coverage
Prepare the Space
Ensure good ventilation and wear protective gloves. It’s best to apply in a well-ventilated room on a dry, dust-free day. This prevents inhalation of fumes and allows the protector to dry evenly.
Apply Evenly and Systematically
Hold the spray nozzle about 6-8 inches from the fabric and spray in sweeping motions. Avoid saturating any one spot; instead, cover the entire surface lightly. I once applied too heavily to one corner, leading to uneven texture. After spraying, let it sit undisturbed for the duration specified by the manufacturer—usually 15-30 minutes—before gently buffing the surface with a clean cloth to remove excess product. Doing this ensures a uniform protective layer that won’t alter the feel of your furniture.
Maintain and Reapply the Protection
Regular maintenance extends the life of the protector. Vacuum and dust your sofa weekly, and reapply the protector every 6-12 months depending on use. If you notice stains beginning to seep through or if the fabric feels less resistant, it’s time for a refresh. For best results, consult the protector’s instructions or contact specialists for advice on reapplication techniques.
Prevent Future Stains with Smart Habits
Encourage family members and guests to adopt stain-preventive behaviors. Using coasters, avoiding eating on the sofa, and promptly cleaning spills can save time and effort later. I learned this when a spilled glass of red wine went unnoticed, seeping into the fabric, despite prior protection. Acting quickly with blotting rather than rubbing minimizes damage and helps your protective layer do its job longer.
When tackling move-out cleaning or maintaining upholstery, many assume that a surface-level approach suffices. However, these tasks are riddled with nuanced pitfalls that can sabotage your efforts if overlooked. Let’s peel back the layers and examine the subtle traps most people unintentionally fall into.
One widespread myth is that using generic cleaning products guarantees spotless results. In reality, specific stains or fabric types demand tailored solutions. For example, using harsh chemicals on delicate upholstery can cause discoloration or fiber damage, a mistake often made by those unaware of material sensitivities. Professionals recommend consulting manufacturer guidelines or expert advice, such as those found in [effective house cleaning secrets from cleaning experts](https://spotlesscarpetz.com/effective-house-cleaning-secrets-from-cleaning-experts), to avoid this common error.
Another misconception revolves around the perceived ease of DIY sanitizing. Many believe that simply spraying disinfectant on surfaces creates a germ-free environment. But this approach often leaves pathogens behind, especially in high-touch areas like light switches or remote controls. Deep sanitization requires meticulous attention to contact points and proper dwell times of disinfectants—details emphasized in specialized cleaning strategies. Crucially, failing to recognize the importance of thoroughness can result in a false sense of security.
Think you can skip pre-cleaning before disinfecting? Think again. Dirt and grime act as barriers, preventing disinfectants from reaching bacteria lurking beneath. This oversight is a common pitfall. For an effective strategy, see [how to sanitize high-touch surfaces during flu season](https://spotlesscarpetz.com/how-to-sanitize-high-touch-surfaces-during-flu-season), which underscores the necessity of initial cleaning to maximize disinfectant efficacy.
Ever wonder if your move-out cleaning methods are truly comprehensive? A hidden nuance is the importance of addressing overlooked spots, such as under appliances or behind furniture. These areas harbor dust and grime that can cause property managers to withhold deposits, as detailed in [move-out cleaning strategies to secure your deposit](https://spotlesscarpetz.com/move-out-cleaning-strategies-to-secure-your-deposit). Neglecting these zones isn’t just an oversight—it can cost you financially.
From a technical perspective, advanced cleaners understand that not all stains respond equally. For example, wine or ink stains require specific removal techniques; using the wrong approach can set them permanently. Professional tips, like [how to remove ink stains from leather without discoloring](https://spotlesscarpetz.com/how-to-remove-ink-stains-from-leather-without-discoloring-it), illustrate the importance of matching stains with targeted treatments.
Be aware that many underestimate the importance of materials’ unique properties. For instance, stone countertops are vulnerable to acidic cleaners like vinegar, which can etch surfaces permanently. An expert consensus highlights this in [why vinegar is ruining your stone countertops during deep cleans](https://spotlesscarpetz.com/why-vinegar-is-ruining-your-stone-countertops-during-deep-cleans). Recognizing these nuances protects your surfaces from costly damage.
In sum, effective move-out cleaning, upholstery care, and sanitizing transcend generic routines. They demand understanding of materials, stains, and environmental factors. By learning about these subtleties, you safeguard your security deposit, prolong furniture lifespan, and ensure a genuinely sanitized home.
Have you ever fallen into this trap? Let me know in the comments, and share your experiences or questions about overlooked cleaning nuances.
How Do I Keep My House in Top Shape Over Time?
Achieving a pristine home isn’t a one-time effort; it requires reliable tools that can handle routine maintenance and unexpected messes. I personally rely on a few key pieces of equipment that make upkeep more manageable and ensure long-term results. First, a high-quality, commercial-grade steam cleaner is my go-to for deep cleaning upholstery and sanitizing surfaces without harsh chemicals. The steam penetrates fabrics and crevices, killing bacteria and lifting stubborn stains effectively. For upholstery, I prefer models like the McCulloch MC1275, which offers adjustable steam levels and removable water tanks for extended use.
Second, a cordless handheld vacuum with a HEPA filter is indispensable for quick pickups and allergy control. I use the Dyson V7 Trigger because its powerful suction and filtration system keep dust and pet hair at bay, especially in hard-to-reach places. Regular vacuuming, especially in corners and beneath furniture, prevents dust buildup that can degrade fabrics over time.
Third, I recommend investing in microfiber dusters with extendable handles. These tools are not only gentle on surfaces but also trap dust better than traditional cloths, reducing the need for chemical cleaners. Using these regularly helps maintain a dust-free environment, contributing to healthier indoor air quality.
For sanitizing high-touch areas like switches, remotes, and door handles, I use UV-C sterilizers designed for household use. These devices provide a quick, chemical-free way to eliminate germs without wear and tear on your electronics. Unlike sprays or wipes, UV sterilization is thorough and fast, making it perfect for daily quick cleans.
Looking ahead, I believe the trend toward intelligent cleaning tools with app integrations and automation will grow. Imagine robots that not only vacuum but also monitor air quality and trigger deep cleans when needed. To stay ahead, I suggest incorporating smart devices into your routine and choosing tools that can adapt as technology advances.
What’s the Best Way to Maintain Your Cleaning Arsenal?
Keeping your equipment in peak condition is essential for ongoing results. Regularly clean your steam cleaner’s filters and check for mineral buildup to prevent malfunctions. For vacuum filters, follow the manufacturer’s instructions—many recommend replacing them every 3-6 months to sustain suction power. Use gentle brushes to remove dust from microfiber dusters after each use, and sanitize your UV sterilizer lamps periodically according to the manufacturer’s guidelines.
By maintaining your tools properly, you’ll ensure their longevity and consistent performance, making house cleaning less of a chore. Want to explore more expert insights? Check out effective house cleaning secrets from cleaning experts for additional tips and tricks.
Ready to upgrade? I recommend trying the advanced steam cleaning method with a model that offers adjustable heat and pressure settings. It’s a game-changer for deep cleaning and sanitizing your home efficiently without relying on chemical products.

Over the years, I’ve learned that the real secret to maintaining a pristine home or a fresh-upholstered sofa isn’t just about the products or tools you use, but understanding some deep, often overlooked lessons. These insights have transformed my approach, saving me time, money, and frustration.
Lessons the Experts Won’t Share About Move-Out Cleaning and Upholstery Care
- Patience Pays Off: Rushing through cleaning tasks often means missing hidden spots. A slow, deliberate approach reveals problems you might not see otherwise, like dust trappings behind appliances or stubborn stains stuck in fabric fibers.
- The Power of Consistency: Regular maintenance beats sporadic deep cleans. I found that weekly vacuuming and quick wipe-downs prevent dirt from settling, which makes the big cleaning days much easier and more effective.
- Small Details Matter: Things like dusting ceiling fans, cleaning door frames, or sanitizing remote controls can seem trivial—but neglecting these areas results in accumulated grime and bacteria that can affect indoor air quality and overall cleanliness.
- Beyond Products—Proper Technique: No matter how expensive your cleaning supplies are, poor technique will diminish their effectiveness. I highly recommend paying attention to application methods—like applying fabric protectors evenly or ensuring upholstery is completely dry before use—to get the most out of your efforts.
- Understanding Your Surfaces—Not All Materials Are Equal: Different fabrics, leathers, or surfaces require tailored cleaning methods. Using a one-size-fits-all approach can cause damage rather than preservation. For instance, knowing to stop using vinegar on stone countertops saves a costly mistake.
My Arsenal for a Smarter Home Keeping Journey
Over time, I curated a set of tools that genuinely make a difference. My essentials include a high-quality steam cleaner that sanitizes fabrics without harsh chemicals—like the expert-recommended steam cleaner. A cordless HEPA-filter vacuum keeps pet hair and dust at bay, especially in hidden corners. Microfiber dusters with extendable handles help me reach those tricky ceiling fan blades or behind furniture, all without spreading dust around.
For quick disinfecting, UV-C sterilizers have become game-changers—they efficiently kill germs on high-touch surfaces without chemicals. These tools, combined with routine practices, elevate my cleaning routine from a chore to a mindful care ritual that protects me and my family.
Step Beyond Routine—Create a House that Truly Feels Fresh
Implementing these lessons is about more than appearances; it’s about cultivating an environment where you feel comfortable, healthy, and proud of your space. Regularly revisiting your tools and techniques, and understanding your surfaces deeply, transforms cleaning from a necessary evil into a rewarding activity. For ongoing inspiration and pro tips, I recommend exploring effective cleaning secrets from cleaning experts.
Remember, every detail counts when building a home environment that’s not only spotless but truly welcoming. Keep learning, experimenting, and refining your routines—and watch your space thrive.
What’s One Cleaning Habit You’re Ready to Change?
Are you prepared to shift your approach and incorporate some of these hidden lessons into your routine? Share your thoughts below—I’d love to hear what’s worked for you or what you’re excited to try!