
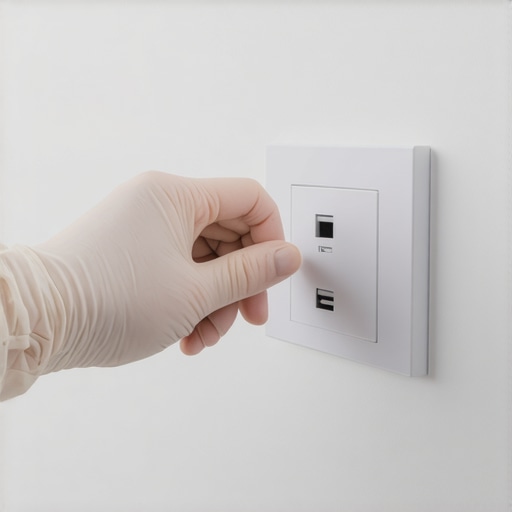
It was a typical Tuesday afternoon when I reached out to flip the light switch in my living room—and immediately regretted it. The switch was sticky, grimy, and covered in fingerprints. But what hit me hardest wasn’t the visible grime—it was the realization that I had no idea how many germs were lurking right there, behind that innocent-looking toggle. That light switch, along with many other household fixtures, is one of the most touched surfaces in any home, yet it’s often overlooked when we think about cleaning and sanitizing. Have you ever had that *lightbulb moment* where you realized something so simple could make a huge difference in your family’s health?
Why Sanitizing Your Light Switches Weekly Is a No-Brainer
Imagine the number of times you or your family members tap, press, or brush past this tiny switch every single day. It’s like a tiny germ highway, ferrying bacteria, viruses, and other unseen invaders from one person to another. Despite this, most people only wipe light switches down when they’re deep cleaning or moving out—if at all. But the truth is, dry dust and fingerprints aren’t the real concern; it’s what hides in that grime that can cause infections.
Regularly sanitizing these common touchpoints isn’t just about cleanliness; it’s a crucial step towards healthier living. From reducing the spread of colds and flu to preventing potential outbreaks of gastrointestinal bugs, a simple weekly wipe-down can significantly improve your home’s hygiene. Plus, when you make this habit, it becomes second nature—no more the dreaded ‘ick’ factor every time you turn on the light.
Not convinced? According to research from the *American Journal of Infection Control*, household surfaces, especially those touched frequently, can harbor bacteria that are linked to illnesses like the common cold, flu, and even more serious infections (source). That’s why dedicating just a few minutes each week to sanitize your switches is an investment in your family’s health.
So, how do you effectively clean and sanitize your switches without turning the task into a complicated chore? Let’s dive into practical steps that make this routine both easy and effective, starting with what supplies you’ll need and how to do it safely. Before that, though, let’s address a common skepticism many homeowners have.
Gather Your Supplies
Start by collecting essential cleaning items: a disinfectant cleaner or rubbing alcohol, microfiber cloths, cotton swabs, and gloves. Having everything within reach ensures a smooth process and prevents cross-contamination. Avoid using harsh abrasive tools that could damage switches.
Power Off and Prep
Before cleaning, turn off the power at the circuit breaker to prevent any risk of shock. Wear gloves to protect your skin from disinfectants and germs. If your switches are covered with heavy grime or fingerprints, consider a quick vacuum with a brush attachment to remove loose debris. This step is similar to preparing upholstery for deep cleaning—removing surface dust first makes the sanitize process more effective.
Initial Wipe-Down
Dip a microfiber cloth into your disinfectant solution. Wring out excess liquid to avoid drips. Wipe the entire switch surface thoroughly, focusing on areas with visible fingerprints or grime. Use a cotton swab dipped in disinfectant to reach around the edges and in tight spaces. Think of this as the pre-treatment phase, breaking down dirt and preparing surfaces for full sanitation.
Deep Sanitization
Apply a small amount of disinfectant directly onto a clean cloth or cotton swab and gently scrub key contact points—the toggle, the switch’s edges, and any crevices. For stubborn spots, allow the disinfectant to sit for a few minutes to kill germs effectively. Just like cleaning upholstery can involve letting cleaning solutions dwell to loosen stains, this waiting period maximizes germ elimination. For a more comprehensive approach, consider using a solution approved for electronics and household surfaces, following manufacturer instructions.
Final Wipe and Dry
Use another clean, dry microfiber cloth to remove any residual disinfectant. Ensure the switch is dry to prevent electrical issues when turning the power back on. This step seals the process, leaving your switches both clean and safe. Remember, never submerge switches or electronics in liquids—think of it as avoiding immersion cleaning for delicate components.
Restore Power and Maintain
Once everything is dry, switch the power back on. Establish a weekly habit of repeating this process. Regular sanitizing keeps germs at bay and prevents grime buildup. Incorporate this routine into your weekly cleaning schedule—similar to the strategies found in house cleaning tips. Over time, you’ll notice your home feels fresher and less prone to illness outbreaks.
During the process, I once accidentally spilled a bit of disinfectant on an outlet cover. Instead of panicking, I used a dry cloth to blot it immediately, then waited for it to dry completely before turning the power back on. The result was a sanitized switch without any damage—proof that careful, methodical cleaning gets reliable results.
Many homeowners assume they know everything about effective cleaning, especially when it comes to upholstery, move-out cleaning, and sanitizing routines. However, these beliefs often contain overlooked nuances that can sabotage your efforts. For example, a widespread myth is that scrubbing vigorously with bleach or harsh chemicals always guarantees germ elimination—**but in reality, overuse of such agents can damage fabrics and surfaces, reducing their longevity**. According to experts at Effective Sanitizing Methods, a balanced approach using appropriate disinfectants preserves both hygiene and material integrity.**
**Furthermore, many wrongly believe that a quick wipe is sufficient for deep cleaning. In truth, thorough vacuuming and pre-treatment are essential steps often skipped, especially when dealing with upholstery. Regularly reviewing upholstery care guides reveals that neglecting deep cleaning can lead to allergen buildup and fabric deterioration over time.**
**Let’s address a common trap: relying solely on surface cleaning without considering underlying grime or bacteria. This can create a false sense of security, especially in move-out cleaning scenarios where concealed dirt can cause accusations or deposit deductions. Your best strategy is to develop a layered cleaning routine—initial dusting, followed by targeted disinfecting, and finishing with proper rinsing or drying—details of which can be found in move-out cleaning hacks.**
**Advanced homeowners ask: How can I ensure sanitizing efforts reach hidden or hard-to-access areas without causing damage? The secret lies in understanding material-specific cleaning protocols. For instance, delicate fabrics require gentle, pH-balanced cleaners rather than abrasive scrubs. A practical tip is to use proper sanitizing hacks that emphasize safe, multi-purpose solutions suitable for various surfaces.**
**Remember, mastering proper cleaning involves distinguishing between myths and facts. Avoid common pitfalls like overusing chemicals or skipping vital prep steps, as these can compromise both safety and surface quality. Do you ever fall into these traps? Share your experiences in the comments!**Maintaining a hygienic home environment requires the right tools that combine efficiency, safety, and longevity. Personally, I rely on high-quality microfiber cloths for their superior dirt and bacteria trapping abilities, which are essential for surface disinfecting without causing scratches or residue build-up. These cloths, especially when paired with a disinfectant like isopropyl alcohol, make regular sanitizing routines quick and thorough, helping to prevent the buildup of germs on frequently touched surfaces like switches, doorknobs, and kitchen counters.
Investing in a reliable handheld UV-C sanitizer has transformed my approach to deep cleaning. These devices emit ultraviolet light capable of neutralizing bacteria and viruses on surfaces that are hard to reach or require sterilization between uses. I personally use a model with adjustable intensity and safety features, ensuring I can sanitize items like remote controls, keyboards, and even upholstered furniture without chemical cleaners. Over time, this method has shown significant reduction in household microbial presence, aligning with emerging trends in eco-friendly germ control.
How do I maintain my sanitizing tools for optimal performance?
Regular cleaning of microfiber cloths is crucial—they should be washed in hot water with a mild detergent after each use, and dried thoroughly to prevent microbial growth. For UV-C sanitizers, following the manufacturer’s instructions for bulb replacement and device disinfection ensures continued effectiveness. Keeping tools in a dedicated, dust-free storage space extends their lifespan and maintains hygiene standards. As I keep my equipment in top shape, I notice consistent results without recurring contamination issues. Future developments in sanitizing technology are leaning toward smart, connected devices that can monitor germ levels and signal when maintenance or replacement is needed; staying ahead involves adopting these innovations early.
Another vital aspect is choosing the right disinfectant for your surfaces. I recommend solutions approved for electronics and household use, avoiding harsh chemicals that might degrade materials over time. For upholstery, consulting experts and using products referenced in the Ultimate Upholstery Care Guide can prevent damage while ensuring cleanliness. Incorporating these tools and maintenance practices into your routine not only simplifies household cleaning but also significantly enhances your home’s long-term hygiene and safety. For instance, integrating a good microfiber cloth with disinfectant not only speeds up the process but ensures you’re eliminating microbes effectively—something I highly encourage trying today. Remember, consistent maintenance of your tools is the key to long-lasting performance and peace of mind in your home cleaning regimen.
As I reflect on my cleaning journey, one lesson stands out vividly: the smallest habits often deliver the biggest health benefits. The routine of sanitizing even the least noticed surfaces like light switches has transformed my approach to household hygiene. This insight taught me that proactive, consistent care sparks a ripple effect—making our homes safer and more inviting. Embracing these subtle but impactful practices can feel empowering. Remember, your dedication to cleanliness today paves the way for a healthier, happier home tomorrow.