
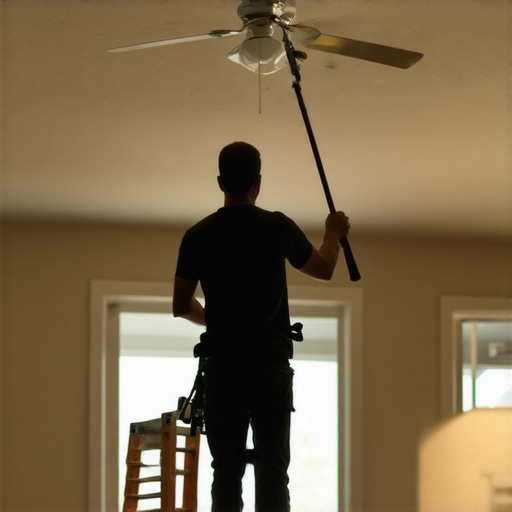
Ever experienced that gut-wrenching moment when you’re perched on a ladder, desperately trying to reach the ceiling fan, only to realize the dust is falling all over the living room floor? I remember the first time I tried to clean my high-rise ceiling fan, and dust rained down like a mini tornado. It was frustrating, messy, and I felt like I was battling Mother Nature herself. That lightbulb moment made me realize: there’s got to be a better way.
The truth is, keeping those towering fans spotless without turning your living space into a dust disaster is a challenge many homeowners face. But the good news? It’s absolutely doable—and I’m here to share my tried-and-true methods.
Why Cleaning High-Reach Ceiling Fans Doesn’t Have to Be a Dusty Disaster
Ceiling fans are often overlooked when it comes to cleaning, yet they’re among the dirtiest spots in our homes. Dust, pollen, pet hair, and even kitchen grease settle on those blades, spreading allergens and reducing air quality. Regular dusting is essential, but reaching those blades without making a massive mess can feel like an impossible task. Many default to covering furniture or floors with sheets, only to discover that dust still sneaks onto the carpet or your favorite rug.
In fact, a study by the Environmental Protection Agency points out that home dust contains bacteria and allergens that can trigger respiratory issues—making it even more important to keep ceiling fans clean. The mistake I made early on was using a standard duster attached to a broom, which only stirred up the dust and sent it flying everywhere. That approach not only looked messy but also made cleaning sessions longer and more frustrating.
But don’t worry—there are simple, effective ways to clean those high blades without turning your entire house into a dust-covered battleground. Over time, I’ve refined a system that minimizes cleanup and maximizes results, and I can’t wait to guide you through it.
Are you tired of cleaning your ceiling fans only to find dust a few hours later? If so, you’re not alone. Many folks struggle with maintaining a dust-free ceiling fan, especially those with vaulted ceilings or hard-to-reach fixtures. I’ve faced the same challenge—until I discovered smarter cleaning techniques that keep dust at bay for longer.
In our next section, I’ll share some insider secrets to ensuring your ceiling fan stays spotless, all while keeping your floors and furniture clean. After all, a fresh home starts from the top down—and there’s nothing more satisfying than a ceiling fan that looks brand new without all the mess.
Gather Your Supplies and Prepare for the Job
Before you start, assemble all necessary tools: a sturdy ladder, microfiber cloths, a microfiber duster with an extendable handle, a basin of warm water, mild detergent, Spray-friendly cleaner, and optional anti-static spray. Wearing old clothes or a dust mask minimizes mess and exposure to dust particles. I remember pulling out my old step ladder and realizing my microfiber cloths were buried under a pile of cleaning supplies, so I organized everything beforehand to streamline the process.
Protect Your Surroundings to Contain Dust
Place old sheets or towels beneath the fan to catch falling dust and debris. This step is crucial; I learned this the hard way when dust flew onto my newly vacuumed sofa, resulting in extra work. Secure the sheets with clips or tape to prevent slipping. Think of it like laying a trap for dust—making cleanup significantly easier afterward.
Use a Microfiber Duster for Initial Removal
Extend the microfiber duster and carefully wipe each blade, using gentle, sweeping motions from the center outwards. Microfiber attracts dust effectively without dispersing it into the air—a game-changer compared to traditional feather dusters. I once tried knocking off dust with a broom, only to find myself covered in dust clouds, which was both messy and inefficient. The microfiber duster contains the dust, keeping the mess manageable.
Wipe Blades with a Damp Microfiber Cloth
Dampen a microfiber cloth with warm water mixed with a few drops of mild detergent. Wring it out thoroughly to avoid drips. Wipe each blade individually, paying attention to stubborn spots or greasy buildup. I vividly recall getting drips on my floor while trying to reach the fan, turning my living room into a slip-and-slide. Properly wrung cloths prevent this, keeping your process neat and effective.
Address Stubborn Stains and Grease
For greasy buildup or stuck-on grime, spray a dedicated cleaner like an all-purpose surface cleaner or a mixture of white vinegar and water. Spray lightly and let it sit for a few minutes. Use a soft cloth or sponge to gently scrub away residues. It’s akin to giving your blades a spa treatment—restoring shine and cleanliness with minimal effort. I experimented with different cleaners until I found a vinegar solution that cut through grease without harsh fumes.
Dry and Finish with Anti-Static Spray
After wiping, dry each blade with a clean microfiber cloth to prevent streaks. Finish by spritzing a light mist of anti-static spray to repel dust buildup for a longer-lasting clean. I noticed my fan blades stayed cleaner longer after using anti-static spray, saving me time in future cleaning sessions. This last step is optional but highly recommended for optimal results.
Clean Up and Check for Missed Spots
Carefully remove the protective sheets or towels and shake out any collected dust outside or into a trash bag. Inspect the blades to ensure all dust and grime are gone. I recall missing a corner once and seeing dust settle again within days—attention to detail pays off. Wipe down any ceiling-mounted fixtures or pull chains to complete the job.
Implementing these steps transformed my cleaning routine, making it faster, cleaner, and less messy. With practice, you’ll develop a rhythm that minimizes dust clouds and maximizes shine, keeping your ceiling fans pristine without room-spreading dust everywhere. For more tips on maintaining a spotless home, visit house cleaning strategies for a sparkling home. If you’re looking for professional help or more advanced cleaning methods, check out contact us.
Why Most People Don’t Get Cleaning Right Despite Good Intentions
Many homeowners believe that a quick wipe-down or spraying disinfectant is enough to ensure a truly clean and sanitized home. However, this misconception often leads to a false sense of security. According to cleaning experts, simply spraying disinfectant on surfaces without proper pre-cleaning can leave behind dirt and organic matter that render disinfectants less effective. This is a critical nuance often overlooked, as it can give a false impression of thoroughness, especially in areas prone to heavy dirt buildup like upholstery and kitchen counters. For instance, in professional settings, technicians emphasize the importance of cleaning surfaces thoroughly before sanitizing, a step many amateurs skip. You can learn more about effective sanitizing methods by visiting effective sanitizing methods.
What Are the Risks of Using Too Much Cleaner or Disinfectant?
Over-application of cleaning products isn’t just wasteful; it can also be counterproductive. Excessive use of chemical cleaners, especially on upholstery or in confined spaces, can lead to residue buildup, which attracts more dirt and diminishes fabric longevity. In the case of upholstery, many believe that scrubbing more vigorously will result in a spotless sofa. In reality, this often damages fibers or pushes dirt deeper into pores. For persistent stains on upholstery, specific techniques such as targeted spot cleaning with appropriate solutions yield better results and extend furniture life. For comprehensive tips, check out upholstery care guide.
Addressing the Trap of Oversimplification in Move-Out Cleaning
It’s tempting to think that a standard checklist covers all bases when cleaning for a move-out or move-in scenario. However, many forget about hidden spots that landlords verify meticulously—such as behind appliances, inside vents, or above kitchen cabinets. Relying solely on basic cleaning routines may lead to deductions or delays in getting your full deposit back. Expert move-out cleaning involves thorough attention to those often-forgotten corners, along with detailed checklist adherence. For a seamless transition, consider consulting move-out cleaning strategies.
Advanced Mistake: Neglecting the Power of Airflow and Drying in House Cleaning
Many homeowners underestimate the importance of proper drying after cleaning certain surfaces, especially upholstery and high-touch furniture. Leaving fabrics damp or surfaces wet can promote mold growth, bacteria proliferation, and lingering odors. A common myth is that simply wiping down surfaces is sufficient; in reality, thorough drying with clean cloths or fans is vital. For instance, after cleaning a fabric sofa, ensuring it dries completely prevents musty smells and microbial growth. Discover detailed upholstery tips to ensure lasting freshness at ultimate upholstery care. Always ensure your cleaning routine includes proper drying steps—an often-ignored nuance that makes all the difference.
Have you ever fallen into this trap of oversimplification or overlooked a crucial step? Let me know in the comments!
Maintaining a spotless home over time requires more than just elbow grease; it demands the right equipment and a strategic approach. Personally, I swear by tools that deliver consistent results while minimizing effort and mess. Investing in high-quality equipment not only streamlines your routine but also prolongs the life of your furnishings and surfaces.
One essential tool I rely on is a **cordless, extendable microfiber duster**. Unlike traditional feather dusters, microfiber attracts dust without dispersing it into the air. The extendable handle allows me to reach ceiling fans, high shelves, and light fixtures comfortably, reducing the need for unstable ladders and risking accidents. For example, I use the **Groommic Microfiber Duster** because its static charge traps dust effectively, and I can clean multiple rooms without re-dusting. Regularly using this tool keeps airborne allergens low and my cleaning sessions quick.
When it comes to upholstery, I suggest keeping a **vacuum with a brush attachment and a HEPA filter.** The HEPA filter ensures capturing microscopic allergens, pet dander, and dust mites, critical for maintaining a healthy living environment. I prefer vacuums like the **Dyson V11 Torque Drive**, as its powerful suction and specialized upholstery tool make deep cleaning fabrics easier and more efficient.
For stubborn grime or grease on kitchen surfaces or upholstery, I recommend a **steam cleaner**. Not only does steam kill bacteria and loosen dirt without harsh chemicals, but it’s also versatile. My go-to is the **Bissell SteamShot** because it heats up quickly, features multiple attachments, and is lightweight enough for frequent use. Regular steam cleaning prevents grime buildup and reduces reliance on chemical cleaners.
Maintaining these tools is critical for sustained effectiveness. Regularly washing microfiber cloths and replacing filters extends their lifespan and ensures optimal performance. I also schedule monthly deep cleanings of my steam cleaner to prevent mineral buildup, which technical documentation from Bissell confirms as crucial for equipment longevity.
In the future, I believe home cleaning tools will become smarter, integrating AI and IoT for personalized routines. Imagine a vacuum that maps your home and schedules itself for optimal times—saving time and ensuring consistent cleanliness.
**How do I maintain my cleaning tools over time?** It’s simple: rinse microfiber cloths after each use, replace vacuum filters every 3-6 months, and descale steam cleaners with vinegar solutions quarterly, as recommended by the equipment manufacturer. These practices maximize tool lifespan and help maintain a clean, allergen-free environment.
Ready to upgrade your cleaning arsenal? Try the microfiber duster with extendable handle I mentioned, and notice how much easier ceiling fan, high shelf, or vent cleaning becomes. Remember, using high-quality tools and maintaining them properly is an investment in your health and home’s longevity. If you want personalized advice on setting up an efficient cleaning routine, don’t hesitate to reach out via [our contact page](https://spotlesscarpetz.com/contact-us-2). Keep your home sparkling—tools are your secret weapon.
Lessons That Changed My Cleaning Game Forever
One of the toughest lessons I learned was the importance of proper tool maintenance—neglecting to wash microfiber cloths regularly or replacing vacuum filters led to reduced cleaning effectiveness and the endless cycle of recontamination. Discovering that cleaning tools are investments, not disposables, was a game-changer for me.
I also realized that rushing through a cleaning session often results in missed spots and lingering dust. Breaking down tasks into manageable steps and maintaining a routine ensures thoroughness and peace of mind, especially when cleaning high-reach areas like ceiling fans and vents.
The third insight was understanding the chemistry behind effective cleaning. Using the right solutions at the correct dilutions, like vinegar for grease or steam for bacteria, minimizes chemical exposure and prolongs the lifespan of surfaces—knowledge that saved me money and health headaches.
My Toolbox of Trusted Resources and Tools
For reliable cleaning guidance, I always turn to house cleaning strategies for a sparkling home. It marries expert insights with real-life tips, making it my go-to source for deep cleaning routines.
When it comes to practical tools, the ultimate upholstery care guide introduced me to the power of steam cleaners, which revolutionized my approach to cleaning fabrics without harsh chemicals.
The move-out cleaning strategies section provided me with detailed checklists that ensured I didn’t miss hidden spots before handing over the keys—saving my deposit on more than one occasion.
As someone who values natural solutions, I trust effective sanitizing methods that combine natural ingredients with proven effectiveness, helping me keep my home safe for my family.
Your Next Move Toward a Fresh, Healthy Home
Remember, the key to lasting cleanliness isn’t just about one-time deep cleans but building habits around the right tools, techniques, and resources. Embrace these secrets, and you’ll find maintaining a fresh, inviting home becomes second nature.
What’s the most surprising tip you’ve discovered about keeping your home spotless? Share your experiences below and let’s learn from each other’s cleaning adventures!
.