
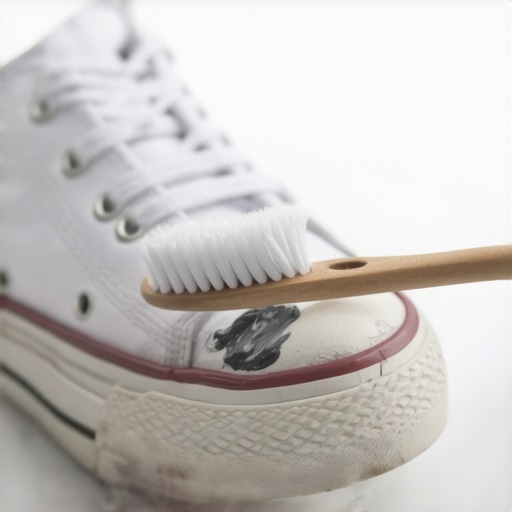
I was ten minutes away from heading out to a dinner party when I looked down and saw it: a jagged, coal-black scuff mark right on the toe of my pristine white leather sneakers. I felt that instant sink in my stomach. You know the one—the feeling that you’ve just ruined a expensive investment. I grabbed a wet paper towel and scrubbed until the paper disintegrated, but that mark didn’t budge. It looked like a permanent scar. I almost threw them in the back of the closet to die, but then I remembered a tip my neighbor once gave me while we were discussing effective house cleaning secrets from cleaning experts. She swore by a tube of basic white toothpaste.
Give Your Tired White Shoes a Fresh Start Today
I’ll be honest, I was a total skeptic at first. Why would something I use to polish my teeth work on a rubber sole or leather upper? But I was desperate. I grabbed a tube of non-gel paste and an old toothbrush, and within thirty seconds, the scuff didn’t just fade—it vanished. It felt like a magic trick. This isn’t just about making your shoes look ‘okay’ for a trip to the grocery store; it’s about restoring that crisp, out-of-the-box glow that makes you feel confident when you walk into a room. Just like when you are hunting for move-out cleaning hacks to ensure your deposit refund, the goal here is to get things back to their original state without spending a fortune on specialized products.
Is This Just a Viral Myth That Might Ruin My Leather?
It’s a fair question. I actually made a huge mistake the first time I tried this on a different pair of shoes. I used a bright blue gel toothpaste thinking it wouldn’t matter. Big mistake. The blue dye actually tinted the stitching on my shoes, and I had to spend an hour rinsing it out. You have to use the plain, white, gritty stuff. There is actual science behind why this works, too. According to the American Dental Association, many toothpastes contain mild abrasives like silica or calcium carbonate. These tiny particles are designed to scrub away plaque, but they are also perfect for lifting surface-level friction marks off of sneakers without the harshness of bleach. I’ve found this technique is remarkably similar to how to remove scuff marks from baseboards without using chemicals, proving that the best tools are often already in your bathroom cabinet. Have you ever had a pair of shoes you thought were destined for the bin because of one nasty mark? Before you give up, let’s talk about how to do this correctly so you don’t repeat my blue-gel disaster.
Master the Art of the Two-Minute Scrub
Before you even touch that tube of toothpaste, you need to clear the field. Think of your sneakers like a high-end sofa; you wouldn’t just start rubbing liquid into a spill without vacuuming first. Just like the advice in this upholstery cleaning tips for a fresh home revival guide, getting rid of loose debris is step one. I remember trying to skip this once when I was in a rush. I applied the paste directly onto some dried mud on my canvas Converse, and instead of cleaning them, I created a greyish sludge that stained the fabric deeper. Use a stiff-bristled dry brush or even a dry paper towel to flick off any loose dirt or dried mud. This prevents you from just pushing the grime deeper into the pores of the leather or the weave of the fabric.
Stick to the White Paste Method
Once the surface is clear, grab your non-gel white toothpaste. You only need a pea-sized amount for each scuff. I’ve found that the best way to apply it is with a dedicated “cleaning toothbrush”—the ones with firm bristles that you retired from your dental routine months ago. Much like when you’re learning the secret to making your stainless steel sink shine like new, the tool you use is just as important as the cleaning agent itself. Apply the paste directly to the scuff mark and let it sit for about sixty seconds. This gives the mild abrasives time to “grab” onto the stain. 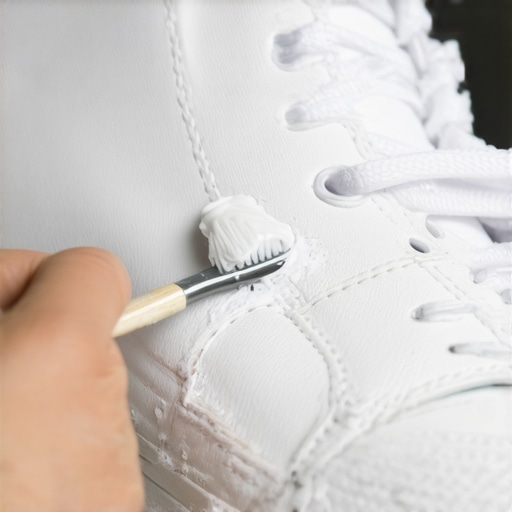
Use Small Circles for Maximum Impact
Don’t just scrub back and forth. You want to work in small, firm circles. This ensures the bristles and the paste get into the tiny textures of the rubber sole. I used this exact technique on a pair of white leather shoes that had been stepped on at a crowded event. The scuffs were deep, but the circular motion lifted the black rubber marks off the white midsole in seconds. If you find the paste is getting too dry, add a single drop of water to reactivate the foam. This isn’t just about friction; it’s about the chemistry of the paste breaking down the oils in the scuff. It’s a precision job, very similar to a daily house cleaning routine to maintain perfection where consistency beats raw power.
Wipe Away the Residue Immediately
After you’ve scrubbed the area until the foam looks slightly grey (that’s the dirt leaving the shoe!), take a damp—not dripping—microfiber cloth and wipe it away. If you leave the toothpaste to dry on the shoe, it becomes a chalky mess that is much harder to remove later. I learned this the hard way when I got distracted by a phone call and left a glob on my heel. When I finally wiped it off, it left a white crust that took ten minutes of rinsing to fully clear. You want to see that instant glow as the damp cloth passes over the leather. This final wipe is what seals the deal, much like the precision needed for a move-out clean checklist to simplify your transition.While the toothpaste method is a lifesaver for sneakers, it opens up a larger conversation about how we treat our household investments. Most people assume that the harder you scrub or the more product you use, the cleaner an object becomes. That is a dangerous myth that usually leads to more damage than repair.
Stop Drowning Your Surfaces in Excessive Soap
I used to be the person who poured half a bottle of cleaner into a bucket, thinking it would work double-time. But if you’ve ever wondered why your floors feel sticky even after you finished mopping, it’s almost certainly due to product buildup. The same logic applies to your leather shoes or your favorite armchair. Too much soap creates a microscopic film that acts like a magnet for new dirt. To truly restore items, you need to use the minimum amount of surfactant necessary.
Does Dwell Time Really Matter for Disinfecting?
This is where most casual cleaners fail to see the nuance. There is a fundamental difference between cleaning—which is simply removing visible dirt—and sanitizing. Many people spray a surface and immediately wipe it away, thinking they’ve killed the bacteria. However, the American Cleaning Institute notes that most disinfectants require a ‘dwell time’ of anywhere from three to ten minutes to actually be effective. If you aren’t letting the solution sit, you are merely moving germs around. For those preparing for a move, understanding these sanitizing secrets for a safer house in 2025 is the difference between a truly healthy environment and a superficial shine. 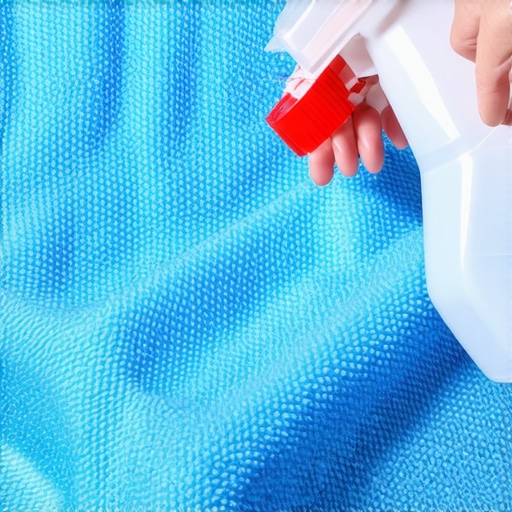
Why Your ‘Natural’ Vinegar Routine Might Be Costing You Thousands
We see it on every DIY social media feed: ‘Use vinegar for everything!’ But here is the nuance most beginners miss: vinegar is a potent acid. While it is fantastic for breaking down hard water on glass, there is a specific reason why vinegar is not always the best choice for granite countertops or other natural stone surfaces. It can etch the seal, leaving permanent, dull spots that require professional restoration. I once ruined a beautiful marble tray trying to be ‘eco-friendly’ without checking the pH levels first.
Stop Spraying Your Cleaning Products Directly on the Surface
This is perhaps the biggest ‘oops’ factor in home maintenance. Whether it is a flat-screen TV, a leather shoe, or a fabric chair, the rule regarding why you should never spray cleaning products directly on surfaces comes down to saturation control. When you spray directly, liquid can seep into seams, soak the internal foam of furniture, or travel into the electronics of an appliance. This leads to hidden mold growth or electronic failure. Always spray your microfiber cloth first, then apply the cloth to the item. This level of precision is non-negotiable if you are following an ultimate upholstery care guide for lasting freshness. Have you ever fallen into this trap of over-cleaning and accidentally making things worse? Let me know in the comments.Maintenance isn’t just a chore; it’s the bridge between a one-time clean and a lifestyle of clarity. I used to think my vacuum was just ‘getting old’ when it lost suction, but the truth was much simpler and grosser. I hadn’t cleaned the brush roll in six months. If you don’t stay on top of this, you’re essentially just dragging a dusty mop across your floors. This is a huge reason why your vacuum brush roll is ruining your hardwood floors. Hair and threads wrap around the agitator, creating friction that can actually buff the finish right off your wood. I now keep a dedicated seam ripper in my utility closet just for this task. It’s a game-changer for maintaining house cleaning strategies for a sparkling home today.
How do I keep my cleaning gear working like new for years?
The secret isn’t buying more expensive tools; it’s respecting the ones you have. Take your microfiber cloths, for instance. Most people toss them in with the regular laundry and then wonder why your microfiber cloths are leaving lint everywhere. I learned the hard way that fabric softener is the mortal enemy of microfiber. It coats the tiny ‘hooks’ in the fabric with wax, making them useless for grabbing dust. I now wash mine exclusively with a splash of vinegar and no heat. According to technical documentation from the *Microfiber Association*, exposing these synthetic polyesters to high heat can actually melt the microscopic edges of the fibers, turning your soft cloth into a scratchy, ineffective mess. 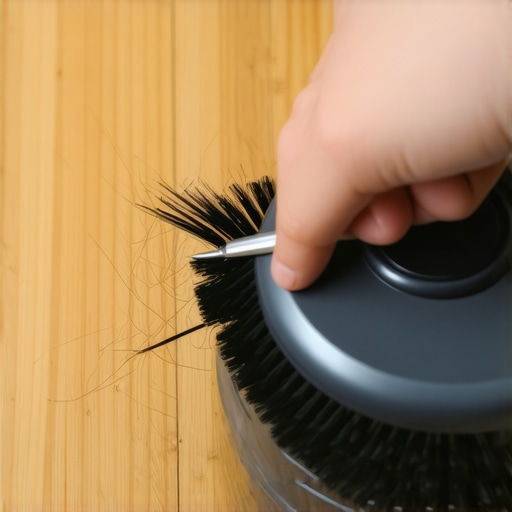 I’m also obsessed with the ‘forgotten’ filters. Last year, I noticed a weird smell in my laundry room. I realized I’d never once checked the drain pump. It’s a vital part of why you must clean the filter in your washing machine. When that gets clogged with coins, hair, and grey sludge, your clothes never truly get clean. It’s the same level of detail required for sanitizing hacks for safe house transitions. If the tool itself is dirty, the result will always be subpar. Looking ahead, I predict we are going to see a massive shift toward ‘smart’ sanitization. We’re already seeing vacuums with built-in laser dust detection, but soon, I expect residential tools to incorporate real-time ATP (Adenosine Triphosphate) testing. This would allow you to see exactly when a surface is biologically clean, taking the guesswork out of effective sanitizing methods for a germ-free home. My challenge to you: Go to your laundry room right now and find that tiny access door at the bottom of your washing machine. Drain it, clean the filter, and see how much better your next load smells. It takes five minutes, but the long-term results are worth every second.
Cleaning Lessons I Learned the Messy Way
Looking back at my years of trial and error, the biggest lightbulb moment was realizing that cleaning is more about chemistry than elbow grease. I used to think scrubbing harder solved everything, but often, just letting the product sit—the dwell time—does the heavy lifting for you. I also realized that natural isn’t a synonym for safe for everything. My kitchen floor debacle taught me why your mop bucket is spreading more dirt than it removes if you don’t change the water frequently. Finally, I’ve learned to trust my eyes and nose more than the label’s marketing; if a surface feels sticky, it is not truly clean, regardless of what the bottle says.
The Essentials I Keep in My Utility Closet
If you want to move beyond basic chores and into true home restoration, these are the tools I never let my supply cabinet run out of. First, a high-quality seam ripper; it is the only tool that effectively clears a vacuum brush roll without damaging the bristles. Second, I highly recommend checking out the technical guides from the American Cleaning Institute for anyone who wants a deep dive into fabric science and safety. Lastly, always keep a stash of white, non-gel toothpaste, not just for your teeth, but as a precision abrasive for those high-stakes scuffs on leather and trim. These tools are the backbone of my house cleaning strategies for a sparkling home today and ensure I am always ready for an unexpected stain.
Take That First Small Step Toward a Brighter Home
It’s easy to feel overwhelmed by a whole house that needs attention, but you don’t have to do it all at once. Start with that one pair of shoes in the closet or that one sticky spot on the kitchen floor. When you see the immediate transformation that a little bit of knowledge and a few minutes of effort can achieve, it changes your entire perspective on home maintenance. Your living space is an investment, and consistent house cleaning is the best way to protect its value and your own peace of mind. #IMAGE_PLACEHOLDER_E# Have you ever tried a bathroom cabinet staple like toothpaste on your sneakers and been shocked by the results? Let me know in the comments below!