
I’ll never forget the sinking feeling in my stomach when I looked at my favorite leather armchair—the one I’d saved for six months to buy—and saw those dreaded spider-web lines spreading across the seat. It looked like a dried-out riverbed. I thought I was doing everything right; I wiped it down weekly and kept it free of crumbs. But I was actually killing it. I made the classic rookie mistake of thinking leather is as indestructible as plastic, when in reality, it’s more like your own skin. I’d been using standard baby wipes to ‘freshen it up,’ not realizing the alcohol in them was sucking the life out of the hide. Today, I’m going to show you exactly how to avoid my $1,200 mistake and keep your furniture looking buttery soft for decades. We are diving into the professional methods that actually preserve the hide rather than just stripping away the surface dirt. [image placeholder]
Stop Treating Your Leather Like Plastic
The biggest hurdle most of us face is realizing that leather is a biological material. It breathes. It has pores. It has a memory. When I first started obsessing over upholstery cleaning tips for a fresh home revival, I didn’t realize that standard household cleaners are essentially poison for high-end hides. Most ‘all-purpose’ sprays have a pH level that is far too high, which strips away the essential oils added during the tanning process. According to the experts at the Leather Working Group, leather is naturally acidic, and maintaining a specific pH balance—usually between 4.5 and 5.0—is the only way to prevent the protein fibers from stiffening and snapping. If you use a basic, alkaline soap, you are essentially accelerating the aging process by twenty years in a single afternoon.
Is specialized leather cleaner actually worth the extra cash?
I get it. You’re standing in the aisle looking at a $20 bottle of leather conditioner thinking, ‘Can’t I just use some dish soap and water?’ I used to think the same thing until I ruined a perfectly good ottoman. Soap is a degreaser. It’s designed to remove oils—which is exactly what your leather needs to stay supple. If you’ve been using harsh chemicals, you’ve probably noticed your sofa feels a bit ‘squeaky’ or stiff. That’s a cry for help. Before you even think about moisture, you have to realize that professional cleaners always vacuum the sofa before wiping it to ensure no abrasive grit scratches the grain during the wet phase. Tiny particles of sand act like sandpaper when you start rubbing a cloth over them. Have you ever noticed those tiny white cracks appearing on your headrests or armrests and wondered if it’s too late to save them? Tell me if you’ve seen that happening, because I’ve been there, and I promise you, most of the time we can bring that hide back to life. Whether you are following an ultimate upholstery care guide for lasting freshness or trying to figure out how to remove ink stains from leather without discoloring it, the foundation is always the same: respect the hide and maintain the moisture.
Prep the hide before you touch the cleaner
The biggest mistake people make is rushing into the wet phase of cleaning. Think of leather like a car’s paint job; if you wipe a dirty car with a sponge, you’re just grinding the dirt into the clear coat. Leather is exactly the same. You must remove every single speck of dry debris first. I remember a particularly tough job where I was implementing move-out cleaning strategies to secure your deposit for a client with a high-end cream sectional. The couch looked gray, but it wasn’t stained—it was just buried in fine dust. Had I started with a wet rag, I would have turned that dust into a permanent muddy dye.
Clean the cracks with a soft brush
Use your vacuum’s softest brush attachment to go over the entire surface, paying special attention to the welting and the deep crevices where the cushions meet. This is the moment to be meticulous. As we’ve discussed in our guide on why professional cleaners always vacuum the sofa before wiping it, skipping this step is the fastest way to scratch the grain. If your vacuum doesn’t have a soft horsehair brush, use a clean, dry paintbrush to flick dust out of the seams while holding the vacuum nozzle nearby to catch the fallout. 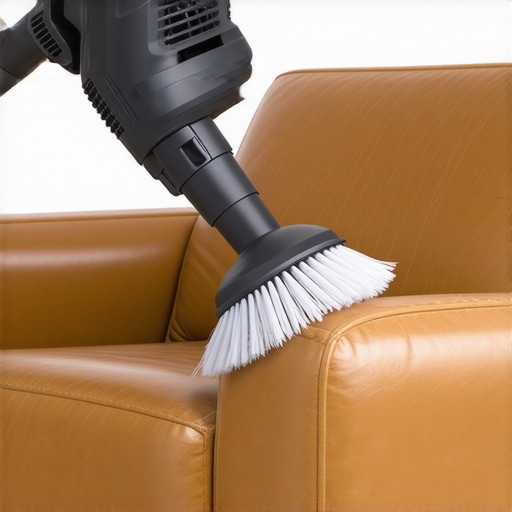
Apply the solution with surgical precision
Once the dry soil is gone, you can introduce moisture. However, the golden rule of leather care is to never saturate the material. Leather is a sponge for liquids, and if the internal padding gets wet, you’re looking at a structural failure and potential mold. When you look at upholstery cleaning tips for a fresh home revival, the pros always emphasize using a foam rather than a liquid.
Dab the stains instead of rubbing them
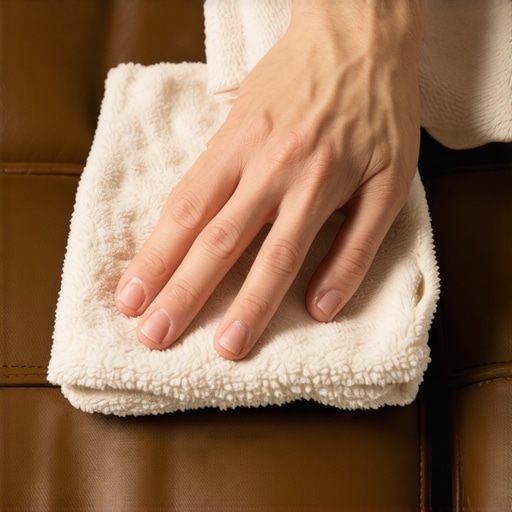
If you are dealing with a specific spot, like a pen mark, you need to be extremely careful. Following the protocol for how to remove ink stains from leather without discoloring it requires a dabbing motion. Rubbing spreads the pigment and forces it deeper into the pores. Also, keep in mind the environment of the home; if you are performing sanitizing hacks for safe house transitions, remember that alcohol-based sanitizers are the enemy of leather. Always apply your cleaner to a lint-free microfiber cloth first, then work the cloth into the leather. You should never spray cleaning products directly on surfaces because it creates concentrated ‘hot spots’ of chemical that can leave permanent rings.
Lock in the softness with a quality conditioner
Cleaning removes dirt, but it also removes the natural lubricants that keep leather flexible. Without replacing those oils, the hide will eventually crack like an old boot. This is where you apply the ‘food’ for the furniture. I once used a cheap, wax-heavy conditioner on a client’s chair, and it left a sticky residue that grabbed every bit of lint in the room. It was a mess. Now, I only use pH-balanced creams that soak in completely. For a truly professional finish, refer to the ultimate upholstery care guide for lasting freshness to understand the buffing process. After applying the conditioner, let it sit for at least thirty minutes, then buff the entire piece with a fresh, dry cloth. This friction generates a tiny bit of heat that helps the leather absorb the last of the oils, leaving a satin sheen rather than a greasy film.I see it every single day on social media: the ‘magic’ vinegar and baking soda hack. While those might work for removing rust stains from porcelain sinks, they are an absolute disaster for high-end leather. Here is the contrarian truth that most DIY blogs won’t tell you: ‘Natural’ does not mean ‘safe.’ Vinegar has a pH of about 2.5, which is incredibly acidic. According to the American Leather Chemists Association (ALCA), the tanning salts used to preserve hides are highly sensitive to pH shifts. When you douse your sofa in vinegar, you are essentially initiating a chemical reaction that destabilizes the collagen fibers. This leads to internal rot that you won’t even see until the leather starts crumbling years before its time. If you want a truly clean home, stick to effective sanitizing methods for a germ-free home that respect the material chemistry. 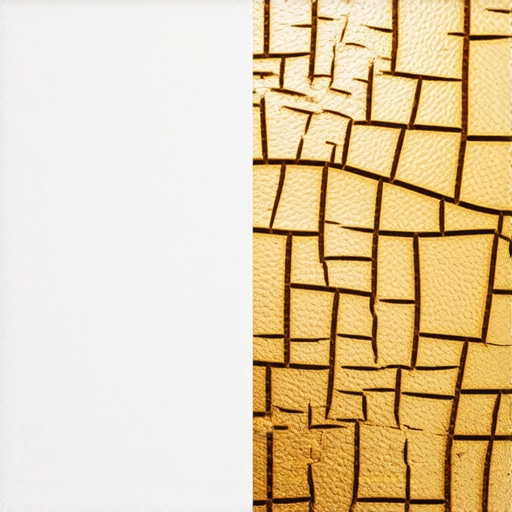
Stop Chasing That Fake Artificial Shine
One of the biggest ‘traps’ I see homeowners fall into is the lure of silicone-based conditioners. We love that instant, glossy ‘new car’ look, but silicone is the fast food of upholstery care. It creates an airtight, plastic-like film over the grain. Because leather is a porous, biological material, it needs to exchange moisture with the air to stay flexible. Silicone suffocates the hide, trapping heat and oils underneath, which eventually leads to a phenomenon called ‘fatty spew’—that persistent white, waxy film that makes your furniture look diseased. If you are implementing house-cleaning strategies for a sparkling home today, check your labels. If the product promises a ‘high-gloss’ finish, put it back on the shelf. Real, healthy leather should have a supple, satin glow, not a greasy reflection. This is especially vital when you are focused on sanitizing secrets for a safer house in 2025, as many modern disinfectants are far too aggressive for delicate top-grain finishes.
Why does your leather feel tacky after you’ve finished cleaning it?
This is the number one question I get from people who have just finished a deep clean. If the surface feels sticky or ‘grabby,’ you have likely over-saturated the pores or failed to remove the cleaning surfactant entirely. It’s a common ‘oops’ moment. When you follow a guide like the ultimate upholstery care guide for lasting freshness, the focus is always on thin, multiple layers rather than one heavy soak. If you are in the middle of a move and using move-out cleaning strategies to secure your deposit, don’t try to speed up the process by using more product. To fix tackiness, take a slightly damp (water only) microfiber cloth, wipe the area firmly, and then immediately buff it dry with a second cloth. While you’re at it, don’t forget that other ‘hidden’ areas need love too; for instance, you should always check why you must clean the filter in your washing machine to ensure your cleaning rags aren’t just redepositing old grime. Have you ever fallen into this trap of using a ‘natural’ hack that backfired? Let me know in the comments.
Upgrade your kit with a genuine horsehair brush
If you are still using a standard yellow kitchen sponge or a generic plastic-bristled brush on your leather, you are doing it wrong. I’ve found that the only way to safely agitate dirt out of the grain without creating microscopic abrasions is by using a genuine horsehair brush. These bristles are firm enough to lift body oils and dust but soft enough that they won’t compromise the protective topcoat. When I’m implementing effective house cleaning secrets from cleaning experts, I always carry a dedicated brush for every leather piece. You want to work in small, circular motions, allowing the bristles to do the heavy lifting. This is far more effective than just wiping, as it reaches into the ‘valleys’ of the leather grain. According to the leather testing standards set by ISO 11640, the resistance of leather to rubbing is a critical factor in its longevity; using the wrong tool can wear down that resistance in a fraction of the intended lifespan. 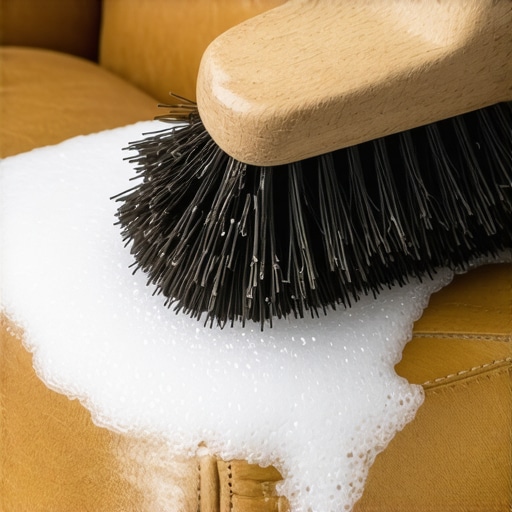
How do I maintain my leather’s soft feel over several years?
The secret isn’t a one-time deep clean; it’s about a consistent rhythm. I recommend integrating leather care into your daily house cleaning routine to maintain perfection. Every week, give it a quick wipe with a dry, clean microfiber cloth to prevent dust buildup. Every quarter, apply a high-quality, pH-neutral conditioner. If you wait until the leather feels dry or looks ‘ashy,’ you’ve waited too long. In my experience, the best products are those that are water-based and contain natural lipids rather than heavy oils or waxes. If you are preparing for a transition, make sure to include a deep conditioning session in your move-out clean checklist to simplify your transition. This not only protects the furniture during the move but ensures it looks its best for the next space. If you find your cleaning efforts aren’t yielding results, it might be because of your equipment; check why your vacuum isnt picking up dirt like it used to to ensure you aren’t leaving abrasive particles behind that eat away at your conditioner.
Predicting the future of high-end hide care
Looking ahead, I see a major shift toward bio-enzymatic leather cleaners. As we move into 2025 and beyond, the industry is moving away from even the mildest detergents toward enzyme-based solutions that specifically target organic proteins and fats without altering the hide’s pH. These products will become staples for upholstery cleaning tips for a fresh home revival because they do the work of a deep scrub without the physical friction. We are also seeing a rise in ‘smart’ leather finishes that are more resistant to UV damage, but they will still require specialized maintenance to keep those high-tech coatings from becoming brittle. My advice is to start building your professional-grade kit now. Stop buying ‘all-in-one’ products and invest in a separate cleaner and conditioner. Try the ‘quarter-yearly’ conditioning rule starting this week—you will be shocked at how much more vibrant your leather looks after just two sessions. If you have questions about a specific stain or material, don’t hesitate to reach out via our contact us page.
You don’t need to be a professional chemist to keep your leather looking new, but you do need to respect the science of the hide. After years of trial and error, I’ve realized that the most beautiful furniture isn’t necessarily the most expensive; it’s the piece that has been treated with consistent, knowledgeable care.
The Price of My Stubborn Upholstery Mistakes
I’ve learned the hard way that leather never forgets. One of my biggest lightbulb moments was realizing that sunlight is a silent scavenger. I once left a chestnut leather chair in a sun-drenched reading nook, only to find the side facing the window had turned a brittle, pale parchment color in less than a year. UV rays break down the chemical bonds in the tanning oils, and once that moisture is gone, it’s incredibly difficult to fully restore. Another lesson? Body oils are your furniture’s secret enemy. We often focus on external spills, but the natural oils from our skin and hair accumulate on headrests and armrests, eventually causing the leather to darken and rot from the inside out. This is why following upholstery cleaning tips for a fresh home revival must include frequent de-greasing of those high-contact zones. Finally, always remember that less is more; I’ve seen more leather ruined by over-conditioning (which makes it mushy and structurally weak) than by under-conditioning.
Build Your Professional Hide Care Arsenal
To get professional results, you need to stop reaching for the kitchen sponge. My personal toolkit consists of three non-negotiable items. First, a genuine horsehair brush; its bristles are uniquely suited to agitating pores without scratching the delicate top-grain. Second, I always keep a stash of high-gsm microfiber cloths. These are essential because microfiber cloths that leave lint everywhere can ruin the finish of a freshly conditioned sofa. Third, I only use distilled water for any light damp-wiping. Tap water often contains minerals like calcium and magnesium that leave behind white, chalky residues inside the leather’s grain. If you are looking for more effective house cleaning secrets from cleaning experts, start by isolating your leather tools from the rest of your cleaning supplies to prevent cross-contamination with harsh floor or glass cleaners.
Give Your Furniture a Second Life Today
Leather is one of the few materials in your home that can actually look better in twenty years than it does today, provided you give it the respect it deserves. It’s about more than just aesthetics; it’s about preserving a piece of history and craftsmanship. When you master these upholstery cleaning tips for a fresh home revival, you aren’t just cleaning a sofa—you’re maintaining an investment. Don’t be afraid to get hands-on with your furniture this weekend. Start with a thorough vacuuming, follow up with a pH-neutral cleaner, and finish with a light buff. Your home will feel more refined, and your leather will stay buttery soft for decades to come. If you ever run into a situation where a stain won’t budge, like a spill during a move, don’t panic—just refer to our move-out clean checklist to simplify your transition or reach out through our contact us page for specialized advice. Have you ever tried a ‘natural’ cleaning hack on your leather that ended in a total disaster? Let me know in the comments below!