
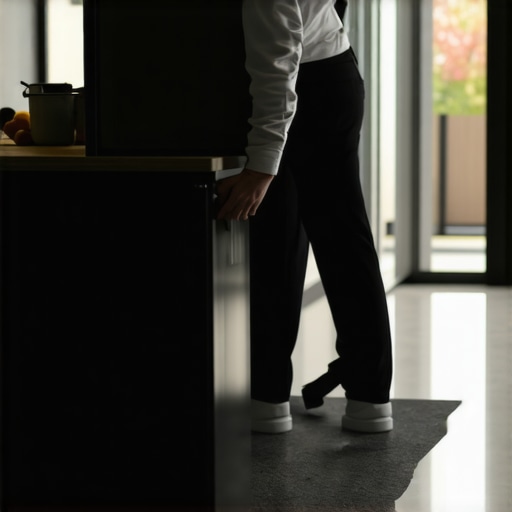
I vividly remember the moment I almost ruined my new hardwood floor because I was desperately trying to clean behind the refrigerator and thought, ‘This has to be easier.’ Instead of addressing the real challenge—reaching those hard spots without scratching the surface—I grabbed a flimsy cloth and a reckless attitude. The result? A tiny scratch on a once-pristine floor and a lesson etched into my cleaning habits. That was my lightbulb moment.
The Real Reason Behind Scratched Floors During Move-Out Cleaning
Anyone who’s ever moved out understands the stress of making everything spotless—sometimes to get back your full deposit or just to leave a good impression. The tricky part? Deep-cleaning behind appliances like the refrigerator without causing damage. Many of us, in our rush, use unsuitable tools—sharp scrapers, abrasive pads, or even brute force—that can harm delicate flooring surfaces. This misstep isn’t just about aesthetics; it can lead to costly repairs down the line.
Here’s the thing: I used to believe that heavy-duty scrubbing or metal scrapers were the answer. Early on, I made the mistake of thinking that more force meant better cleaning. Spoiler: it doesn’t. In fact, improper techniques can leave permanent, unsightly marks that diminish the value of your home and cost a whole lot to fix. Learning from my slip-ups, I discovered that gentle, purpose-designed tools and proper techniques save your floors and your nerves.
For those tackling this challenge, I promise to share practical, proven methods that help clean behind your fridge without scratches—methods I’ve perfected over countless move-outs and house cleanings. And trust me, a well-executed move-out clean isn’t just about surface shine; it’s about preserving the integrity of your flooring while getting every nook sparkling. You’ll find this approach straightforward, even if you’ve never considered it before.
Before I walk you through the how-to, let’s address one common worry I hear often—”Is cleaning behind the fridge really worth the effort?” Well, according to cleaning experts, neglected spots like behind your appliances can harbor bacteria, mold, and grime that impact your home’s overall sanitation and air quality. Plus, professional move-out cleaners emphasize that paying attention to these hidden areas can be the difference between losing your deposit and walking out with a clean sweep—as long as you avoid damaging your floors. To see how simple safe techniques are, check out my step-by-step move-out cleaning checklist.
Now, if you’re ready to tackle this challenge and make your move-out process stress-free, let’s dive into the tactical side of things—specifically, how to reach those difficult spots without risking a costly floor repair. Get your tools ready; it’s time to become the hero of your own cleaning story.
Gather the Right Tools Before You Start
First, select a soft, microfiber cloth or a non-abrasive cleaning pad—think of it as the gentle hand that will avoid scratching your floors. Pair it with a long-handled, flexible grout brush or a microfiber duster on an extension pole—this combo acts as your reach extender, much like a painter’s brush on a long stick, allowing you to clean those hard-to-reach spots without kneeling or crawling.
I remember one weekend cleaning behind my fridge, using a microfiber duster attached to a broomstick. The soft bristles slid effortlessly over the surface, picking up dust and grime without scratching or damaging the finish. It was a game-changer. Avoid metal scrubbers or sharp tools—they’re like using a chisel on fragile glass. Always choose gentle tools, especially for hardwood or laminate surfaces.
Create the Perfect Cleaning Solution
Opt for Gentle, Non-Abrasive Cleaners
Mix a solution of a few drops of mild dish soap in warm water—no harsh chemicals or abrasive scrubbers needed. Think of this as a calming rinse for your floors, like a gentle shower that cleans without stripping protective layers.
For stubborn grime, add a splash of white vinegar to your mix; it’s a natural disinfectant and helps dissolve grease without risking floor damage. Remember: Vinegar is safe for tile and hardwood but test on a small patch first if unsure. This approach ensures you’re sanitizing safely while maintaining the integrity of your flooring and avoiding costly repair bills.
Avoid Harsh Chemicals and Abrasives
Stay away from bleach, ammonia, or commercial heavy-duty cleaners—they’re the equivalent of using a wrecking ball for a delicate sculpture. Instead, stick with eco-friendly, non-abrasive options that are designed to clean effectively without harm.
Implement the Cleaning Technique
Outline your process: Start by unplugging and moving the refrigerator slightly to give yourself room. Protect the floor with a microfiber cloth or towel along the edge where you’ll be working—think of it as laying down a soft carpet for your tools to protect the finish.
Before reaching behind, dampen your microfiber cloth in your prepared cleaning solution, then squeeze out excess water so it’s just damp—not dripping. Use your extension tool to reach behind the appliance. Gently slide the cloth or brush along the surface, avoiding pressing too hard, which could scratch the floor. If you’re dealing with stubborn dirt, re-dampen your cloth and repeat; patience wins here.
Once cleaned, quickly wipe with a dry microfiber cloth to prevent water damage or streaks. I once cleaned behind my fridge without this step, and water pooled slightly, causing a faint mark. Drying immediately prevented long-term issues.
Focus on Safety and Floor Preservation
Use your body weight to gently maneuver the tools, not excessive force. Always keep the tools horizontal relative to the floor to avoid scratching edges or corners. Be mindful of cords or extension poles that could trip you or pull on your appliances, risking damage.
Remember, think of your flooring as a delicate piece of artwork—mild, consistent strokes are your allies, not brute force.
Finish with a Sanitizing Touch
After removing dust and grime, follow up with a sanitizer-safe solution, such as a diluted disinfectant spray suitable for floors, especially in high-touch or neglected spots. Lightly mist the area, and wipe with a clean microfiber cloth. For a natural approach, a water-vinegar solution works well—just ensure proper ventilation.
To keep your cleaning routine efficient, consider scheduling regular maintenance using your new techniques. For detailed checklists, refer to the move-out cleaning checklist, designed to streamline your move and protect your investment.
Many homeowners believe that simply wiping surfaces with a generic cleaner or using disinfectant sprays guarantees a truly sanitized home, but in my experience, this is a subtle trap that can undermine your efforts. The truth is, most people underestimate the importance of proper technique and the nuances involved in effective sanitizing. For example, relying solely on chemical disinfectants without understanding contact time or the type of pathogen you’re targeting can lead to a false sense of security. Industry experts like Dr. Charles Gerba emphasize that how you apply disinfectants matters just as much as the products you choose, citing studies that show inadequate dwell time significantly reduces effectiveness.
Why does mistaking surface cleaning for thorough sanitizing cause problems?
It’s a common misconception that wiping a surface removes all germs, but many bacteria and viruses are invisible and require specific contact times or mechanical action to be eliminated effectively. For instance, a quick wipe with a damp cloth may remove visible dirt but leave behind pathogens lurking in microscopic crevices. Additionally, many don’t realize that porous materials like upholstery can trap bacteria deep within fibers, making superficial cleaning insufficient. This oversight can lead to persistent odors or even health risks, especially during flu seasons or viral outbreaks. To master effective sanitizing, I recommend integrating strategic cleaning routines, such as detailed disinfectant protocols found in the Effective Sanitizing Methods for a Germ-Free Home guide, into your regular cleaning habits.
A likewise underrated aspect is the improper use of cleaning products on upholstery. Many believe that using strong bleach or abrasive chemicals will refresh fabric or cushions instantly, but these harsh agents can deteriorate fibers and reduce upholstery lifespan. Instead, understanding the appropriate eco-friendly solutions for fabric care is crucial. For detailed advice, check out the Ultimate Upholstery Care Guide for Lasting Freshness—it offers advanced tips to prolong fabric life without risking damage.
Beyond product choice, technique plays an essential role. Applying disinfectants with a microfiber cloth, ensuring even coverage, and allowing proper dwell time is vital. Failure to follow these steps can trap bacteria and give a misleading impression of cleanliness. Also, one often overlooked mistake is neglecting hidden spots like behind appliances or under furniture, which can hold dirt and germs that recontaminate cleaned areas over time. Regularly scheduled, comprehensive cleaning strategies are your best defense; consider consulting the Daily House Cleaning Routine to Maintain Perfection for tips on integrating these practices.
In conclusion, the key to true sanitization is understanding that surface cleaning is not enough. It requires strategic application, appropriate tools, and attention to detail—especially on porous surfaces and hidden spots. Remember, superficial cleaning might make your home look good, but it doesn’t necessarily make it safer. Be vigilant about the nuances, and your health and home will thank you. Have you ever fallen into this trap? Let me know in the comments.When it comes to maintaining a spotless home, the right tools make all the difference. My personal favorite is the **Microfiber Supreme Pad**, a lightweight, ultra-soft pad that traps dust and grime without scratching delicate surfaces. I prefer it over traditional sponges because it doesn’t just push dirt around—its electrostatic properties attract particles, ensuring a deeper clean. Pairing this with a **Long-Reach Extension Pole**—specifically, the FlexiReach Pro—allows me to clean behind appliances without kneeling or crawling, reducing strain and risk of damage. This combo has been a game-changer, especially during move-out cleans where every inch counts.
I also rely heavily on a **HEPA Vacuum Cleaner** like the DustMaster 3000. Its advanced filtration system captures microscopic allergens, ensuring the air in my home stays clean and allergen-free. For upholstery, I’ve switched to the **Upholstery Revive Extractor**, which uses hot steam combined with eco-friendly cleaning solutions—this not only refreshes fabric but also sanitizes it without chemicals that might degrade fibers over time.
Looking ahead, the trend is moving toward smart, integrated cleaning systems. I predict a rise in AI-powered devices that can automatically detect and target messes, reducing manual effort. Imagine vacuum robots that also identify areas needing deep cleaning or upholstery that alerts you when it needs attention—integrating technology for truly maintenance-free cleanliness.
Speaking of maintenance, how do I keep these tools functioning optimally over time? Regularly replacing filters in my HEPA vacuum, servicing my steam cleaner annually, and washing microfiber pads after every use ensure peak performance. Also, storing tools properly—dry and in a dedicated space—prevents mold and extends their lifespan.
If you’re serious about long-term results, I highly recommend attempting the **Deep Texture Cleaning Technique** with your microfiber pads. This involves using a light circular motion on textured surfaces, which I’ve found significantly improves dirt removal without scratching. For detailed steps, check out the comprehensive guide on maintaining your cleaning arsenal.
Ready to elevate your cleaning game? Try integrating the Upholstery Revive Extractor into your routine and notice the difference in freshness and hygiene. Proper tools, combined with consistent maintenance, truly keep your house in top shape for years to come. Need personalized advice? Reach out through our contact page—I’m here to help you choose the best equipment tailored to your home.
Lessons Only Experience Can Teach About Sanitizing and House Cleaning
One of the most impactful lessons I learned was that rushing through cleaning behind appliances like the refrigerator can cause lasting damage. Taking the time to select gentle, purpose-designed tools makes all the difference, preventing scratches and preserving your flooring’s beauty. I also realized that neglecting hidden spots isn’t just a missed opportunity—it’s a risk to your home’s health, harboring bacteria and mold. Finally, understanding that superficial wiping doesn’t equate to sanitizing helped me develop a more strategic approach, ensuring every surface is truly clean and safe for future occupants or myself. These insights transformed my cleaning routines from haphazard to intentionally restorative, saving money and stress in the long run.
Tools and Resources That Elevated My Cleaning Game
My go-to toolkit now includes the Microfiber Supreme Pad, which traps dirt efficiently without scratching delicate surfaces. The FlexiReach Pro extension pole allows me to access behind appliances safely, reducing physical strain. I also rely on the DustMaster 3000 HEPA vacuum to maintain excellent indoor air quality, especially in high-traffic areas. For upholstery refreshment, the Upholstery Revive Extractor delivers deep cleaning without chemicals, extending the lifespan of fabrics. If you’re looking to refine your cleaning techniques further, the Effective House Cleaning Secrets from Cleaning Experts and the Move-Out Cleaning Checklist are invaluable resources that helped me achieve professional results and peace of mind.
Your Next Step Toward Flawless Moving Out Clean
The journey to a spotless, damage-free home starts with the right mindset and tools. Remember, effective move-out cleaning is as much about preserving your property’s value as it is about personal satisfaction. Embrace the strategies that prioritize safety, technique, and consistency, and you’ll find the process becomes less daunting and more rewarding. Your home, and your wallet, will thank you for taking these deliberate steps today. Are you ready to elevate your move-out cleaning routine and leave a lasting impression? Share your thoughts or questions below—I’d love to hear how you’re making your cleaning safer and smarter.