
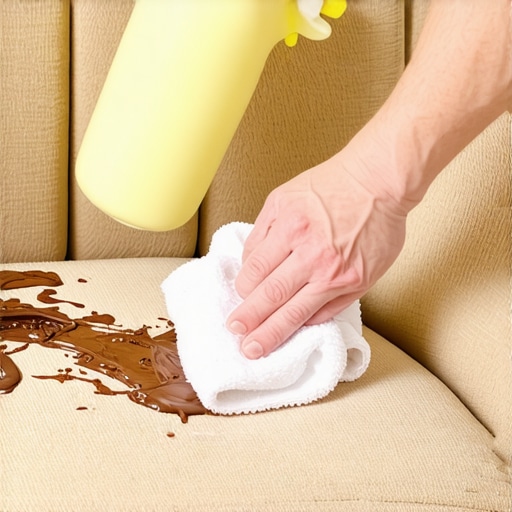
It was a typical lazy afternoon when I watched in horror as my toddler’s hand flung a chocolate bar onto my pristine chenille sofa. The creamy mess spread instantly, turning my once-perfect piece into a sticky riot. In that instant, I realized how easily a simple treat can become a cleaning nightmare, especially on delicate upholstery. Do you know that attempting to clean spills without proper technique can actually make things worse? Trust me, I’ve learned this lesson the hard way. Today, I want to reveal how I finally mastered the art of removing chocolate smears from chenille upholstery without creating a larger mess or damaging my fabric. If you’ve ever faced a similar sticky situation and wondered how to get it all out without turning your sofa into a battlefield, stay tuned. I promise, the method I’m about to share is simple, effective, and gentle enough for even the most sensitive fabrics.
Why Quick Action Matters When Cleaning Chocolate Smears
Will Rushing Your Cleaning Damage Your Couch?
Many people, myself included early on, make the mistake of rushing to remove a spill with harsh chemicals or vigorous scrubbing. I used to think that scrubbing harder would lift the stain faster. Instead, I learned that aggressive cleaning can embed the chocolate deeper into the fibers or cause discoloration. According to professional upholstery care experts, acting promptly and with the right gentle techniques preserves your fabric’s integrity and prevents permanent stains. (Check out their tips at this comprehensive guide.)
Initially, I tried to wipe away the smear with a wet cloth and a splash of soap—big mistake. The stain spread, and I was left with a bigger mess and a stained sofa. That early error taught me a vital lesson: patience and proper cleaning methods are key. Once I understood the significance of gentle blotting and suitable cleaning solutions, my sofa’s fabric stayed vibrant and undamaged. Now, I want to share the step-by-step process I use, which can save you headaches and recovery costs. But first, let’s tackle your biggest worry—”Is it possible to remove chocolate from chenille without ruining the fabric?”.
Start with Gentle Blotting to Lift Excess Chocolate
As soon as you notice the spill, grab a clean, white cloth or paper towel and gently blot the area to absorb as much chocolate as possible. Never rub; pressing without rubbing prevents the stain from spreading deeper into the fibers. I vividly recall the time I immediately blotted a fresh chocolate smear on my sofa, which kept the stain from setting further and made subsequent cleaning much easier.
Prepare a Suitable Cleaning Solution
Mix a mild detergent with cool water—about one teaspoon of detergent per cup of water. Avoid hot water, as it can set protein-based stains like chocolate. Alternatively, use a commercial upholstery cleaner recommended for delicate fabrics, ensuring it’s compatible with chenille. During my last clean, I used a gentle, eco-friendly solution which kept my sofa’s plush texture intact.
Apply the Solution with a Soft Cloth
Dampen a soft microfiber cloth with your prepared solution and gently dab the stained area. Do not soak the fabric; just enough moisture to loosen the stain. Think of this step as pressing a sponge lightly onto a spill rather than scrubbing it in—this prevents fibers from fraying or colors from fading. Remember, patience is key here; let the solution work its magic.
Use Cold Water for Rinsing and Blotting
Dip a clean cloth in plain cold water, wring out excess moisture, and blot the area to remove any residual cleaning solution and loosened chocolate particles. Rinsing prevents residue buildup that can attract more dirt. I once thought leaving soap residue was harmless, but it caused my fabric to become dull over time, highlighting the importance of thorough rinsing.
Dry the Area Properly and Safely
Blot the damp spot with a dry towel to remove moisture, then allow it to air-dry. For faster drying, gently circulate a fan nearby or use a hairdryer on a cool setting. Avoid direct sunlight, which can fade colors. After my last attempt, the fabric was perfectly clean and fluffy, not stiff or discolored, demonstrating the effectiveness of proper drying techniques.
Consider Deep Cleaning for Persistent Stains
If the chocolate remains stubborn, you might need a deeper clean, such as steam cleaning, but ensure your chenille can handle it. Schedule professional upholstery cleaning if necessary, especially for valuable or heavily stained furniture. I once realized that attempting a deep clean myself without proper equipment led to a wet, musty smell, so I opted for professional help from experts, which restored my sofa without damage.
Maintain Your Upholstery for Future Incidents
Regularly vacuum your furniture to remove dust and loose debris, making stains easier to tackle. Using protective slipcovers during messy meals can save significant effort. For ongoing care tips, check out this guide. Remember, acting quickly with gentle methods preserves the fabric’s beauty and longevity, turning a dreaded mess into a manageable task.
Many homeowners believe that scrubbing harder or using harsher chemicals guarantees a cleaner home, but in reality, these misconceptions can lead to damage and ineffective results. One common myth is that bleach is always the best disinfectant; however, experts like those from the Environmental Protection Agency emphasize that proper sanitation often requires specific disinfectants suitable for different surfaces, and overusing harsh chemicals can degrade upholstery and surfaces over time.
Why do so many cleaning efforts fall short even with aggressive scrubbing?
This often stems from not understanding the nuances of cleaning agents and techniques. For example, excessive scrubbing on delicate upholstery or using incorrect cleaning solutions can embed dirt or cause discoloration, rather than remove grime. A professional approach involves targeted methods—like pre-treating stains and understanding material sensitivities—which consistent cleaning guides recommend. Don’t fall into the trap of assuming that more effort (or harsher products) equals better cleanliness. Instead, consider the fabric type, stain nature, and appropriate solutions to avoid permanently damaging your investment. Additionally, many overlook the importance of thorough drying and proper sanitation routines that prevent mold, bacteria, or residual odors from developing. According to research by the National Sanitation Foundation, improper drying and inadequate sanitization are leading causes of bacterial growth in household environments, especially on porous surfaces like upholstery. Be cautious: applying the wrong cleaning method can trap moisture or spread bacteria, making your efforts counterproductive. Continuous neglect of nuanced cleaning details can turn simple chores into costly mistakes. For example, moving-out cleans often focus only on visible dirt, neglecting hidden areas that harbor bacteria or mold, risking loss of security deposits. Learn from professional strategies—like carefully inspecting behind appliances or under furniture—and see how detailed cleaning can make a tangible difference. Want to avoid common pitfalls? Regularly updating your cleaning routine with expert insights ensures you’re not just moving dirt around but genuinely disinfecting and preserving your home’s surfaces. For comprehensive tips on maintaining cleanliness without damage, you can explore this upholstery care guide. Remember, understanding the subtle differences in cleaning approaches—whether for daily maintenance or move-out sanitation—can save you from costly repairs and preserve your home’s value. Have you ever fallen into this trap? Let me know in the comments.Maintaining a clean and sanitized home isn’t just about quick chores; it requires reliable tools and effective methods to ensure long-term freshness. One essential piece of equipment I swear by is a high-quality steam cleaner. Unlike conventional cleaning agents, a steam cleaner uses only hot vapor, making it ideal for deep-cleaning upholstery, tiles, and even curtains without introducing harsh chemicals. My favorite model is the McCulloch MC1385, largely because of its versatility and durability—I’ve used it extensively for stain removal and sanitizing my living space. Over time, investing in a quality steam cleaner has saved me money and extended the lifespan of my furniture, as it effectively kills bacteria and dust mites, preserving fabric integrity. Predicted trends suggest that smart, connected cleaning devices will dominate in the coming years, allowing integration with home automation systems for scheduled maintenance. This means you might soon control your cleaning tools via voice commands or smartphone apps, making upkeep effortless. How do I maintain my cleaning tools to ensure they perform optimally over time? Regular descaling of appliances like steam cleaners and vacuum filters is crucial; I use a vinegar solution for descaling my steam cleaner every few months, which is recommended by experts to prevent calcium buildup ([EPA’s guide on appliance maintenance](https://www.epa.gov)). Additionally, replacing vacuum filters annually ensures that suction power remains strong and allergens are effectively captured. My routine also involves checking tools for wear and tear—damaged brushes or clogged nozzles reduce cleaning effectiveness and can damage surfaces if ignored. Remember, maintenance isn’t just about longevity; it’s about peace of mind that your cleaning routines are thorough. For instance, regularly inspecting and cleaning your upholstery tools can prevent dirt and debris from embedding deeper into fabrics, as detailed in our guide on upholstery care. I encourage you to try my tip: set a monthly schedule for descaling your steam cleaner using a vinegar solution—it’s simple, inexpensive, and makes a noticeable difference in performance. Properly maintaining your cleaning arsenal will save you time, keep your home healthier, and prolong the life of your investment.
Why I Visited the Hardest Lessons in Upholstery Care
One of my biggest surprises was discovering that rushing the cleaning process often worsens stains on delicate fabrics like chenille. I used to scrub aggressively, thinking more effort meant quicker results, only to realize I was damaging my sofa’s fibers. That realization taught me that patience combined with knowledge is the key to effective cleaning, especially with sensitive upholstery. Learning to recognize the right cleaning agents and techniques was a game-changer—saving my furniture and my sanity.
My Go-To Tools That Changed the Cleaning Game
Over the years, I’ve curated a small arsenal that ensures I can tackle stains without fear. A microfiber cloth is my first line of defense, gently blotting to lift spills. A high-quality steam cleaner, like the McCulloch MC1385, works wonders for deep sanitation without harsh chemicals, what I learned from [this trusted source](https://spotlesscarpetz.com/effective-sanitizing-methods-for-a-germ-free-home). Lastly, an eco-friendly upholstery cleaner compatible with chenille has saved me from costly professional treatments, and I trust it because of its gentle yet effective cleaning power.
Now It’s Your Turn to Shine in Upholstery Care
Remember, every spill is a chance to practice patience and gentle techniques that preserve your furniture’s beauty. The next time you face a chocolate mess, don’t panic—apply these insider tips and make cleanup a part of your home’s ongoing care routine. Your sofa will thank you for it and stay vibrant for years to come. If you’re eager for more expert strategies, check out our comprehensive upholstery cleaning guide. What’s the toughest stain you’ve managed to remove without damage? Share your stories below and inspire others to keep their furniture looking pristine.