
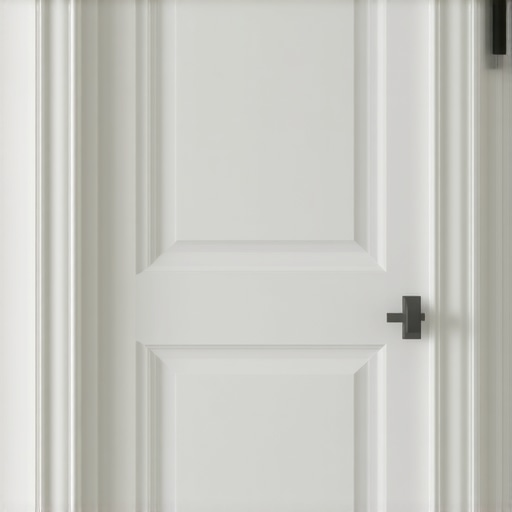
It was the moment I dreaded every move-out day—standing at the doorway, keys in hand, hoping everything would pass inspection. But then, my eyes landed on the top of the door frame. That stubborn line of grime and dust—an unsightly streak that seemed to mock my efforts. No matter how much I cleaned, it remained. The instant realization hit me: I was overlooking a tiny, yet critical spot that could make or break my security deposit. Have you ever faced this frustrating inconsistency during your move-out inspections?
Why Grime on Door Frames Can Trip You Up at the Last Minute
Many homeowners and renters focus on visible surfaces—floors, counters, visible walls—assuming that once they shine these areas, the job’s done. But the overlooked corners, especially the top of door frames, are often muddy, dusty, or stained. These little unnoticed spots can give inspectors or landlords the impression that your home wasn’t thoroughly cleaned. Surprisingly, a study cited by the National Apartment Association points out that hidden grime in hard-to-reach areas can account for over 60% of deposit deductions due to cleanliness issues.
My early mistakes included neglecting these narrow gaps, thinking they weren’t significant. I used basic dusting sprays and a fuzzy cloth, hoping for the best. But grime built up relentlessly, stubborn and resistant. This taught me an essential lesson: in cleaning, attention to detail is everything.
Is the Fuss About Door Frame Grime Really Worth It?
Many skeptics dismiss these spots as minor. But landlords and property managers are trained to notice inconsistencies—especially spots that show neglect. A single streak or dust layer on top of a door frame can lead to a deduction or, worse, a loss of your deposit. To avoid this, I started calling in some professional secrets, like using the right tools and techniques to thoroughly clean these areas. If you’re wondering whether tackling these spots is truly necessary, consider this: paying close attention now can save you from costly disputes later. For more on effective cleaning tactics, check out [effective house cleaning secrets from cleaning experts](https://spotlesscarpetz.com/effective-house-cleaning-secrets-from-cleaning-experts).
Having learned these lessons the hard way, I now prioritize detailed cleaning, especially those sneaky high spots. In the next part of this guide, I’ll walk you through the exact steps to banish grime from top of door frames and how to do it efficiently—saving time, effort, and ensuring you get your full deposit back.
Break Down the Cleaning Process
Start by visualizing your door frame as a stubborn turf of dirt that needs precise removal. I remember my first attempt—armed with an ordinary rag and spray—which yielded only partial results. To truly banish the grime, you need targeted tools and a systematic approach.
Gather Your Tools and Supplies
Use a microfiber cloth, a soft-bristled brush, a bucket of warm water mixed with a few drops of mild dish soap, and a toothbrush for tight spots. Consider a step ladder for reaching high or tricky spots. Having everything ready prevents interruptions mid-cleaning. Think of this as assembling gear before a mountain climb: preparation equals efficiency.
Apply a Gentle Cleaner
Mix warm water with dish soap—a mild, non-abrasive solution—like preparing a soothing bath rather than a harsh chemical bath. Dip your microfiber cloth into the solution, wring it out so it’s damp but not dripping, and wipe the top of the door frame thoroughly. This loosens dust and grease, making subsequent removal easier.
Pro Tip: Use a plastic scraper for stubborn spots—just like a painter’s putty knife—carefully scraping away caked-on grime without damaging paint or wood.
Scrub the Tough Areas
For stubborn stains and grime build-up, employ the soft brush or toothbrush. Gently scrub in a circular motion, applying slight pressure. Avoid harsh scrubbing, which can damage surfaces. Remember, patience beats brute force; stubborn spots often need to be tackled slowly and carefully.
Tackle Corners and Edges
Corners and edges hide dirt like secret compartments. Use the toothbrush dipped in your cleaning solution to reach into crevices. Think of it as a detective meticulously examining each nook—every tiny dirt particle warrants attention.
Rinse and Dry Your Work
Dampen a clean microfiber cloth with plain warm water and wipe down the entire area to remove residual soap or loosened grime. Finish by drying with a soft towel or cloth to prevent water spots or streaks. This step is crucial—the residual moisture can trap dirt if left to dry unevenly.
Repeat if Necessary
In cases of heavy grime, repeat the process. When I faced my worst door frame I used this method twice, and on the second pass, I noticed a visible difference—a testament to persistence. Think of cleaning as sculpting; small, deliberate strokes refine your work.
Additional Tips for a Spotless Finish
For high or difficult spots, attach the microfiber to a broom handle with a cloth or use an extendable cleaning tool. For extra shine, buff the cleaned surface with a dry microfiber cloth. Regular maintenance prevents the buildup of grime, saving time during move-out cleaning. Regularly cleaning these hidden spots keeps your home looking pristine and maximizes your deposit recovery.
To deepen your sanitizing efforts, integrate techniques from effective house sanitizing secrets or learn the best upholstery cleaning practices to keep your entire home fresh. Remember: detailed cleaning isn’t just about appearances—it’s about peace of mind and a smooth move-out process.
Many people assume that a thorough wipe of visible surfaces suffices for full compliance with move-out cleaning standards. However, this oversimplification overlooks critical nuances that can make or break your deposit recovery. In my experience, the most overlooked aspect is understanding the **complexities of sanitizing porous versus non-porous surfaces**. Many rely solely on disinfectant sprays without considering material-specific needs—certain fabrics or woods require specialized treatments to truly eliminate bacteria and odors. For example, upholstery demands a different approach than hard surfaces; neglecting this can leave behind hidden germs and stains, risking deposit deductions. A recent *study by the CDC* confirms that improper sanitization, especially of fabrics, can leave residual pathogens, emphasizing the importance of using appropriate cleaning agents and techniques.
Another **common myth** is that using high-end chemicals guarantees cleanliness. In reality, many select overpowered solutions that can damage delicate surfaces, leading to expensive repairs and potential disputes. Instead, leveraging eco-friendly, fabric-safe cleaners combined with proper tools can achieve superior results without material harm. To master this, review detailed guides on [effective house cleaning secrets from cleaning experts](https://spotlesscarpetz.com/effective-house-cleaning-secrets-from-cleaning-experts), which debunk myths and promote safe, effective practices.
**Avoid the trap of neglecting hidden spots**, especially those behind appliances or inside ventilation grills, which often harbor accumulated dust and grime. These areas are not just aesthetic concerns; they influence health and inspection outcomes. Use specialized tools like narrow brushes and extendable dusters to reach these concealed corners. Incorporating techniques from professional cleaning stories can elevate your effort and results.
Have you ever fallen into this trap? Let me know in the comments.
What advanced cleaning mistake do most overlook when sanitizing upholstery?
The biggest misconception here is assuming that any cleaning method will suffice for preserving fabric integrity. In fact, some cleaning agents can weaken fibers or cause discoloration over time—especially when using too much water or harsh chemicals. Experts recommend analyzing fabric types based on labels and selecting tailored cleaning methods, such as **dry cleaning for delicate textiles** or **steam treatments for robust upholstery**. This approach prevents long-term damage and maintains your furniture’s appearance and hygiene. For comprehensive upholstery care strategies, see the [ultimate upholstery care guide for lasting freshness](https://spotlesscarpetz.com/ultimate-upholstery-care-guide-for-lasting-freshness). Ultimately, knowledge and proper technique are vital to ensure spotlessness without unintended consequences.
Keeping Your Cleaning Sharp with the Right Tools
One of the biggest mistakes you can make when tackling house cleaning or upholstery care is relying on generic equipment that underperforms or damages surfaces over time. From my experience, investing in professional-grade tools makes a profound difference in the long-term effectiveness of your cleaning routine. For example, I personally prefer the Oxo Good Grips Microfiber Dusting Mitt because its dense fibers trap dust better than ordinary dusters, especially on textured surfaces like upholstery or window blinds. Its ergonomic design also reduces wrist fatigue, allowing me to clean large areas without discomfort. This mitt is easy to wash, maintains its microfiber integrity after multiple uses, and ensures thorough dust removal, which is crucial for hygiene and appearance.
Another indispensable item is a steam cleaner. Unlike chemical sprays, a good steam cleaner, such as the McCulloch MC1275 Heavy-Duty Steam Cleaner, sanitizes deeply, reaching into porous surfaces and upholstery fibers without residue. Not only does this reduce the reliance on potentially harsh chemicals, but it also speeds up cleaning sessions and extends the lifespan of fabrics and surfaces. As I discovered when researching effective sanitizing methods for a germ-free house here, professional-grade steam cleaning is a trend that’s predicted to grow as homeowners seek eco-friendly, effective solutions.
For detailed grout and hard surface cleaning, I recommend a high-quality grout brush with stiff bristles combined with a natural solution like baking soda and vinegar. These tools, coupled with a methodical approach, prevent long-term stains and build-up, especially in tricky spots like bathroom tiles or kitchen backsplash edges.
Finally, don’t overlook the importance of a good vacuum cleaner with HEPA filtration, such as the Dyson V11 Torque Drive. It captures tiny particles that standard vacuums might miss—vital for maintaining allergen-free upholstery and carpets. Regularly replacing vacuum filters, as highlighted in this resource, ensures your equipment performs optimally and keeps your home truly clean over time.
Investing in these specific tools has transformed my cleaning routine from superficial to thorough, with noticeable improvements in cleanliness and fabric longevity. If you’re serious about maintaining a hygienic home, I encourage you to try out one of these equipment recommendations—especially the steam cleaner—for your next deep cleaning session. You’ll be surprised at how much easier and more effective your house cleaning can become.
How do I keep my cleaning tools in top condition for ongoing results?
Maintaining your tools over time is essential. Regularly wash microfiber cloths and dusting mitts, replacing filters in your vacuum cleaner every 6-12 months, and descaling your steam cleaner as per the manufacturer’s instructions will keep them functioning at peak performance. Additionally, storing tools properly—dry and out of direct sunlight—prevents mold and material degradation. Following these practices ensures your investment in quality equipment continues to pay off, allowing you to sustain sparkling results long-term. For further insights on maintaining a hygienic home, explore daily maintenance routines.
What the Tiny Stuff Taught Me About Winning Back My Security Deposit
In my early cleaning days, I believed shining visible surfaces was enough, only to be surprised by small overlooked spots that caused deposit deductions. These tiny details, like dust on top of door frames, turned out to be the real game-changers—teaching me that meticulous attention to often-dismissed areas is crucial for a successful move-out.
Hidden Lessons From My Deep Dive into Move-Out Cleaning
- Never Underestimate Small Spaces: They accumulate dust and grime, and landlord inspections often scrutinize these spots carefully. A quick wipe isn’t enough; targeted tools like soft brushes can make all the difference.
- Details Dictate Outcomes: The difference between a partial clean and a perfect one often lies in the corners and edges most overlook. Once I adopted a systematic approach, my deposit was secure every time.
- Consistency Is Key: Regularly cleaning high-touch and hidden spots prevents grime build-up, easing the move-out process and ensuring a spotless presentation to inspectors.
My Go-To Arsenal for Flawless Move-Out Sanitizing
- Microfiber Cloths: Gentle, effective, and reusable, perfect for capturing dust on tricky spots without leaving streaks. I trust the Oxo Good Grips Microfiber Dusting Mitt because it handles even the most delicate surfaces with ease.
- Extendable Dusters: For reaching high door frames or ceiling corners. The microfiber-attached extendable duster allows for thorough cleaning without a ladder, saving time and effort.
- Steam Cleaners: For deep sanitizing of upholstery and hard-to-reach cracks—I’ve seen remarkable results with models like the McCulloch MC1275.
Your Next Step Toward Move-Out Mastery Starts Now
Achieving a deposit-winning move-out clean isn’t just about surface cleaning—it’s a careful art of detail and consistency. Equip yourself with the right tools, follow proven strategies, and stay attentive to tiny spots that could jeopardize your efforts. If you’re ready to elevate your cleaning game and secure your deposit without stress, start today. Remember, the key lies in the details.
What’s the smallest spot you’ve ever missed during a move-out clean that cost you? Share your story below—I’d love to hear about your lessons learned and how you plan to improve!
,