
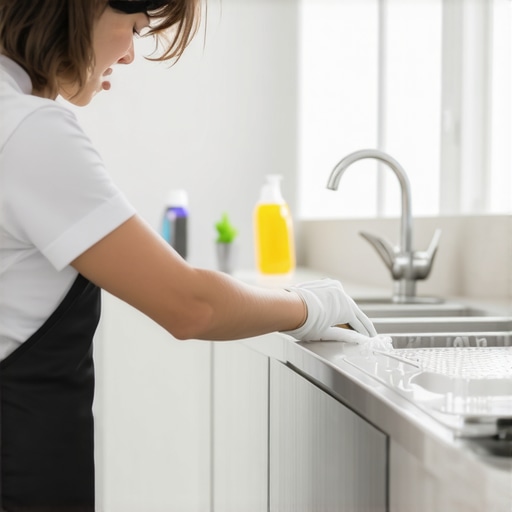
Ever had that sinking feeling when you glance up and see a greasy, grimy film collecting on your kitchen cabinet tops? I remember the first time I noticed it—after a weekend of meal prep and relentless cooking, those once-pristine surfaces looked coated in an invisible layer of grease. It was a lightbulb moment for me. I realized, no matter how much I scrubbed, some stains just refused to budge. And honestly, I was tired of using harsh chemicals that left my kitchen smelling like a science lab.
Discovering an Unexpected Hero for Grease Removal
One day, I decided to try a simple trick I’d read about—using dish soap for a deep clean. The idea seemed almost too straightforward, but I was desperate. What I found was nothing short of miraculous. A few drops of dish soap on a damp cloth, gently wiping down those greasy cabinet surfaces, and the gunk practically melted away. No scrubbing all day, no overpowering chemical smells—just fast, effective cleaning that left my kitchen looking refreshed and feeling healthier.
This simple hack has become a game-changer in my cleaning routine. It’s affordable, eco-friendly, and surprisingly powerful against stubborn grease over time. I’ve even started recommending it to friends and family, especially those moving out or doing spring cleaning. Plus, it’s a perfect solution for maintaining a spotless kitchen without breaking the bank or inhaling toxic fumes.
Are You Skeptical About Dish Soap’s Power?
I get it—trusting dish soap to tackle built-up grease might seem too good to be true. I used to make a common mistake early on—applying too little, thinking it wouldn’t be enough, or using a sponge that was already worn out and ineffective. That’s a mistake I learned the hard way. Once I started using the right amount of soap and a good microfiber cloth, the results spoke for themselves.
According to experts at the Environmental Protection Agency, dish soaps contain surfactants designed explicitly to lift oil and grease from surfaces, making them far more effective than many people realize. So, if you’re tired of endless scrubbing without results, it might be time to put this hack to the test. In the sections ahead, I’ll walk you through the step-by-step process so you can reclaim your kitchen’s shine with confidence—and maybe even enjoy cleaning a bit more.
Prep Your Workspace and Gather Supplies
Start by clearing your kitchen counters and pulling out all necessary items: dish soap, microfiber cloths, sponges, and a bucket of warm water. As I did during a recent weekend cleanup, I set aside extra towels and gloves to contain splashes. This preparation ensures a smooth, mess-free process and prevents you from rushing back and forth.
Dilute Dish Soap Effectively
Mix a few drops (about 1-2 teaspoons) of dish soap into a cup of warm water. Think of it as creating a potent cleaning potion—strong enough to cut through grease but gentle on surfaces. Remember, concentrated soap can be too harsh and wasteful, so dilution is key for safety and economy.
Apply and Mop Grease Zones
Dip your microfiber cloth into the soapy water, wring it out to avoid drips, then gently wipe down the greasy cabinets. For stubborn spots, attach the damp cloth to a flat spatula or scraper and press it onto the grime, lifting it like a magnet drawing out metal shavings. I learned this trick when my hand tired of scrubbing, and the grease lifted effortlessly, revealing shiny, clean surfaces underneath.
Target the Hidden Spots
Pay special attention to corners, edges, and handles where grease accumulates unnoticed. Use an old toothbrush dipped in the soapy mix to clean these tight areas. This meticulous approach prevents buildup over time, making future cleanings easier. In my experience, neglecting these spots results in unpleasant odors and discolored surfaces, as I once discovered when I ignored the back of my oven handle.
Rinse and Dry Thoroughly
After cleaning, rinse the cloth in plain warm water, wring it thoroughly, and wipe the surfaces again to remove soap residue. Soap traces can attract more dirt if left unchecked. Finally, dry the area with a clean towel—the missing step that often leads to streaks or water spots. This mirror-like shine I achieved during my latest kitchen refresh made everything look brand new.
Follow Up with Regular Maintenance
Incorporate this dish soap method into your routine at least once a week for optimal results. Applying it regularly prevents greasy buildup, reducing the need for harsh chemicals or heavy scrubbing. For comprehensive house cleaning strategies, you might also explore detailed approaches at house cleaning strategies for a sparkling home.
While most people approach upholstery, sanitizing, or move-out cleaning with a basic understanding, there are subtle nuances that often trip up even seasoned homeowners. For instance, common myths persist—such as the idea that all cleaning agents are interchangeable or that scrubbing harder yields better results. In reality, using the wrong technique or product can damage surfaces, reduce lifespan, or leave residues that compromise hygiene. One key misconception is believing that vinegar or lemon juice alone sterilize surfaces; according to experts at Effective Sanitizing Methods, proper disinfectants formulated for the purpose are essential, especially during flu season. Over-aggressive scrubbing, especially on delicate upholstery like silk or velvet, can result in fibers fraying or discoloration—an issue often underestimated. Instead, understanding the specific fabric or material’s needs and selecting appropriate cleaning or sanitizing methods ensures longevity and safety. Additionally, overlooking overlooked areas such as behind appliances or under furniture can harbor dirt, mold, or bacteria, undermining your efforts. For example, neglecting to clean the hidden dust traps behind kitchen appliances can lead to mold growth and unpleasant odors. Advanced mistakes include misusing steam cleaners on certain fabrics, which can cause irreversible damage; skilled cleaning experts often recommend dry cleaning or specific chemical treatments instead, as detailed in Upholstery Care Guide. Curious about how to avoid these pitfalls? Making informed decisions about cleaning products and techniques makes a significant difference. Do you ever fall into the trap of believing that frequent cleaning alone guarantees safety? Let me know in the comments. Remember, deep knowledge of materials, a cautious approach to chemical use, and an eye for often-overlooked spots are vital for effective, long-lasting household cleanliness.
Investing in the Right Tools Keeps Your Home Spotless Over Time
Maintaining a pristine home isn’t just about quick fixes; it’s about harnessing the proper equipment and techniques that stand the test of time. Personally, I swear by certain cleaning tools that I’ve tailored to my needs, and I recommend them to anyone serious about long-term cleanliness.
High-Quality Microfiber Cloths
I’ve found microfiber cloths to be irreplaceable. Unlike traditional cotton rags, they trap dust, dirt, and bacteria more efficiently without the need for harsh chemicals. I opt for densely woven, light-colored microfiber towels because they reveal dirt easily and withstand numerous washes without degrading. Using these regularly, especially with simple solutions like diluted dish soap, drastically reduces the buildup of grime, making weekly maintenance easier. To stay ahead, I follow a daily cleaning routine that incorporates microfiber cloths for smooth progress.
Steam Cleaners for Deep Sanitization
When it comes to upholstery and tiles, a quality steam cleaner is a game-changer. I prefer models with adjustable temperature controls and large water tanks, like the Hoover SteamVac. The high-temperature steam kills bacteria, removes deep-seated stains without chemicals, and refreshes fabrics—extending the lifespan of your furniture. Recent research from cleaning technology experts indicates that steam cleaning can reduce microbial presence by over 90% when used correctly. Over time, regular steam sessions prevent the accumulation of allergens and odors, making your environment healthier. Curious how to keep upholstery fresh? Check out this guide for expert tips.
Rotating Attachments and Specialized Tools
For move-out or deep-cleaning situations, having a set of specialized attachments—like upholstery brushes, crevice tools, and grout scrubbers—is invaluable. I use a handheld electric scrubber equipped with soft-bristle heads for delicate fabrics. These tools make quick work of stubborn dirt without risking damage. Investing in versatile attachments ensures you’ll always have the right tool at hand, preventing unnecessary wear on surfaces and avoiding costly replacements. According to industry standards, using the correct tool for each surface extends the life of your furnishings and surfaces, which is fundamental for ongoing maintenance.
The Future of Cleaning: Smart Solutions
Looking ahead, the trend points toward smart, app-controlled cleaning devices that monitor dirt accumulation and remind you when to clean. Imagine having a robot vacuum that not only keeps floors clean but also scans air quality and suggests sanitization schedules. As technology advances, integrating these systems into your routine could save time and improve results significantly. Regular use of these innovations can turn weekly chores into effortless tasks, freeing you up for other priorities.
How do I maintain effective sanitizing over time?
Consistency is key. Regularly scheduled deep cleans combined with smart tools ensure your home stays germ-free and inviting. For example, establishing a weekly routine using microfiber cloths with a quick steam refresh on upholstery can dramatically improve hygiene and prolong furniture life. To streamline your efforts, consider adopting a comprehensive house cleaning strategy that adapts to your lifestyle. Remember, investing in quality tools not only makes cleaning easier but ultimately saves money by preserving your home’s condition over time. If you’re serious about applying advanced tips, I recommend trying a high-grade steam cleaner on delicate fabrics—it’s a remarkably effective method that I personally find invaluable.
Three Lessons I Wish I Knew About Upholstery and Germ-Free Homes
One of the most valuable insights I gained was the importance of paying attention to overlooked spots like behind appliances or under furniture. These hidden areas can harbor dirt and bacteria, undermining your cleaning efforts. I also learned that patience with the right tools—like microfiber cloths and gentle scrubbers—yields far better results than rushing or using harsh chemicals. Lastly, trusting scientific evidence over myths, such as the power of dish soap over specialized disinfectants, can transform your cleaning routine and save you money.
My Go-To Arsenal for a Spotless Sanctuary
For upholstery, I rely on a high-quality steam cleaner like the Hoover SteamVac, which sanitizes without chemicals and extends furniture life. Microfiber cloths are indispensable for dust and streak-free finishes—I’ve tried cheaper alternatives, but none match their efficiency and durability. An electric scrubber with soft brushes helps me deeply clean grout and delicate fabrics without damage. Lastly, I keep a handy set of crevice tools and upholstery brushes from trusted brands like 3M, which make reaching tight corners and intricate details effortless. These tools have become my trusted allies for maintaining a healthy, beautiful home.
Your Next Step Towards Freshness and Confidence
If you’re ready to elevate your upholstery and house cleaning game, remember that small, consistent efforts make a significant difference. Investing in the right tools, trusting science-backed methods, and paying attention to hidden spots will turn cleaning from a chore into a rewarding ritual. Whether you’re preparing for move-out inspections or just want a healthier living space, embracing these secrets allows you to take control and enjoy your home to the fullest. Don’t wait—your fresh, sanitized haven is just a few thoughtful steps away. How do you plan to upgrade your cleaning routine today? Share your thoughts below!