
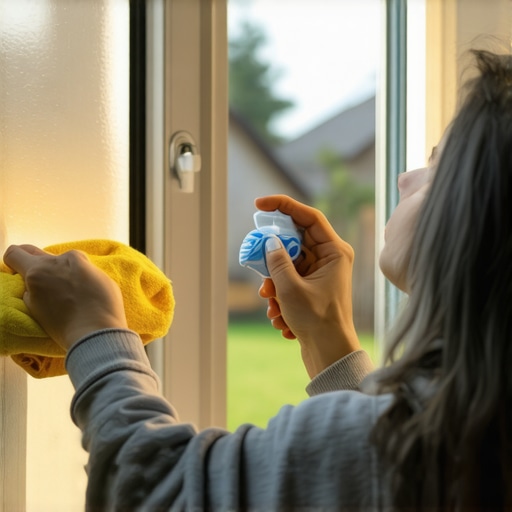
It was a typical Saturday afternoon when I finally hit my breaking point. I was attempting to clean the grimy, stubborn residue caked into my window tracks—those little grooves that seem to collect dust, dirt, and all sorts of household mysteries. No matter how much I scrubbed or how many specialized tools I considered borrowing, the mess refused to budge. That lightbulb moment hit me: there had to be a way to make this easier, cheaper, and less frustrating.
Why Cleaning Window Tracks Can Feel Like an Uphill Battle
If you’ve ever tried to tackle these tight spots, you know the struggle. The narrow space, combined with the gunk that’s baked in over time, makes it nearly impossible to reach with regular cloths or brushes. Plus, using the wrong tools can lead to scratches or even damage. I remember once trying to use a metal scraper, only to realize I’d risked gouging the frame. That experience taught me something crucial: you don’t need fancy, expensive tools to do the job right.
Many folks overlook a simple truth—most of the time, the best solutions are right in your kitchen or cleaning cabinet. A common mistake I made early on was thinking I needed a specialized tool, but instead, I learned that common household items could be more effective—and safer. In fact, according to cleaning experts, you can achieve squeaky-clean window tracks using just a few everyday items.
Ready to see how you can drastically improve your cleaning routine? I’ll walk you through a straightforward method that won’t involve scraping, prying, or buying any new gadgets. And trust me, once you see how simple it is, you’ll wonder why you ever struggled with those stubborn residues.
Is There Really an Easy Way to Clean Windows Without Special Tools?
The truth is, yes! I’ll share my tried-and-true trick that saves time, effort, and your patience. Before that, let me tell you about a mistake I made early on—using harsh chemicals that not only failed to work but also damaged the rubber seals. Learning what to avoid is just as important as knowing what works, and I’ll point out some pitfalls so you can skip the common pitfalls that trip up many homeowners.
Stay tuned, because what I discovered transformed my cleaning days from a dreaded chore to a manageable task. Plus, the approach is eco-friendly, affordable, and oh-so-effective. Now, let’s get into the step-by-step process that will make your window tracks look brand new, with no specialized tools required.
Prepare Your Workspace and Gather Supplies
Before diving into the cleaning process, clear the area around your window to prevent any accidental spills or drops. Gather essential household items: a microfiber cloth, an old toothbrush, a small bowl of warm water, dish soap, white vinegar, baking soda, and a spray bottle. These simple materials will be your arsenal for a thorough clean. I once tackled my grimy window tracks during a rainy weekend, ending up with a satisfying streak-free finish that improved my view instantly.
Remove Loose Debris and Dust
Start by brushing out loose dirt and dust from the tracks with an old toothbrush. Think of it like sweeping crumbs off a countertop; it loosens the gunk before the deeper clean. Be thorough—dislodge dirt trapped deep inside the grooves. Using a microfiber cloth to catch the dust ensures nothing settles back during the next steps. This initial step significantly cuts down on grime, making subsequent cleaning more effective and less time-consuming.
Apply a Cleaning Solution and Scrub
Mix a few drops of dish soap with warm water in your bowl. Dip your toothbrush into this solution and scrub along the track, focusing on areas with stubborn build-up. Imagine how you’d clean a dirty grill; persistent scrubbing dislodges baked-in residue. For extra stubborn spots, sprinkle a bit of baking soda directly onto the area after applying the soap solution. This abrasive, natural scrubber helps lift grime without scratching the surface. Avoid harsh chemicals—these can damage rubber seals or paint. I once used just dish soap and baking soda on my own window tracks and achieved noticeable results without any harsh fumes or damage.
Let Natural Acids Break Down Dirt
Now, fill your spray bottle with equal parts white vinegar and water. Spray this mixture generously onto the tracks—think of it as a natural solvent that eats away at greasy residues. White vinegar acts like an all-natural degreaser, turning stubborn gunk into loose, rinsable grime. Allow the solution to sit for 5-10 minutes, giving it time to work. During this waiting period, I once tackled my kitchen grime and was amazed how easily the vinegar loosened even the most baked-in dirt, reducing the need for aggressive scraping.
Wipe and Rinse for a Fresh Finish
Using a damp microfiber cloth, wipe away the loosened dirt and residue. Follow this with a dry cloth to remove moisture, preventing mold and rust. For recessed or hard-to-reach spots, use the toothbrush dipped in clean water to rinse out remaining debris. Visualize it as washing a car; rinsing away soap and dirt leaves the surface gleaming. The result? Smooth, clean tracks that slide effortlessly—no scratches or damage, just a polished finish achievable with everyday items.
Maintain Regularly for Long-Lasting Cleanliness
To keep your window tracks pristine, repeat this process every few months. Regular maintenance prevents the build-up of dirt that turns into stubborn grime. Think of it like brushing your teeth—early cleaning prevents cavities. I set a reminder to do this seasonal clean, which has helped me preserve the lifespan of my window parts and always enjoy a clear view without the hassle. Mastering this routine with common household ingredients makes home maintenance both affordable and eco-friendly, transforming what was once a dreaded chore into a quick, satisfying task.While many homeowners believe they master upholstery care and house cleaning, there are nuanced mistakes that often go unnoticed. One false assumption is that high-temperature washing always sterilizes fabrics; however, excessive heat can damage fibers and color. In reality, experts recommend gentle cleaning to preserve longevity, as detailed in the [Upholstery Care Guide](https://spotlesscarpetz.com/ultimate-upholstery-care-guide-for-lasting-freshness). Another overlooked nuance is the use of vinegar for sanitizing surfaces. Though popular, vinegar isn’t effective against certain viruses and bacteria, as confirmed by studies from the CDC, which advise specialized disinfectants for true sanitation.
A common myth is that move-out cleans solely focus on visible dirt. Advanced move-out cleaning requires attention to hidden grime—like behind appliances or within vents—that can jeopardize your deposit refund if overlooked. To avoid such pitfalls, consult move-out checklists, like the one available [here](https://spotlesscarpetz.com/move-out-cleaning-hacks-ensure-your-deposit-refund), ensuring nothing is missed.
Have you ever fallen into this trap? Let me know in the comments.
What about deep sanitizing—are your methods truly effective? Many rely on surface-level sprays, but deep cleaning involves understanding the materials and choosing appropriate agents, like bactericidal wipes for electronics or steam cleaners for upholstery. Using inappropriate disinfectants can cause fading, damage, or residues, which is why professional advice emphasizes tailored solutions. For instance, [house cleaning strategies](https://spotlesscarpetz.com/house-cleaning-strategies-for-a-sparkling-home-today) recommend specific products depending on surface types.
Lastly, misconceptions around microfiber cloths suggest they are universally superior. While microfiber traps dust effectively, improper washing or using them with certain chemicals can reduce their effectiveness or even spread bacteria. Proper maintenance and usage are critical, as outlined in [microfiber cleaning tips](https://spotlesscarpetz.com/effective-house-cleaning-secrets-from-cleaning-experts).
Being aware of these hidden nuances helps you elevate your cleaning game beyond basic expectations. Remember, informed cleaning isn’t just about surface appearance but ensuring your home’s hygiene and fabric preservation. Need personalized advice? [Contact us](https://spotlesscarpetz.com/contact-us-2) for expert tips tailored to your home.Keeping your home spotless over time requires not just diligence but also the right tools and methods that stand the test of time. As someone who has experimented extensively with various cleaning equipment, I can confidently recommend investing in a high-quality steam cleaner for upholstery. Unlike traditional vacuuming or spot-cleaning sprays, a steam cleaner penetrates deep into fibers, killing bacteria and loosening grime without harsh chemicals. I personally use the Bissell SteamShot, which is compact, affordable, and incredibly effective for refreshing sofas, curtains, and even mattresses. As noted in [effective sanitizing methods](https://spotlesscarpetz.com/effective-sanitizing-methods-for-a-germ-free-home), steam cleaning not only cleans but sanitizes surfaces, making it a vital tool for families and allergy sufferers alike. Looking ahead, the trend points toward smarter, eco-friendly cleaning devices that integrate IoT technology—allowing remote operation and real-time monitoring of cleanliness levels. For now, sticking with tried-and-true equipment like steam cleaners ensures you achieve long-lasting results.
How do I maintain my cleaning tools to ensure they perform at their best over time?
Regular maintenance is key to prolonging the lifespan of your tools. For electric steam cleaners, this means descaling every few months using manufacturer-recommended solutions, and thoroughly drying components after use to prevent mold growth. Microfiber cloths should be washed separately in hot water with minimal detergent to preserve their electrostatic properties. Investing in a quality storage system, such as a dedicated cleaning caddy, helps keep your tools organized and ready for routine maintenance. Also, replacing worn-out brushes and filters as suggested in professional cleaning guides can prevent decreased efficiency. In terms of software, if you rely on cleaning apps or scheduling tools, keep them updated to streamline your routine and adapt to new methods. By routinely caring for your equipment, you’ll ensure consistent performance, making household chores less burdensome and more effective.
Looking into the future, the advancement of eco-friendly, AI-enabled cleaning systems, and robotic vacuums that learn your home’s layout, will revolutionize long-term maintenance strategies. Until then, taking good care of your current tools maximizes their lifespan and keeps your home shining. Don’t forget—regular deep-cleaning sessions using reliable tools like steam cleaners significantly extend the life of your upholstery and surfaces. I encourage you to try my favorite tip: invest in a quality steam cleaner and commit to descaling and maintaining it every few months for optimal performance. For more detailed guidance on upholstery care, check out the [ultimate upholstery maintenance guide](https://spotlesscarpetz.com/ultimate-upholstery-care-guide-for-lasting-freshness). Happy cleaning!
Why Conventional Wisdom About Upholstery and House Cleaning Can Lead You Astray
One of the biggest lessons I learned was that many popular cleaning myths are just that—myths. For instance, I used to believe that harsh chemicals were necessary for deep sanitizing. Turns out, this approach can damage fabrics and surfaces, and there are gentler, more effective alternatives, as highlighted in the [effective house cleaning secrets from cleaning experts](https://spotlesscarpetz.com/effective-house-cleaning-secrets-from-cleaning-experts). This realization saved me time, money, and stress—and improved my home’s safety.
What I Wish I Knew When I Started My Upholstery and Move-Out Cleaning Journey
- Patience is Key: Rushing through cleaning often leads to missed spots and frustration. Taking it slow and methodical ensures better results and less damage.
- Tools Don’t Have to Be Expensive: Reliable household items can outperform costly gadgets. For example, a simple microfiber cloth can do wonders—see [microfiber cleaning tips](https://spotlesscarpetz.com/why-microfiber-is-better-than-cotton-for-sanitizing-surfaces).
- Regular Maintenance Saves Hassle: Scheduling periodic cleaning prevents buildup. I now set seasonal reminders that keep my home pristine without the last-minute scramble.
- Deep Cleaning Isn’t a One-Time Fix: Consistency beats occasional effort. A little work every month keeps dust and grime at bay, making deep cleans easier.
Tools and Resources That Changed How I Approach Cleaning
- High-Quality Steam Cleaner: For upholstery, a steam cleaner delivers deep sanitization without chemicals. I trust the Bissell SteamShot because of its affordability and effectiveness, as recommended in [effective sanitizing methods for a germ-free home](https://spotlesscarpetz.com/effective-sanitizing-methods-for-a-germ-free-home).
- Move-Out Cleaning Checklists: Clear guides like [the move-out clean checklist](https://spotlesscarpetz.com/move-out-clean-checklist-to-simplify-your-transition) help ensure nothing gets overlooked, especially during stressful moves.
- Natural Cleaning Solutions: Vinegar, baking soda, and dish soap form a powerful trio. They’re eco-friendly, budget-friendly, and safe for fabrics—perfect for house and upholstery cleaning.
- Educational Content and Community: Staying informed through resources like [ultimate upholstery care guide](https://spotlesscarpetz.com/ultimate-upholstery-care-guide-for-lasting-freshness) has empowered me to avoid costly mistakes.
Your Next Step Towards a Truly Clean Home
Cleaning smart and with purpose transforms a mundane task into a satisfying routine. The secret isn’t just about having the right tools but developing a mindset geared toward consistency and learning. Whether you’re freshening up your upholstery or preparing for a move-out inspection, embracing these lessons and resources will make a tangible difference. Imagine walking into your home, knowing every surface has been cared for with confidence—this is achievable with the right knowledge and attitude. Don’t wait—start tonight by reviewing your cleaning routine and making a plan that incorporates these insights. Your home, your sanctuary, deserves it.