
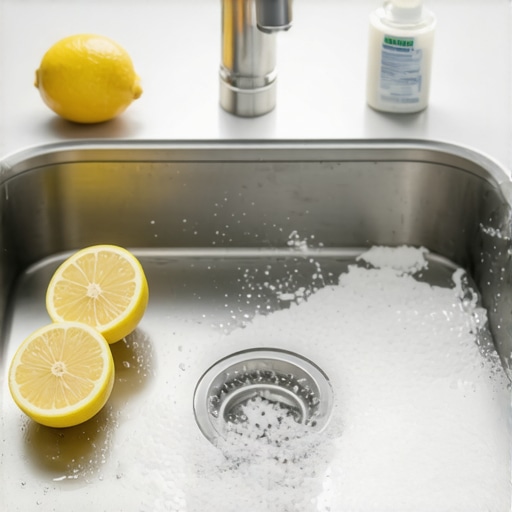
Have you ever been hit with that awful, unavoidable smell coming straight from your kitchen sink, making your entire house stink just when you’re about to relax or welcome guests? I remember the first time it happened to me; I thought maybe my trash was overflowing or there was a hidden spill I missed. But nope. It was just my garbage disposal, quietly chuckling at my obliviousness with its own relentless stench.
That moment of realization was indeed eye-opening. No matter how clean I kept my countertops or how often I mopped floors, there was this stubborn, nose-wrinkling smell sneaking out from the drain that refused to go away. Frustrating! I tried everything, from pouring baking soda down to enzymatic cleaners. Yet, nothing seemed to solve the problem for long.
Then I stumbled upon a simple trick that changed everything: a quick, 2-minute fix that can totally freshen up your disposal. And the best part? It’s so straightforward, you’ll wonder why you didn’t try it sooner. Today, I’ll share the exact method I use and help you conquer that foul smell once and for all.
Why a Smelly Garbage Disposal Is More Common Than You Think
Many homeowners don’t realize that their garbage disposal can harbor bacteria, mold, and food debris—culprits behind those unpleasant odors. According to the Environmental Protection Agency, kitchen sinks are among the two dirtiest spots in the home, harboring germs that can multiply quickly if not properly maintained. A lingering smell isn’t just unpleasant; it can also point to underlying hygiene issues that could affect your health.
I made a significant mistake early on: I believed that regular cleaning with just soap and water was enough. Spoiler alert—it’s not. That’s why understanding the root causes of disposal odors and addressing them with simple hacks is crucial. Trust me, a little knowledge and the right technique can save you from permanent stinks and expensive repairs.
Now, let’s get into the fix that has become my go-to quick solution, one that I think you’ll love. Want to make your kitchen smell fresh in just a couple of minutes? Keep reading. I promise, your nose will thank you sooner than you think.
Is this quick trick really worth trying? The skeptics’ questions answered
I get it—many skeptics worry that a quick fix might only be temporary or just a myth. Believe me, I was there too. But over time, I’ve refined this method, and I can proudly say it works wonders—even on stubborn smells that have persisted for days. A mistake I made early on was neglecting routine maintenance, which only worsened the odor over time. Incorporating this simple step into my cleaning routine transformed how my disposal smells day-to-day. If you’re tired of masking smells with sprays or manually scrubbing, this little trick might just be your new best friend.
Ready to say goodbye to that sour, rotten smell? Let’s dive into the easy, effective steps that will leave your disposal smelling clean and fresh—starting with that quick 2-minute fix.
Prepare Your Workspace and Gather Supplies
First, clear the area around your sink to ensure easy access and prevent water from splashing onto your cabinets. You’ll need a few simple supplies: ice cubes, coarse salt or baking soda, and optionally, lemon peels or vinegar for extra freshness. I remember once when I was rushing to clean before guests arrived, I gathered these items hastily and spilled a bit of salt on the countertop, creating a small mess, but it was worth it for the fresh results.
Start with the Ice and Salt or Baking Soda
Pour about a cup of ice cubes into your garbage disposal, then add half a cup of coarse salt or baking soda. Turn on the cold water faucet and run your disposal at full speed for about 15-20 seconds. This combination acts as a scrub brush, chipping away grease and debris stuck inside. I once did this after a heavy pasta night, and the next morning, the disposal felt noticeably cleaner, and the smell was significantly reduced.
Enhance with Lemon Peels or Vinegar
For added freshness, drop some lemon peels into the disposal or pour a small amount of vinegar down the drain while the disposal runs. Lemon brightens the smell and helps break down residue. I remember I used lemon peels left over from making lemonade, which made the kitchen smell invigorating. Be cautious with vinegar if your plumbing contains natural stone, as acids can sometimes cause damage.
Flush and Finish
After running the disposal with ice and salt, turn off the unit and flush with hot water for about 30 seconds to wash away loosened debris. Do this regularly—once a week—to maintain freshness. I found that sticking to this routine prevented odors from returning and kept my sink smelling fresh without any chemical sprays. For more expert house cleaning tips, explore effective house cleaning secrets.
Many homeowners and renters believe they fully understand the nuances of upholstery care, move-out cleaning, and sanitizing. However, common misconceptions often lead to ineffective results or even damage. For instance, a widespread myth is that all fabrics require the same cleaning approach; in reality, upholstery materials vary significantly, and using the wrong method can cause fading or deterioration. According to the upholstery expert at Spotless Carpetz, tailored cleaning strategies are essential for longevity and freshness.
Another trap many fall into during move-out cleaning is over-reliance on harsh chemicals. While they might seem effective, they can leave residues that attract more dirt or damage surfaces over time. Instead, implementing targeted cleaning hacks—like deep-cleaning appliances with eco-friendly solutions—can make a significant difference. For example, move-out hacks focus on thorough yet gentle techniques that protect the property and ensure your deposit return.
When it comes to sanitizing, a common misconception is that using disinfectants alone guarantees a germ-free environment. While disinfectants are effective, their success depends on proper application time and surface compatibility. A more advanced understanding involves knowing which areas require more frequent attention, such as light switches, doorknobs, and HVAC filters. The expert cleaning strategies suggest a multi-step approach combining cleaning, disinfecting, and regular maintenance.
Beware of the Oops! trap: many people damage valuable furniture or surfaces simply because they overlook material-specific cleaning instructions. For example, natural stone countertops and delicate fabrics need special care to avoid etching or staining. Ignoring these nuances can lead to costly repairs or replacements. An insightful resource is the home cleaning guide that emphasizes correct techniques tailored to various materials.
So, next time you tackle upholstery, move-out cleaning, or sanitizing, remember that knowledge of the finer details sets apart a professional job from amateurish results. If you want a comprehensive, safe, and effective cleaning routine, consider exploring upholstery care tips or advanced sanitizing methods. Have you ever fallen into this trap? Let me know in the comments.Maintaining your cleaning tools and equipment is crucial for achieving long-term cleanliness and efficiency. Personally, I swear by a few specialized tools that have transformed my routine, saving me time and ensuring quality results. One of my top picks is the **O-Cedar Microfiber Flip Mop**. This mop features a dual-sided microfiber pad that can be flipped, allowing me to scrub stubborn spots and switch to a fresh side without changing equipment. I’ve found that its washable pads reduce waste and keep my floors spotless without the need for harsh chemicals. For sanitizing smaller surfaces like bathroom fixtures or kitchen counters, I rely on the **Virex Plus Hospital-Grade Disinfectant**. I’ve used it extensively in professional cleaning for its proven efficacy, as detailed in the CDC’s guidelines on disinfectants effective against Norovirus and other pathogens. Using a high-quality disinfectant like Virex ensures safety and peace of mind, especially during move-out cleans or post-illness sanitation.
Three Surprising Lessons That Changed My Cleaning Outlook
One of the most eye-opening lessons I learned was that regular cleaning routines aren’t enough to keep odors at bay—especially in areas like upholstery or move-out cleaning where hidden grime lurks beneath the surface. It took my own experience with stubborn smells to realize that understanding the materials I was working with—be it delicate fabrics or natural stone—made all the difference. Discovering that not all cleaning hacks work universally taught me the importance of tailored approaches and the patience to find what truly works. I also learned that investing in quality tools, like eco-friendly upholstery vacuums and professional-grade disinfectants, pays off by saving time and avoiding damage. These insights have transformed my cleaning strategy from a rushed chore into a mindful practice that ensures lasting freshness.