
I was staring at the floor, horrified. Not because of the dust bunnies—those were expected—but because of the deep, permanent gouges I’d just carved into my landlord’s hardwood. I was trying to be thorough for my final walkthrough, but instead of earning my security deposit back, I was staring at a repair bill. That was my first big move-out mistake. I tried to manhandle a 300-pound appliance without a plan. If I’d known then what I’m about to tell you, I could have moved that fridge with two fingers and zero damage.
You Don’t Need Muscle to Move a Refrigerator
Most people treat moving the fridge like a heavy-weight lifting competition. They grunt, they pull, and they pray the floor doesn’t rip. We’ve all been there, right? You realize you haven’t looked back there in three years and the thought of what’s growing near the coils is enough to make you want to move houses instead of cleaning. But here’s the reality: that space is a magnet for more than just dust. It’s often where we find the hidden mold trap inside your refrigerator drip pan, which can impact the air your family breathes every single day. [image_placeholder_1] Look, I’m your neighbor, not a professional drill sergeant. I know that after packing fifty boxes, the last thing you want to do is play tug-of-war with a Frigidaire. It is exhausting! But ignoring the black hole behind your appliances is a gamble I don’t want you to take. In my early days of DIY cleaning, I assumed clean just meant what I could see. I’d spray some cleaner on the doors and call it a day. But when you’re prepping for a move, you have to go deeper. Using specific move-out cleaning hacks to ensure your deposit refund is the difference between getting your money back and losing five hundred dollars for floor restoration. Plus, a clean fridge runs better. According to the U.S. Department of Energy, cleaning your refrigerator’s condenser coils can improve energy efficiency by as much as 30 percent in some older models.
Will this trick actually save my security deposit?
I hear this all the time: the inspector won’t even look back there! Trust me, they will. If they see a pristine kitchen but find a wall of cat hair and old grease behind the fridge, they know you haven’t really deep cleaned. They’ll start looking closer at your upholstery or the baseboards. By mastering this one simple trick, you signal that you’ve taken care of the home. It is part of the broader sanitizing secrets for a safer house in 2025 that every renter should know. Have you ever tried to move your fridge and felt like it was bolted to the floor? Tell me about your most stuck appliance moment in the comments—I promise I have had worse! The trick isn’t about strength; it is about reducing friction. Whether you use the soapy floor method or the cardboard slide, the goal is to protect your back and your flooring. We’re going to dive into the exact steps so you never have to fear the behind-the-fridge abyss again. While the fridge is out, you might as well use the quickest way to clean your refrigerator shelves to finish the job, and don’t forget to check your move-out clean checklist to ensure you haven’t missed any other sneaky spots.
Don’t Let Friction Ruin Your Hardwood
Before you even touch the handles, you need to understand that moving a fridge is about physics, not power. Think of your refrigerator like a giant sled on dry asphalt; it doesn’t want to move. Your job is to turn that floor into an Olympic ice rink. I learned this the hard way during a humid July move. I tried to pull a massive unit across some delicate linoleum and nearly tore the floor in half. I was using all my strength, but it stayed stuck until I realized I was fighting friction, not weight. This is why move-out cleaning strategies to secure your deposit always start with protecting the physical structure of the home.
Strip the Fridge Down to Its Skeleton
Your first step is to remove every ounce of unnecessary weight. Take out the milk, the condiments you haven’t used since 2022, and all the glass shelving. This makes the unit significantly lighter and prevents internal damage if the fridge tilts. Once it’s empty, you must secure the power cord and the water line. I once saw a friend trip over his own fridge cord, nearly pulling the whole thing down on top of him. Tape the cord to the back of the unit. This is one of those effective house cleaning secrets from cleaning experts: keep your tools and cords managed so you can focus on the task at hand.
Create a Slippery Runway
Now for the ‘magic’ trick. You need two long strips of thick cardboard or heavy-duty plastic sliders. Tilt the fridge back slightly—you might need a buddy for this—and slip the protection under the front feet. If the floor is tile or stone, you can even use a small amount of dish soap and water as a lubricant on the floor itself. When I did this in my last apartment, the fridge practically floated out of its nook with a single push. 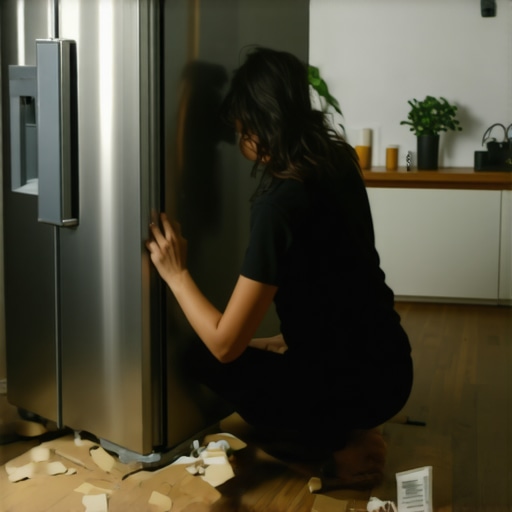 Just be careful; once it starts moving, it doesn’t want to stop! Using cardboard ensures you aren’t leaving those dreaded black rubber marks or deep scratches that scream ‘amateur move’ to your landlord.
Attack the Grime While the Space is Open
Once the fridge is out of the way, you’ll likely see a graveyard of Cheerios and dust. This is your one chance to shine. Remember, why you should always start cleaning from the top of the room applies even to these narrow gaps. Dust the walls first, then move to the floor. You’ll want to pay special attention to the space between the stove and countertop nearby, as grease often migrates between these appliances and creates a sticky bond.
Blast the Dust Off the Coils
While the back is exposed, use a vacuum with a narrow attachment to clean the condenser coils. If you’ve ever wondered what your move-out inspector is really looking for in the kitchen, it is often these neglected mechanical areas. A dusty coil forces the fridge to work twice as hard, which can lead to it dying right as the new tenant moves in—a massive headache you don’t want. Use a damp microfiber cloth to wipe down the back of the appliance and the baseboards. It takes five minutes but makes the whole kitchen smell five years younger.
Stop Spraying Your Surfaces Directly
Most people think that more is better when it comes to cleaning products. They walk into a kitchen and spray every cabinet, countertop, and appliance until the room is dripping with chemicals. In my early years, I did the exact same thing, thinking I was being thorough. But here is the truth that professional cleaners won’t always tell you: you are likely doing more harm than good. When you douse a surface, the liquid seeps into cracks, hinges, and electronics, often causing long-term damage or sticky buildup that actually attracts more dust later. This is exactly why you should never spray cleaning products directly on surfaces. Instead, spray your microfiber cloth first. This gives you control and ensures you aren’t leaving behind a film that your move-out inspector will definitely feel with their fingertips. Have you ever fallen into this trap and ended up with more streaks than you started with? Let me know in the comments!
The Mop Bucket Trap Most Renters Fall For
If you are still using a single-chamber mop bucket to clean your entire apartment, you are effectively just painting your floors with gray, dirty water. This is the ‘Oops’ factor that costs people their ‘pristine floor’ status during an inspection. You start in the bathroom, dunk the mop, and then carry those bathroom germs straight into the kitchen. It is one of the biggest effective house cleaning secrets from cleaning experts: keep your rinse water separate. Understanding why your mop bucket is spreading more dirt than it removes is the first step toward a floor that actually passes the white-sock test. For a truly deep clean, I always recommend the two-bucket method or using a high-quality steam mop to ensure you are actually removing pathogens rather than relocating them.
Is it possible to sanitize surfaces without leaving a chemical residue?
Advanced cleaners often worry about the toxic film left behind by heavy-duty disinfectants. The nuance here is ‘dwell time.’ Most people spray and wipe instantly, which does almost nothing to kill bacteria. According to the Centers for Disease Control and Prevention (CDC), most household disinfectants require a specific ‘dwell time’—sometimes up to ten minutes—to actually kill the pathogens listed on the label. If you want a residue-free finish, you must use effective sanitizing methods for a germ-free home that include a final rinse with plain water after the disinfectant has done its job. This is particularly important on food-prep surfaces or if you are using sanitizing hacks for safe house transitions to protect the next family moving in. 
Avoid the Upholstery Ghost Mark
Finally, let’s talk about that living room chair. If you try to spot-clean a single stain on a fabric sofa without cleaning the entire panel, you’ll end up with a ‘ghost mark’—a ring of clean fabric that highlights how dirty the rest of the piece is. This is a common move-out mistake. Always refer to upholstery cleaning tips for a fresh home revival before you touch a stain. If you aren’t careful, you’ll be left trying to explain a giant water ring to your landlord. When you are following your move-out clean checklist, remember that consistency across the entire surface is the only way to avoid these amateur pitfalls. By using these move-out cleaning strategies to secure your deposit, you aren’t just cleaning; you are performing a professional-grade restoration of the space.But let’s be honest—you can’t perform a professional restoration with a paper towel and a prayer. If you’re tired of seeing dust settle five minutes after you finish, it’s probably because your gear is failing you. I used to buy the cheapest vacuum at the big-box store until I realized I was just rearranging the dirt. Now, I swear by a vacuum with a sealed HEPA system. This isn’t just marketing fluff; it’s about air quality. When you’re following your move-out clean checklist, a bad vacuum will spit fine particles back out, and why your house still feels dusty even after you just vacuumed is usually down to a lack of proper filtration or a clogged filter. Check your manual; if you haven’t cleaned the intake in months, why your vacuum isn’t picking up dirt like it used to becomes painfully obvious. According to the Institute of Inspection Cleaning and Restoration Certification (IICRC), using a vacuum with HEPA filtration is critical for capturing particles as small as 0.3 microns, which includes many common allergens and bacteria that regular bags simply let pass through.
Get the Right Tools Before You Start
For floors, stop pushing a dirty mop around and look into a high-quality steam mop. I’ve found that learning how to sanitize your bathroom floor using steam alone is a game changer for households with pets or toddlers. It cuts through grime without the sticky chemical residue that usually attracts more dirt. Also, ditch the old cotton rags. If you’ve ever wondered why your microfiber cloths are leaving lint everywhere, it’s usually because they’ve been washed with fabric softener, which ruins their static charge. Using the right house cleaning strategies for a sparkling home today requires maintaining your tools just as much as your surfaces. 
How do I maintain that ‘just cleaned’ feeling over time?
The secret isn’t a 10-hour cleaning binge every Sunday; it’s a sustainable daily house cleaning routine to maintain perfection. I focus on high-touch points and ‘resetting’ the kitchen every night. By staying on top of small spills, you prevent them from becoming the permanent stains described in the ultimate upholstery care guide for lasting freshness. Looking ahead, I suspect we’ll soon see ‘smart’ cleaning tools that use built-in sensors to tell us exactly when a surface is biologically clean, moving us toward more effective house cleaning secrets from cleaning experts. For now, I challenge you to try one advanced tip: the next time you clean your mirrors, use a dry, high-gsm microfiber cloth with zero cleaning solution first to buff out oils before you ever reach for a spray. You’ll be shocked at the streak-free results!
What My Most Expensive Cleaning Disaster Taught Me
After years of scrubbing floors and fighting for every dime of my security deposits, I’ve realized that the most common move-out cleaning mistakes that cost renters money usually happen because we rush the final hour. Here are the lightbulb moments that changed my approach forever:
- The ‘Clean-Smell’ Illusion: Spraying air freshener doesn’t fool anyone. A landlord looks for tactile cleanliness. If the top of the door frame is dusty, they assume the whole house is. Always use house cleaning strategies for a sparkling home today that focus on these often-ignored ‘touch points’.
- Sanitization vs. Visual Cleaning: In 2025, a ‘clean’ house must also be a safe one. Mastering sanitizing secrets for a safer house in 2025 is as much about peace of mind for the next tenant as it is about getting your check back.
- The Power of the Photo: I never finish a clean without taking a timestamped video of the inside of the oven and the back of the fridge. Documentation is your best defense against an unfair deduction.
The Toolkit That Actually Gets Your Deposit Back
I don’t believe in buying every gadget on the shelf, but these items are non-negotiable if you want a professional finish without the professional price tag:
- A Sealed HEPA Vacuum: If you want to know why your house still feels dusty even after you just vacuumed, it is likely because your filter is letting fine particles escape. A HEPA-rated machine is the only way to ensure you aren’t just recirculating the dust.
- High-GSM Microfiber Cloths: Forget paper towels. Using high-quality microfiber with the secret to streak-free mirrors using just a microfiber cloth saves you money and leaves a better shine.
- The Steam Mop: It is the fastest way to how to sanitize your bathroom floor using steam alone, cutting through hairspray and soap scum without sticky chemicals.
- A Professional Reference: Keep the ultimate upholstery care guide for lasting freshness bookmarked to handle those sudden ‘oh no’ moments with the sofa before the walkthrough.
[image_placeholder_final]
Turn Your Move-Out Into a Fresh Start
Moving is inherently stressful, but your final move-out cleaning doesn’t have to be the breaking point. Think of this process as a final thank you to the space that held your life for a while, and a gift to the person moving in next. When you establish a consistent daily house cleaning routine to maintain perfection in your new place, you’ll never have to face a mountain of grime during a transition again. You’ve got the tools, the tricks, and the neighborly advice to leave this place better than you found it. Go get that deposit back! Have you ever found a surprise ‘treasure’ (or a total nightmare) behind an appliance when moving out? Let me know in the comments below!