
I was crawling around on my kitchen floor last Tuesday, hunting for a stray cherry tomato, when a smell hit me. It was not the ‘something died in the walls’ kind of smell, but a heavy, damp, basement-like funk that felt completely out of place in my sunny kitchen. I realized I had not properly looked under the appliance since we moved in. When I finally popped off that plastic kick plate and slid out the drip pan, I nearly lost my appetite. It was a literal swamp of gray sludge and fuzzy black spots. I have always prided myself on having effective house cleaning secrets from cleaning experts, but here I was, living on top of a mold factory.
Stop Ignoring the Sludge Factory Under Your Fridge
We spend so much time worrying about sanitizing hacks for safe house transitions when we move, but we often overlook the working parts of our daily appliances. The refrigerator drip pan is the ultimate ‘out of sight, out of mind’ trap. It is designed to catch condensation, which is fine, but the heat from the compressor turns that water into a warm bath for mold spores. I made the rookie mistake of thinking the water just evaporated into thin air before anything could grow. I was dead wrong. If you are not checking this every few months, you are basically running a humidifier filled with allergens. In fact, researchers from NSF International found that while we scrub our counters, the hidden areas around our appliances often harbor some of the highest concentrations of mold and yeast in the entire kitchen. This is especially critical if you are currently working through a move-out clean checklist to simplify your transition; ignoring this spot could cost you.
Is a Dirty Drip Pan Actually Making You Sick?
You might be wondering if a little tray of water can really impact your health. Think about it: your fridge has a fan that blows air over the coils to keep things cool. That air is circulating right next to—and sometimes over—that stagnant, moldy water. If you have been sneezing more often or noticed a lingering musty scent that even ultimate upholstery care guide for lasting freshness cannot fix, this is your primary culprit. It is a vital step in any house cleaning strategies for a sparkling home today. Have you ever actually checked yours, or are you too afraid of what you might find? Today, I am going to show you exactly how to tackle this gross task without losing your mind.First things first, you need to find the access point. Most modern refrigerators house this tray behind a plastic kick plate at the bottom front. It’s like a secret trapdoor that leads to a very unpleasant basement. I remember my first time doing this; I tugged on the plate so hard I thought I would snap the plastic tabs, but a firm, steady pull usually does the trick. Once that is off, you will see the pan sitting right there, often nestled near the condenser coils. If you are lucky, it is dry. If you were like me that Tuesday, it is a petri dish of gray goo. This is a critical step in move-out cleaning strategies to secure your deposit, because landlords will definitely notice if the kitchen smells like a swamp.
Pull the Pan Out Without a Flood
Slow and steady is the name of the game here. If the pan is full of liquid, pulling it too fast is a recipe for a kitchen floor disaster. I once yanked it out in a hurry and watched a wave of lukewarm, moldy water soak into the floorboards. It was a nightmare. While you are down there, you should also take a moment to see how to clean the gaskets in your fridge to prevent mold, as the two areas often share the same bacterial colonies. Use a flashlight to see if there are any hidden screws holding the pan in place. Most just slide out like a drawer, but some older models might require a bit of unscrewing. 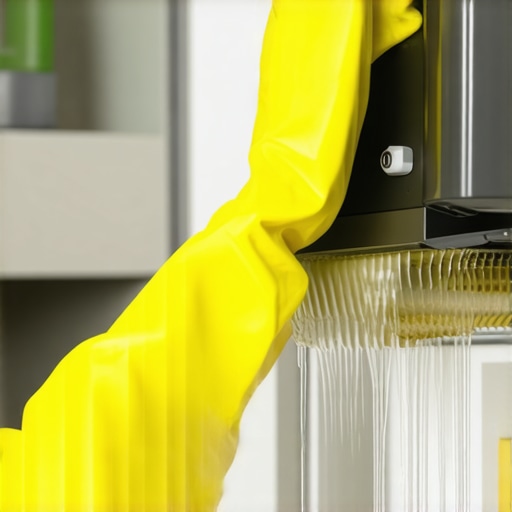
Scrub Away the Biofilm with Heat
Once you have the tray in the sink, do not just rinse it with lukewarm water. That biofilm—that slippery layer of bacteria—is surprisingly resilient. You need effective sanitizing methods for a germ-free home. I use a mix of hot water, a splash of bleach, and a stiff brush. When I cleaned mine, the gunk was so thick I had to let it soak for twenty minutes before the black spots would even budge. It is the same level of attention you would give if you were following sanitizing secrets for a safer house in 2025. Scrub every corner, especially the ridges where the water tends to pool and stagnate. If the plastic is stained, do not sweat it too much as long as the surface is smooth and clean to the touch.
Prevent the Sludge from Returning
Drying the pan completely before putting it back is the most overlooked part of the process. If you put a damp pan back into a warm, dark spot, you are just hitting the reset button on the mold growth. I like to let mine air dry in the sun for an hour. This task is not something you need to do every week, but it should definitely be part of your daily house cleaning routine to maintain perfection on a quarterly basis. Sliding it back in should be easier than getting it out. Just make sure it sits level; if it is tilted, the condensation will not collect properly and you will end up with a mystery puddle on your floor in a week.This “out of sight, out of mind” mentality is where most homeowners fail. We often assume that if it looks clean to the naked eye, the job is done. But here is the nuance most people miss: cleaning and sanitizing are two completely different beasts. Most people swear by natural solutions, but there is a reason why vinegar is not always the best choice for granite countertops or deep-seated refrigerator sludge. It simply does not have the chemical muscle to dismantle a matured biofilm.
The Dwell Time Trap That Ruins Your Sanity
In my years of obsessive cleaning, the biggest “oops” factor I have seen is the lack of dwell time. We are all guilty of it—spray, wipe, and move on. However, if you are using effective sanitizing methods for a germ-free home, you have to let the product sit. A study published in the Journal of Applied Microbiology found that many common household pathogens require up to ten minutes of contact time to be fully neutralized. If you are just misting that drip pan and wiping it dry immediately, you are essentially just giving the mold a refreshing bath. This is also why you should never spray cleaning products directly on surfaces like your fridge’s control panel; you risk moisture damage while achieving zero actual sanitization.
Can Bacteria Build Shields Against Your Cleaning Products?
If you have ever wondered the reason your bathroom grout stays orange even after you scrub it, you have encountered a biofilm shield. Bacteria create a protective, slimy matrix that acts like a raincoat against your cleaners. To beat this, you need mechanical agitation—not just a light wipe, but a focused scrub with a stiff brush to break that physical barrier before the sanitizer can work. This is why your living room still smells like pets after you vacuum; the odors are often trapped in a microscopic layer that simple suction won’t reach. Have you ever fallen into this trap of the “quick wipe” only to find the funky smell returns a few days later? Let me know in the comments. When you are implementing sanitizing secrets for a safer house in 2025, remember that patience is your most powerful tool. When you are rushing through a move-out clean checklist to simplify your transition, the temptation to cut corners is massive. I have seen people use heavy bleach on everything as a shortcut, but leaving chemical residue is a major mistake. This is exactly why your floors feel sticky even after you finished mopping. The same rule applies to your furniture. A common trap is over-wetting the fabric. If you have been following an ultimate upholstery care guide for lasting freshness, you know that moisture is the enemy of deep fibers. People often think more water equals more clean, but in reality, it just leads to internal mold growth that you cannot see but can definitely smell. This is why you should never use a steam cleaner on these specific upholstery fabrics like silk or velvet. Always test a small area first, and focus on low-moisture extraction. Whether you are dealing with a fridge tray or prepping for move-out cleaning strategies to secure your deposit, giving your cleaners the time to work is the difference between a surface that looks clean and one that is actually safe.To truly get ahead of the grime, you need to stop thinking about your hands and start thinking about your reach. I used to think a microfiber cloth was the pinnacle of cleaning technology, but for those tight gaps under the fridge or behind the stove, it is essentially useless. Now, I never start a deep session without my flexible radiator brush. It is about 30 inches long and thin enough to slide into the narrowest crevices where the drip pan sits. This tool is a game-changer for effective house cleaning secrets from cleaning experts because it physically dislodges the dust bunnies that trap moisture and lead to mold. If you are currently tackling move-out clean checklist to simplify your transition, this brush is your best friend for ensuring you do not leave behind a decade of debris.
The Tools That Actually Reach the Hidden Sludge
Beyond the brush, I have become a bit of an evangelist for the handheld steam cleaner, but with a major caveat. You have to know the limits of your equipment. While steam is fantastic for loosening that refrigerator sludge, you must follow up with a dry wipe to prevent instant re-contamination. This is the same logic used when you are looking for upholstery cleaning tips for a fresh home revival; moisture is a tool, not a solution on its own. For the absolute best results, I recommend the specialized coil cleaning brushes used by HVAC technicians. According to the Association of Home Appliance Manufacturers (AHAM), keeping your condenser coils and drip areas free of debris can actually extend the life of your compressor by up to 30%. That is a massive financial incentive to get down on your hands and knees once a quarter.
How can I keep these hidden areas clean year-round?
The secret is not more scrubbing, but better scheduling. I integrated a “Deep Zone” check into my daily house cleaning routine to maintain perfection, but only for five minutes on the first of every month. I use a high-lumen flashlight to inspect the drip pan and the area where the stove meets the cabinets. If you see shadows, you have dust. If you see a shine, you might have a leak. This proactive approach is part of the sanitizing secrets for a safer house in 2025 that I live by. It is much easier to wipe a dusty tray than it is to scrub a fermented one.
Future Cleaning Trends: Smart Sensors and UV-C
Looking ahead, I predict we are going to see a shift toward “passive sanitation.” We are already seeing smart refrigerators with built-in leak detectors and internal air purifiers. In the next few years, I expect UV-C light strips to become standard in refrigerator drip zones to kill mold spores before they can even settle. Until then, we have to rely on house cleaning strategies for a sparkling home today that prioritize physical removal and proper ventilation. If you are prepping for a big move, remember that move-out cleaning strategies to secure your deposit depend on these small, overlooked details. Here is my advanced tip for you: next time you have the drip pan out, place a single copper penny in the bottom of the tray. The copper acts as a natural algicide, slowing down the growth of that gray sludge between cleanings. Try it this weekend and see if it doesn’t make your next deep clean significantly less disgusting.
The Hardest Lessons I Learned About Invisible Sludge
One of the biggest eye-openers for me was realizing that “clean enough” is often a lie we tell ourselves to save time. When it comes to the areas beneath our appliances, if you can smell it, the bacterial colony has already established a stronghold. I have learned that effective house cleaning secrets from cleaning experts are not about working harder, but about working smarter. For instance, I used to think the “self-evaporating” feature meant maintenance-free. It does not. Dust acts as a wick, drawing water out of the pan and onto the floor before it can evaporate, which is often why your floors feel sticky even after you finished mopping. Another lightbulb moment was discovering that the air your family breathes is directly influenced by the state of that tray. If you want a truly fresh home, you have to look at the parts you cannot see from the doorway.
My Essential Toolkit for Appliance Sanitization
To keep my kitchen running like a well-oiled machine, I rely on a few non-negotiables. First is a high-lumen LED flashlight; you cannot clean what you cannot see in those dark gaps. Second, a flexible radiator brush is the only way to reach deep enough without moving the entire fridge. I also swear by upholstery cleaning tips for a fresh home revival techniques for the surrounding areas, as fabrics nearby can absorb those damp odors. Finally, do not underestimate the power of a simple copper penny in the tray to inhibit growth. These small additions are far more effective than any “as seen on TV” gadget and form the backbone of my house cleaning strategies for a sparkling home today.
Take Control of Your Kitchen Health
It is easy to feel overwhelmed by the hidden corners of your home, but remember that every small step you take makes your living space safer. Whether you are prepping for a move and using move-out cleaning hacks to ensure your deposit refund or just want to breathe easier tonight, tackling the refrigerator drip pan is a massive win for your health. Integrating these checks into your daily house cleaning routine to maintain perfection prevents the sludge from ever returning. You have the tools and the knowledge now—do not let the “sludge factory” win. Have you ever braved the area under your fridge, or are you too scared to look? Let me know in the comments below!