
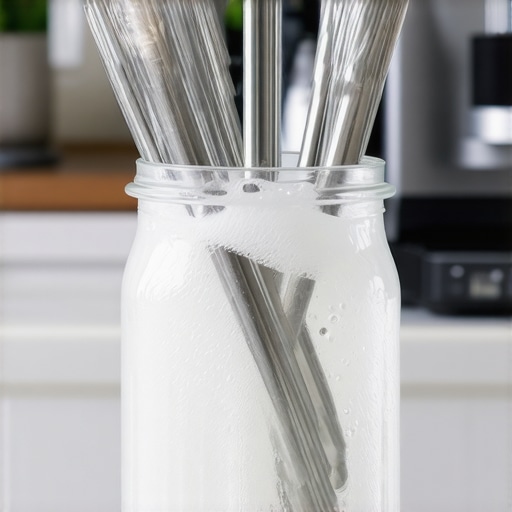
I’ll never forget the Tuesday I decided to actually peek inside my favorite silicone straw. I’d been using it for my morning kale-and-berry smoothie for months, faithfully rinsing it under the tap every single day. I thought I was being the ultimate green-living champion. But when I held it up to the light and saw a fuzzy, dark grey film clinging to the inner walls? I nearly lost my breakfast. It wasn’t just a stain; it was a science experiment. I didn’t have one of those pipe-cleaner brushes—they always seem to disappear into the kitchen drawer abyss—and I realized that ‘rinsing’ is basically just giving germs a warm bath. If you’ve been there, you know that heart-sinking feeling of ‘Wait, have I been drinking mold?’
Stop the Rinse and Hope Routine
We’ve all been sold this idea that you need a specific kit for every chore in the house. But let’s be real. When you’re doing a house cleaning, you don’t always have the exact gadget ready. My biggest mistake early on was thinking that boiling water alone would do the trick. I once threw my favorite straws into a rolling boil for twenty minutes. Bad move. The silicone ended up with a weird, tacky texture and the metal ones stayed hot enough to burn my fingers for an hour. You don’t need to overcomplicate things to maintain effective sanitizing methods for your kitchenware. I quickly learned that the real secret isn’t high heat or fancy tools, but a bit of simple friction and the right household basics.
Is it actually possible to get these clean without a brush?
I get the skepticism. How are you supposed to reach that mysterious middle section? It feels like trying to clean a tiny, narrow cave. However, physics and the right cleaning agents do most of the heavy lifting. A surprising fact found in research published by the International Journal of Environmental Research and Public Health highlights that reusable items like straws can develop complex biofilms—layers of bacteria—that are significantly more resistant than loose germs. This means a quick rinse does absolutely nothing to the ‘stuck-on’ stuff. Have you ever looked inside your reusable straw and immediately considered throwing the whole thing away? Don’t toss it yet. You can achieve a professional-level clean using things you likely already have in your pantry, and I’m going to show you how to do it without spending a dime on new gadgets.
Turn Your Straw into a Mini Cocktail Shaker
You don’t need a specialized tool when you can use simple hydraulic pressure. Think of your straw like a tiny, enclosed pipe system. If you plug both ends, the liquid inside has nowhere to go but against the walls. Fill the straw halfway with warm water and a single drop of concentrated dish soap—this is the same dish soap trick experts use to cut through heavy kitchen film. Plug the ends tightly with your thumbs and shake it vigorously for thirty seconds. This creates a high-velocity soapy sudsing action that loosens the ‘easy’ debris. I remember the first time I tried this; I didn’t plug the bottom end well enough and ended up spraying soapy smoothie residue all over my clean backsplash. It was a mess, but the straw actually sparkled afterward. Using this as part of your daily house cleaning routine ensures that sugars don’t have the chance to harden into that stubborn, grey biofilm. 
The Dental Floss and Cloth Pull-Through Method
When the shake isn’t enough, you need to bring in the heavy hitters: friction. This is the ultimate ‘MacGyver’ move for straw hygiene. Take a long piece of dental floss or thin twine—about three times the length of the straw. Tie a small, tight knot in the middle of the string and wrap a tiny scrap of microfiber cloth or a piece of a sturdy paper towel around that knot. If you’ve ever looked for effective house cleaning secrets, you know that microfiber is king for grabbing microscopic particles. Feed one end of the string through the straw until it comes out the other side, then pull. The cloth ‘plug’ should be snug enough to feel resistance but loose enough to move. As it travels through, it acts like a squeegee, wiping away everything in its path.
Boost the Friction with an Abrasive Paste
If your straw has been sitting in the sink for a couple of days, you’re dealing with dried-on proteins that water alone won’t touch. This is where you apply the same logic used in the salt and lemon trick for cleaning stained cutting boards. Mix a little baking soda with water to create a gritty paste. Dip your string-cloth into this paste before pulling it through the straw. The baking soda acts as a gentle sander, lifting the debris without scratching the inner surface of metal or glass straws. It’s a specialized version of house cleaning strategies that prioritizes mechanical action over harsh chemicals.
Sanitize Without Damaging the Material
Once the visible gunk is gone, you have to deal with the bacteria you can’t see. Instead of the dangerous rolling boil that ruined my silicone straws, use a controlled soak. Submerge your straws in a mixture of one part white vinegar and four parts warm water. This provides effective sanitizing methods that are safe for food-grade materials. Let them sit for at least ten minutes. If you are preparing for a move-out clean and want to ensure every kitchen item is pristine, this soak is non-negotiable. It breaks down the mineral deposits from hard water that often trap bacteria, much like how you might sanitize your bathroom sink drain to prevent odors. Finally, rinse them under a high-pressure stream of hot water to flush out any remaining vinegar scent and let them air dry vertically. Propped up in a clean glass is best; never lay them flat on a towel where moisture can get trapped inside.While the vinegar soak I mentioned is great for straws, I see people take this ‘natural’ or ‘chemical-heavy’ logic too far when they tackle a full move-out clean. The biggest myth? That ‘stronger’ always equals ‘cleaner.’ If you’ve ever reached for the bleach to sanitize a reusable straw or a kitchen surface, you might be doing more harm than good. Bleach is highly corrosive. On a microscopic level, it can etch the surface of your kitchenware, creating tiny jagged ridges. These ridges act like a fortress for bacteria, making future sanitizing secrets for a safer house in 2025 much harder to execute because the germs are literally tucked away where your soap can’t reach.
Does High Heat Replace the Need for Friction?
Many of my readers ask if they can just blast their items in the dishwasher on the ‘sanitize’ cycle and call it a day. The short answer: No. According to a study in the journal *Applied and Environmental Microbiology*, heat alone often fails to penetrate the protective matrix of a biofilm. Think of a biofilm like a suit of armor for bacteria. You can bake it, but the germs inside stay cozy. This is why the manual methods I described earlier—the shaking and the dental floss ‘squeegee’—are non-negotiable. If you don’t break that physical bond first, you’re just heat-treating a layer of slime. This applies to your furniture too; simply steaming a stain without proper extraction is one of the most common upholstery cleaning tips that actually ends up setting the stain deeper into the fibers. 
Don’t Fall for the Universal Cleaner Trap
The most dangerous mistake I see is the ‘one-bottle’ approach. Someone finds a solution that works for their straws and suddenly they’re using it on everything. For instance, why vinegar is not always the best choice for granite countertops is a hard lesson many learn during a stressful move-out cleaning strategy. The acid in vinegar that kills germs in your straw will eat right through the sealant on your stone. Similarly, using the wrong chemical on a couch can lead to permanent discoloration. I once tried to ‘sanitize’ a velvet cushion with a standard kitchen spray and ended up with a stiff, bleached spot that looked like a cloud. Always check the material compatibility before you go full-throttle on a cleaning spree.
Have you ever fallen into this trap and accidentally ruined something while trying to get it clean? Let me know in the comments.
Even the pros have a ‘hall of shame’ moment, and sharing those ‘oops’ factors is how we all get better at maintaining a truly effective sanitizing methods.So, how do we move from ’emergency cleaning’ to a sustainable rhythm? I’ve found that the biggest shift happens when you stop viewing cleaning as a weekend event and start treating it like a system. For example, if you’re prepping for a big change, using specific move-out cleaning hacks to ensure your deposit refund can actually teach you how to maintain your next place better from day one. Personally, I’ve stopped buying cheap plastic spray bottles that break after three uses and started investing in pressurized hand sprayers. They provide a much more even coat for sanitizing large surfaces without tiring out your hand, which is vital when you are tackling every room in the house.
How do I keep my house truly sanitary without spending hours every week?
The secret isn’t more scrubbing; it’s better timing and professional-grade basics. I’m a huge advocate for the ‘dry-to-wet’ rule. Most people spray cleaner on a dusty surface and create a muddy slurry that just pushes germs around. Instead, always use a vacuum with a HEPA filter first to remove the physical particles. When it comes to fabrics, following an ultimate upholstery care guide for lasting freshness means vacuuming your couch every single time you vacuum your floors. This prevents skin cells and organic dust from becoming ‘food’ for bacteria deep within the fibers. 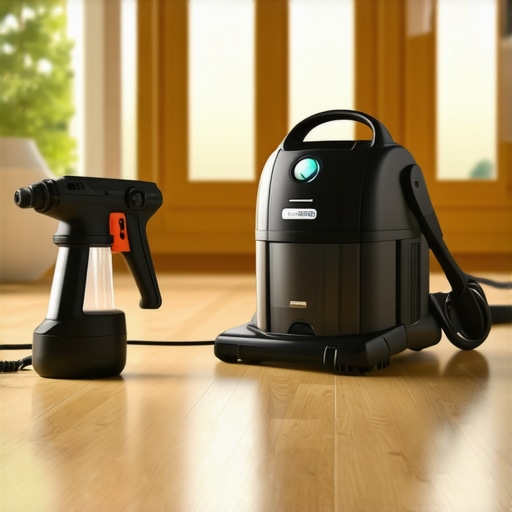
Ditch the Cheap Sprayers for Professional Results
One tool I swear by for scaling your cleaning is a high-quality pH-neutral cleaner. Why? Because it’s safe on almost everything, from your kitchen tiles to your laundry room floor. When you follow a daily house cleaning routine to maintain perfection, you realize that 90% of the battle is just stopping the buildup before it bonds. According to the IICRC S300 standards for professional upholstery cleaning, the most critical step is ‘soil suspension’—using the right chemistry and dwell time so the dirt actually lifts instead of being pushed into the backing of the material. This technical approach is what separates a quick wipe from a professional-level sanitization.
What Home Hygiene Looks Like in 2030
Looking ahead, I think we’re going to see a massive shift toward UV-C integrated storage for things like our reusable straws, sponges, and even remote controls. We’re already seeing this technology in high-end phone sanitizers. For now, sticking to a solid move-out cleaning strategy even when you aren’t moving is the best way to keep your home’s value high and your environment healthy. Don’t forget the hidden spots either, like how to deep clean the interior of a dryer to prevent lint fires, which is a maintenance task most people ignore until it becomes a safety hazard. Even small details, like knowing the only way to clean dusty artificial plants, contribute to the overall air quality of your home. Give that dental floss ‘squeegee’ method a try on your favorite reusable straw tonight. It is incredibly satisfying to see that first pull-through work its magic!
Why My Best Rinsing Routine Was Actually Failing
For years, I believed that if a straw looked clean to the naked eye, it was safe for my next drink. The hardest lesson I learned is that ‘visually clear’ is not the same as biologically safe. After consulting with pros on effective house cleaning secrets from cleaning experts, I realized that moisture trapped in a dark, narrow tube is the perfect incubator. I also discovered that most people wait too long to deep clean; if you can smell anything other than fresh air when you sniff your straw, the biofilm has already won. Finally, I learned that heat is a sanitizer, not a cleaner—you must physically break the bond of the gunk before any temperature or chemical can do its job effectively.
The Minimalist Toolkit for Serious Deep Cleaning
You don’t need a pantry full of chemicals to maintain a healthy home. My essential toolkit relies on high-velocity friction and natural acids. I personally trust unflavored dental floss because it is stronger than string and fits into the tightest glass or silicone tubes. I also recommend keeping a pH-neutral cleaner on hand for your broader surfaces; it is the safest way to ensure you aren’t damaging your home while hunting for germs. If you are trying to how to schedule a deep clean that actually lasts more than a week, start with high-quality microfiber cloths. Unlike paper towels, they actually lift and trap particles rather than just smearing them around. Lastly, never underestimate a HEPA-filtered vacuum. If you don’t have one, check out why your vacuum filter might be making your allergies worse to understand why the air you breathe during cleaning matters just as much as the surfaces you scrub.
Stop Worrying and Start Shaking
It is easy to feel overwhelmed by the invisible germs in our kitchens, but the ‘shaker’ and ‘floss’ methods prove that you are in control without needing expensive gadgets. By adopting these small, high-impact habits, you are implementing sanitizing secrets for a safer house in 2025 that protect your family one sip at a time. Remember, the goal isn’t to live in a sterile lab, but to ensure the tools we use for our health—like those eco-friendly straws—don’t become a liability. Reclaiming your kitchenware is the first step toward a more sustainable and effective sanitizing methods. Go grab that dental floss and see the difference for yourself tonight!