
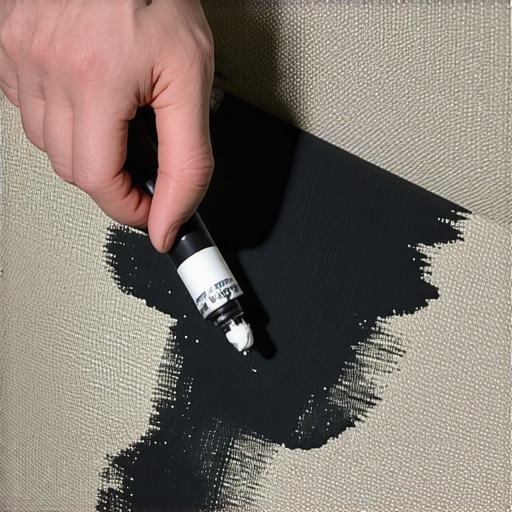
I was midway through a slice of extra-cheese pepperoni pizza when the unthinkable happened—a heavy, orange droplet of oil landed squarely on my favorite beige couch. My heart sank. In a moment of pure panic, I did the one thing you should never do: I grabbed a wet dishcloth and started scrubbing like my life depended on it. All I did was push that oil deeper into the fibers, turning a tiny dot into a massive, blurry smear that felt like a permanent scar on my living room. That was my rock-bottom moment in the world of home maintenance. I realized then that most of us are fighting grease with the wrong weapons. We treat it like dirt, but oil is a different beast entirely. Today, I’m going to share the weird, wonderful, and incredibly cheap secret I discovered that day. We are going to tackle those stubborn marks using nothing but a simple piece of white chalk.
Stop Reaching for the Spray Bottle and Pick Up the Chalk Instead
Many of us assume that a heavy-duty chemical cleaner is the only way to handle a mess, but when it comes to upholstery cleaning tips for a fresh home revival, less is often more. The mistake I made—and maybe you have too—is thinking that water and soap are universal solvents. They aren’t. Grease is a lipid, and lipids hate water. When you introduce moisture to a fresh grease spot, you’re actually helping the oil travel further into the padding. It is a similar logic to why you should never use hot water on a fresh blood stain; the wrong temperature or the wrong medium just sets the problem in stone. I learned the hard way that you need an absorbent, not a liquid, to truly lift a fatty stain out of fabric.
Does a cheap stick of classroom chalk really work better than chemicals?
It sounds like a total myth, but the science is actually on our side here. Chalk is primarily made of calcium carbonate, a substance that is naturally porous and extremely thirsty for oils. According to the American Cleaning Institute, the key to removing oily stains is using an absorbent material to draw the grease out of the fibers before it has a chance to oxidize and turn yellow. I used to think I needed a professional crew for every spill, but once I understood how to treat s-coded upholstery fabric without ruining it, my confidence skyrocketed. I’ve even used similar logic to get grease off kitchen cabinets without removing the finish. Have you ever tried to ‘fix’ a stain only to realize you made it five times bigger? I’d love to hear your most frustrating cleaning stories—it makes me feel much better about my pizza catastrophe! If you’re currently staring at a dark spot on your sofa, take a deep breath. We are about to fix this.
Don’t Touch That Spray Bottle Yet
Before you do anything, put down the multi-purpose cleaner. The biggest mistake in house cleaning strategies for a sparkling home today is applying moisture to a fresh grease stain. Imagine the oil as a thirsty sponge; adding water just makes it expand and travel deeper into the cushion. Instead, take a standard piece of white sidewalk or classroom chalk. If you have colored chalk, steer clear, as the dyes can transfer and create a secondary disaster. You want pure, white calcium carbonate. This is the same principle behind sanitizing hacks for safe house transitions: you must absorb the contaminant before it bonds with the surface.
Rub the Chalk Directly Into the Fibers
Take your chalk and draw right over the stain. Don’t be gentle; you want to create a thick, dusty layer that covers every millimeter of the oil. I remember trying this on a vintage velvet chair I found at a thrift store. It had a mysterious dark patch on the armrest—likely years of accumulated skin oils and hair products. I thought I’d ruined the texture by rubbing it too hard, but as I brushed it off, the grey film disappeared, leaving the fabric feeling soft instead of tacky. This technique is a lifesaver when you need to treat s-coded upholstery fabric without ruining it because it involves zero liquid solvents. 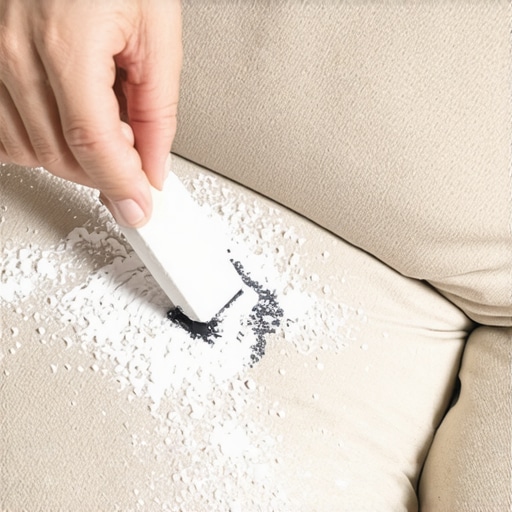
Give the Calcium Carbonate Time to Drink
Now comes the part that tests your patience. You need to let that chalk sit for at least 15 to 20 minutes. If the stain is particularly nasty—like a glob of butter or bike grease—leave it for an hour. The chalk is literally ‘drinking’ the oil out of the threads. Think of it like a magnet for lipids. This is one of those effective house cleaning secrets from cleaning experts that saves you a fortune on professional steam rentals. While you wait, you can use the same logic to get grease off kitchen cabinets without removing the finish by dusting the sticky areas with a bit of dry absorbent powder before a light wipe.
Buff Away the Ghost of Your Pizza Night
Once the time is up, don’t just blow the dust away into the air. Use a dry microfiber cloth or a soft-bristled toothbrush to gently agitate the area. You’ll notice the chalk has likely turned a slight shade of yellow or tan—that’s the oil trapped inside the powder. If the stain is still visible, simply repeat the process. This layered approach is vital for an ultimate upholstery care guide for lasting freshness. For those working through a move-out clean checklist to simplify your transition, this 2-cent trick can save your security deposit from that one glaring spot the landlord always notices first.The reason the chalk trick works so well is that it bypasses the most common mistake in home maintenance: the residue trap. Most people believe that if a little bit of cleaner works, a lot of cleaner will work better. This is a total myth. In reality, over-using detergents creates a sticky, microscopic film on your fabrics and floors. This is exactly why your floors feel sticky even after you finished mopping. You aren’t walking on clean wood; you are walking on a layer of unrinsed surfactants that act like a magnet for every speck of dust and pet hair that enters the room.
Stop sanitizing your dirt and start cleaning it
One of the biggest ‘oops’ moments I see is the confusion between cleaning and sanitizing. Many homeowners, especially when trying to follow sanitizing secrets for a safer house in 2025, spray disinfectant directly onto a visibly dusty or greasy surface. This is effectively useless. You cannot sanitize a dirty surface because germs hide underneath layers of organic matter. According to a study published in the Journal of Hospital Infection, biofilms—complex communities of bacteria—can protect pathogens from even hospital-grade disinfectants if the surface isn’t physically cleaned first. For a truly effective sanitizing methods for a germ-free home, you must use a two-step process: scrub the grime away with a mild cleaner, and only then apply your sanitizer. 
Can your vacuum actually make the air in your living room dirtier?
It sounds like a paradox, but if you aren’t careful, your vacuum is just a localized dust storm. This is a nuance often missed in a standard daily house cleaning routine to maintain perfection. If your filters are clogged or your machine lacks a properly sealed HEPA system, you are simply sucking up heavy particles and exhausting fine allergens back into your breathing zone. This is why your vacuum is actually spreading more dust around. For those tackling a major transition, using specialized move-out cleaning hacks ensure your deposit refund by focusing on the mechanical integrity of your tools before you ever start the job.
The hidden trap of chemical cross-reactions
Another advanced mistake is the ‘more is better’ approach to mixing products. Beyond the obvious danger of mixing bleach and ammonia, many people inadvertently create a mess by layering different waxes or oils on furniture. If you’ve ever noticed the reason your bathroom grout stays orange even after you scrub it, it might be due to an alkaline cleaner reacting with iron in your water, essentially ‘setting’ the stain. Similarly, before you leave a rental, don’t just scrub randomly; use the move-out trick for removing rust from bathroom fixtures to avoid permanent damage. Have you ever fallen into the trap of using too much soap and wondering why the spot came back twice as dark a week later? Let me know in the comments—I’ve definitely been there!
Invest in a Real Horsehair Brush Before Your Next Spill
For years, I used whatever plastic-bristled scrub brush was on sale at the grocery store. It was a massive mistake. Synthetic bristles are often too aggressive, creating friction that can actually ‘frizz’ the delicate weave of your sofa. Now, I exclusively use a natural horsehair brush. Why? Because the bristles are soft enough to preserve the integrity of the fabric but firm enough to agitate the chalk or cleaning powder out of the grain. This is a game-changer when you need to treat s-coded upholstery fabric without ruining it. It’s the difference between a couch that looks new for ten years and one that looks pill-ridden in two. If you’re dealing with tougher surfaces, like the top of the fridge, you might need the dish soap trick for removing greasy buildup on kitchen cabinets to break down the surface tension before you even think about buffing.
How can I maintain my furniture’s lifespan over years of use?
The secret isn’t a deep clean once a year; it’s the microscopic maintenance you do every week. Most people wait for a visible stain to act, but by then, the grit has already acted like sandpaper on your upholstery fibers. To truly follow an ultimate upholstery care guide for lasting freshness, you need to vacuum with a soft brush attachment at least once a week. This prevents the ‘settling’ of skin cells and dust that eventually leads to odors. I’ve noticed that when people ignore this, their living room still smells like pets after they vacuum because the dander is trapped deep in the base layer, not just the surface. 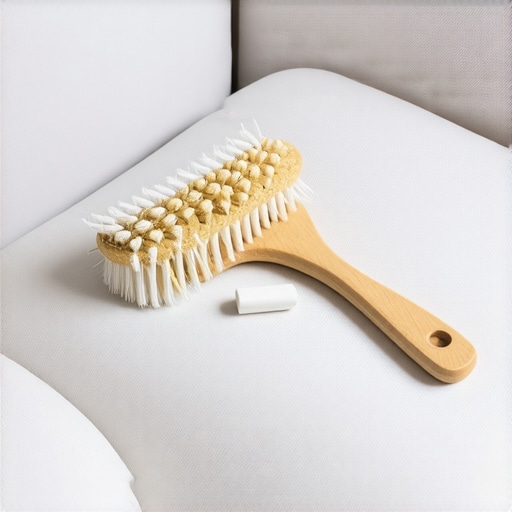
Stop Using Vacuums That Just Move Dust Around
If your vacuum doesn’t have a certified HEPA filter, you are essentially participating in a futile exercise. High-efficiency particulate air filters are the gold standard because they trap 99.97% of particles as small as 0.3 microns. According to the IICRC S300 Standard for Professional Upholstery Cleaning, the physical removal of dry soil is the most important step in the entire process. Without a proper seal, your vacuum is blowing dust back into the air, where it simply waits to settle back onto your clean couch. This is a critical detail when executing move-out cleaning strategies to secure your deposit. Looking ahead, I predict we’ll see more consumer-grade vacuums integrated with UV-C light sensors that can detect and neutralize pathogens in real-time, making sanitizing secrets for a safer house in 2025 even more accessible. Don’t wait for the future, though—go check your vacuum filter right now. If it’s grey and fuzzy, it’s not cleaning; it’s polluting. If you have questions about specific fabric types, contact us to avoid a permanent mistake.
The Three Myths About Deep Cleaning That Almost Cost Me My Deposit
Over years of managing my own messes and helping friends move, I’ve realized that our instincts are often our own worst enemies when it comes to home maintenance. First, scent is not a sign of cleanliness. We often spray perfumes to hide odors, but if you do not address the root cause, your living room still smells like pets after you vacuum because the dander is still trapped in the base layer. Second, the idea that “more soap equals more clean” is a trap that leads to the sticky film we talked about earlier. Finally, never assume a surface is clean just because you cannot see the dirt; microscopic grit acts like sandpaper on your upholstery fibers if left unaddressed.
The Toolkit I Always Keep in My Cleaning Cupboard
If I had to narrow down my entire cabinet to just a few essentials for a successful daily house cleaning routine to maintain perfection, these would be it. I always keep a box of plain white chalk for grease emergencies—it has saved more sofas than any expensive spray. I also swear by a certified HEPA vacuum; without a proper seal, your machine is just moving dust around the room. Lastly, a natural horsehair brush is my go-to for agitating fibers without causing friction damage. These simple tools are the foundation of effective house cleaning secrets from cleaning experts that actually work in the real world.
Don’t Be Afraid to Take the First Step Toward a Fresh Home
It is easy to feel overwhelmed when you are staring at a stained cushion or a dusty corner, but remember that even the most daunting tasks start with one small action. Whether you are trying to follow an ultimate upholstery care guide for lasting freshness or you are deep in the middle of a move-out clean checklist to simplify your transition, the key is to be methodical and patient. Proper upholstery cleaning is not about brute force; it is about using the right science to protect your investment. If you ever feel stuck or worried about a specific fabric, do not hesitate to contact us for professional advice before you potentially damage the material. You have got this! What is the one stubborn stain in your house that has always defeated you? Let me know in the comments below!