Have you ever peeked into your oven and noticed a stubborn layer of grime between the glass panels, but dreaded the thought of disassembling the entire door just to clean it? I remember the first time I faced this dilemma — I was about to pull out the tools, ready for a messy, complicated job. The thought alone made me want to give up before I started. But then, a lightbulb moment hit me. Why not find a way to do it without all that hassle?
Why Cleaning Between Oven Glass Matters More Than You Think
Oven glass tends to trap grease, dust, and food splatters over time. Not only does this affect the appearance, but it can also pose health concerns if bacteria start to thrive in those hidden crevices. Plus, a clean oven enhances cooking efficiency and keeps your space smelling fresh. Interestingly, a study from the National Kitchen and Bath Association highlights that properly maintained appliances can cut energy bills by up to 10%. Now, imagine missing those between-glass spots because of a fear of disassembly. That’s a missed opportunity to keep your kitchen spotless and safe.
Is It Really Worth the Effort or Just a Waste of Time?
I’ll admit, I once believed that cleaning between oven glass required professional help or labor-intensive disassembly. I also made the mistake early on of using harsh chemicals or sharp tools, which only risked damaging the glass or voiding the warranty. Over time, I discovered effective, simple tricks that avoid those pitfalls, saving me money and frustration. If you’re like I was, eager to clean but unsure whether the payoff is worth the effort, I can promise this approach is straightforward and safe — and it works wonders. Curious? Keep reading, because I’ll reveal step-by-step how I managed to clean behind those stubborn panes without dismantling a thing.
Have you faced this cleaning conundrum before? Let me know in the comments below. And if you’re tired of making an even bigger mess trying to reach those hidden spots, you’re in the right place. The next sections will guide you through the secrets I wish I’d known from the start, transforming what once seemed like a daunting chore into a quick, manageable task. Ready to get your oven gleaming? Let’s dive in and make behind-the-glass cleaning simple and stress-free.
**[Learn more about effective house cleaning secrets from cleaning experts.](https://spotlesscarpetz.com/effective-house-cleaning-secrets-from-cleaning-experts)**.
Prepare Your Tools and Environment
Gather a set of soft microfiber cloths, a plastic scraper, a small bowl of warm water mixed with a few drops of dish soap, and a toothbrush. Turn off your oven and unplug it if possible to ensure safety. Lay down old towels or a plastic sheet under the oven door to catch any drips or debris. I once did this job without proper preparation, which resulted in a flood of soap water and a frantic clean-up—learning from that, I now always set the scene before starting.
Locate and Access the Cleaning Area
Identify the gaps around the oven glass where dirt accumulates. Most modern ovens have a way to access the interior panel without full disassembly. Look for screws or clips that hold the glass in place—these are usually accessible from the front or on the sides. Carefully inspect your model’s manual or look for tutorials specific to your oven if you’re unsure. Once I learned to locate these access points, I avoided the messy disassembly, saving hours of work.
Remove and Soak the Glass Panels
If your oven design allows, gently loosen the panels by unscrewing or unclipping them. Soak them in the warm soapy water for at least 15 minutes. The warm water loosens grease and grime, making it easier to wipe off. I once tried skipping this step and started scrubbing, which only smeared grease further. Soaking was a game-changer—it softened the stubborn grime, allowing for easier removal.
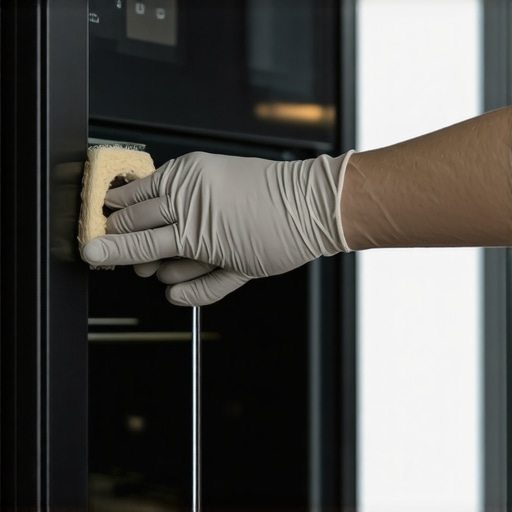
Scrub and Clean Gently
Use the toothbrush dipped in the soapy water to reach into corners and edges. Lightly scrub the glass and surrounding areas, applying gentle pressure. For tougher spots, re-soak the cloth and hold it against the grime for a minute before wiping. Avoid abrasive materials that could scratch the glass. Once, I used a metal tool by mistake, which left scratches—learning to be gentle saved me from costly repairs.
Use the Plastic Scraper for Stubborn Residue
If any stubborn residue remains, carefully use the plastic scraper to lift it without scratching the glass. Work slowly and avoid applying excessive pressure. Remember, patience beats force in cleaning delicate surfaces. I once hurried and pressed too hard, which caused a minor crack—deliberate gentle movements prevent damage.
Reassemble and Final Touches
Dry the glass thoroughly with a clean microfiber cloth. Make sure all parts are dry before reassembling to prevent streaks and water spots. Replace the panels securely, ensuring clamps or screws are tightly fastened. For a crystal-clear finish, buff the glass with a dry microfiber cloth. I always finish with a quick wipe of the surrounding frame, which leaves everything looking pristine. This simple process, done right, results in a clean, streak-free glass that boosts your oven’s appearance and hygiene.
Remember, a little patience and the right tools make this task straightforward. With these steps, you eliminate grime buildup without resorting to disassembly or harmful cleaners. For more efficient cleaning tips, check out effective house cleaning secrets from cleaning experts.
Many homeowners believe that disinfecting is as simple as spraying a surface with any available disinfectant and wiping it down. However, this superficial approach can be a costly mistake, undermining the very purpose of sanitation. In truth, effective sanitizing involves understanding the nuanced differences between cleaning, disinfecting, and sterilizing, which many overlook. For instance, a study published in the Journal of Environmental Health emphasizes that proper contact time—allowing disinfectants to sit on surfaces for the recommended period—is critical to kill germs effectively. Skipping this step only gives a false sense of security, leaving your home still vulnerable to pathogens.
Common Misconceptions That Can Backfire
One widespread myth is that disinfecting wipes or sprays alone can eliminate bacteria and viruses completely. In practice, many consumers underestimate the importance of thorough cleaning beforehand. Dirt, grease, and organic material can shield germs from disinfectants, rendering them ineffective. This is why proper pre-cleaning is essential to maximize the efficacy of disinfectants. Neglecting this step often results from a misguided belief that chemical kill power outweighs physical removal. Remember, disinfectants work best on clean surfaces—not dirty ones.
Additionally, many assume that using bleach or harsh chemicals is necessary for thorough sanitation. While bleach can be effective, overuse or improper application can damage surfaces, pose health risks, and even lead to resistant microbial strains. An advanced mistake involves assuming all disinfectants are interchangeable—some are suitable for non-porous surfaces, but not for electronics or fabrics. For safer and more effective results, consider non-abrasive, EPA-registered products tailored for specific materials.
How to Avoid the Hidden Pitfalls in Your Cleaning Routine
There’s a subtle trap in trying to achieve a hospital-level clean with minimal effort. Many people overlook the importance of contact time, proper ventilation, and correct diluting ratios—factors that significantly influence disinfectant performance. For example, using an inadequate amount of solution or spraying in a tightly enclosed space may leave germs alive. Incorporating cleaning protocols like thorough wiping followed by appropriately timed disinfectant application can make a substantial difference. For a comprehensive guide on effective sanitizing, visit secrets from cleaning experts.
Another common error is neglecting high-touch areas such as light switches, door handles, and remote controls, which are hotspots for germ transmission. Regularly disinfecting these spots, especially during flu season or a pandemic, is essential but often underestimated. Noticing the overlooked dust and grime in such areas reveals a common misconception: cleaning is only for visible dirt. Effective sanitizing is about targeting the unseen microbial threats that lurk in everyday contact zones.
Lastly, a critical advanced point: over-sanitization can sometimes cause harm. Using antibacterial agents excessively can contribute to microbial resistance, similar to antibiotic overuse in medicine. It is vital to balance sanitation with routine cleaning—aiming to reduce microbial load without fostering resistant strains. The CDC advocates for targeted, evidence-based cleaning instead of indiscriminate use of disinfectants.
In essence, mastering home sanitation is about more than just sprays and wipes. It involves understanding the science behind germ elimination, avoiding shortcuts, and paying attention to frequently missed spots. Have you ever fallen into this trap? Let me know in the comments. For further insights on maintaining a hygienic home environment, explore why disinfectant sprays can fail.
Keep Your Cleaning Game Strong with the Right Equipment
Investing in quality tools can dramatically improve your cleaning efficiency and results over time. I personally swear by a high-powered cordless vacuum like the Dyson V11 because its suction strength and rapid maneuverability make routine chores like upholstery and floor cleaning effortless. When it comes to microfiber cloths, I prefer the E-Cloth brand due to their durability and superior dirt-trapping capabilities, which stay effective even after multiple washes—saving me money and reducing waste. For scrubbing stubborn stains or grime, a versatile grout brush with stiff bristles, such as the OXO Good Grips, ensures thorough cleaning without scratching surfaces. These tools consistently perform and stand the test of time, making my cleaning routine smoother and more satisfying.
Why I Choose Specific Products Over Generic Options
My selection isn’t random; I look for tools with proven longevity and strong reviews. For example, I avoid cheap, non-branded sprayers because they often leak or fail prematurely. Instead, I opt for chemical-resistant, adjustable spray bottles from brands like AmoTec, which maintain their integrity after frequent use. Similarly, for upholstery, I rely on steam cleaners like the Bissell SteamShot due to their portability and effective sanitizing power without the need for harsh chemicals—crucial for allergy sufferers. Knowing these tools are built for durability and safety encourages me to stick to regular maintenance routines, ensuring long-term results.
The Future of Cleaning Tools: What’s Next?
Looking ahead, smart cleaning gadgets are becoming increasingly popular. Devices like app-controlled robot vacuums are evolving to recognize different surfaces and adjust suction automatically, reducing manual effort. IoT-enabled air purifiers with HEPA filters are also on the rise, promising cleaner indoor air by continuously monitoring airborne particles. As technology advances, I expect these tools to become more affordable and integrated with home automation systems, making maintenance even more seamless. Staying ahead by adopting these innovations can help keep your cleaning routines efficient and effective well into the future.
How Do I Maintain My Cleaning Tools Over Time?
Regular upkeep is crucial to ensure your tools stay effective. I recommend thoroughly cleaning microfiber cloths after each use by washing them in hot water with a small amount of gentle detergent, like the ones recommended in this guide. For vacuum filters, check manufacturer instructions—most require periodic replacement or deep cleaning to prevent dust buildup and preserve suction power. Be sure to inspect brushes and scrub heads for hair or debris that can hinder performance. Additionally, I advocate for creating a routine schedule—weekly checks, monthly maintenance—to extend your equipment’s lifespan and ensure consistent cleaning quality. Staying proactive in maintenance saves time and money and keeps your home healthier.
If you’re curious about integrating smarter tools into your cleaning regimen, consider trying a robotic vacuum or an advanced air purifier to simplify your tasks. Small investments now can lead to significant long-term benefits, like better air quality and less physical effort. For more tailored advice, reach out through this contact page to discuss options suitable for your home.
Over my years of deep cleaning, I’ve learned that the journey toward a truly hygienic home is filled with surprises and lessons that aren’t immediately obvious. These insights have transformed my routines and could do the same for you, turning mundane chores into empowering rituals.
The Hidden Truths That Changed My Approach to Sanitizing
- Less Is More When It Comes to Chemical Use: I once believed that aggressive disinfectants were the key to a germ-free home. However, over time, I discovered that thorough cleaning with eco-friendly solutions and proper technique can be more effective without the risks associated with harsh chemicals.
- Leaving Room for Microbial Kill Time: I used to rush the disinfectant process, assuming wiping was enough. Then, I realized that many disinfectants require a specific contact time to truly do their job. Patience here results in a safer, more sanitized space.
- Targeting High-Touch Spots Regularly: Initially, I overlooked the importance of frequently disinfecting door handles, light switches, and remotes. Now, I incorporate these into my weekly routine, knowing they are critical in breaking the chain of germs.
- Clean Before You Disinfect: I learned that applying disinfectant on a dirty surface is like trying to clean mud with bleach—ineffective. Pre-clean with warm soapy water, then follow up with the disinfectant to maximize results.
Tools and Secrets That Keep My Home Germ-Free
- Microfiber Cloths: Their ability to trap dirt and microbes makes them indispensable. I favor high-quality brands like E-Cloth because they last longer and perform better over time.
- Compact Steam Cleaner: For upholstery and hard surfaces, steam provides chemical-free sanitization. I trust models like Bissell SteamShot for their portability and power.
- Plant-Based Disinfectants: Using vinegar or tea tree oil diluted properly has often replaced stronger chemicals in my routines, reducing exposure risks while maintaining hygiene.
- Educational Resources: Books and expert blogs have enlightened me beyond the basics. For example, effective sanitizing isn’t just about sprays—it’s about understanding contact times and material compatibility. Check out these tips from cleaning professionals.
Embrace a Sanitizing Mindset and Watch Your Home Flourish
Choosing to prioritize sanitation isn’t just about cleanliness—it’s about fostering a healthier, more vibrant environment for you and your loved ones. Small conscious changes, like disinfecting high-touch areas every day or pre-cleaning surfaces before applying disinfectants, make a profound difference. Today is the perfect day to start refining your routine, incorporating insights that set you apart from the crowd. Your home’s health is in your hands—make every step count.
What’s one surprising cleaning tip that revolutionized your routine? Share your story below—I love learning from fellow home sanitizers!