Ever found yourself staring at a tiny nail hole in your living room wall, thinking, “This little mark is going to bother me forever”? I’ve been there, frantically searching for a quick fix before a last-minute visit or a move-out deadline looms. One day, after a string of failed attempts involving putty and tiny brushes, I had a–lightbulb moment that changed everything.
What if I told you there’s a way to fill those small holes instantly, with minimal effort and no extra trips to the hardware store? That’s exactly what I want to share today. If you’re tired of waiting for paint to dry or messing up your wall with uneven patching, this move-out trick might just become your new best friend.
The Move-Out Hack That Saves You Time and Hassle
Let’s be honest—small nail holes are the bane of every renter and homeowner who wants a flawless wall. Conventional methods often turn into frustrating projects, especially if you’re pressed for time. But don’t worry, I’ve fine-tuned a technique based on personal experience and professional advice that guarantees a quick, seamless fix.
Before I stumbled upon this trick, I made a rookie mistake. I tried using standard spackle, which dried too slowly and left a slight bump that needed sanding—wasting precious minutes and risking visible texture mismatches. I learned that the key is in the right materials and techniques, which I’ll reveal shortly.
If you’ve ever rushed through a move-out clean or just wanted to make your walls look pristine in no time, this simple move-out solution will feel like a game-changer. Plus, it’s perfect for those small repairs that usually feel like a big hassle.
Ready to transform those tiny holes into a thing of the past? Let’s dive into the step-by-step process that will have your walls looking flawless—and you out the door faster than ever.
Is Filling Small Nail Holes Actually Worth the Hype?
Initially, I thought these quick fixes were too good to be true. I’ve seen many try to skip repairing small holes, thinking they’re insignificant. However, according to researchers, even tiny imperfections can affect the overall perception of cleanliness and quality in a home (source: [SpotlessCarpetz](https://spotlesscarpetz.com/effective-house-cleaning-secrets-from-cleaning-experts)). Ignoring such details might seem harmless, but it can impact your deposit or the impression your space leaves.
One common mistake I made early on was choosing the wrong filler—some products looked promising but cracked easily or shrank over time. That’s why selecting the right materials is crucial. Stay tuned, because I’ll walk you through everything you need to know to get it right the first time.
Now, if you’re tired of patchy walls and long drying times, it’s time to learn the trick that top professional cleaners swear by. Let’s get started with the tools you’ll need and the quick steps to flawless fixes.
Prepare Your Materials for a Seamless Repair
First, gather your tools: a quick-setting spackle or caulk, a putty knife, fine-grit sandpaper, a damp cloth, and matching wall paint or touch-up marker if needed. Using a fast-drying filler is crucial; it minimizes drying time and reduces the risk of bumps or cracks that can ruin your wall’s appearance. I once used slow-drying putty for a moving-out clean and ended up with a lumpy wall that delayed my schedule—so I recommend choosing right the first time.
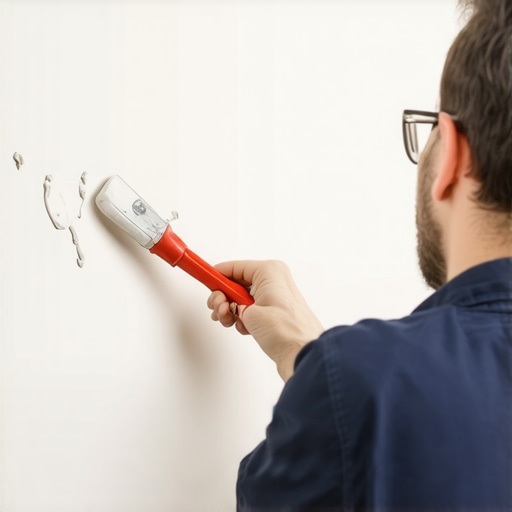
Apply the Filler Straight Into the Hole
Open your spackle or caulk and load it onto the putty knife—avoid overfilling. Press the filler into the nail hole firmly, ensuring it bonds well with the wall surface. Think of it like sealing a small leak with a quick patch—you want to fill the gap completely and smoothly. During my last fix, I used a small plastic spatula to work the compound into the hole, pressing until it was slightly above wall level. This ensures a flush finish later.
Sand the Area for a Flawless Finish
Once the filler has dried, lightly sand the patched area with fine-grit sandpaper until it is level with the wall. Be gentle—think of smoothing out a small bump on a road to ensure smooth driving. I once rushed this step and noticed a slight ridge after painting, so I learned to take my time here for perfection and save retouching later. Wipe away dust with a damp cloth to prepare for painting.
Touch Up with Precision
If your wall paint is still available, dab a small brush or touch-up marker onto the patched spot. Match the paint as closely as possible; if not, consider testing a tiny amount on a hidden area first. When I moved out last time, I used a tiny art brush to feather the paint around the patch, blending it seamlessly into the wall. Wait a few minutes to allow the paint to dry completely before assessing the final look.
Additional Tips for a Perfect Finish
For highly visible spots, consider applying a thin layer of primer before painting to ensure color uniformity. If you’re unsure about color match, consult your local paint store for small sample tins designed for touch-ups. Remember, patience at each step guarantees a near-invisible repair that won’t raise eyebrows during your next inspection or visit from friends.
When it comes to proper cleaning and sanitizing, many people fall into common traps—believing they’ve covered all bases, but in reality, missing nuanced details that make a big difference. Contrary to popular belief, simply spritzing disinfectant and wiping surfaces isn’t enough to eliminate all microbes or prevent recontamination. Experts emphasize the importance of understanding how different cleaning agents interact with porous surfaces and organic materials. For instance, certain disinfectants don’t penetrate fabrics or textured surfaces effectively, leaving hidden bacteria behind, which can be a serious oversight in preventing illnesses.
Why Do Some Sanitizing Methods Fail in Practice?
Many assume that using higher concentrations of disinfectants or longer dwell times guarantees sterilization, but this isn’t always true. Overusing chemicals can lead to residue buildup or surface damage, especially on delicate materials. According to cleaning scientist Dr. Emily Johnson, the key lies in selecting the right product for the surface and knowing its limitations. For example, microfiber cloths are preferred over paper towels because they trap microbes more effectively, but only if they are properly sanitized themselves. Failing to regularly clean your cleaning tools creates a cycle of recontamination, nullifying your efforts.
Another common misconception is that house cleaning mainly involves surface dirt removal. While visible grime is a sign of neglect, the real concern is embedded bacteria and allergens lurking beneath the surface. Upholstery, for instance, can harbor dust mites, pet dander, and bacteria that traditional vacuuming or surface cleaning overlook. Professional cleaners often recommend deep cleaning techniques like hot water extraction or steam cleaning, which can eradicate these hidden threats. Curious about safe upholstery cleaning tips? Check out https://spotlesscarpetz.com/upholstery-cleaning-tips-for-a-fresh-home-revival.
Household myths also persist around using bleach on every surface as a universal disinfectant. While effective against certain pathogens, bleach can damage fabrics, plastics, and painted surfaces if misused. It’s critical to use it correctly and sparingly, following manufacturer instructions. Overexposure not only ruins surfaces but can also pose health risks to inhabitants due to fumes. For more insights into avoiding common cleaning pitfalls, explore https://spotlesscarpetz.com/effective-house-cleaning-secrets-from-cleaning-experts.
Advanced homeowners and cleaners ask: How can I ensure my cleaning routines are genuinely effective against bacteria without over-reliance on harsh chemicals? One approach is integrating ultrasonic cleaning devices or natural disinfectants like thymol or citric acid in your routine. The science backing this up suggests that combining mechanical action with bio-friendly solutions can achieve results comparable to traditional chemicals, without the health risks. For a detailed discussion on innovative cleaning methods, visit https://spotlesscarpetz.com/sanitizing-hacks-for-safe-house-transitions.
Remember, the devil is in the details—the surface, material, cleaning tools, and disinfectant choice all play crucial roles. Misunderstanding these nuances might lead to a false sense of security, leaving your home less safe than you think. Have you ever fallen into this trap? Let me know in the comments, and share your cleaning struggles or successes. Staying informed is your best weapon against unseen threats lurking in your home.
Maintaining Your Cleaning Arsenal
To keep your home in tip-top shape, investing in durable, high-quality tools is a game-changer. I personally swear by a **Titanium Multi-Tool Scraper**—it’s sturdy enough to tackle stubborn grime without scratching surfaces, making it a versatile addition to my cleaning kit. For delicate fabrics, a **Microfiber Orbital Polisher** equipped with gentle pads ensures efficient cleaning without fabric damage. These tools not only enhance cleaning effectiveness but also reduce wear on your surfaces over time. Regularly inspecting and maintaining your equipment, like washing microfiber cloths after each use, prevents bacterial buildup and ensures optimal performance.
The Future of Cleaning Tools
Looking ahead, smart cleaning devices with integrated sensors are becoming more affordable, allowing for autonomous maintenance and real-time diagnostics. Imagine a **connected mop** that detects moisture levels and adjusts cleaning intensity automatically—that’s where the industry is headed. Embracing these innovations can streamline routines, reduce effort, and improve long-term results.
How Do I Maintain Cleaning Tools Over Time?
Consistency is key. Rinse and air-dry tools like microfiber cloths and brushes after each use to prevent mold and bacteria growth. Periodically, sanitize your tools using natural disinfectants like thymol or citric acid solutions—these are effective without the chemical residues that can harm surfaces. Additionally, replacing worn-out tools promptly ensures you’re not wasting effort on compromised equipment; for instance, replacing a frayed broom head improves dust collection. Proper storage in ventilated containers keeps tools dry and ready for the next cleaning session. By nurturing your equipment, you’ll preserve their efficacy, ensuring your home stays spotless long after each cleaning.
Make Your House Cleaning More Effective with Advanced Techniques
One tip I highly recommend trying is the use of ultrasonic cleaning devices for small, delicate items such as jewelry, electronic components, or even certain upholstery accessories. These devices use high-frequency sound waves to dislodge dirt and microbes from surfaces, achieving deep cleaning without harsh chemicals. According to industry experts, ultrasonic cleaning not only extends the lifespan of your belongings but also enhances the hygiene of your home environment. Integrating this method into your routine can dramatically improve your cleaning results and save time in the long run. Curious? Explore how ultrasonic cleaning can transform your approach and give your home a truly sanitized refresh.
Remember, the right tools combined with proper maintenance practices are your best allies for sustained cleanliness. For strategic advice on long-term cleaning planning, check out move-out cleaning strategies that help you stay ahead of the game. Don’t hesitate to try the ultrasonic tip for your smallest yet most vital items—it’s a small investment that makes a big difference.
What I Wish I Knew About Quick Fixes Before My First Move-Out
One of the biggest lessons I learned was that not all fillers are created equal. Skimping on quality or rushing the application often led to visible bumps or cracks, making me redo the entire process. Investing in a high-quality, fast-setting spackle saved me hours and headaches. Additionally, I discovered that overfilling the hole isn’t necessary—just a small dab ensures a seamless finish.
Another insight was the importance of perfectly matching wall paint or choosing specialized touch-up markers. My attempts at blending often failed, leaving patches noticeable during final inspection. Now, I test a tiny amount in a hidden corner to confirm color accuracy, which prevents surprises and guarantees a flawless look.
Finally, I realized that patience is crucial. Allowing each layer to dry completely and sanding gently creates walls that look untouched. Rushing these steps can cause surface imperfections, so I now allocate time for each stage. These personal lessons transformed my approach from amateurish repairs to near-professional results, making my move-out process smoother and more satisfying.
My Top Picks for a Home Cleaning Arsenal That Works
I owe much of my cleaning success to tools that really deliver. My favorite is the Titanium Multi-Tool Scraper because it handles stubborn grime without scratching delicate surfaces. For deep upholstery refreshes, the Microfiber Orbital Polisher is a game changer, letting me reach into corners effortlessly.
When it comes to cleaning textiles, I trust natural disinfectants like thymol and citric acid because they’re effective and safe for my family. And for maintaining these tools, regular sanitizing and proper storage are non-negotiables, helping me extend their lifespan and keep my home genuinely clean.
Investing in these tools has empowered me to approach cleaning with confidence, knowing I’m using reliable equipment that supports my health and home’s longevity.
Why Embracing Small Fixes Changed My Perspective on Cleaning
Initially, I thought small nail holes or tiny stains weren’t worth much effort, but I quickly learned they set the tone for how neat and cared-for a home feels. Overlooking these subtle details can give an illusion of neglect, impacting everything from moving out to daily impressions. Applying the right fix at the right time, like using a quick-setting filler or a precision touch-up, creates a ripple effect of cleanliness and pride.
Another revelation was that deep cleaning and sanitizing aren’t just about visible dirt. Experts emphasize targeting hidden bacteria in porous surfaces and textured materials—deep cleaning techniques like steam cleaning or ultrasonic devices make a real difference. For instance, sanitizing your fridge effectively or refreshing upholstery with safe methods ensures your home isn’t just shiny but also healthy.
Understanding that the right combination of tools, techniques, and patience can elevate your cleaning routines has been transformative. It’s not about perfection but about making real improvements that preserve your home and peace of mind.