
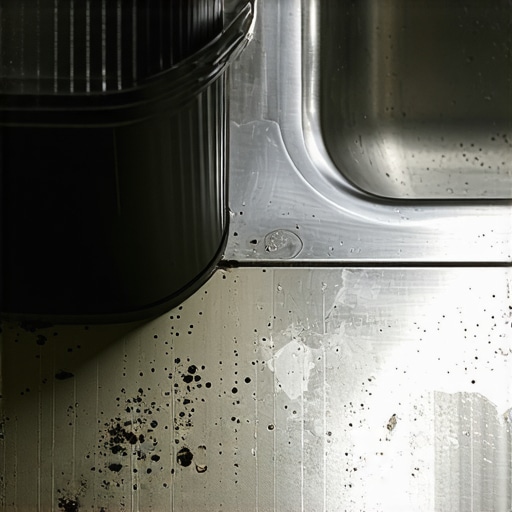
It hit me one evening while scrubbing dishes after a long day—my kitchen sink, that seemingly harmless fixture, was actually a bubbling hotspot of bacteria. I had always assumed the trash can was the dirtiest thing in my home, but the more I looked into it, the more I realized my sink was lurking in the shadows, harboring germs and grime far more than I had ever imagined.
The Hidden Germ Power of Your Kitchen Sink
Many of us overlook the cleanliness of our sinks because they seem so straightforward. We rinse, scrub, and forget. But did you know that studies have shown kitchen sinks can harbor 100,000 times more bacteria than a toilet seat? That’s right. A 2018 study published in the journal “Applied and Environmental Microbiology” revealed that sink drains and basins are prime breeding grounds for bacteria like E. coli and Salmonella, which can cause serious illnesses if they find their way onto your food or hands.
Initially, I made the mistake of simply rinsing mine with soap and water, thinking that was enough. But I realized I was barely scratching the surface—literally. Early on, I also believed that a quick clean was sufficient, without paying attention to hidden crevices or the drain itself. It’s a common mistake, and one that can compromise your health over time.
So, if you’ve ever wondered whether your sink is just a harmless fixture or a bacterial haven, you’re not alone. Many of us are in the dark about the real situation, and uncovering the truth can be a bit unsettling. But here’s the good news: with a few simple steps, you can transform your kitchen sanitation routine and ensure your sink is a safe zone instead of a hazard.
Ready to dive into practical solutions? Let’s explore how to give your kitchen sink the deep clean it deserves—one that truly eradicates germs and keeps your family healthy. And believe me, once I changed my cleaning habits, I noticed a real difference in my home’s freshness and safety.
Interested in more house cleaning secrets? You might find this helpful: Effective house cleaning secrets from cleaning experts. Now, let’s get hands-on with what works best for a truly clean, germ-free sink.
Disassemble and Prep Your Sink
Remove any dish racks, soap dishes, or detachable parts from your sink. Scrape off debris and rinse thoroughly with hot water to loosen grime. I once spent an afternoon dismantling my sink components, discovering hidden food particles and soap scum that had accumulated behind the fixtures, which significantly contributed to bacterial buildup.
Apply a Heavy-Duty Cleaner to Kill Germs
Use a commercial disinfectant or a bleach solution (1 part bleach to 10 parts water). Pour or spray generously over the entire basin, including the drain and surrounding edges. Let it sit for at least 10 minutes. Think of this step as giving your sink a microbial fortress—similar to a medieval castle’s moat, it creates a barrier that bacteria can’t penetrate.
Scrub Deep into Crevices
With a sturdy bristle brush or an old toothbrush, scrub all surfaces, focusing on corners, around the drain, and under the faucet. Don’t forget to clean the drain itself thoroughly—use a pipe cleaner if needed. I once used my son’s old toothbrush to reach the tiny holes around the faucet, which were overflowing with limescale and bacteria, and the difference was immediate after rinsing.
Rinse and Repeat for Complete Sanitization
Rinse all parts with hot water to wash away loosened dirt and residual disinfectant. For extra reassurance, repeat the disinfection step. Making this a routine can be likened to giving your sink a second skincare session—ensuring maximum cleansing.
Sanitize the Drain and Garbage Disposal
Pour a mixture of baking soda and vinegar down the drain to activate a bubbling cleaning action. Follow with boiling water to flush out remaining grime. This not only deodorizes but also kills lingering germs. I曾 use this trick, which transformed the foul smell from my disposal into a fresh, clean scent.
Dry and Reassemble
Use a clean cloth to dry all surfaces, preventing water spots and bacterial growth. Reassemble any removed parts. I vividly remember the satisfaction when I reattached the faucet and saw a gleaming, germ-free sink, ready for safe use.
Maintain Routine Cleaning with Sanitizing Strategies
Schedule weekly deep cleans to keep bacteria at bay. Incorporate sanitizing secrets from experts, like using hydrogen peroxide for stubborn spots, or ensuring your cleaning process covers hidden areas like the drain pipe and sink rims. With consistent effort, your sink becomes a safe zone, reducing health risks. For more effective sanitation methods, check out effective sanitizing methods.
When it comes to maintaining a spotless home, many of us fall prey to widespread myths that can undermine our efforts. Let’s dig deeper into some misconceptions that often trip even seasoned homeowners and cleaning enthusiasts. Understanding these nuances is crucial for achieving truly deep-clean results and avoiding costly mistakes.
One prevalent belief is that using a standard vacuum is enough for upholstery cleaning. In reality, many rely solely on vacuuming and overlook the necessity of professional-grade or specialized cleaning methods. According to experts at Ultimate Upholstery Care, periodic deep cleaning with appropriate solutions removes embedded dirt, oils, and allergens that vacuuming cannot reach, substantially extending furniture lifespan.
A common sanitizing myth is that bleach is the universal solution for every bacterial threat. While bleach is effective against many germs, overuse can damage delicate fabrics and surfaces. It’s essential to understand material-specific cleaning agents—effective cleaning secrets recommend eco-friendly disinfectants that are safe for upholstery and eliminate bacteria without harsh chemicals, reducing health risks.
When preparing for move-out cleaning, many assume that a quick wipe or mop suffices before returning keys. This oversight often leads to deductions from security deposits due to overlooked grime or left-behind stains. A thorough move-out cleaning requires attention to often-neglected areas, like behind appliances or under cabinets, as outlined in Move-Out Cleaning Strategies. Missing these details can cost a hefty deposit refund.
For the seasoned cleaner, a question might be: How do I prevent cross-contamination during multi-unit cleanings? This is a nuanced issue often ignored by casual cleaners but critical in professional settings. Using color-coded microfiber cloths for different areas and surfaces significantly reduces the risk of spreading bacteria, a best practice endorsed by House Cleaning Strategies. Incorporating rigorous sanitation protocols, especially amid health concerns, ensures safer and more effective cleaning.
Beware the trap of relying solely on natural remedies like vinegar or baking soda for sanitizing upholstery or surfaces. While environmentally friendly, these solutions may fall short against resilient microbes. Scientific studies, including one in Sanitizing Secrets, highlight that combining chemical disinfectants with proper cleaning techniques enhances efficacy. Misjudging this can give false confidence in cleanliness.
Have you ever fallen into this trap? Let me know in the comments. Recognizing these common misconceptions empowers you to refine your cleaning routines, ensuring your home is not just clean but sanitized and well-maintained.
Investing in Quality Equipment Makes the Difference
When it comes to maintaining a spotless home or keeping upholstery looking fresh, having the right tools is essential. I personally swear by a high-quality steam cleaner like the Dupray Neat Steam Cleaner. It’s compact, eco-friendly, and versatile enough to handle everything from sofas to bathroom tiles. Its ability to reach deep into fabric fibers ensures thorough sanitization, surpassing standard vacuuming routines. As industry experts recommend, choosing a device with variable steam control allows for gentle cleaning of delicate fabrics while tackling stubborn grime in heavier materials. This investment not only saves money in the long run but also minimizes reliance on chemical cleaners, aligning with sustainable cleaning practices.
How do I maintain my upholstery cleaning tools to keep them working long-term?
Proper maintenance is key. After each use, I rinse out the water tank and remove any residual dirt or debris from attachments. Regularly descaling my steam cleaner with manufacturer-recommended solutions prevents mineral buildup, ensuring optimal performance. Storing tools in a dry, dust-free area extends their lifespan and readiness for next use. Additionally, replacing worn-out parts promptly, such as brushes or filters, keeps cleaning effectiveness at its peak. Embracing these routines aligns with advice from Ultimate Upholstery Care and helps maintain equipment efficiency over years of service.
Future Trends: Smarter, Safer, More Effective Tools
The future of home cleaning tools points toward automation and smart technology. Imagine robotic upholstery cleaners that can map your furniture and deliver targeted cleaning sessions, or app-controlled devices that schedule and monitor maintenance tasks. These advancements will make maintaining a hygienic home more effortless, combining convenience with precision. Staying ahead involves investing in adaptable, high-performance equipment now, so your home benefits from cutting-edge innovation in years to come.
Achieve Long-Term Results with Consistent Effort
Achieving lasting cleanliness starts with using the right equipment combined with disciplined maintenance routines. Regularly cleaning and inspecting your tools ensures they remain effective, saving you money and time. Incorporate professional cleaning methods, like those detailed in effective house cleaning secrets, into your routine for a comprehensive approach. Remember, equipment is only as good as its upkeep—so treat your tools like the investments they are and watch your home stay pristine longer.
Try this tip: regularly descale your steam cleaner with manufacturer-approved solutions to prevent mineral buildup and ensure peak performance. Doing so will extend your investment’s lifespan and deliver consistently sanitize surfaces, keeping your home healthier over time.
What I Wish I Knew About Deep Cleaning Before I Started
- Looking back, I realize that neglecting the hidden corners behind furniture allowed grime and bacteria to build up slowly, making deep cleaning more challenging later. Now, I always check behind and underneath items to prevent long-term buildup.
- One of the biggest lightbulb moments was understanding that not all disinfectants are created equal—some are too harsh for certain fabrics, and mixing products can be dangerous. Educating myself on the appropriate cleaning solutions made my efforts safer and more effective.
- I underestimated the importance of regular maintenance on cleaning tools, like steam cleaners and vacuums. Proper upkeep ensures long-term performance and prevents microbial spread, turning routine cleaning into genuine sanitizing sessions.
My Go-To Resources That Keep My Home Safer and Cleaner
- Effective house cleaning secrets from cleaning experts — This site provides practical tips backed by professional experience, helping me avoid common pitfalls and focus on what truly works.
- Ultimate Upholstery Care guide — I trust this resource for understanding material-specific cleaning methods, preventing damage, and extending the lifespan of my furniture.
- Sanitizing secrets for a safer house in 2025 — Staying ahead with the latest sanitizing techniques is crucial. This guide introduces innovative tools and methods that keep my home germ-free amid new health challenges.
Your Next Step Toward a Healthier Home
Getting serious about upholstery and household cleaning is a journey that rewards you with peace of mind and a safer environment for your loved ones. Don’t wait until grime and germs take over—start integrating expert tips and smart tools today. By investing in proper techniques and maintaining your equipment, you’re building a home that truly protects your family and offers lasting comfort. Remember, real change begins with that first bold step—so why not take it now? Have you ever struggled with tackling those hidden spots behind furniture or under appliances? Let me know below, and share your best cleaning hack!