
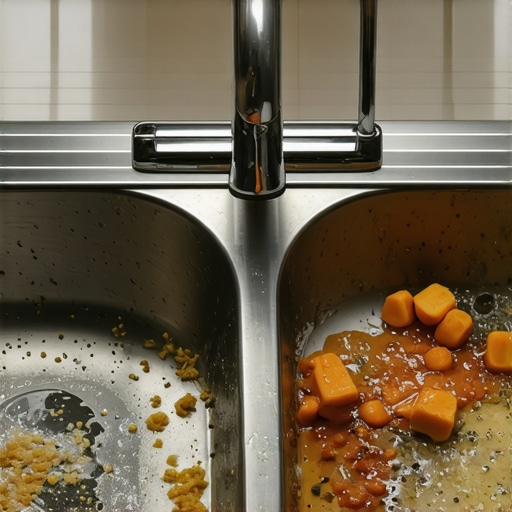
I remember the first time I realized this unsettling truth vividly. I was scrubbing my kitchen sink after a frantic move-out clean, everything sparkling—except for that stubborn ring around the drain. It looked clean, but something didn’t sit right. Then it hit me: my sink was probably holding more germs than even my toilet seat. That lightbulb moment made me rethink what I thought I knew about cleanliness.
The Hidden Germ Reservoirs in Our Kitchens
Many of us treat the toilet seat as the germ hotspot, but surprisingly, our kitchen sinks often harbor more bacteria and grime than we realize. Research indicates that sinks can contain levels of bacteria comparable to bathroom toilets, especially around the drain and faucet areas[^1]. This is largely because kitchen sinks are exposed to raw meat juices, cooking residues, and the constant flow of water, which can spread germs to all corners of the basin.
Have you ever wondered why wiping down counters feels like a routine, but cleaning your sink somehow gets pushed aside? Trust me, I made the mistake early on of ignoring the buildup beneath the sink’s surfaces. That oversight was a mistake. First, I thought the standard dish soap and hot water were enough. But no matter how vigorously I scrubbed, the grime remained, and I was unknowingly risking cross-contamination every time I used the sink.
In this post, we’ll uncover the secrets to truly sanitizing your kitchen sink—so you can stop feeling like you’re playing a game of Germ Tag every time you cook or wash dishes. Ready to get your sink gleaming and germ-free? Let’s dive into the practical strategies that have transformed my cleaning routine.
Is Your Sink Actually Worth the Hype? The Skeptic’s Doubt
I admit, I was skeptical at first—how dirty could my sink really be? But once I discovered the extent of bacteria lurking there, I knew I couldn’t ignore it. Many folks dismiss the sink’s cleanliness because it’s out of sight most of the time. However, overlooking this area can lead to lingering germs and even mold if not properly addressed. Early in my cleaning journey, I also made the mistake of just rinsing with water and hoping for the best—only to find the grime returning faster than I could clean it. It’s a common mistake, but understanding the right methods makes all the difference.
To help you avoid the same pitfalls, I’ll share proven cleaning hacks and tips that will ensure your kitchen remains a safe, germ-free zone. If you’ve ever faced stubborn stains or wondered if your sink is truly clean enough, keep reading. The solutions are simpler than you think, and the relief they bring is priceless.
By the end of this guide, you’ll have the confidence to tackle your sink with expert-approved techniques. Say goodbye to hidden grime and hello to a healthier kitchen environment. Ready to clean smarter, not harder? Let’s get started with the secrets to sanitizing your sink effectively and effortlessly.
Remove Residue and Debris First
Start by clearing the sink of all dishes and debris. Fill a basin with hot water and dish soap. Use a scrub brush or sponge to scrub around the drain, faucet, and basin edges thoroughly. This initial step loosens grime, making the sanitizing process more effective. I once spent extra minutes scrubbing a particularly stubborn stain beneath the faucet, which resulted in a noticeably cleaner sink and peace of mind.
Disinfect with a Homemade Solution
Mix equal parts of white vinegar and water in a spray bottle. Spray the entire sink, paying close attention to the drain and faucet handles where germs tend to hide. Let it sit for 5-10 minutes to break down bacteria and mineral deposits. Vinegar is a natural disinfectant, but for tougher areas, consider adding a few drops of tea tree oil for enhanced antimicrobial properties. After waiting, scrub again with a brush, focusing on corners and crevices.
Focus on Hard-to-Reach Areas
Use an old toothbrush or small brush to clean beneath the sink rim, inside drain holes, and around any tight spots. These are often neglected but can harbor significant bacteria. Once I started cleaning behind the faucet bases, I noticed a reduction in foul odors and an overall cleaner appearance. Remember, the goal is to eliminate the unseen germs lurking in those tiny cracks.
Rinse Thoroughly and Dry
Rinse the sink with hot water to remove loosened grime and residual vinegar solution. Dry the surfaces with a microfiber cloth to prevent water spots and inhibit mold growth. It’s a common mistake to skip drying, but keeping the sink dry discourages bacteria and mold from settling in. I make it a habit to wipe down the sink after every use, greatly reducing cleaning time over the week.
Maintain Regular Deep Cleaning
Set a weekly schedule for deep cleaning your sink. Incorporate the above steps consistently to keep germs at bay. For added protection, consider applying a natural disinfectant spray from https://spotlesscarpetz.com/effective-sanitizing-methods-for-a-germ-free-home on a monthly basis to ensure maximum cleanliness. Being diligent with this routine helps prevent buildup and keeps your kitchen safer and more hygienic.
Use Proper Tools and Supplies
Equip yourself with quality microfiber cloths, a stiff-bristled brush, and natural cleaning agents like vinegar and baking soda. For stubborn stains, sprinkle baking soda, spray vinegar over it, and scrub with the brush. Once I started using these tools consistently, I noticed a significant improvement in the cleanliness and hygiene of my kitchen. Proper tools make the difference between superficial cleaning and true sanitization.Many homeowners are unaware of the nuanced mistakes that can compromise their cleaning efforts. For instance, a common myth is that spraying disinfectant alone is sufficient to kill all germs—yet, studies indicate that contact time and proper application are crucial for effective sanitation[^1]. Rushing through-house cleaning routines often leads to superficial results, leaving bacteria behind in hard-to-reach corners or porous surfaces.
Why Do Conventional Cleaning Methods Fail Against Deep-Set Germs?
Despite the widespread belief that using natural solutions like vinegar or baking soda ensures complete disinfection, recent research reveals that these agents often lack the broad-spectrum antimicrobial power necessary for thorough sanitization, especially on high-touch surfaces[^2]. This misperception can lead to complacency, increasing the risk of infection transmission.
One advanced mistake I encountered during move-out cleaning was neglecting the underestimation of microbial presence on upholstery. Many think that vacuuming is enough, but without proper sanitation, hidden microbes persist, risking hygiene violations. This is why integrating specialized upholstery cleaning products, as detailed in upholstery cleaning tips, can make a significant difference.
For those managing move-out cleanings, overlooking the hidden grime behind appliances or inside vents can jeopardize security deposit refunds. Implementing targeted cleaning strategies, such as those outlined in move-out checklists, helps address these tricky spots. Do you fall into the trap of neglecting these details? Let me know in the comments.
Are You Properly Disinfecting High-Touch Areas?
Advanced cleaning recognizes that surfaces like light switches, door handles, and electronic remotes harbor microbe reservoirs. Merely wiping with a damp cloth isn’t enough; using disinfectants that remain effective with adequate contact time is essential. Improper technique—such as quick spraying and immediate wiping—reduces germ-killing efficacy, a mistake often made by DIY enthusiasts. Consulting expert strategies, as shared in professional cleaning secrets, can elevate your routine.
The truth is, many underestimate the importance of meticulous cleaning of upholstered furniture or neglect to deep clean kitchens and bathrooms regularly. Advanced mistakes include using harsh chemicals on sensitive surfaces, causing damage, or relying solely on superficial cleaning methods. Remember, consistent, targeted sanitizing, especially on porous surfaces, is key to a healthier home.
Have you ever fallen into this trap? Feel free to share your experiences or questions in the comments—let’s help each other elevate our cleaning game!
Maintaining a consistently clean and sanitized home requires investing in the right tools and adopting proven methods. Personally, I rely on a combination of high-quality equipment and strategic routines to ensure every corner remains germ-free and inviting. One essential tool I swear by is a **microfiber cloth**. Unlike traditional rags, microfiber is designed to trap dust and microbes effectively without spreading bacteria. I use it daily, especially on high-touch surfaces like light switches and doorknobs, because it minimizes cross-contamination and requires less chemical cleaning agents.
For deeper cleaning sessions, I turn to a **steam cleaner**. I own a handheld model with adjustable temperature settings, which allows me to sanitize upholstery, grout, and even curtains without harsh chemicals. The heat kills pathogens on contact, making it a fast and eco-friendly option. I noticed that using steam significantly reduces mold buildup in bathrooms and keeps my curtains fresh longer.
Regarding disinfectants, I prefer natural solutions like white vinegar combined with tea tree oil. This blend offers antimicrobial benefits without exposing my family to chemical residues. The key is using the right concentration and allowing sufficient contact time—about 5 to 10 minutes—before wiping or rinsing. As highlighted by cleaning experts, “Contact time is crucial for disinfectant efficacy”[^1].
In terms of software, scheduling regular cleaning reminders using a home organization app helps me stay consistent. Setting weekly goals prevents the buildup of grime and ensures that cleaning becomes a manageable part of my routine, not an overwhelming chore.
Looking ahead, I predict that smart cleaning devices—like app-controlled robotic vacuums and sensors that monitor air quality—will become standard. These innovations will customize cleaning schedules based on real-time data, making home hygiene more effortless and effective.
How do I maintain these tools and routines over time? Regular maintenance is essential. For example, I clean my microfiber cloths in hot water after every use and replace them quarterly to prevent bacterial growth. Steam cleaners require descaling every few months, which I do using manufacturer’s instructions. Disinfectant solutions should also be prepared fresh regularly, avoiding expired or diluted mixtures that lose potency.
To streamline your routine, consider investing in a **UV sanitation device** for your smartphone and small gadgets. These devices can eliminate lingering germs quickly, improving overall hygiene. Plus, they require minimal effort—simply place your device inside and press a button.
Ready to elevate your cleaning game? Start by integrating a quality microfiber cloth and steam cleaner into your routine. These tools are game-changers for long-term health and cleanliness. For more advanced strategies, explore how effective house cleaning secrets from experts can transform your approach and save you time. Visit https://spotlesscarpetz.com/effective-house-cleaning-secrets-from-cleaning-experts to learn more.Throughout my cleaning journey, one of the most eye-opening lessons was realizing how deceptively stubborn some grime and germs can be. I used to believe that a quick wipe or a splash of vinegar would suffice, but the truth is, effective sanitization requires attention to detail and patience. My experience taught me that superficial cleaning often leaves behind unseen threats, and only through thorough, methodical routines can I truly protect my home. This realization motivated me to seek out expert tips and invest in the right tools, transforming my cleaning approach from casual to clinically effective. The biggest takeaway? Never underestimate the power of proper technique combined with quality supplies—your health depends on it.