
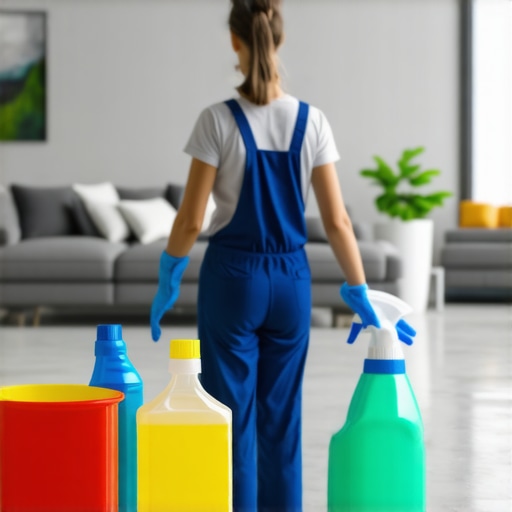
Ever found yourself standing in your new home, only to realize the place looks clean on the surface but feels… off? Maybe it’s that lingering smell, dusty corners you missed, or dirt hiding behind radiators. I remember my first move-in experience—expecting a fresh start, only to be greeted by stubborn grime and an oddly sticky kitchen floor. That lightbulb moment hit me hard: a superficial clean isn’t enough. You need to know what to look for in a move-in deep clean to truly settle in without surprises.
Why Paying Attention to the Little Things Matters
When I started paying closer attention to the details, everything changed. I learned that a move-in deep clean isn’t just about wiping surfaces; it’s about thoroughly inspecting hidden spots, sanitizing high-touch areas, and ensuring every nook and cranny is up to standard. Skipping these steps can mean enduring stubborn bacteria, unpleasant odors, or surprises during your final walkthrough with your landlord.
Is It Really Worth the Extra Effort or Just Overkill?
Initially, I thought, “It’s good enough.” But experienced tenants and professional cleaners know that neglecting certain spots can cost you your security deposit or compromise your health. I made the mistake early on of ignoring beneath the fridge and behind the bathroom fixtures—sure, they looked fine from afar, but upon closer inspection, they were teeming with dust, mold, and grime. Learning to identify these areas is essential. Want to see how to get ahead of these common pitfalls? Check out our move-out clean checklist for expert tips.
According to a study published by the Environmental Protection Agency, indoor air can be up to five times more polluted than outdoor air, primarily due to dust, mold, and bacteria hiding in neglected spots. That’s a stark reminder that even a seemingly clean home can harbor unseen threats. So, before you settle in, I encourage you to do a thorough evaluation—because a deep clean that covers the overlooked details can make all the difference in creating a safe, fresh environment.
But where do you start? Glad you asked. We’ll dive into practical steps to ensure your move-in cleaning is comprehensive, effective, and leaves no stone unturned.
Tackle High-Traffic Areas First
Begin with spots that gather the most dirt and bacteria, such as kitchen countertops, sinks, and bathroom fixtures. Use a disinfectant spray to eliminate germs and wipe thoroughly with microfiber cloths. Remember, high-touch surfaces like door handles and light switches deserve extra attention—sanitize them well to prevent health issues. During my first cleaning, I spent hours scrubbing the kitchen sink because I had neglected it initially, which resulted in stubborn stains and odors that lingered until I attacked them with a commercial-grade sanitizer. This immediate focus ensures your home is safe and welcoming from day one.
Deep-Clean Hidden Spots and Hard-to-Reach Corners
Don’t overlook the nooks behind appliances or beneath cabinets—these are often reservoirs of dust, mold, and grime. Carefully move appliances like the fridge and stove to clean underneath and behind them, removing accumulated dirt that can harbor pests or mold. For instance, I once rolled out my refrigerator and found a layer of old crumbs and mold spores—cleaning this area dramatically improved air quality and prevented future pest issues. Use a long-handled duster or brush to reach ceiling corners, vents, and behind radiators, which are notorious for dust buildup. Regularly inspecting these areas during move-in prevents surprises during your final walkthrough.
Sanitize Upholstery and Fabrics Effectively
Furniture and curtains can trap dust and allergens; deep cleaning upholstery extends their lifespan and maintains indoor air quality. For fabric couches, vacuum thoroughly with a brush attachment, then treat stains with an eco-friendly fabric cleaner—consider using hot steam for disinfecting. Here’s a quick secret: I once used a mixture of baking soda and a few drops of essential oil on my sofa, then vacuumed after 15 minutes to refresh it. Check out this upholstery care guide for expert tips. Additionally, removing dust from curtains can be as simple as tossing them in the dryer with a damp cloth or using a specialized vacuum attachment.
Scrub and Sanitize Bathrooms with Precision
Bacteria love damp, dark spaces—so pay special attention to grout lines, showerheads, and drains. Use a brush to scrub grout with a cleaning solution containing baking soda and vinegar (careful with this combo—they can react). To eliminate mold buildup, apply a commercial mold remover or a diluted bleach solution, then rinse thoroughly. Be sure to sanitize shower handles and toilet seats with disinfectant. I learned from a professional cleaner that letting a bleach solution sit for about ten minutes maximizes mold-killing efficacy without damaging surfaces. This systematic approach ensures your bathrooms are hygienic and odor-free.
Perfect Your Floors and Carpets
Floors can harbor unseen dirt, dust mites, and bacteria. Vacuum carpets deeply, making multiple passes—especially in high-traffic zones—and consider renting a steam cleaner for a deep refresh. For hard floors, mop thoroughly using an eco-friendly cleaner to remove stains and disinfect. Don’t forget to clean behind and beneath furniture—dust and dirt can hide in these spots and cause allergies. I vividly recall dragging out my sofa and discovering layers of dust. Using a microfiber mop offers better dust capture than traditional dusters, improving air quality instantly. For carpets, check out this sanitizing hack for effective sterilization.
Vents, Filters, and Less Obvious Areas
Air quality is often compromised by dirty vents and filters. Remove and clean HVAC filters, replacing them if necessary, and use a brush to clear dust from air vents and exhaust fans. This prevents dust recirculation and improves indoor air quality. During my overhaul, cleaning the air vents dramatically reduced the dust in the air and made the space feel fresher. Regularly inspect and clean these areas to maintain optimal airflow and hygiene.
Final Checks and Maintenance
Once the deep cleaning is complete, do a walkthrough with a checklist—either your own or from this move-out checklist. Look for overlooked spots, ensure all surfaces are sanitized, and freshen the air by airing out rooms. Use odor absorbers like activated charcoal or baking soda to eliminate lingering smells. A thorough, detail-oriented approach ensures your new home starts spotless, setting the stage for comfortable living ahead.
Many assume that surface-level cleaning suffices for a truly hygienic and spotless home, but in my experience, this mindset often backfires. One prevalent misconception is that using generic disinfectants is enough to eliminate all germs; however, studies show that many common disinfectants fail to thoroughly sanitize porous or textured surfaces, leaving behind bacteria and viruses (see [Effective Sanitizing Methods](https://spotlesscarpetz.com/effective-sanitizing-methods-for-a-germ-free-home)). Additionally, many people underestimate the importance of deep cleaning upholstery, assuming regular vacuuming is sufficient. But dust mites, pet dander, and allergens embed deep within fibers, necessitating specialized treatments like hot steam cleaning, as detailed in our [Upholstery Care Guide](https://spotlesscarpetz.com/ultimate-upholstery-care-guide-for-lasting-freshness).
A frequent trap is over-reliance on commercial sprays for mold and mildew, ignoring the fact that improper use can worsen the problem. For instance, spraying bleach directly onto mold without proper dilution and without addressing moisture issues can cause mold to spread or penetrate deeper into surfaces, making it nearly impossible to eradicate completely. Experts recommend combined approaches—mechanical removal, moisture control, and targeted cleaning solutions—highlighted in [Mold Removal Strategies](https://spotlesscarpetz.com/removing-mold-from-window-sills-before-you-move-out).
For move-out cleaning, many tenants focus solely on visible messes, neglecting hidden areas like behind appliances or inside air vents. This oversight not only costs them potential deposit deductions but also leaves residual dirt that can cause pest problems or indoor airquality issues. Advanced cleaning involves systematic disassembly and inspection, as outlined in [Move-Out Cleaning Tips](https://spotlesscarpetz.com/move-out-cleaning-strategies-to-secure-your-deposit).
What surprises many is that some cleaning agents can be counterproductive if misused. For example, mixing vinegar and baking soda seems harmless but can produce a foaming reaction that diminishes cleaning effectiveness, not to mention potential property damage if misapplied. The key is understanding each product’s chemistry, which is explained thoroughly in [Cleaning Expert Secrets](https://spotlesscarpetz.com/effective-house-cleaning-secrets-from-cleaning-experts).
So, what’s the biggest nuance often missed? It’s the importance of non-porous versus porous surface cleaning and understanding that not all surfaces react equally to cleaning agents. For example, using vinegar on natural stone countertops can cause etching, while some disinfectants may discolor upholstery if not properly tested first. Always read manufacturer labels and consult expert resources before applying solutions—details that can make or break your cleaning outcome.
Have you ever fallen into this trap? Let me know in the comments! Being aware of these nuances enables you to approach cleaning with precision, efficiency, and safety, ensuring your home not only looks clean but is truly hygienic and preserved for the long haul.
Keeping your home impeccably clean over the long term requires more than just elbow grease; it demands the right tools, proper maintenance routines, and an understanding of how to keep equipment functioning optimally. As someone who’s been through countless cleaning cycles, I can attest that investing in quality tools and maintaining them properly significantly extends their lifespan and effectiveness.
Invest in High-Quality Equipment for Lasting Results
For upholstery, I personally rely on a steaming cleaner like the Bissell Steam & Clean because it combines powerful steam output with a lightweight design, making deep cleaning less of a chore. Unlike traditional vacuums, steam cleaners not only lift dirt but also sanitize fabrics and surfaces without chemicals. Choosing durable, commercial-grade equipment like this means I can perform periodic deep cleans—whether it’s on my sofa, curtains, or mattresses—and ensure they remain fresh and allergen-free.
When it comes to move-out cleaning, a reliable professional-grade vacuum with HEPA filters is indispensable. I prefer models with multi-layer filtration systems because they trap tiny dust particles and prevent recirculation into the air. Regular maintenance of these vacuums, such as replacing filters every 6-12 months and cleaning the brush rollers, keeps them performing at peak levels.
Why Regular Tool Maintenance Matters
Misusing or neglecting these tools can lead to decreased efficiency and shortened lifespan. I make it a habit to check my equipment’s filters and brushes monthly—cleaning or replacing parts as needed to prevent clogging or wear. This proactive approach not only saves money in the long run but also ensures my home stays hygienic and dust-free. For example, a clogged filter can reduce suction power, making vacuuming less effective and allowing dirt to escape back into the environment.
Looking ahead, the trend is moving toward smart cleaning devices equipped with sensors to monitor dirt levels and notify users when maintenance is due. Think of robot vacuums that can self-maintain filters or alert you when brushes need replacing—these innovations promise to make upkeep even easier.
How do I maintain my cleaning tools over time?
Developing a routine for tool maintenance is vital. For upholstery steamers, I rinse and descale the water tank every few uses using specially formulated descaling solutions, effectively preventing mineral buildup that hampers performance. For vacuums, I empty the dust bin after each use, wash or replace filters periodically, and inspect brush rollers for hair and debris that can cause strain or damage. Reviewing manufacturer instructions for specific maintenance recommendations can prevent costly repairs and keep your equipment operating smoothly.
If you’d like to step up your home maintenance, consider keeping a detailed schedule for tool inspections, repairs, and replacements. For example, ensuring your vacuum’s filters and brushes are in tip-top shape can profoundly affect cleaning efficacy. Try scheduling a monthly check of all your equipment; it’s a small effort with big long-term benefits. Want some concrete guidance? Check out our move-out cleaning checklist for detailed routines. Properly maintained tools will serve you many years, making every clean more effective and less stressful.
The Hardest Lesson I Learned About House Cleaning, Upholstery, Sanitizing, and Move-Out Clean
One of my most eye-opening realizations was that shortcuts in cleaning can lead to costly mistakes, especially during a move-in. I once skipped a thorough inspection behind appliances, only to find mold and pests weeks later. That experience taught me to always prioritize hidden spots, understanding that real cleanliness requires attention to every corner—no matter how inconvenient it seems.
Secrets That Changed How I Approach Move-Out Stripping
Discovering effective strategies, like disassembling furniture to clean beneath and behind, made a huge difference. I learned that using specialized tools and following checklists from trusted resources, such as the move-out clean checklist, ensures nothing gets overlooked. It’s about being meticulous and systematic, not just quick surface wipes.
The Unexpected Power of Detail-Oriented Cleaning
I was surprised to find that even the most neglected areas—air vents, behind radiators, and grout lines—hold bacteria and allergens that impact health. Regularly tackling these spaces transforms a home from just looking clean to truly being safe and fresh. Fun fact: using eco-friendly solutions like vinegar and baking soda can elevate your cleaning game without harmful chemicals, as discussed in expert cleaning secrets.
My Trusted Arsenal for Lasting Cleanliness
Over the years, I’ve come to rely on a few proven tools. The upholstery care guide introduced me to steam cleaners that refresh fabrics without residue. Additionally, a multi-filter vacuum helps maintain indoor air quality, making routine cleaning more effective. Investing in quality gear, combined with regular maintenance—like replacing filters or descaling steamers—significantly extends their lifespan and ensures consistent results.
Your Future in Sparkling Homes Starts Now
Never underestimate the impact of deep, mindful cleaning on your well-being and peace of mind. Every corner you refine brings comfort and health, and you’ll feel empowered knowing you control the cleanliness of your sanctuary. Ready to elevate your move-in cleaning routine? Remember, the journey is worth every effort, and your home will thank you for it. What’s the most surprising spot you’ve discovered during a move-in deep clean? Share your insights below—I’m eager to hear your stories and tips.