
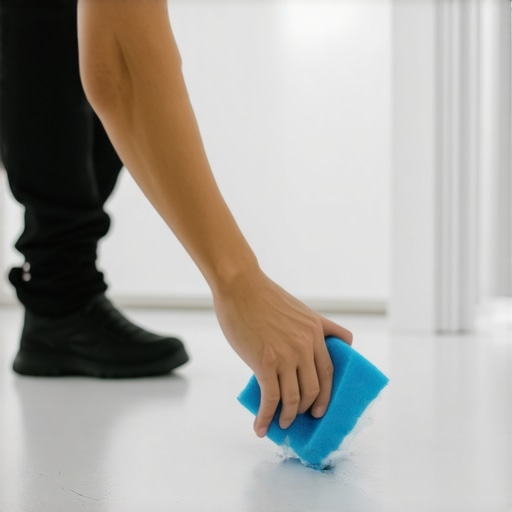
I’ll never forget the first time I moved out of an apartment and discovered that despite scrub brushes and endless elbow grease, those stubborn scuff marks on my baseboards refused to budge. It was a frustrating moment—standing there, trying to wipe away years of dirt and wear, wondering if I’d ever restore that crisp, clean look. That lightbulb moment made me realize: there has to be a better way. And after countless trial-and-error sessions, I finally cracked the code to removing those pesky marks swiftly and effectively.
Why Tackling Baseboard Scuffs Is More Than Just Cleaning
Those scuff marks might seem like minor blemishes, but they can really drag a space down. Dirty, scratched, or dinged baseboards can instantly make a room look neglected, even if the rest of your house is spotless. Plus, if you’re preparing for a move-out inspection, leaving those marks behind can jeopardize your deposit. According to the Ultimate Upholstery Care Guide, maintaining clean and undamaged baseboards can significantly improve your home’s overall appearance and even boost its value.
Now, here’s the honest truth: I once made the mistake of using only harsh chemicals without testing a small area first. It caused discoloration that took more work to fix. That experience taught me: approach cleaning with care and patience. Today, I want to share tried-and-true methods that helped me restore my baseboards quickly and safely.
Is Fast Removal of Scuff Marks Really Possible Without Professional Help?
At first, I doubted that a few homemade solutions could handle those tough marks. I was worried about damage, streaks, or just wasting time. But I learned that with the right tools and techniques—like gentle abrasives or simple household items—you can make your baseboards look brand new in no time. And my hope is that you won’t fall into the trap of over-scrubbing or using chemicals that can do more harm than good. Want to see how I did it? Let’s dive into the practical steps that turned my cleaning mess into a success story.
If you’ve ever faced this common frustration—scrubbing without success—you’re not alone. Stick around, because I’ve got some simple, effective tips that will save you time and effort, and get those baseboards shining again. Ready to restore that fresh, clean look? Keep reading!
Identify the Type of Scuff Marks
Before starting, assess your baseboards to determine if the marks are just surface dirt or ingrained grime. For recent, light scuffs, a simple cleaning solution may suffice. For deeper stains, you’ll need specific techniques. I once tackled a set of baseboards in my living room where fresh sneaker scuffs turned out to be dirt trapped in tiny grooves. Recognizing the type of mark helped me choose the right method.
Gather Your Tools and Ingredients
Equip yourself with mild dish soap, warm water, microfiber cloths, a soft-bristled brush, and a magic eraser. For tougher stains, a mixture of baking soda and water creates a gentle abrasive. I recommend having a spray bottle for even application. Remember, the goal is to clean gently without damaging the paint or finish: think of it like polishing jewelry without scratching the surface.
Start with a Gentle Cleaning
Mix a few drops of dish soap into warm water. Dampen a microfiber cloth—never soak it—to avoid excess moisture that can harm baseboards. Wipe along the length of the baseboard, applying light pressure. I once cleaned an entire hallway in a single pass, noticing how even stubborn marks started fading after a thorough wipe. For corners and detailed areas, use a soft-bristled brush dipped in the solution, moving in gentle circles.
Target Stubborn Marks with an Eraser or Baking Soda Paste
For lingering scuffs, use a magic eraser lightly dampened. Gently rub over the stain—check frequently to avoid removing paint. Alternatively, make a baking soda paste by mixing equal parts baking soda and water, then apply with a soft cloth. This acts like a gentle abrasive, like a pumice stone for grout but milder. Be cautious: test a small area first to prevent discoloration. I once had to repeat this step twice on a stubborn mark, and eventually, it vanished without harm to the baseboard’s finish.
Wipe and Dry for a Spotless Finish
After treating the stains, wipe down the baseboards with a clean, damp cloth to remove residue. Follow with a dry microfiber cloth to prevent streaks and water damage. This final step enhances the shine and clarity of your baseboards. I learned that neglecting this step can leave streaks or cause warping over time, so patience is key. For an extra boost, buff the surface with a soft cloth to restore brightness.
Prevent Future Scuffs with Protective Measures
Once your baseboards gleam, consider applying a light coat of furniture wax or a protective sealant suitable for paint. This creates a barrier against scuffs and dirt, making future cleaning easier. In my experience, regular maintenance—like a quick wipe every few weeks—keeps baseboards looking fresh without deep cleaning. Think of it as giving your space a healthy skincare routine.
If the task feels overwhelming or the marks persistent, professional cleaning services like those described in move-out cleaning hacks can ensure a thorough job. Sometimes, a professional touch can save you time and guarantee excellent results.
Remember, patience and gentle techniques are your best allies in restoring your baseboards. With consistent effort and the right tools, those stubborn scuff marks can become a thing of the past, leaving your space looking spotless and welcoming.
 Many assume that a thorough scrub with generic cleaning products guarantees a spotless home, but in my years of experience, I’ve observed a few critical misconceptions that can hinder effective cleaning. For instance, the belief that all disinfectants work equally well on every surface is simply false. The efficacy of sanitizing agents varies significantly depending on the material and type of bacteria or mold, as highlighted by expert studies in the field. Using the wrong product not only leads to ineffective sanitation but can also damage delicate surfaces, making your efforts counterproductive.
Another trap many fall into involves over-reliance on chemical cleaners without understanding their limitations. While powerful sprays might seem like a quick fix, they often leave residues that can cause long-term damage or contribute to allergen build-up. Instead, employing targeted, purpose-specific cleaners—like those described in our \[effective house cleaning secrets\]—ensures safer, more effective results. Additionally, neglecting proper ventilation during and after cleaning can trap harmful fumes indoors, posing health risks. Always remember, ventilation is key to a truly sanitized and safe environment.
What most people overlook is the importance of deep cleaning upholstered items before move-out. Many think a vacuum alone suffices, but without proper sanitizing, allergens and odors can persist. Advanced techniques, such as hot water extraction and specialized upholstery cleaning solutions—discussed in our \[upholstery cleaning tips\]—are essential for genuine freshness and odor removal.
Make sure you understand that superficial cleaning doesn’t replace thorough sanitization. For example, visible dirt might be removed easily, but bacteria, mold spores, and dust mites often hide in unseen corners, contributing to health issues and foul odors. That’s why integrating proper sanitizing techniques, like those covered in our \[sanitizing hacks\], into your routine is crucial for a truly clean home.
Why do so many overlook the significance of detailed cleaning checklists? Studies suggest that incomplete tasks often lead to compromised results. Creating a comprehensive move-out checklist ensures no area is neglected, particularly often-missed spots like behind appliances or inside vents. Following proven strategies, like those in our \[move-out cleaning strategies\], can fully protect your deposit and leave your landlord impressed.
Finally, I advise caution when using vinegar or harsh abrasives on delicate surfaces. While seemingly effective, these can cause discoloration or scratches, a common mistake among DIY cleaners. Instead, opting for gentle, appropriate solutions tailored to each surface type preserves beauty and functionality.
Have you ever fallen into this trap? Let me know in the comments. Remember, understanding these hidden nuances can elevate your cleaning from ordinary to expert-level, ensuring a safe, spotless space that truly impresses.
Invest in Proven Equipment for Consistent Results
When it comes to maintaining a pristine home, using the right tools makes all the difference. Personally, I swear by a high-quality microfiber mop like the Microfiber Magic. Its dense fibers trap dust and dirt better than standard mops, and it dries quickly to prevent streaks. Unlike cheap alternatives, this mop’s textured head reaches into corners and under furniture, reducing the need for constant re-wetting and making daily upkeep more manageable.
For carpets and upholstery, I rely on a steam cleaner with variable heat and pressure. It not only refreshes fabrics but also sanitizes without harsh chemicals. This saves money on professional services and gives me control over the process, ensuring gentle yet effective cleaning that preserves fabric integrity over time.
Maximize Long-Term Results with Smart Maintenance
Long-term cleanliness hinges on routine checks and early intervention. I recommend scheduling bi-weekly spot treatments for high-touch areas like door handles, switches, and remote controls—especially in households with kids or pets. Using disinfectant wipes designed for electronics, such as those detailed in effective sanitizing methods, helps prevent germs from settling into surfaces.
Don’t forget to routinely inspect and replace elements like HVAC filters—clogged filters foul indoor air and strain your system. A clean filter extends your system’s life and reduces dust circulation. I personally set a reminder every three months to swap filters, which keeps allergens at bay and maintains energy efficiency.
Scaling Up Your Cleaning Arsenal with Technology
As cleaning challenges grow, so should your toolkit. I’ve adopted smart home cleaning devices, like robotic vacuums with mapping features, which automatically maintain floors daily. They’re especially handy for hard-to-reach spots. Additionally, ultrasonic cleaners—originally used in jewelry repair—are now perfect for cleaning delicate items like eyeglasses and small decor pieces without risking damage.
Predicting the future of home maintenance, I believe smart sensors will play a bigger role, alerting you when filters need changing or surfaces require sanitizing, greatly reducing neglect and extending the lifespan of your fixtures.
Maintaining Hygiene in Challenging Areas
How do I sustain cleanliness over time? The key lies in routine, targeted efforts. Focus on overlooked spots like behind appliances and inside vents. Properly sealing these areas prevents dust buildup and mold growth. Regularly using specialized tools, such as strategic cleaning tools, will keep your home fresh and safe from long-term decay.
My personal favorite is a handheld steam cleaner, which handles grout lines, bathroom fixtures, and even fabric curtains quickly and effectively. It’s an investment that pays off by reducing the need for intensive deep cleans—saving time and money in the long run.
Next time you’re deep into a cleaning project, try using a high-grade microfiber cloth for polishing surfaces or an ultrasonic cleaner for smaller, delicate items. Implementing these precise tools and methods can significantly extend the time between major cleaning sessions, allowing you to enjoy a consistently comfortable, hygienic environment. Want to deepen your approach? Visit our contact page to ask for tailored advice or professional assistance in achieving your cleaning goals.
Lessons the Experts Don’t Usually Share
One of the biggest revelations I had was realizing that the smallest overlooked spot, like behind the refrigerator or inside air vents, can make or break a cleaning job. I once spent hours cleaning visible surfaces only to get my security deposit revoked because I ignored these hidden areas. It taught me that thoroughness isn’t just about what’s visible—true cleanliness lies in the details.
Furthermore, relying solely on chemical solutions often leads to damage or residue buildup. I learned that gentle, purpose-made products outperform harsh chemicals every time, especially when combined with the right techniques. Patience and a careful approach have transformed my cleaning routine from a chore into a mastery.
Another lesson was that investing in high-quality tools, like microfiber cloths or steam cleaners, isn’t an expense but a game changer. They deliver results that cheap alternatives simply can’t match. These insights helped me turn my home from a list of chores into a space I’m genuinely proud of.
Tools That Took My Cleaning to the Next Level
My trusted microfiber mop, such as the Microfiber Magic, has become indispensable for quick daily touch-ups. For deep cleaning, a steam cleaner like the one discussed in our Ultimate Upholstery Care Guide helps sanitize and refresh fabrics without harsh chemicals. Both tools have saved me time and money while maintaining safety.
For small, precision tasks, ultrasonic cleaners are fantastic for jewelry, buttons, and delicate fixtures. These devices, discussed in our home maintenance section, ensure thorough cleanliness at home without damage. They’ve made my cleaning routine more efficient and effective.
Embracing a Routine that Keeps Your Space Radiant
Routine maintenance is key. I schedule weekly quick cleans of high-touch areas using disinfectant wipes from our sanitize smarter guide. This practice prevents buildup and extends the lifespan of surfaces. Additionally, checking and replacing filters regularly, as outlined in our move-out checklist, ensures indoor air quality stays pristine.
Technology adapts, too—robotic vacuums with mapping features save me daily effort. The future holds even more innovative solutions, such as smart sensors, which promise to remind us when areas need attention, reducing neglect and preserving our home’s value.
Remember, Your Home Is a Reflection of Your Care
With each cleaning step, I remind myself that a well-maintained space fosters peace and pride. It’s not about perfection but about consistent effort and the right attitude. Once you embrace these secrets, maintaining a beautiful, healthy home becomes less of a burden and more of a joy.
What’s the one hidden cleaning tip you swear by? Share your secrets below—let’s learn from each other’s experiences!
,