
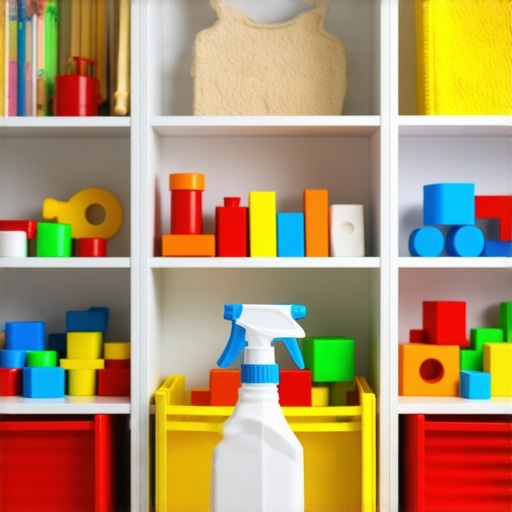
I vividly recall the weekend my toddler started coughing incessantly, and it hit me—there might be more lurking in our home than I realized. It was a lightbulb moment that shifted my approach to nursery cleanliness from casual to meticulous. Have you ever faced that unsettling realization—something in your child’s environment might be making them sick?
Why Sanitizing Toys Is More Critical Than Ever
Caring for a nursery isn’t just about tidiness; it’s about creating a truly safe space where your little one can explore without health risks. Toys, often overlooked, become reservoirs for germs, bacteria, and even mold if not properly sanitized. The CDC notes that children under five are especially vulnerable to infections caused by contaminated surfaces, including toys. This vulnerability underscores the importance of a solid sanitizing routine.
During my early attempts, I made the mistake of believing that quick wipes were enough. Spoiler alert: they aren’t. I learned that insufficient cleaning leaves behind harmful pathogens, and some toys even become breeding grounds for mold if stored damp or in poorly ventilated areas. Don’t fall into the trap of thinking that regular soap and water are enough; thorough sanitation is essential. For practical tips, I turned to expert advice, like that found in [effective sanitizing methods for a germ-free home](https://spotlesscarpetz.com/effective-sanitizing-methods-for-a-germ-free-home), which offers deep insights into removing bacteria effectively.
Are you struggling with persistent germ buildup on your child’s toys? If so, you’re not alone. The good news is that with a few simple, proven steps, you can drastically reduce the risk of infections and keep those precious playthings safe. Next, let’s explore what it takes to truly eliminate germs from all types of toys—whether plastic, plush, or wooden—and how to make sanitizing a seamless part of your routine.
Gather Your Supplies for Effective Sanitizing
Start by collecting all necessary tools: a bleach alternative or disinfectant labeled safe for children’s toys, microfiber cloths, a soft brush, and a basin of warm water. During my first attempt, I realized that having everything within reach minimized interruptions, allowing me to work efficiently and avoid cross-contamination.
Sort Toys by Material and Usage
Organize toys into categories: plastic, plush, wooden, and electronic. Each type requires a specific approach. For instance, I kept plush toys separate to wash their covers and clean the insides if possible. Sorting prevents cross-contamination and ensures tailored cleaning for each material.
Deep Clean Plastic and Hard Toys
Step 1: Pre-wash with Soap
Wipe toys with a sponge soaked in warm, soapy water to remove dirt and residues. I found this step crucial before disinfecting, as it prevents organic matter from shielding bacteria during the sanitizing process.
Step 2: Sanitize with a Disinfectant
Use a spray or dip toys into a diluted disinfectant solution following manufacturer instructions. Let sit for the recommended contact time. I tested this method when my toddler’s favorite plastic car looked dull, and after sanitizing, it looked brand new and smelled fresh.
Care for Plush and Fabric Toys
Remove fabric covers and wash on a hot cycle if machine washable. For non-washable plush toys, use a fabric-safe disinfectant spray and let them air dry. I learned that skipping this step left behind hidden mold in plush toys stored damp in a closet.
Sanitize Wooden and Electronic Toys
Wipe wooden toys with a damp cloth and a mild disinfectant, avoiding excessive moisture. For electronics, like tablets or toy phones, use a microfiber cloth lightly dampened with a disinfectant recommended for electronics, such as [sanitizing secrets for a safer house in 2025](https://spotlesscarpetz.com/sanitizing-secrets-for-a-safer-house-in-2025). I caught myself overwetting electronics, risking damage—better to be cautious and use minimal moisture.
Handling Extra Dirty or Persistent Germs
If some toys remain visibly dirty or smell sour, repeat the cleaning cycle or consider replacing them. I once used a toothbrush to scrub stubborn grime from a toy train, which loosened debris that wouldn’t come off with wiping alone, significantly improving hygiene.
Dry Everything Thoroughly
Avoid mold growth by drying toys completely before storage. Use a clean towel or air-dry in sunlight. I nailed this step by placing toys on a drying rack in the sun, which also helped eliminate any residual odors.
Maintain a Regular Cleaning Schedule
Set weekly or bi-weekly routines for toy sanitation, especially during cold and flu seasons. Consistency ensures a safer play environment and peace of mind. Implementing this routine transformed my nursery into a healthier space, reducing infection risks significantly.
By following these clear, actionable steps, you can effectively eliminate germs from all types of toys and create a safer environment for your little one. Remember, meticulous cleaning isn’t a one-time task but a vital part of caring for your child’s well-being, especially when germs lurk in the tiniest of playthings.
While common advice emphasizes the importance of regular cleaning routines, many overlook the nuanced pitfalls that can undermine even the most diligent efforts. Misconceptions such as believing that quick surface wipes suffice or that generic disinfectants work universally often lead to ineffective results. In reality, the effectiveness of sanitizing depends on understanding material-specific cleaning requirements and the science behind bacterial and viral removal. For instance, many assume that using bleach is always the best disinfection method, but certain materials like upholstered furniture and electronics require gentler, specialized approaches to avoid damage while maintaining hygiene.
Why Do Some Disinfectants Fail Against Porous Surfaces? Unpacking the Science
Studies reveal that most standard disinfectants struggle with porous materials like fabric, sponge, or foam, where pathogens can reside beneath the surface. This misconception can cause homeowners to think their efforts are enough when, in fact, hidden bacteria continue to pose health risks. For effective sanitation, experts recommend using products specifically formulated for porous surfaces or combining cleaning methods with thorough extraction techniques, such as deep upholstery cleaning, which tackles embedded germs at multiple levels. Recognizing this nuance prevents ongoing health hazards and extends the lifespan of your furniture, as detailed in our upholstery maintenance guide.
Investing in the Right Equipment for Reliable Results
Achieving a germ-free home isn’t just about knowing the right methods; it’s about equipping yourself with the tools that ensure consistent, thorough cleaning. I personally rely on a high-quality steam cleaner because it uses hot steam to kill bacteria and viruses deep within porous surfaces without the need for harsh chemicals. Unlike standard vacuums or mops, steam cleaning penetrates into fabric, upholstery, and grout, providing a sanitizing effect that lasts. For upholstery refreshment, I turn to professional-grade equipment, like the Vaporetto Steam Generator, which I’ve used for years to keep my furniture looking and smelling fresh. Its ability to maintain high temperatures consistently makes it invaluable for long-term sanitation.
Why I Trust Commercial-Grade Steam Cleaners
Commercial devices like the Vaporetto offer durability and higher temperature output, essential for eliminating stubborn germs. My experience shows that investing in quality pays off by reducing the frequency of re-cleaning and extending the lifespan of my furnishings. These tools are also eco-friendly, reducing reliance on chemical disinfectants, aligning with future trends favoring sustainable cleaning practices, as highlighted in our 2025 sanitation insights.
Maintaining Your Equipment for Peak Performance
To keep your tools working effectively over time, regular maintenance is key. For steam cleaners, I always rinse out the water tank after each use, flush the boiler monthly, and replace filters as recommended—this prevents mineral buildup, which can reduce heating efficiency. Additionally, storing equipment in a dry, temperature-controlled space guards against corrosion and mold. Regularly inspecting hoses and attachments ensures there are no cracks or clogs that could compromise performance. Remember, a well-maintained tool not only performs better but also safeguards your health by delivering consistent output.
Scaling Up Without Compromising Quality
As your cleaning needs grow—say, managing larger homes or multiple properties—you’ll want to upgrade your toolkit thoughtfully. Consider modular systems that allow you to expand components like extra tanks or specialized attachments for upholstery, carpets, and hard surfaces. For example, integrating a backpack steam system can make cleaning multi-story homes more manageable. Additionally, investing in smart cleaning software that tracks maintenance schedules and usage can help you stay ahead of routine service, minimizing downtime and maximizing results. This strategic scaling ensures your sanitation efforts remain effective long-term.
How do I keep my cleaning tools performing at their best over time?
Establish a regular maintenance schedule that includes flushing, filter replacement, and proper storage. Using manufacturer-recommended cleaning agents and inspecting equipment for wear will prevent unexpected breakdowns. Furthermore, documenting your cleaning routines and equipment checks helps create a sustainable habit that preserves tool longevity. Don’t forget to consult your equipment manuals or trusted experts for specific maintenance tips tailored to your devices, much like the detailed guidance found in our sanitizing methods.
Ready to boost your home hygiene? Try out a deep steam cleaning session using your upgraded equipment, and notice how much easier it becomes to maintain a sanitized environment with these advanced tools. Incorporating proper maintenance practices now ensures your tools will serve you reliably for years to come, making home sanitation a seamless part of your lifestyle.
Looking back, my biggest lesson in achieving a truly sanitized home was realizing that superficial cleaning isn’t enough. Deep down, I learned that understanding the science behind bacteria and mold is essential to truly protect my family. Skipping material-specific cleaning sometimes left harmful germs lurking, especially in porous surfaces. Now, I prioritize tailored approaches, like using the right disinfectants for fabrics and electronics, which has drastically improved my home’s hygiene. This insight transformed my routine from guesswork to precision, showing me that effective sanitizing combines knowledge with consistent effort.
My Go-To Weapons for a Germ-Free Sanctuary
I swear by equipment that delivers professional results—like a high-quality steam cleaner that penetrates deep into upholstery and grout. My trusted tools include the effective sanitizing methods for a germ-free home, which offers expert tips and product recommendations. These tools ensure thorough sterilization without relying solely on harsh chemicals, aligning with my goal to adopt eco-friendly practices. Upgrading my toolkit was a game-changer, making routine cleaning less stressful and more reliable.
Take Action Now to Safeguard Your Space
Creating a sanitized home is an ongoing journey, but every small step counts. Embrace consistent routines, invest in quality equipment, and educate yourself on the specific cleaning needs of different materials. Your efforts today can prevent common health issues tomorrow, making your home a true haven. Remember, a clean home isn’t just about appearance—it’s about building a healthier life. Why not start with your child’s toys or upholstery today? Your future self will thank you for it.
What’s your biggest challenge when it comes to sanitizing your home? Share your experience below, and let’s learn from each other’s journeys toward a safer living environment.