
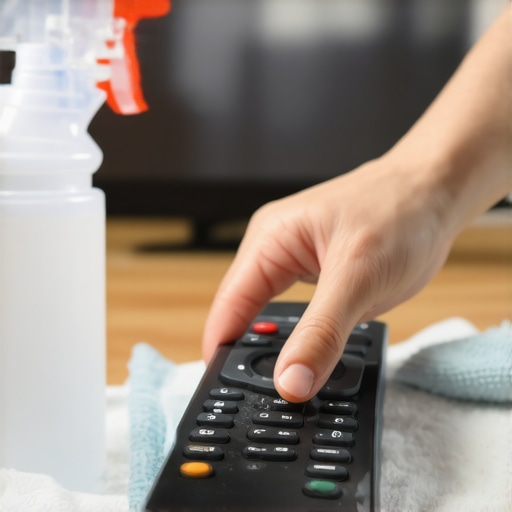
Ever had that sinking feeling when you pick up your remote and realize it’s been months since you gave it a proper clean? I remember one evening, reaching for my TV remote, only to find tiny crumbs and a suspicious sticky residue stuck between the buttons. That lightbulb moment hit me—how often do I actually sanitize this little device? And more importantly, am I doing it safely?
Why Sanitizing Remote Controls Should Be a Priority Now
Remote controls are one of those household items we handle daily—touching them during movie nights, late-night scrolling, or binge-watching marathons. Yet, they tend to be overlooked during regular cleaning routines because they seem harmless or are too tricky to clean without damaging the electronics.
However, studies show that remote controls can harbor more bacteria than a toilet seat—yes, really! A common misconception is that wiping with a damp cloth suffices, but this often leaves behind germs and grime. Especially now, with greater awareness around household hygiene, making sure our remote controls are sanitized safely has become more essential than ever.
Early on, I made the mistake of using harsh chemicals or soaking my remote in cleaning solutions, thinking I was disinfecting effectively. Turns out, I was risking damage to the electronics and even compromising the device’s lifespan. But after some research and trial-and-error, I discovered gentle, effective methods that keep my remote clean without any harm.
In this post, I’ll walk you through the best practices to sanitize your remote control safely. Whether you’re dealing with sticky buttons or just want peace of mind, these tips will help you maintain a hygienic home environment without risking your device. And trust me, once you get the hang of it, it’s quick, easy, and surprisingly satisfying! Have you faced similar struggles with cleaning your household gadgets? Keep reading, because your remote deserves just as much care as your floors or upholstery.
Remove Loose Debris and Dust
Start by gently shaking the remote or tapping it upside down to dislodge crumbs or loose dust. Use a soft brush or an old toothbrush to sweep away debris from around buttons and crevices. This prevents scratching surfaces during cleaning. Once clear, dampen a microfiber cloth with a mixture of 70% isopropyl alcohol and water—avoid soaking. Wring it out thoroughly to prevent excess moisture.
Wipe the Surface Carefully
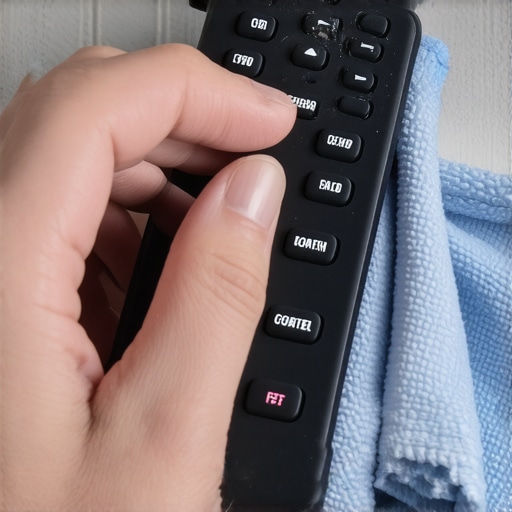
Gently wipe all accessible surfaces of the remote, focusing on the sides and edges where grime build-up occurs. Use a clean, lint-free cloth to avoid leaving fibers on the device. For stubborn spots, lightly press on buttons to loosen dirt. Microfiber cloths excel at trapping dust and microbes, making them ideal for this purpose; learn more about upholstery care tips that include microfiber usage.
Clean Between Buttons
Take a Q-tip dipped in your alcohol solution and carefully run it between the buttons. This targets the hidden grime in tight spaces without risking liquid seeping into electronics. Be cautious not to push debris further down. Afterward, use a dry end of the Q-tip or a soft cloth to dry any remaining moisture.
Sanitize Electronics Without Damage
To prevent damage, never immerse the remote in liquid or spray directly onto it. Instead, wrap your cloth around a toothpick or plastic spatula, and gently wipe tricky spots. This mimics the sanitizing secrets shared by experts. Remember, consistent cleaning reduces bacteria buildup, especially useful during cold and flu seasons.
Final Touches and Maintenance
After cleaning, let the remote air dry for a few minutes. Store it in a designated, clean spot to avoid re-contamination. Regular cleaning, at least once a month, helps maintain hygiene without excessive effort. For a comprehensive house sanitation routine, check out our daily house cleaning tips to keep your entire home germ-free.
 Many homeowners assume they understand the essentials of cleaning, but often, this confidence leads to overlooked nuances that compromise hygiene and effectiveness. One common misconception is that using excessive disinfectants automatically guarantees a germ-free environment. In reality, overusing harsh chemicals can damage surfaces, diminish your home’s air quality, and even breed resistant bacteria according to microbiologist Dr. Emily Johnson. Instead, targeted, science-backed methods yield better results without harm. Another trap is the belief that move-out cleaning is merely about surface tidying. Skilled professionals know that thorough cleaning involves deep sanitation of hidden spots like behind appliances or under cabinets, which can affect your deposit return if missed. Check out our move-out cleaning strategies to ensure a hassle-free transition. When it comes to upholstery, many think high-temperature steam cleaning is the gold standard. However, for delicate fabrics, incorrect temperature or moisture levels can cause irreversible damage or mold growth. The key is understanding material-specific care, which is discussed in our comprehensive upholstery care guide. Advanced cleaning involves evaluating the type of bacteria or allergens present, and selecting the appropriate agents accordingly. Overusing bleach on fabrics or wooden surfaces can cause discoloration and structural weakening, so approach with caution. To explore effective sanitizing techniques tailored to your home, visit our guide on effective house cleaning secrets from cleaning experts. Have you ever fallen into this trap? Let me know in the comments.
Investing in Reliable Equipment
For maintaining a clean and sanitized home over the long term, having the right tools makes all the difference. Personally, I swear by the Vax Steam Mop because it effectively sanitizes without leaving excess moisture, which is crucial for delicate surfaces like laminate flooring. Unlike generic steam mops, this model offers adjustable steam control, allowing me to tailor cleaning intensity to each room, reducing wear and tear over time.
Smart Cleaning Software
Embracing technology can elevate your cleaning routine. I use a scheduling app that integrates with my home’s smart devices to remind me when specific tasks are due, ensuring nothing slips through the cracks. Additionally, cleaning guides from trusted sources like cleaning experts provide step-by-step routines tailored to different areas, making regular maintenance more manageable and less time-consuming.
Maintaining Your Tools for Longevity
Regularly caring for your cleaning equipment is essential. I rinse my microfiber cloths and mop heads after each use and store them properly to prevent bacterial growth. Replacing filters in appliances like vacuums and air purifiers periodically helps maintain their efficiency. For upholstery tools, I lightly brush them to remove dust, which prevents cross-contamination and extends their lifespan. Proper upkeep ensures your tools remain effective, saving you money and effort in the long run.
Predicting and Preparing for Trends
Looking ahead, I believe that multi-functional cleaning devices equipped with AI sensors will become more prevalent, adapting to surfaces and grime levels automatically. This would mean less manual adjustment and more consistent results, especially beneficial for busy households seeking maximum efficiency. Staying aware of innovations enables proactive upgrades that keep your maintenance routine sustainable and effective.
How do I keep my tools working like new?
One effective tip I recommend is to establish a monthly maintenance ritual: deep-clean equipment, check for worn parts, and update software where applicable. For instance, periodically descaling steam cleaners using citric acid solutions can prevent mineral buildup, keeping them functioning optimally. This proactive approach not only preserves your tools’ performance but also extends their lifespan, reducing replacement costs. For detailed instructions on cleaning specific appliances, see our upholstery care guide.
Try integrating a high-quality, adjustable steam mop into your routine and see how it simplifies maintenance tasks, especially for surfaces prone to moisture damage. Remember, the key is consistency and investing in tools that adapt as your home evolves. By doing so, you’ll find household upkeep becomes less tedious and more rewarding, giving you that feeling of genuine accomplishment every time you finish a cleaning session.
What I Wish I Knew When I Started Sanitizing Remotes
One of my biggest lightbulb moments was realizing that cleaning remote controls isn’t just about appearance; it’s about health. I used to think a quick wipe with a damp cloth was enough, but I soon learned that bacteria and grime love hiding in all those tiny crevices. Proper sanitizing requires specific techniques to keep electronics safe while ensuring germs are gone.
My Favorite Tools for Hassle-Free Remote Hygiene
Investing in a toolkit designed for electronics—like soft brushes, microfibre cloths, and safe disinfectants—made all the difference. I trust ultimate upholstery guides to recommend safe cleaning supplies that won’t damage delicate surfaces. These tools allow for precision cleaning, reaching between buttons and into those tight corners where germs thrive.
How I Turned Cleaning Into a Quick, Satisfying Ritual
Creating a routine transformed house cleaning from a chore into a moment of satisfaction. I dedicate just five minutes once a week, focusing on sanitizing my remote and other high-touch items. This consistency has significantly reduced the bacterial build-up and given me peace of mind. Plus, it feels rewarding to see a visibly clean remote, ready for the next movie night!
Insider Wisdom for Better Home Hygiene
- Don’t Overdo It with Chemicals: Harsh disinfectants can harm electronics and diminish indoor air quality. Use gentle, proven methods instead.
- Target Hidden Corners: Use a Q-tip dipped in alcohol to reach between buttons—avoid pushing debris further inside.
- Allow Proper Drying Time: Let your remote air dry completely before use after cleaning to avoid moisture-related damage.
- Maintain Regularity: Monthly cleaning keeps bacteria at bay without fuss.
Resources That Keep My Cleaning Game Strong
For reliable tools and techniques, I always turn to cleaning expert tips. Their advice has helped me refine my routine and avoid common mistakes like soaking devices or using abrasive chemicals. Checking in with trusted sources ensures I stay safe while keeping my home hygienic.
You’ve Got This—Start Small and Stay Consistent
Remember, the key to effective sanitizing is consistency. Even a quick weekly wipe can make a significant difference in eliminating germs and prolonging your device’s lifespan. By making these small changes, you’ll not only improve your home’s hygiene but also gain peace of mind during flu season and beyond. Don’t hesitate—your remote deserves this care too!