
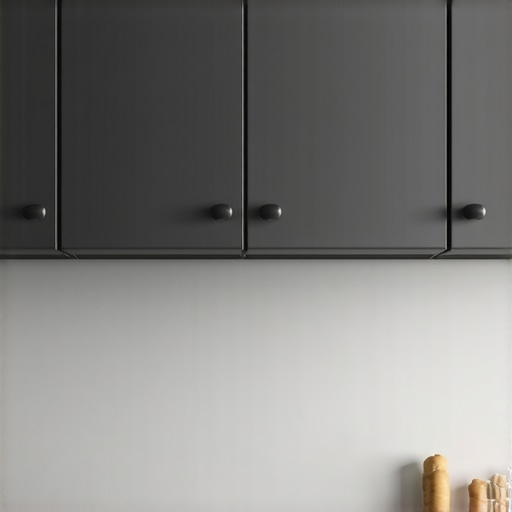
I remember the exact moment I realized I had been ignoring the biggest dust magnet in my kitchen. It was a Saturday morning, and I was meticulously cleaning every corner, every crevice, only to discover a thick layer of dust and grime lurking above my cabinets. That startling realization made me feel like I’d been living in a cloud of invisible dirt—one I had completely overlooked! If you’ve ever wondered why your kitchen still feels gritty despite regular cleaning, you’re not alone. Today, we’re going to tackle a sneaky culprit that often gets intentionally ignored: the dust and debris that settle on top of your kitchen cabinets.
Why You Should Never Ignore The Dust on Your Kitchen Cabinets
Our kitchens are the heart of our homes, but they also attract a surprising amount of dust, grease, and crumbs—especially above those high cabinets. These areas are notoriously hard to reach, and many of us tend to forget about them during routine cleaning. Over time, this neglected space becomes a breeding ground for a layer of dust and even mold if moisture sneaks in. The dust can circulate back into your living space, settling on countertops, utensils, and even food packages. Plus, if you’re sensitive to allergens, this hidden buildup can impact your health.
Don’t fall into the trap of thinking a quick swipe of the countertop is enough. That dust thickening above your cabinets is a silent sneaky, quietly degrading your home’s air quality and overall cleanliness. Trust me, I’ve been there, and once I started paying attention to these overlooked spots, my home felt fresher and healthier.
But the question is — how do you effectively clean those hard-to-reach spots without creating a mess or risking injury? That’s exactly what we’ll explore today. Preparing yourself with the right techniques will transform your cleaning routine and keep your kitchen truly spotless.
Have you noticed how stubborn the dust above your cabinets has become? Or do you avoid cleaning there because you think it’s too complicated? You’re not alone, and I’ll show you simple, effective steps to conquer this challenge.
One common mistake I made early on was trying to reach those spots with a flimsy old cloth on an awkward broomstick. It just smeared the dirt around, and I ended up making a bigger mess. Now, I use specific tools and techniques that make the job easier and more thorough. If you want to learn how I do it and keep your kitchen feeling truly clean, stick around. We’re diving into practical solutions that will make your chores less of a hassle and more of a breeze.
Ready to become the hero of your own cleaning story? Let’s get into the nitty-gritty of cleaning those filthy forgotten spots and reclaim your space from the dust demons lurking above your cabinets.
Gather Your Tools and Prepare Your Space
Start by collecting essential cleaning supplies: a sturdy step ladder, microfiber cloths, a long-handled duster, a gentle cleaner, and a vacuum with a hose attachment. Clear the area around your cabinets and furniture for easy access. Wearing gloves and a mask can help protect you from dust and allergens. I once tried to clean above the cabinets with a flimsy cloth on a broom—results were messy and inefficient. Instead, using a dedicated duster attached to a telescoping pole made my job cleaner and faster.
Remove Dust and Loose Debris Carefully
Use a microfiber duster or vacuum attachment to gently remove loose dust from cabinet tops and upholstery. For tricky spots, wrap a microfiber cloth around a broom handle for better reach. Make sure to wear a mask; I remember coughing after neglecting this step during my first attempt! This initial step prevents dust from falling onto surfaces below, making subsequent cleaning more effective.
Apply a Suitable Cleaning Solution
Mix a mild soap solution, such as a few drops of dish soap in warm water, or choose an eco-friendly cleaner specific to your needs. For upholstery, use a fabric-safe sanitizer like the one outlined in our sanitizing methods. Test the cleaner on a small, hidden area first to prevent damage. I once used harsh chemical sprays on my fabric sofa, which resulted in discoloration; now, I stick to gentle, tested solutions for fabric safety.
Scrub and Wipe with Precision
Dip a microfiber cloth into the cleaning solution, then wring out excess to avoid drips. Wipe the cabinet surfaces from top to bottom, paying attention to corners and mold-prone spots. Use a clean, damp cloth to rinse and remove residue. For upholstery, a soft-bristled brush can help lift dirt without damaging fibers. Remember, vigorous scrubbing can damage delicate fabrics; gentle motions yield the best results.
Deep Clean Tough Spots and Embedded Dirt
For stubborn grime, apply a paste of baking soda and water directly on the stain, letting it sit for 10-15 minutes before scrubbing gently. In my kitchen, a soda paste removed years of grease above the stove effortlessly, turning a previously dull area into pristine surface. Always check for compatibility with your material—baking soda is generally safe but never on glossy finishes or certain delicate fabrics. A soft toothbrush can help reach into crevices or textured surfaces.
Dry and Reassemble for Final Touch
After cleaning, wipe the surfaces dry with a clean microfiber cloth to prevent streaks or water spots. For upholstery, let the fabric air dry or use a fan for faster results. Reposition all moved items carefully. If your cabinets have lingering odors, consider a natural deodorizer like a mixture of lemon juice and water wiped across surfaces. This step ensures no moisture remains to cause mold or mildew growth.
Maintain Regular Upkeep
Schedule routine dusting and wiping sessions to prevent buildup. Incorporate upholstery vacuuming weekly to keep fabrics fresh and allergen-free. Regular maintenance simplifies deep cleaning and preserves the appearance of your furniture and cabinets. I started using these quick weekly routines after one particularly overwhelming weekend of neglected cleaning—now, my home stays consistently tidy without the stress of massive scrubs.
Many believe that a quick spray of disinfectant or a brisk wipe is enough to make a house truly sanitized or clean. However, in my experience, this oversimplifies what sanitation really entails. One common myth is that using a heavily scented disinfectant automatically means your home is germ-free. But recent studies show that many chemical disinfectants only target certain viruses and bacteria and may not eliminate all germs effectively, especially on porous surfaces. According to Dr. Stephanie Seneff, a research scientist at MIT, proper sanitation requires a multi-step process that includes cleaning, disinfecting, and proper drying to prevent recontamination.
An often overlooked nuance is that many products marketed as “disinfectants” don’t kill hardy bacteria like *Clostridium difficile* or spores, which can survive standard cleaning. Relying solely on disinfectant sprays can give a false sense of security, leading to incomplete sanitation. Instead, paying attention to the types of germs present and selecting appropriate, proven cleaning methods is vital. For example, deep-cleaning upholstery with the right techniques, such as hot water extraction and proper sanitizers, ensures a healthier environment. For detailed guidance on effective sanitizing protocols, I recommend reviewing targeted strategies outlined in our effective sanitizing methods article.
Another frequent mistake is neglecting hidden spots where bacteria and dirt hide. You might think wiping surfaces is enough, but bacteria can lurk in fabric fibers, beneath light switches, or inside vents. Regular, targeted cleaning of these areas is essential. This is especially true during seasons with higher illness transmission or for homes with vulnerable family members.
Now, for those advanced readers asking, “How can I ensure my cleaning routine effectively eradicates spores and resilient pathogens?” a thorough approach involves using EPA-registered disinfectants designed to kill spores, followed by adequate contact time and drying, as spores can survive on surfaces for weeks. Incorporating steam cleaning with high-temperature vapor can also be highly effective for upholstery and fabrics, as heat is one of the most reliable germ killers.
Overcoming misconceptions about cleaning and sanitizing not only improves hygiene but also reduces long-term health risks. Avoid shortcuts like skipping steps or relying on scent as an indicator of cleanliness. If you want to avoid the common pitfalls and elevate your cleaning game, check out our comprehensive guides and expert tips.
Have you ever fallen into this trap? Let me know in the comments. Remember, mastering the nuances of proper cleaning and sanitizing can make your home not just look clean, but genuinely safer for everyone living in it.
Keep Your Cleaning Game Strong with Reliable Tools
Investing in the right equipment is crucial for maintaining a pristine home over time. I swear by my **corded vacuum cleaner with a HEPA filter**, such as the Dyson Ball Animal 2, because it offers unparalleled suction power and excellent filtration, which is vital for allergen control. For upholstery, I rely on a **hot water extraction machine** like the Bissell ProHeat 2X, which deep cleans fabrics without relying on harsh chemicals, ensuring longevity and freshness of your furniture. When it comes to tackling those hard-to-reach spots, a **telescoping duster** with microfiber heads allows me to remove dust without disturbing delicate surfaces, saving time and preventing damage.
Maintain Your Tools for Best Results
To ensure your equipment stays effective, clean your vacuum filters monthly and replace them as recommended by the manufacturer. Store your microfiber cloths in a clean, dry place to prevent bacteria buildup, and wash them on hot settings regularly. Auditing your tools seasonally, much like a car maintenance routine, keeps your cleaning arsenal reliable and ready. Remember, a well-maintained tool is a powerful ally in your long-term cleaning efforts. For upholstery, gentle steam cleaning every six months helps break down embedded grime and kills bacteria, keeping fabrics fresh and durable. For comprehensive guidance on upholstery care, check out our Ultimate Upholstery Care Guide.
Technology Trends Shaping Future Cleaning Routines
Emerging innovations like robotic vacuums equipped with AI vision, such as the robovac models by iRobot, are revolutionizing daily maintenance by automating routine chores. These devices learn your home’s layout, avoid obstacles, and can be scheduled to run while you’re away. Additionally, eco-friendly cleaning appliances utilizing ultrasonic or steam technology are gaining popularity for chemical-free sanitizing. As the industry advances, integrating smart home systems with cleaning devices will offer seamless, personalized routines—making maintenance effortless and more sustainable. According to a report by Technavio, the global home automation market is expected to grow at a CAGR of over 25% through 2024, signaling a future where cleaning becomes a hands-free, integrated part of home management.
How do I maintain my equipment for consistent results?
Regular maintenance of your cleaning tools is essential. Clean vacuum filters and brushes every month, replace worn-out parts promptly, and store everything in a dry, accessible space to extend their lifespan. Incorporating these habits ensures that your tools work efficiently, saving you time and effort in the long run. For a detailed review of professional-grade cleaning equipment versus home appliances, I recommend reading this analysis. Give your tools a little love today—you’ll thank yourself later!
Lessons No One Tells You About Deep Cleaning
One of the biggest breakthroughs I had was realizing that frequent superficial cleaning creates a false sense of security. The real challenge—and reward—comes from tackling those hidden spots like behind appliances or inside vents, where unseen dust and bacteria thrive. Investing time in these areas taught me that consistency in cleaning these overlooked spaces prevents long-term health issues and keeps my home feeling fresh. I also learned that patience during deep cleaning, like letting baking soda paste sit on stubborn stains, transforms my routine from a chore to a gratifying ritual. Embracing these lessons elevated my approach from casual tidying to genuine sanitation.
Tools That Turn Cleaning Into a Breeze
Over the years, I’ve curated a set of trusted tools that genuinely make a difference. A telescoping microfiber duster helps me reach the highest corners without risking injury, while a HEPA-filter vacuum captures allergens lurking in carpets and upholstery. For fabrics, I turn to a portable steam cleaner, which not only refreshes but sanitizes without harsh chemicals. I’ve found that investing in quality tools like these not only saves time but also encourages maintenance—making deep-cleaning moments less daunting. For more ideas on effective equipment, check out our review on professional cleaning tools.
Your Path to a Healthier, Happier Home Starts Now
Achieving a truly sanitized home is within your reach, and it begins with embracing the small, persistent efforts that compound over time. Remember, every carefully cleaned corner reduces allergen levels and promotes well-being. Your commitment to learning and applying these secrets can turn cleaning from a dreaded task into a satisfying routine that nurtures your family’s health. Don’t wait for chaos to force your hand—start today, and watch your home transform into a sanctuary of purity and comfort. Have you ever wondered how much healthier your home could be with just a few extra steps? Let me know in the comments below and share your cleaning victories.