
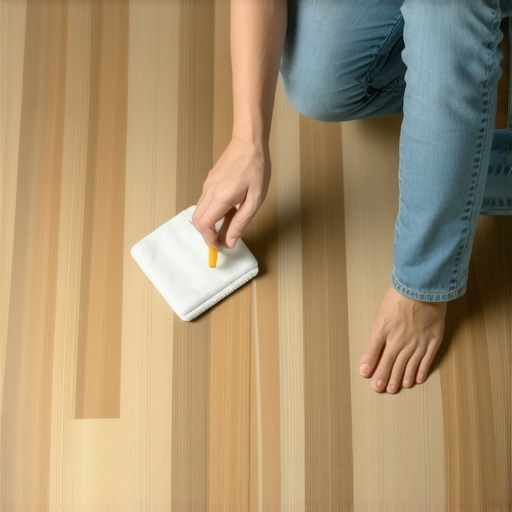
I remember the moment perfectly. I was hurriedly moving out of my apartment, trying to finish the final cleaning while already exhausted from a long day. As I swept the living room, my eye caught a dreadful sight: deep, stubborn scuff marks etched into my vinyl flooring. They looked like a badge of my hurried departure, and frankly, they felt impossible to remove. It was a sinking feeling — like I was about to lose my security deposit over a few stubborn stains. Have you ever faced that frustration? If so, you’re not alone.
How I Discovered the Move-Out Trick for Vinyl Scuffs
The truth is, I’d always assumed that cleaning vinyl floors meant endless scrubbing, maybe some harsh chemicals, or even higher-end products I didn’t want to spend on. But early on, I made a common mistake — I tried using brute force with abrasive sponges. It only made things worse, scratching the surface and setting those marks deeper. That’s when I stumbled upon an easy, effective trick that transformed my move-out cleaning routine.
Ready to say goodbye to those pesky scuffs? In this post, I’ll share the foolproof method that not only works quickly but also keeps your floors gleaming without damage. Trust me, it’s a game-changer your landlord will appreciate!
Is Over-the-Counter Products the Best Solution or Just a Waste of Money?
One big fear I had was wasting money on gimmicky products that promise miracles but deliver nothing. Many initial attempts involved grocery-store cleaners or worse, harsh chemicals that dulled the vinyl’s shine. It’s easy to believe that more aggressive methods yield faster results, but often, they cause more harm than good. I learned this lesson early, especially when I damaged a corner of my floor trying to scrub away a stubborn scuff.
According to experts, understanding the right cleaning agents is crucial. A trusted source like [Spotless Carpetz](https://spotlesscarpetz.com/effective-house-cleaning-secrets-from-cleaning-experts) emphasizes the importance of gentle, purpose-specific solutions to preserve your floor’s integrity. Staying within recommended cleaning practices helps protect your investment while achieving a spotless look.
You might be skeptical about the effectiveness of simple home remedies, but I promise, this trick is surprisingly efficient. Ready to see how it works? Let’s dive into the step-by-step process that changed my move-out game — and can do the same for you.
Prepare Your Cleaning Supplies and Environment
Start with gathering gentle, vinyl-safe cleaning agents like mild soap or a specialized vinyl floor cleaner. Clear the area of all furniture and obstacles to avoid accidental damage. Wearing gloves can also protect your skin from harsh chemicals. I remember one time rushing to move out, I forgot to clear the space, which led to accidental scuff smudges on nearby items. Setting the stage is crucial for an efficient clean.
Test a Small Area First
Before applying any solution across the entire stain, test it on a hidden corner. Use a soft cloth or sponge with the cleaner and gently rub the area. This step prevents unexpected discoloration or surface damage. A friend once suggested trying baking soda mixed with water, which turned out to be very effective without risking my entire floor. Think of it as a trial run before the main event—saving time and avoiding costly mistakes.
Apply the Cleaning Solution Properly
Dampen a microfiber cloth with your chosen cleaner—damp, not soaked. Gently dab the scuffed area, aligning with the grain of the vinyl if visible. Let the solution sit for a minute or two to loosen the residue. During my last move, I used a cotton swab dipped in rubbing alcohol to target stubborn marks, which is perfect for deep cleaning small areas. Remember, patience and gentle pressure yield better results than brute scrubbing, which can scratch the surface.
Use the Right Tools to Gently Remove the Marks
For stubborn scuffs, a soft plastic scraper, like a plastic putty knife, can be effective. Place a cloth under the blade to prevent scratching the floor. Slowly glide the tool over the stain with minimal pressure. I once used an old credit card for similar purpose, avoiding the need for harsh tools. This is akin to peeling away a sticker—gentle but firm. Avoid metal objects; they damage the vinyl beyond repair.
Addressing Persistent Stains
If the stain remains, apply a small amount of white vinegar on a cloth and lightly rub the area. Vinegar’s acidic nature helps break down stubborn residues. Always test first to ensure it doesn’t dull your floor’s finish. I found that using vinegar in combination with baking soda creates a bubbling reaction that lifts tough marks more effectively. Just remember to rinse thoroughly afterward to prevent residue buildup.
Rinse and Dry the Floor Carefully
After removing the stain, wipe the area with a clean damp cloth to remove any lingering cleaner or residue. Dry immediately with a soft towel to prevent water spots or slip hazards. Wet floors are risky during a move, so take your time. I learned this lesson when hurriedly mopping, only to slip later, emphasizing the importance of thorough drying.
Prevent Future Scuffs and Maintain Shine
Once the stain is gone, consider applying a vinyl floor polish or a protective sealant to guard against future marks. Regularly cleaning with gentle solutions complements this approach. Implementing a daily quick wipe-down routine, as described in this guide, helps keep your floors pristine. I started doing light daily cleans, which drastically reduced the accumulation of marks and made deep cleans easier.
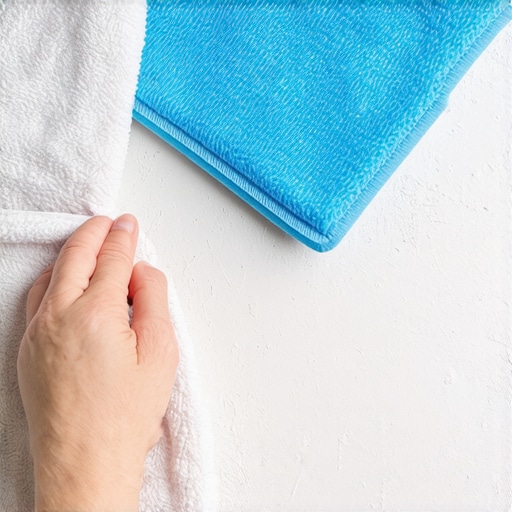 Many homeowners and renters believe that cleaning upholstery or preparing a home for move-out is straightforward—simply vacuum, wipe with a damp cloth, and you’re done. However, these assumptions often lead to subpar results or even damage. One prevalent myth is that harsher chemicals or aggressive scrubbing yield better cleanliness, but in reality, this approach can erode fabrics and surface finishes, making them more susceptible to stains and wear. Experts like those from cleaning professionals emphasize the importance of understanding the specific materials and choosing gentle, appropriate cleaning agents to prolong the lifespan of your furnishings.
A common ‘oops’ is neglecting the hidden buildup in less visible areas, such as behind appliances or under furniture, which can harbor bacteria, dust mites, and allergens. This oversight not only diminishes indoor air quality but also complicates your cleaning efforts down the line. Regularly inspecting these spots and employing targeted cleaning methods can make a marked difference. For instance, upholstery care guides suggest vacuuming with a brush attachment and using specialized foam cleaners for deep but safe cleaning.
For the advanced homeowner, the question arises: How do you effectively sanitize surfaces without compromising fabric integrity? It’s a nuanced process that involves balancing chemical efficacy with material safety. According to recent studies summarized in sanitizing experts’ reviews, using a dilution of white vinegar or alcohol-based solutions can kill germs effectively on many surfaces, provided they are tested beforehand to avoid discoloration or deterioration. This approach underscores the importance of tailored cleaning routines rather than one-size-fits-all solutions.
An often-overlooked aspect is the misconception around move-out cleaning strategies. Many believe that over-cleaning or using excessively strong products is necessary to secure their security deposit. In reality, focusing on key areas—like the kitchen, bathrooms, and floors—while following a comprehensive move-out checklist will suffice. Overusing chemicals can cause damage that costs more to repair than to just clean properly in the first place. Moreover, applying proper techniques, such as the ‘Razor Blade’ trick for removing mineral deposits, ensures delicate surfaces are preserved.
Be cautious of common pitfalls, such as confusing surface stains with ingrained dirt, which requires different techniques. For example, trying to scrub a stain stubbornly might embed it further or damage the fabric. Instead, employing targeted solutions like enzymatic cleaners or specific stain-removal methods can yield better results without harm. Remember, patience and proper knowledge are your best tools. If you’re interested in preserving your furniture and maximizing cleaning efficiency, check out upholstery cleaning tips tailored for various fabrics.
In summary, believing that all cleaning methods are interchangeable or that harder is better is a misconception that can lead to costly mistakes. Instead, gaining a nuanced understanding of materials, appropriate cleaning agents, and advanced techniques is essential for true mastery. Have you ever fallen into this trap? Let me know in the comments.Maintaining a clean and pristine home requires more than just the initial effort; it demands the right tools and consistent upkeep to ensure longevity and continued effectiveness. Investing in high-quality equipment can make all the difference in achieving professional-level results without constantly relying on external services. For upholstery, I personally swear by a dedicated portable steam cleaner like the Dupray Neat Steam Cleaner. Its versatility allows me to deep-clean fabric couches, mattresses, and even curtains, effectively killing bacteria and removing dirt without harsh chemicals—a method supported by experts in house cleaning professionals. Additionally, its compact size makes storage effortless, and regular use prevents grime buildup, extending the lifespan of furniture. When tackling house cleaning beyond upholstery, I recommend a microfiber mop with angled swivels for floor maintenance, which I use to reach under furniture and into corners easily, reducing dirt accumulation over time. Combining these tools with scheduled maintenance routines, like the daily cleaning tips found in this guide, ensures a consistently fresh environment. Looking ahead, the trend points toward smart cleaning appliances equipped with sensors to automatically monitor dirt levels and notify homeowners when attention is needed—technology that I believe will revolutionize household upkeep. To keep your upholstery and home in top shape, I advise incorporating a regular steam cleaning session every three to six months using your portable device, and diligently maintaining your floors with quality microfiber tools. Not only does this prevent stubborn stains and wear, but it also preserves your home’s value and comfort. Ready to elevate your cleaning routine? Try the advanced tip of using your portable steam cleaner for furniture and see the long-term benefits firsthand—less dirt, fewer repairs, and a healthier living space.Throughout my cleaning journey, I realized that the harshest lessons often come from unexpected places, like a stubborn stain or a neglected corner. One insight that truly transformed my approach was understanding that patience and proper tools outperform brute force every time. For instance, trying to scrub away a deep-seated stain with abrasive sponges not only failed but also damaged the fabric or surface. It taught me to respect the material and use gentle, targeted techniques instead. Additionally, investing time in thorough inspections before detailed cleaning prevented costly mistakes—like overlooking hidden dirt that could compromise my results or damage the finish. Overall, embracing a strategic, gentle, and informed approach elevated my cleaning game and saved me countless headaches.