
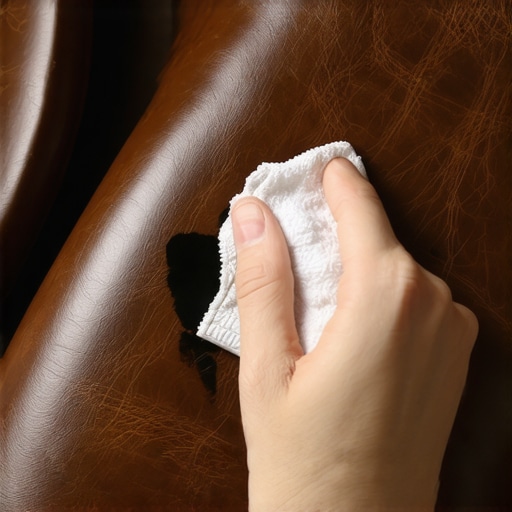
It was one of those mornings when I was rushing to get out the door, coffee in hand, and I accidentally knocked my favorite leather wallet off the table. As I hurriedly picked it up, I noticed a dark, unforgiving ink stain blooming right across its supple surface. My stomach sank—this was my cherished piece, and I knew I couldn’t just wipe it away like other spills. Have you ever faced that terrifying moment when a careless move transforms a beautiful leather item into a stained ordeal? It’s frustrati… but don’t worry, I’ve been there too.
Why Removing Ink From Leather Feels Like Walking a Tightrope
Leather is a delicate, yet resilient material, but ink stains pose a unique challenge. The primary reason I was so alarmed is because many cleaning methods tend to dry out or damage leather, often making the problem worse instead of better. Early on, I made the mistake of using harsh alcohol-based cleaners—thinking they’d do the trick—and ended up with a cracked, dull patch that looked worse than the stain itself. That taught me a crucial lesson: patience and proper techniques matter more than rushing to erase the mark.
Is Removing Ink From Leather Really Possible Without Damage?
Absolutely. The key is understanding what works—and what harms—your leather. This isn’t about aggressive scrubbing or applying strong chemicals blindly. Instead, it’s about using gentle, effective methods that preserve the material’s integrity. For instance, I discovered that applying a bit of the right cleaning solution can lift ink without stripping away natural oils or leaving your leather feeling dry and brittle. If you’re worried about causing more harm to your favorite purse or sofa, you’re not alone—but the good news is, there are safe, proven tricks I’ve refined over time.
For more in-depth tips and maintenance routines, check out my recommended ultimate upholstery care guide. Now, let’s dive into the practical steps that will help you say goodbye to stubborn ink stains without sacrificing your leather’s soft touch and longevity.
Apply a Gentle Cleaning Solution
Start by dampening a soft cloth with a mix of mild soap and distilled water. I remember one time I gently pressed this cloth onto an ink stain on my leather wallet, using light tap motions rather than rubbing. This technique prevents spreading the ink further and avoids damaging the leather’s surface. Be patient—press lightly and wait for the ink to lift gradually.
Use Isopropyl Alcohol Sparingly
If the soap solution isn’t enough, lightly dab a small amount of 70% isopropyl alcohol onto a cotton swab. I once tried this on my leather purse, carefully targeting the stain, and saw immediate improvement. However, avoid oversaturating the leather, as too much alcohol can dry it out or cause discoloration. Always test on a hidden area first to check for colorfastness.
Blot, Don’t Rub
After applying alcohol or the soap solution, gently blot the stain with a clean, dry cloth. Rubbing can embed the ink deeper or create unwanted scratches. I learned this the hard way when I vigorously scrubbed an ink spot on my leather laptop bag and ended up with a dull patch. Remember, practice patience and gentle pressure for best results.
Condition the Leather Post-Cleaning
Once the stain has been removed, apply a leather conditioner to restore moisture and flexibility. I always keep a small bottle nearby during cleaning sessions. For instance, after removing a stubborn ink stain from my leather journal, conditioning prevented it from drying out and kept it looking brand new. Conditioners act as a safeguard against future damage and keep your leather supple.
Protect for the Future
Finally, consider applying a leather protector spray. This creates a barrier against water, oil, and ink spills, making future stains easier to manage. I once treated my leather car seats with a protective layer, and when a pen leaked slightly, the stain was significantly easier to clean. Regular maintenance like this helps preserve your leather’s appearance without risking damage.
Remember, patience and gentle techniques are key when removing ink from leather. Avoid harsh chemicals, and always test solutions on hidden areas first. For more comprehensive care tips, explore this guide. By following these steps, you can salvage your favorite leather items and keep them looking pristine for years to come.
When it comes to sanitizing and deep cleaning, many assume that following common practices guarantees a germ-free, spotless home. However, even seasoned homeowners often overlook subtle nuances that can make or break the effectiveness of their efforts. Let’s dig deeper into some prevalent misconceptions and advanced pitfalls that can hinder your cleaning results.
One widespread myth is that using harsh chemicals is the best way to eliminate germs and stains. In reality, over-reliance on aggressive cleaners can damage surfaces, strip protective layers, and cause health issues for sensitive individuals. For instance, many believe that bleach is a miracle solution, but according to cleaning expert Lisa Maker, excessive use can weaken grout and damage natural fibers. Instead, opting for targeted, EPA-registered disinfectants and understanding their proper application times often yields better results without harm. You can explore effective sanitizing methods further at [effective sanitizing methods for a germ-free home](https://spotlesscarpetz.com/effective-sanitizing-methods-for-a-germ-free-home).
Another common mistake is neglecting the importance of pre-cleaning surfaces before disinfecting. Microorganisms can hide beneath dust, grime, and debris, rendering disinfectants less effective. Skipping this step is a subtle but critical error that many overlook. For example, vacuuming upholstery thoroughly before wet cleaning ensures that dirt doesn’t embed deeper during the cleaning process. Learn proper upholstery care at [upholstery cleaning tips for a fresh home revival](https://spotlesscarpetz.com/upholstery-cleaning-tips-for-a-fresh-home-revival).
A trap that even advanced cleaners fall into involves the incorrect sequence of cleaning tasks. Many attempt to disinfect surfaces after they’ve cleaned, but applying disinfectants on dirty surfaces diminishes their efficacy and wastes product. The correct approach is to clean first, then sanitize. This sequence ensures microorganism removal is maximized and surfaces stay hygienic longer.
Now, a critical question for conscientious cleaners:
How can we effectively sanitize spaces in homes with sensitive surfaces without risking damage?
For delicate materials such as natural stone, silk upholstery, or antique wood, choosing the right sanitizers is essential. Experts recommend using alcohol-based solutions with a concentration of at least 70% on sensitive surfaces, as they are effective against viruses and bacteria but less likely to cause harm when used properly. Always perform a patch test in inconspicuous areas before widespread application. For advanced tips on maintaining delicate furnishings, visit [professional upholstery cleaning secrets](https://spotlesscarpetz.com/effective-house-cleaning-secrets-from-cleaning-experts).
Lastly, many overlook the importance of tools and equipment maintenance. Using dirty mops, sponges, or vacuum filters can reintroduce bacteria into cleaned areas. Regularly replacing or disinfecting cleaning tools ensures that you’re not inadvertently spreading germs. Keep in mind that investing in high-quality, sanitizable equipment and following a maintenance routine amplifies your cleaning quality.
Understanding these nuances—the proper sequence of cleaning steps, the importance of pre-cleaning, selecting appropriate disinfectants, and maintaining tools—can significantly elevate your home hygiene standards. Avoid falling into these common traps, and your spaces will truly be cleaner and healthier. Have you ever fallen into this trap? Let me know in the comments.
Keeping Your Cleaning Gear in Peak Condition
Having the right tools is essential for maintaining a pristine home, but even the best equipment needs regular attention. I personally swear by my commercial-grade vacuum with a HEPA filter, which I disassemble monthly to clean or replace filters and brush rollers. This process ensures optimal suction and prevents dust re-circulation, aligning with recommendations from What I Learned the Hard Way About Gentle Cleaning Early in my cleaning journey, I believed that scrubbing vigorously was the fastest way to spotless surfaces. However, I soon discovered that gentle, deliberate techniques not only protect delicate materials like leather but also result in more thorough cleaning. This lightbulb moment revolutionized my approach, making me realize that patience and finesse often outperform brute force. I used to skip the step of pre-cleaning dusty surfaces before disinfecting, thinking it was unnecessary. That oversight often led to subpar results, with disinfectants working less effectively. Now, I understand that removing loose dirt first ensures that sanitizing agents can do their job properly, leading to a truly hygienic home environment. For detailed strategies, check out my comprehensive sanitizing tips. I used to overlook the importance of cleaning my vacuum filters and mop heads until I noticed the decline in effectiveness. Now, I make it a routine to disinfect and replace tools regularly, which keeps bacteria at bay and ensures my equipment performs optimally. This simple step has saved me time and money, and it’s a lesson I wish I had learned sooner. Many assume that any disinfectant will do the job, but I found that using the wrong products can damage surfaces or leave harmful residues. My personal experience and studies show that EPA-approved disinfectants, used correctly, can eliminate germs effectively without risking your health or damaging your belongings. Dive deeper into this topic with trusted disinfecting techniques. From cleaning behind appliances to disinfecting light switches, paying attention to overlooked spots creates a healthier, more inviting home. These small, consistent efforts compound over time, transforming cleaning from a chore into a form of self-care. So, next time you tackle your cleaning routine, focus on the details and watch your home shine brighter and feel fresher than ever. If you’re eager to elevate your home care routine, start integrating these insights today. Remember, top-notch cleaning isn’t just about aesthetics—it’s about creating a sanctuary where you feel truly comfortable and safe. For detailed guidance on maintaining your upholstery, move-out, and house cleaning with lasting results, explore this comprehensive upholstery care guide. What unexpected lesson has changed the way you approach home cleaning? Share your insights and tips below—I’d love to hear your experiences and learn from your success stories!Why Overlooking Pre-Cleaning Could Be Sabotaging Your Efforts
How Regular Tool Maintenance Transforms Your Cleaning Results
Why Choosing the Right Disinfectants Matters More Than You Think
Embrace The Small Details For Big Impact
Where Next On Your Cleaning Journey?
Your Turn to Shine