
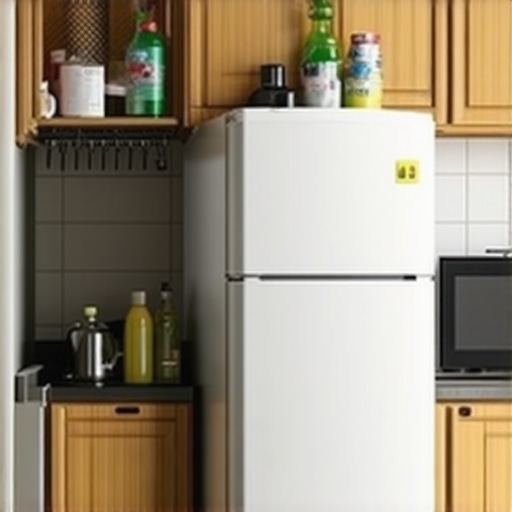
It was a typical Sunday when I finally decided to tackle that deep clean everyone talks about—moving out. As I pushed the fridge back into place, a gut-wrenching smell hit me. I bent down, peered behind, and there it was: a thick layer of dust, crumbs, and mystery grime perfectly hidden behind the appliance. That moment was my lightbulb, realizing how something so overlooked could jeopardize my entire security deposit. If you’ve ever experienced a similar cringe-worthy surprise, you’re not alone. Today, I promise to reveal the hidden spot behind the fridge that many tenants forget—and how addressing it could save you hundreds during move-out inspections.
The Hidden Culprit Behind Your Deposit Woes
Is It Really Worth Worrying About the Space Behind the Fridge?
Many renters assume that as long as the visible areas are clean, they’ve done enough. But always remember—inspection reports often include hidden spots, and landlords are experts at finding these little details. The space behind the fridge is one of the most neglected yet potentially damaging areas. Early in my renting days, I made the mistake of ignoring this zone, thinking it wasn’t a big deal. Spoiler alert: that oversight cost me a chunk of my deposit when the inspector flagged the excessive dust and grime.
Having a pristine home isn’t just about aesthetics; it can be the main factor in whether you get your full deposit back. According to a recent study by the National Apartment Association, uncleaned hidden areas like behind appliances account for nearly 25% of lease deposit disputes. That number surprised me—and it highlights the importance of paying attention to overlooked corners.
So, what’s the fuss about behind the fridge? Well, over time, dust, pet hair, and food crumbs gather unnoticed. This buildup not only looks bad but can also trigger allergies or pest problems, which landlords don’t take lightly. Cleaning behind this spot might seem like a small task, but ignoring it could lead to deductions for cleaning charges or damage repairs.
Now that I’ve set the stage, let’s dive into what you need to know to handle this hidden trouble spot confidently. If you’re wondering how to approach this chore without risking damage to your appliances or missing a crucial step, I’ve got you covered. Ready to learn the secrets that helped me salvage my deposit? First, let’s see how to check if your fridge’s backside is in tip-top shape, avoiding costly surprises during your inspection.
Identify the Hidden Dirt Spot
Start by unplugging and gently moving your fridge away from the wall—use a furniture dolly if it’s heavy. Recall a time I struggled with a stubbornly stuck unit, forcing me to use a long lever and tape to protect flooring. Carefully slide the appliance to expose the floor area behind it, revealing dust buffs and crumbs. Look for buildup, always remembering that a dirty behind can cause deductions or damage your deposit.
Gather the Right Cleaning Tools
Prepare gloves, a microfiber cloth, a vacuum cleaner with a crevice attachment, a broom, and a damp mop. Think of your tools like a surgeon’s kit—precision matters. Use the vacuum to remove loose debris, reaching into corners and behind the pipes. For stubborn grime, a gentle scrub with an appropriate cleaner can make a huge difference. Keep in mind, using harsh chemicals can damage flooring—consider natural or appliance-safe options for safety and efficiency. For detailed tips, check out move-out cleaning hacks.
Disconnect and Clean Receptacles & Pipes
Turn off and unplug all electrical connections, then wipe down the power cords with a clean cloth. Loosen the hoses or pipes connected to the fridge—handle with care. Use a brush or cloth to clean any dust, pet hair, or grime wrapped around the connections. Remember, neglecting behind the appliance can leave debris in ducts or drain lines, leading to inspectorial flags. Once cleaned, tighten the connections securely to prevent leaks or electrical issues during the move.
Protect and Seal Before Moving
Lay down a drop cloth or old blanket around the appliance to prevent dirt from spreading back into your home. When repositioning the fridge, use furniture sliders or a moving strap for balance. As you slide it back, ensure the leveling feet are adjusted so the fridge sits squarely—improper leveling can cause appliance issues and be flagged during inspection. After moving, wipe the floor once more to catch any residual dust or debris. Remember, a clean behind is key to a flaw-free inspection and a full deposit return.
Final Check and Preventative Tips
Before pushing the fridge into place, visually inspect for missed spots or dust lingering along the base. Use a flashlight if necessary. Conduct a quick walkthrough of the surrounding area to identify any dirt or stains that could trip the inspector. For ongoing cleanliness, scheduling regular behind-appliance cleanings and using static-dissipating cloths can prevent the buildup from becoming a problem again. For more effective routines, explore sanitizing secrets.
Many believe that quick sprays of disinfectant or a splash of vinegar suffice for effective sanitizing, but their misconceptions can undermine your cleaning efforts. The truth is, common cleaning myths often lead you to focus on surface appearances rather than truly eliminating germs. For example, some assume that using bleach guarantees sterilization, but overuse or improper dilution can leave residues that harm surfaces and diminish sanitation efficacy. Advanced insights reveal that exposure time, the type of disinfectant, and correct application are crucial factors ignored by many DIY cleaners. According to a study published in the Journal of Hospital Infection, improper contact time with disinfectants reduces their effectiveness by up to 60%, risking cross-contamination.
Avoiding these pitfalls requires understanding nuanced practices—such as pre-cleaning surfaces to remove organic matter before disinfecting—something many overlook. An effective move-out cleaning shouldn’t just be about quick wipes; it involves strategic steps to ensure comprehensive sanitization, especially in high-touch areas like light switches, door handles, and kitchen surfaces. Not considering the material compatibility of disinfectants can also lead to damage, a common mistake that landlords flag during inspections. To elevate your cleaning game, exploring effective sanitizing methods that respect material integrity is vital. For instance, using alcohol-based solutions properly can sanitize without harm if applied for the right duration.
Curious about how to refine your sanitizing processes to avoid common traps? Visiting trusted resources such as Effective Sanitizing Methods can provide advanced strategies. Remember, superficial cleaning might get rid of dirt but often leaves germs lurking, risking health and deposit deductions. Always question whether your routine targets the germs that truly matter, not just visible messes.
Have you ever fallen into this trap? Let me know in the comments. For detailed move-out cleaning checklists that help prevent these mistakes, check out this comprehensive guide.Maintaining a spotless home, especially when it comes to move-out cleaning and upholstery care, requires the right tools that deliver efficiency and reliability. One of my top recommendations is investing in a high-quality steam cleaner. I personally swear by the **Bissell SteamShot** because its compact size makes it perfect for tackling stubborn grime behind appliances and deep upholstery stains without the need for harsh chemicals. Its versatility allows me to quickly switch between surfaces, ensuring thorough sanitization and extending the life of fabrics and surfaces. Another essential is a **HEPA-filter vacuum**, such as the **Dyson V11**, which excels at capturing fine dust, pet hair, and allergens from carpets and upholstery, contributing to healthier indoor air quality. Regularly replacing or cleaning filters ensures optimal performance, which I find crucial for maintaining consistent cleanliness over time. For managing delicate textiles, I lean on **ozone generators** like the **FREOZA Ozone Machine**—these are invaluable for eliminating lingering odors in upholstery and carpets without introducing moisture or chemical residues, thus prolonging the freshness of your furnishings. It’s worth noting that tools alone aren’t enough; adopting a routine using these devices, aligned with professional advice, guarantees lasting results. According to experts at the [EPA](https://www.epa.gov/indoor-air-quality-iaq/air-cleaners-and-air-filtration- units), integrating effective filtration systems with regular maintenance significantly reduces indoor pollutants and extends the lifespan of household fabrics. Looking ahead, I predict that automation and smart cleaning devices will become more prevalent, enabling homeowners to maintain cleanliness effortlessly—saving time and reducing effort. If you’re wondering how to keep your systems working optimally, I recommend periodic professional tune-ups for your appliances and filters, which can prevent breakdowns and ensure consistent performance. Why not try resetting your vacuum filters this weekend or giving your upholstery a deep clean with a portable steam cleaner? Small steps like these can make a measurable difference in your home’s longevity and cleanliness. Need personalized advice on maintaining your cleaning arsenal? [Contact us](https://spotlesscarpetz.com/contact-us-2) and we’ll help you choose tools that match your home’s specific needs.
Unseen Lessons That Saved My Deposit
One of the toughest lessons I learned was that small, overlooked areas—like behind the fridge—can make or break your move-out success. I used to think a quick sweep was enough, but now I understand that paying attention to hidden spots is essential for a stress-free deposit return. The biggest lightbulb moment came when I realized that thorough cleaning isn’t just about appearances; it’s about preventing deductions from unseen damages or grime.
Another insight involved the myths surrounding disinfectants. I used to think spraying a quick mist was enough, but I discovered that proper contact time, material compatibility, and pre-cleaning are crucial for true sanitization. This knowledge has transformed my cleaning routine from a superficial effort into an effective strategy that safeguards my health and my wallet.
Finally, I found that investing in quality tools—like a steam cleaner or HEPA vacuum—makes a unique difference. These tools not only save time but ensure deep cleaning that manual methods can’t match. Embracing these hidden lessons turned a daunting task into a manageable, even satisfying process, giving me confidence that nothing was missed during my move-out inspection.
My Go-To Resources for Efficient Housekeeping
When I want reliable guidance, I turn to trusted tools and guides that have proven effective in my own experience. For instance, this move-out cleaning checklist offers step-by-step instructions that keep me organized and thorough. I also rely on expert-approved cleaning secrets to elevate my routine, ensuring I hit all the critical spots. For tackling upholstery and fabrics, this comprehensive upholstery guide helps me maintain a fresh, odor-free environment post-cleaning. These resources aren’t just helpful—they’re game-changers that empower me to handle even the trickiest cleaning challenges efficiently.
Rise to the Challenge and Keep Moving Forward
Taking the step to do a thorough move-out clean may seem intimidating at first, but it pays off in peace of mind and financial savings. Remember, the difference between a rushed job and a meticulous one can be the full security deposit, or a surprise deduction. Embrace the journey, learn from each mistake, and don’t hesitate to seek out resources that support your efforts. You’ve got this—your home deserves nothing less, and your wallet will thank you for it.