
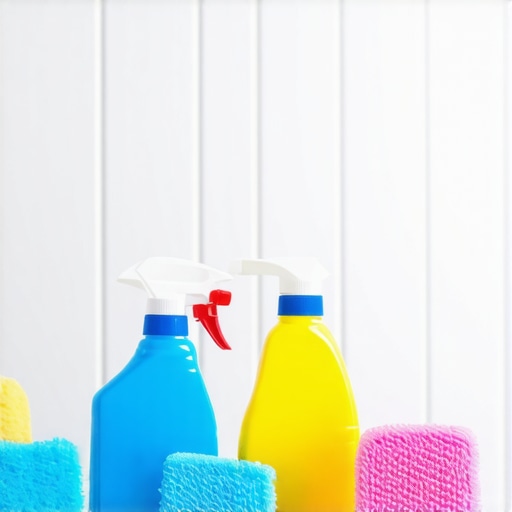
Ever stood in your shower, frustration mounting as you catch sight of that stubborn film of soap scum clinging to your plastic liner? I remember the moment vividly—my own bathroom, a mess of yucky residue, and a sinking feeling I had no idea how to tackle it effectively. It was a lightbulb moment when I realized that this seemingly minor annoyance was actually a common household dilemma, one that countless homeowners face but often overlook with quick fixes that don’t last. Today, I promise to share proven methods to help you banish soap scum from your shower liner once and for all.
Understanding Why Soap Scum Became Your Shower’s Unwanted Guest
Many people don’t realize how soap scum forms and why it stubbornly sticks. It’s a mix of soap residue, mineral deposits from hard water, and body oils—fastly building up if not cleaned regularly. Over time, this layer not only makes your shower look dingy but can also affect the hygiene and longevity of your plastic liner.
What’s more surprising is that improper cleaning can sometimes make things worse. An early mistake I made? Using harsh abrasive cleaners that scratched the plastic, creating more nooks and crannies for soap scum to settle in. I learned the hard way that gentle, targeted cleaning approaches work best. Interestingly, studies show that regular cleaning with proper techniques can significantly reduce bacterial build-up—yes, soap scum isn’t just unsightly; it can harbor germs too. You can find more effective tips in our comprehensive article on [effective house cleaning secrets](https://spotlesscarpetz.com/effective-house-cleaning-secrets-from-cleaning-experts).
If you’ve ever stared at your shower liner feeling helpless, thinking it’s just part of the bathroom grime you’ll have to live with, you’re not alone. But here’s the good news: with a few simple, natural strategies, you can restore your shower’s sparkle and keep that stubborn soap scum at bay.
So, are you ready to discover practical ways to reclaim your bathroom’s cleanliness? Whether your liner is coated in a thick layer or just a faint film, I’ll guide you through the most effective methods—techniques that have transformed my cleaning routine and could do the same for you. Let’s dive into those proven steps and finally put an end to soap scum’s reign over your shower.
Pre-Treat Stubborn Soap Scum
Start by wiping down your shower liner with a mixture of equal parts white vinegar and water using a microfiber cloth. This helps loosen the soap scum before a deep clean. I once soaked a heavily stained liner in this solution for 15 minutes, which made scrubbing much easier and reduced the cleaning time significantly.
Apply a Baking Soda Paste
Create a paste with baking soda and a few drops of water. Use a sponge or an old toothbrush to scrub the affected areas gently. Imagine baking soda as a gentle abrasive that lifts residue without scratching the plastic, similar to how mild scouring powders work on glassware. I did this on my shower last week, and it restored the liner’s clarity without any harsh chemicals.
Use a Commercial Cleaner (If Needed)
If the soap scum persists, spray a bathroom-specific cleaner designed for plastic surfaces. Follow the manufacturer’s instructions for application. Be sure to ventilate the area well — I always open a window and turn on the exhaust fan. After applying, let it sit for 5-10 minutes to break down the buildup.
Scrub and Rinse Thoroughly
Scrub the liner with a soft-bristled brush or sponge, focusing on areas with heavy buildup. Think of this step as polishing a car; gentle, consistent pressure yields the best results. Rinse thoroughly with warm water to wash away residue and cleaning agents. I prefer to do this with a detachable showerhead for a thorough rinse.
Disinfect and Protect
Finish by spraying a disinfectant safe for plastics or a diluted bleach solution (1 part bleach to 10 parts water) to eliminate germs and prevent mold. This step is crucial to maintaining a hygienic shower. Once disinfected, dry the liner with a microfiber towel or let it air dry to prevent water spots and new soap scum formation. I hang my liner in the sun for natural bleaching and drying, which leaves it fresh and clear.
Maintain Regular Cleaning
To prevent future buildup, adopt a simple routine: spray the liner with vinegar solution after each shower, wipe with a squeegee, and do a deep clean once a month. This consistency saves time and keeps your shower liner looking new. I keep a spray bottle in my bathroom to facilitate quick daily maintenance.
While many believe that following basic cleaning routines suffices for a spotless home, the reality is more nuanced. A prevalent misconception is that using harsh chemical cleaners will always deliver better results. In my experience, there are significant drawbacks to this approach, such as surface damage and potential health risks. For example, overusing bleach or abrasive agents can deteriorate upholstery fibers and cause discoloration, undermining long-term cleanliness. Studies have shown that natural cleaning methods, when applied correctly, can be equally or more effective without these side effects. This underscores the importance of understanding the chemistry behind cleaning agents and their interactions with various surfaces, as highlighted in expert analyses on effective house cleaning secrets from cleaning professionals. \n\nAnother common trap is neglecting the importance of proper technique. For instance, many overlook that scrubbing with excessive force can push dirt deeper into fibers or cracks, especially in upholstery. A gentle, methodical approach preserves material integrity and improves cleaning efficiency. Moreover, some underestimate the significance of consistent maintenance routines. Regularly sanitizing high-touch surfaces, like light switches and door handles, dramatically reduces germ buildup, as emphasized in sanitizing hacks for safe house transitions.\n\nA frequently overlooked aspect is the danger of relying solely on superficial cleaning. Superficial efforts may remove visible dirt but leave behind bacteria and allergens, especially in upholstery and concealed corners. Deep cleaning, using appropriate tools and sanitizers, ensures a healthier environment, aligning with the insights in effective sanitizing methods for a germ-free home. \n\nA critical advanced question is: how can one measure the true effectiveness of their cleaning regimen beyond visual inspection? The answer lies in understanding microbial load testing and adherence to scientifically-backed protocols. While this might seem excessive for everyday cleaning, implementing such principles enhances overall hygiene, particularly in households with vulnerable members. For further guidance, refer to detailed strategies in house cleaning strategies for a sparkling home today.\n\nDo you ever fall into these common traps, believing myths that hinder effective cleaning? If so, consider reevaluating your approach and embracing nuanced, science-informed techniques for truly clean spaces. Remember, mastering the subtle nuances in cleaning leads to lasting results and healthier living environments. If you’re interested in more advanced tips, explore upholstery cleaning tips for a fresh home revival to elevate your cleaning game.Maintaining a clean and healthy home requires not just effort but also the right tools and a strategic approach. Over the years, I’ve discovered that investing in quality equipment makes all the difference in achieving long-lasting results. For example, my Dyson V15 Detect cordless vacuum not only provides powerful suction but also offers advanced filtration, trapping allergens and fine dust, which is essential for households with allergy sufferers. Its versatility allows me to quickly switch between carpets and hard floors, ensuring every surface receives proper attention without the hassle of cumbersome cords. I also rely on a premium microfiber mop with an adjustable handle and washable pads—this simple yet effective tool helps me swiftly clean large floor areas and reach tricky spots behind furniture, saving time and reducing strain.
When it comes to upholstery, I recommend the Bissell CrossWave Pet Pro, especially if you have pets. Its multi-surface capabilities and specialized cleaning formulas tackle pet hair and stains efficiently, extending the lifespan of your furniture while maintaining hygiene. For sanitizing, I swear by a steam cleaner like the Dupray Tosca, which kills bacteria and germs without chemicals, making it perfect for sensitive areas. Its high-temperature steam penetrates deep into fabrics and grout lines, delivering a thorough cleanse that surpasses traditional mopping.
Looking forward, I believe the trend in home cleaning tools emphasizes automation and smart technology. Robotic vacuums with mapping capabilities, like the iRobot Roomba i7+, are increasingly becoming essential, providing consistent upkeep and freeing up your time for other tasks. Additionally, app-controlled steam mops and UV sanitizing wands are gaining popularity for their convenience and effectiveness, helping you maintain a hygienic environment effortlessly.
**How can you keep your cleaning tools performing at their best over time?** Regular maintenance is key. For vacuums, replace filters according to the manufacturer’s recommendations—this not only extends the device’s life but also ensures optimal air quality. Wash microfiber pads and mop heads after each use to prevent bacteria buildup and maintain cleaning efficiency. Periodically descale steam cleaners with vinegar solutions to remove mineral deposits that can clog nozzles and affect performance. Remember, a well-maintained toolkit helps your cleaning efforts last longer and produce better results.
When selecting tools, invest thoughtfully; quality equipment reduces the need for frequent replacements and enhances your safety. For example, using a high-quality cleaning solution compatible with your equipment, as advised in [effective house cleaning secrets](https://spotlesscarpetz.com/effective-house-cleaning-secrets-from-cleaning-experts), can prevent damage and ensure thorough sanitation. Incorporate these tools into your routine consistently, and you’ll notice your home staying cleaner, healthier, and more inviting.
Lastly, embrace technology by exploring automated solutions. A good starting point is trying out a robotic vacuum—it’s a game-changer for maintaining floors between deep cleans and frees you up for more enjoyable activities. To deepen your knowledge, I recommend visiting [sanitizing hacks for safe house transitions](https://spotlesscarpetz.com/sanitizing-hacks-for-safe-house-transitions), which offers insights into enhancing your cleaning routines with efficient tools and methods.
Lessons From the Trenches: What My Cleaning Journey Taught Me
One of the most invaluable lessons I learned is that consistent, gentle maintenance is far more effective than aggressive scrubbing sessions. I used to think that tackling stubborn soap scum required heavy-duty chemicals and intense effort, but I discovered that regular vinegar sprays and prompt attention prevent buildup before it becomes a nightmare. Another insight? Rushing through cleaning tasks often results in missed spots and residual grime—slowing down and paying attention to detail truly pays off. And perhaps the biggest lightbulb moment was realizing that using the right tools, like microfiber cloths and soft brushes, preserves the integrity of my surfaces while delivering superior results.
Tools and Resources That Keep My Home Spick and Span
My go-to toolkit includes a high-quality microfiber mop, which I rely on for quick, thorough floor cleaning, and a versatile steam cleaner that disinfects without chemicals—perfect for upholstery and tricky corners. I’ve found [effective house cleaning secrets](https://spotlesscarpetz.com/effective-house-cleaning-secrets-from-cleaning-experts) to be a treasure trove of tips that constantly upgrade my routine. For tackling stubborn stains or deep sanitizing, I trust products like the Bissell CrossWave Pet Pro because it handles pet hair and dirt effortlessly. And for deep sanitation, I heavily lean on resources like [sanitizing hacks](https://spotlesscarpetz.com/sanitizing-hacks-for-a-safe-house) to ensure my practices are backed by science and proven methods, helping my home stay healthier long-term.
Your Next Step Starts Today
The journey to a cleaner, healthier home isn’t about perfection—it’s about consistency, mindfulness, and using the right techniques. Embrace the small daily habits, like quick vinegar spritzes and squeegeeing after showers, and watch how your living space transforms over time. Remember, each effort adds up, leading to less stress and more comfort in your home. Take that first step now—your home and your peace of mind are worth it. Are you ready to redefine what cleanliness means for you? Share your own experiences or questions below, and let’s build a community of growth and support.