Have you ever spent hours painstakingly wiping down your blinds, only to end up covered in dust and debris, with dust flecks everywhere except on the blinds? I used to think that simply wiping with a cloth was enough—until the day I turned my back for a second and knocked over a pile of dust onto my freshly cleaned floor. It was a mess I didn’t see coming, and I knew there had to be a better way.
Why Dusting Blinds Can Turn Into a Dirty Dilemma
The truth is, dusting blinds often feels like an endless battle. Dust, pet hair, and allergens cling stubbornly to those tiny slats, and traditional methods—like wiping with a rag—can scatter particles into the air or let them fall onto your furniture below. It’s frustrating, and honestly, it can make you dread cleaning days even more.
But here’s a little secret I discovered through trial and error: effective dusting doesn’t have to mean chaos. With the right tools and techniques, you can leave your blinds sparkling clean without creating a cloud of dust or making an even bigger mess. Today, I promise to share simple, practical strategies that will revolutionize your approach to dusting blinds, saving you time and hassle while keeping your home healthy.
Is It Really Worth the Extra Effort?
Early on, I made a common mistake—I grabbed a dry rag and scrubbed furiously. Turns out, that just spread the dust around, and some of it settled deeper into the slats. I got lazy, thinking any cloth would do. What I didn’t realize then was that specialized dusting tools and a gentle technique are key to avoiding this trap. For a deep dive into expert-approved cleaning secrets, check out effective house cleaning secrets from cleaning experts.
If you’ve faced similar struggles, don’t worry—you’re not alone. Dusting blinds can seem like a small task, but it’s one that impacts your home’s air quality and overall cleanliness. In the following parts of this post, I’ll walk you through exactly how to dust your blinds efficiently and mess-free, so you can enjoy a cleaner, healthier space without the cleanup chaos.
,
Choose the Right Tools to Tackle Dust
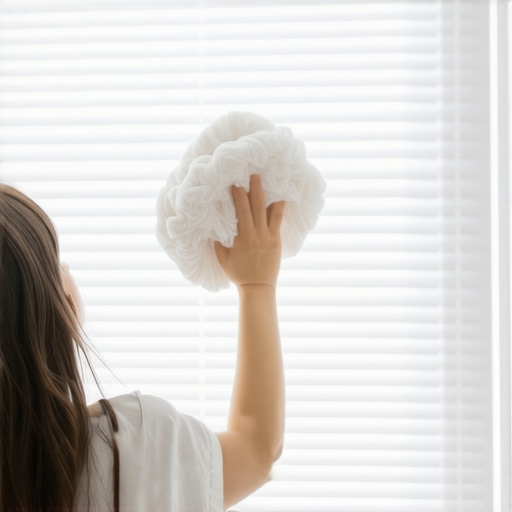
My first attempt at a deep blinds clean was using an old, lint-laden cloth and a spray bottle. It was a mistake that left me sneezing and with dust settling onto my furniture. Instead, I learned that microfiber dusters or extendable slat-cleaning brushes with quill-like feathers are *game-changers*. These tools trap dust rather than just move it around, making the process cleaner and more efficient. Purchase a quality duster or make your own by attaching a microfiber cloth to a long-handled broom for stubborn, high-reaching blinds.
Prepare Your Space to Minimize Mess
Before beginning, remove any items from around the window area and cover nearby furniture with a drop cloth or old sheets. This catches falling dust and wiped-off debris, preventing a bigger cleaning mess afterwards. I once skipped this step and ended with dust all over my freshly vacuumed sofa, so it’s worth the effort.
Start with Dry Dusting to Dislodge Particles
Use your microfiber duster or brush to gently sweep along each slat. Work from the top down, slowly progressing to avoid stirring dust into the air. I recommend doing this in sections, especially on sunlit days—less dust floating around means less inhalation and easier cleanup. If you encounter stubborn spots, switch to a slightly damp microfiber cloth to lift debris without dispersing it.
Manage Stubborn Residue with a Gentle Damp Cloth
If some dust stubbornly clings, dampen a microfiber cloth with water or a mild cleaning solution. Wring it out thoroughly—no drips!—and wipe each slat carefully. This prevents dust from flying into the air or settling on your floor. During my last weekend project, I used a spray bottle with a mix of water and a few drops of mild dish soap, which worked well without the need for harsh chemicals.
Use a Vacuum for a Final Cleanse
Attach a brush and crevice tool to your vacuum cleaner and gently suck along the slats. This step removes any remaining dust particles and ensures a thorough clean. I found this especially useful after using a damp cloth, acting as a safety net for any residual particles. It’s a quick finish that guarantees nothing is missed and leaves your blinds visibly cleaner.
Inspect and Touch Up
Finally, inspect under good lighting for any missed spots or residue. Use a clean microfiber cloth to handle these areas. If your blinds are particularly grimy or have accumulated years of dust, consider a more intensive cleaning routine or professional help. Still, with these steps, you’ll deal with the majority of dust efficiently and avoid the messy aftermath that can happen with improper techniques learned from trial and error.
Remember, consistency is key. Regular dusting prevents buildup and keeps your home healthier. Incorporate this quick routine into your weekly cleaning schedule, and you’ll notice the difference in air quality and overall cleanliness. For more in-depth strategies on house cleaning, visit effective house cleaning secrets from cleaning experts. Happy dusting!
When it comes to maintaining a clean home, many of us fall prey to popular myths that hinder our effectiveness. One widespread misconception is that disinfectants alone are sufficient to eliminate all germs, but experts emphasize that proper cleaning—removing dirt and organic matter—is a crucial first step before disinfecting. As highlighted by the CDC, neglecting this sequence can leave pathogens shielded by grime, rendering disinfectants less effective. This nuance often escapes casual cleaners, leading to a false sense of security and superficial sanitation.
Another common trap is believing that harsher chemical cleaners always deliver better results. In reality, overly aggressive products can damage sensitive upholstery or surfaces, and may even introduce health risks. For example, using bleach on colored fabrics can cause discoloration, while unnecessary chemical exposure isn’t justified for routine cleaning. Instead, understanding the appropriate cleaning agents for specific materials, such as natural furniture or delicate upholstery, is vital for safe, effective results. Learn more about upholstery care from expert tips on upholstery cleaning.
Many people overlook the importance of cleaning hidden or neglected areas, believing that visible surfaces are enough. In truth, spots like behind appliances, under furniture, or inside air vents can harbor dust, mold, and bacteria that impact your indoor air quality. A failure to address these areas not only compromises hygiene but also allows dirt to accumulate over time, making regular deep cleans essential. For comprehensive guidance, check out hidden spots that often fail move-out inspections.
Diving deeper, an advanced misconception involves the belief that all sanitizing products are equally effective across different surfaces. The reality is, porous materials like fabric or unsealed wood can absorb chemicals, leading to lingering residues or damage if inappropriate disinfectants are used. For high-traffic upholstery, using specialized, fabric-safe sanitizers is more effective. To ensure your cleaning methods are on point, consider consulting professional advice or trusted resources like cleaning expert secrets.
Now, you might wonder: how do I avoid these pitfalls and enhance my cleaning routine? The key lies in understanding the nuances—like the importance of proper order, suitable products, and covering overlooked areas. Remember, superficial cleaning might give a grossly clean look, but without addressing these hidden aspects, your home might still harbor unseen dangers. Taking these advanced steps can significantly improve your home’s hygiene and longevity.
Have you ever fallen into this trap of misconceptions? Let me know in the comments! For more insights on achieving a thorough, safe clean, visit effective house cleaning secrets from cleaning professionals.
Investing in the Right Equipment for Staying Clean
Maintaining a spotless home over time requires more than just effort; it demands reliable, effective tools that can handle recurring cleaning tasks without breaking down. One of my top recommendations is a high-quality microfiber duster, such as the Swiffer Extendable Duster, which I personally use because its fine fibers trap dust efficiently and reach into tight spaces like behind radiators or ceiling fan blades. Unlike traditional cloths, microfiber captures and holds particles, reducing the spread of dust into the air, making cleanup safer and more efficient.
For upholstery, I swear by a weighted upholstery cleaning attachment paired with a portable steam cleaner like the McCulloch MC1275. The attachment ensures deep cleaning without over-wetting, and the steam effectively kills bacteria and removes odors. I’ve seen long-term results that keep my furniture looking and smelling fresh for months, especially when combined with regular maintenance routines. Regular use of such tools prevents dirt buildup, which extends the lifespan of your furnishings and helps avoid expensive professional cleanings.
How do I maintain cleaning tools over time?
Proper maintenance of your cleaning tools is critical to keep them functioning optimally. Microfiber cloths and dusters should be washed regularly in warm water with mild detergent to remove embedded dirt and prevent bacterial buildup. Avoid fabric softeners, as they can clog the fibers and reduce effectiveness. Equipment like steam cleaners require descaling every few months; I follow the manufacturer’s instructions closely, often using specialized descaling solutions to prevent mineral deposits that can diminish steam output.
Storing your tools correctly is equally important. Keep dusters and microfiber cloths in a dry, clean place to avoid mold or mildew growth. This extends their lifespan and keeps them ready for a quick grab when cleaning day arrives. Regularly replacing worn-out parts, such as vacuum filters or brushes, also ensures your devices operate at peak efficiency.
Future Trends in Cleaning Equipment
The industry is trending toward smarter, app-enabled gadgets with IoT connectivity, remote diagnostics, and automated scheduling, which I believe will revolutionize home maintenance by making it more efficient and less time-consuming. For example, robotic vacuums are now equipped with AI navigation to adapt to complex layouts, reducing the need for manual intervention. I expect similar advancements in upholstery and surface cleaning tools, making long-term upkeep even more hands-off and reliable.
For those eager to elevate their cleaning game, I recommend trying a professional-grade microfiber duster combined with a descaling steam cleaner. These tools, when maintained properly, offer consistent performance and help sustain that pristine look in your home for years to come. Curious about more advanced cleaning hacks? Visit effective house cleaning secrets from cleaning experts for extra insights.
Over the years, I’ve learned that the real challenge with dusting blinds isn’t just about cleaning—it’s about understanding what truly works and what pitfalls to avoid. One lightbulb moment was realizing that regular dry dusting only displaces dirt, often making surfaces appear cleaner but leaving residues behind that can affect indoor air quality. Switching to microfiber tools and incorporating a final vacuum step transformed my approach, saving time and reducing mess. Additionally, I discovered that neglecting high, out-of-reach areas or overlooking behind appliances can lead to hidden dust buildup that aggravates allergies and diminishes home freshness. Embracing these nuanced techniques has profoundly improved my home environment, and I believe they’ll do the same for yours. Remember, consistent, mindful cleaning isn’t just about appearances—it’s about creating a healthier living space that you can enjoy every day.