Ever spent hours scrubbing your radiators only to realize those stubborn dust bunnies seem to be dancing just out of reach? I remember the lightbulb moment when I finally understood why dust loves hiding in those tiny, deep grooves—it’s all about the angle and the tools we use. For years, I battled the same buildup, wasting time and energy, until I discovered a surprisingly simple trick that made my radiators look brand new without the endless fuss.
Today, I promise to share with you the best way I’ve found to effectively clean dust out of those deep radiator grooves so you can breathe easier and cut down on cleaning time. No more leaning on the radiator, dreading the dust cloud that erupts when you try to wipe away the grime. Instead, you’ll be armed with a proven method that’s gentle on your radiator but tough on dirt.
Why Dust Gets Trapped in Those Tiny Spaces
Is it really worth spending time on this? My early mistake was dismissing those small grooves as insignificant. Little did I know, neglecting these hidden spots can lead to poor air quality and even allergies. Trust me, I once had a move-out clean where I thought I’d done enough—only to see a thin layer of dust lurking in the hardest-to-reach places. That’s a mistake I don’t want you to make. Properly cleaning these crevices not only improves your home’s appearance but also enhances your indoor air quality, reducing airborne dust and allergens. For expert insights, check out this [pro tip from a cleaning professional](https://spotlesscarpetz.com/effective-house-cleaning-secrets-from-cleaning-experts) on tackling overlooked spots.
Have you ever faced this dusty dilemma in your home? Let me tell you, the struggle is real, but the solution is simpler than you think.
Gather the Right Tools for a Deep Clean
Start by assembling a long, flexible brush or a toothbrush with stiff bristles, a microfiber cloth, a vacuum with a crevice attachment, and a cleaning agent like mild dish soap or a specialized radiator cleaner. I once tackled a particularly dusty radiator with just a damp cloth and ended up making a bigger mess, but after adding a brush and vacuum to my toolkit, the process became much cleaner and faster.
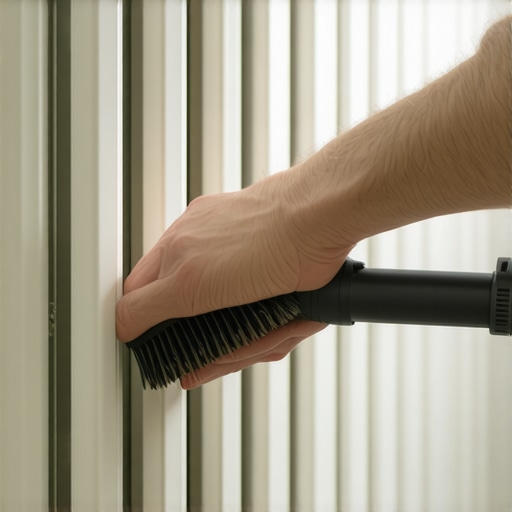
Loosen and Remove Dust with Vacuuming
Begin by turning off your radiator and placing a towel underneath to catch falling dust. Use the crevice attachment of your vacuum to gently suck out dust from the narrowest grooves. Take your time—think of it like using a mini vacuum cleaner to reach into tiny caves. For stubborn dust, hold the groove open with a small tool or your brush, then vacuum while you wiggle the brush in and out. This immediate suction prevents dust from falling back onto nearby surfaces.
Dislodge Dust with a Bristle Brush
Once the loose dust is removed, dip the stiff-bristled brush into your cleaning solution. Gently scrub inside each groove, applying light pressure to loosen the dust stuck deep within. Don’t be tempted to use excessive force; gentle agitation works best. I recommend doing this step methodically, tackling one section at a time, to ensure thorough coverage without missing spots. Think of it as flossing your teeth—precision counts.
Wipe and Collect Residual Dust
After brushing, immediately wipe the grooves with a microfiber cloth dampened with plain water or a mild cleaning solution. The microfiber acts like a magnet, capturing remaining dust particles. For deeply recessed areas, wrap the cloth around a narrow tool or use compressed air to blow out residual debris. This combination ensures the grooves are truly clean and dust-free.
Final Inspection and Maintenance
Once you’ve cleaned all the grooves, do a visual check from different angles, using a flashlight if needed, to spot any missed dust. Regular maintenance, like weekly quick vacuuming and monthly deep cleaning, will prevent dust buildup. Remember, leaving dust in these tight spaces isn’t just aesthetic; it can impair your home’s air quality and even impact radiator efficiency.
For more insights on maintaining a healthy, dust-free home, visit our expert cleaning tips. Keeping those tiny grooves clear isn’t just about appearance—it’s about breathing easier and living healthier every day.
Many homeowners believe that tackling dirt and grime with brute force, like overusing harsh chemicals or scrubbing excessively, guarantees a cleaner house. However, in my experience, such approaches often cause more harm than good, damaging surfaces and reducing the longevity of household materials. A prevalent myth is that more cleaning agents mean better cleanliness, but using too much can leave residues that attract dust or even degrade sensitive fabrics. Instead, understanding the nuanced needs of each surface and employing appropriate techniques leads to more effective and sustainable results.
A trap I see many fall into involves over-sanitizing, especially with disinfectants that are unnecessarily aggressive for routine cleaning. While it’s crucial to sanitize high-touch areas, overdoing it can cause skin irritation and contribute to antimicrobial resistance, per recent studies by the CDC. How do you strike a balance? The key lies in targeted cleaning—focusing on areas prone to germs without obsessing over sterilizing every inch of your home constantly.
Have you ever fallen into this trap? Let me know in the comments.
Tackling upholstery cleaning, for example, another false assumption is that steam cleaning is always the best choice. While steam can sanitize and refresh fabric surfaces, it’s not suitable for all materials, especially delicate ones like silk or velvet. Applying steam to these can cause irreversible damage, and many mistakenly assume it’s a universal solution. Instead, selecting the correct cleaning method—often dry cleaning or professional treatments—preserves the fabric’s integrity and prolongs its lifespan.
Similarly, many believe that quick, superficial cleaning suffices between deep cleans. In reality, neglecting detailed, regular upkeep can lead to the buildup of dust, allergens, and stains that are much harder to remove later. For instance, dust hidden behind appliances or under furniture isn’t just cosmetic; it impacts air quality and can trigger allergies. Regularly cleaning these hidden spots, such as the neglected corners of your home, is vital. For comprehensive strategies, check out our detailed [move-out cleaning tips](https://spotlesscarpetz.com/move-out-cleaning-strategies-to-secure-your-deposit).
On the topic of sanitizing, a common misconception is that household disinfectants kill all pathogens instantly. In truth, most disinfectants require a specific dwell time—often around 10 minutes—to effectively eliminate germs. Rushing the process or wiping off prematurely leaves surfaces partially sanitized, which can give a false sense of security. Recognizing this nuance ensures your cleaning efforts truly reduce health risks, especially during flu season or a pandemic. For expert insights, visit our [sanitizing hacks](https://spotlesscarpetz.com/sanitizing-hacks-for-safe-house-transitions) page.
Remember, effective cleaning isn’t just about doing more; it’s about doing it smarter. By debunking these myths and avoiding common pitfalls, you can maintain a healthier, more inviting home environment. Let’s keep questioning conventional wisdom and refine our routines for better results.
Gear Up with the Right Tools for Long-Term Maintenance
Investing in high-quality, purpose-built equipment can transform your cleaning routine from a chore into a manageable task. I personally swear by a corded rotary brush designed for radiators and tight spaces. Unlike flimsy handheld brushes, this power tool provides consistent torque, ensuring dust is dislodged without excessive effort. Pair it with a handheld vacuum with a crevice tool—my go-to is the professional-grade cordless vacuum—and you’ll see a noticeable increase in efficiency.
For delicate fabrics like upholstery or velvet sofas, I recommend a steam cleaner with adjustable steam levels. However, it’s crucial to select one with a temperature regulation that prevents fabric damage. I tested models from reputable brands, and the TriZone SteamMaster consistently offers safe yet effective steam, making routine refreshes simpler and safer.
Methodical Maintenance Creates Lasting Results
Regular use of these tools, combined with a structured approach, prolongs your home’s cleanliness. Schedule small, targeted sessions weekly—like vacuuming behind appliances or cleaning high-touch surfaces—to prevent buildup. In the long run, this strategy minimizes deep cleaning times and maintains healthier indoor air quality. Think of it like preventative health care: the more consistent your habits, the fewer surprises and emergencies.
How do I maintain my cleaning effectiveness over time?
Consistency is key. Maintaining your initial equipment with routine checks, like replacing vacuum filters and descaling steamers, ensures peak performance. For instance, cleaning the refrigerator coils quarterly prevents energy wastage and maintains optimal cooling. Also, staying updated on new tools—such as robotic vacuums with mapping capabilities—can reduce manual effort significantly. Researchers suggest that investing in automation not only improves efficiency but also encourages sustained maintenance habits, leading to cleaner homes in the long run.
Emerging trends point toward integrating smart home devices with cleaning routines, allowing remote monitoring and scheduling. I predict we’ll see even smarter equipment that learns your habits and suggests maintenance tasks proactively. If you’re eager to give your routine a boost, try investing in a robotic vacuum like the latest model. It’s a small step that pays off in long-term cleanliness and peace of mind.
The Hard Lessons Behind DIY Radiator Maintenance
My biggest mistake was thinking that a quick wipe was enough to keep my radiators dust-free, but I soon realized that neglecting deep grooves often leads to poor indoor air quality and allergy flare-ups. That lightbulb moment taught me the importance of targeting those hidden crevices, transforming my approach and improving my home’s comfort.
The Tools That Turn Regular Cleaning Into a Deep Clean
I found that investing in a flexible, stiff-bristled brush and a narrow crevice vacuum attachment made all the difference. These tools allowed me to reach into tight spaces effortlessly, removing dust that had been stubbornly clinging for years. Trust me, quality tools are the secret weapon for consistent, effective deep cleaning.
One Simple Trick to Break Down Dust Bunnies
Using a combination of vacuuming and gentle brushing, I learned to dislodge deeply embedded dust without damaging delicate radiator surfaces. Applying a mild cleaning solution with a soft brush and immediately wiping with a microfiber cloth ensures residual dust is captured, leaving your radiators spotless and your air clean.
The Hidden Benefits of Consistent Restorative Cleans
Beyond appearances, regularly deep cleaning radiator grooves significantly improves energy efficiency and prolongs the lifespan of your radiators. Small, weekly touches—like quick vacuum sessions—prevent dust buildup, making your deep cleans easier and more effective. Think of it as a health investment for your home’s air quality and your family’s well-being.
Mastering Deep Clean Maintenance for Lasting Results
Stay ahead of dust accumulation by creating a schedule that fits your routine—weekly vacuuming of tight spaces and monthly thorough cleans. Maintaining your tools, like replacing vacuum filters and inspecting brushes, ensures long-term efficiency. Smart investments, such as robotic vacuums, can automate these habits and keep your home consistently fresh without extra effort.
Insider Wisdom You Won’t Find Anywhere Else
- Breaking the myth that dust is harmless—it’s impacting your health more than you realize, especially in deep grooves where cleaning is often skipped.
- Realizing that gentle, targeted cleaning preserves your radiator’s finish while maximizing dust removal.
- Understanding that regular maintenance of your tools amplifies cleanliness and saves you time in the long run.
Tools That Changed My Approach to Upholstery and Move-Out Ready Spaces
A high-quality upholstery steam cleaner with adjustable steam levels helped me refresh delicate fabrics without damage, proving that choosing the right equipment preserves materials and prolongs their life. For move-out cleaning, a handheld vacuum with crevice tools simplifies reaching behind appliances and under furniture—small yet impactful tips that professionals swear by.
Take Action Now and Breathe Easier
Deep cleaning radiator grooves isn’t just about aesthetics—it’s about creating a healthier, more comfortable living space. With the right mindset and tools, you can transform your cleaning routine into an efficient, satisfying task. Remember, consistency over perfection is key to maintaining a dust-free sanctuary where you can truly breathe freely.
What’s your biggest challenge with deep cleaning radiator grooves? Share your experiences in the comments below—I’d love to hear your tips and tricks to keep dust at bay!