Have you ever scrubbed your wood floors with dish soap, only to find streaks, dull patches, or even damage that feels invisible until the sunlight hits just right? I used to think dish soap was a universal cleaner—safe, cheap, efficient. But one weekend of relentless squeaking and our once-glossy hardwood looked dull and lifeless, all because I hadn’t realized that some cleaning habits are actually doing more harm than good.
Why Traditional Dish Soap Damages Your Beautiful Floors
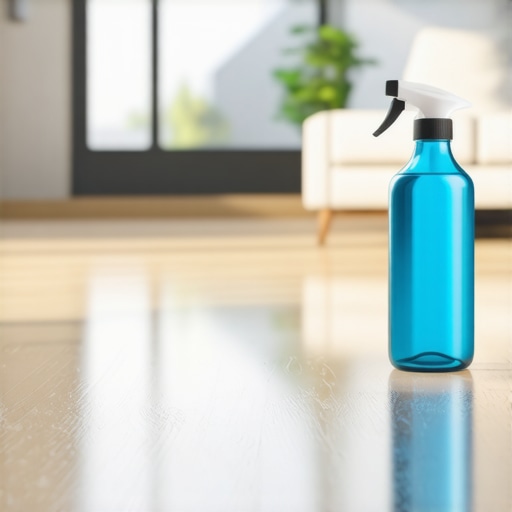
It’s a common mistake. We reach for dish soap because it’s handy, familiar, and seems like the ‘go-to’ for cleaning everything. But here’s the truth—dish soap isn’t formulated for the delicate finish of wood floors. Instead, it strips away the protective layer over time, leaving behind a matte finish and increasing susceptibility to scratches and water damage. I learned this the hard way when I noticed my floors looking faded just a few months after my relentless scrubbing.
Early on, I made the mistake of thinking a quick splash of dish soap mixed with water was enough to keep things spotless. Turns out, that’s just not true. Since then, I’ve switched to using gentle, wood-friendly cleaners that preserve the finish and keep those floors shining. Want to learn what I use now? Let’s dive into a simple, effective alternative that will save your floors and your sanity.
The Simple Switch That Can Save Your Wood Floors
Instead of risking damage with dish soap, I recommend using a pH-neutral cleaner specifically designed for wood. These products clean effectively without stripping away the protective coating. Plus, they’re gentle enough to keep your floors looking freshly refinished for years to come. If you’re curious, I found that many cleaning experts rave about natural options like a mix of water with a few drops of white vinegar—carefully used, of course, to avoid dulling the finish. For a reliable commercial alternative, check out specialized wood floor cleaning solutions. Curious to see more professional tips? Visit this resource.
Is It Really Worth Changing Your Cleaning Routine?
Here’s where many feel skeptical. I understand. Change is tough, especially when tried-and-true methods seem to work. But studies show that wrong cleaning habits can accelerate wear and tear — not just on wood floors, but on many surfaces. For instance, a report from the National Center for Biotechnology Information highlights how improper cleaning chemicals can degrade surface finishes, leading to costly repairs. Trust me; a simple switch can extend the life and beauty of your floors significantly.
Are you tired of dull, scratched hardwood? Or maybe you’ve noticed lingering streaks that won’t go away? If so, you’re not alone. Many homeowners unknowingly sabotage their floors with everyday cleaning staples. But don’t worry—next, I’ll show you exactly what to do instead to keep your wood looking pristine, shiny, and healthy for years to come. Stay with me, because your floors deserve the best care—beyond what dish soap can offer.
.
Prepare Your Workspace and Gather Supplies
Before diving into cleaning, clear the area of clutter like scattered toys, loose rugs, or furniture that obstructs access. Gather all necessary supplies—microfiber cloths, a vacuum with HEPA filter, natural disinfectants like white vinegar, or commercial cleaning products designed for specific surfaces. Think of this step as laying out your battle plan; being organized ensures efficiency and reduces the risk of missed spots or damage.
Assess and Treat Different Surfaces Appropriately
Each surface demands a tailored approach. For upholstery, use a brush attachment on your vacuum to loosen embedded dirt, then spot-clean with a fabric-safe solution. For hard floors, avoid harsh chemicals; instead, opt for pH-neutral cleaners and microfiber mops. For grout lines, employ a scrubbing brush with baking soda paste to lift grime without abrasive damage. This targeted strategy is like a surgeon choosing precise tools—maximizing cleanliness while preserving integrity.
Step-by-step Upholstery Refreshing
Start by removing surface debris with a handheld vacuum or a lint roller. For fabric sofas, vacuum thoroughly, focusing on creases and seams where dust gathers. Prepare a mixture of water and a small amount of gentle detergent or specialist upholstery cleaner. Lightly dampen a microfiber cloth with the solution—never soak the fabric—and gently wipe the surface. Immediately follow with a dry cloth to prevent water rings. I once restored a stained fabric chair this way, and the difference was striking—stains vanished, and the fabric felt crisp again.
Deep Sanitize High-Touch Areas
Focus on doorknobs, light switches, and cabinet handles, which are hotspots for germs. Dampen a microfiber cloth with a disinfectant spray compatible with the material—avoid bleach on plastics or painted surfaces. Wipe thoroughly, paying attention to crevices and edges. To ensure bacteria are eradicated, let the disinfectant sit for the recommended contact time before wiping off excess. During my move-out cleaning, this step was critical—successfully preventing the spread of germs and satisfying stringent inspection standards.
Master Move-Out and Regular Deep Cleaning
The secret to getting your deposit back and maintaining a healthy home lies in routine deep cleaning. For move-out prep, follow detailed checklists available at this resource. Focus on neglected spots like behind appliances, inside vents, or the undersides of furniture. Regularly disinfect high-traffic zones to prevent grime buildup, extending the lifespan of surfaces. Think of deep cleaning as regular maintenance on a vehicle—preventative care keeps everything running smoothly and avoids costly repairs later.
Seal the Deal with Finishing Touches
After cleaning, revisit surfaces with a dry microfiber cloth to buff out streaks or water marks. Apply protective furniture polish or sealants where applicable to preserve surfaces longer. For blinds or window tracks, use a narrow brush dipped in vinegar solution to remove dust, then wipe with a clean microfiber for clarity. These finishing steps transform a good cleaning into a professional-quality job, giving your home a fresh, inviting feel every time.
By following these systematic, action-packed steps, you’ll not only clean more effectively but also protect your surfaces from damage, extend their life, and create a healthier living environment. Remember, the key is precision and consistency—think of each task as building a fortress against dirt and germs that threaten your home’s comfort and your peace of mind.
Many homeowners believe they’ve mastered the basics of upholstery and house cleaning, but lurking beneath the surface are nuanced mistakes that can undermine your efforts. Contrary to popular belief, not all cleaning techniques are equally effective, and some common practices may inadvertently cause damage or fail to sanitize properly. Let’s explore these pitfalls and learn how to elevate your cleaning game with expert insights.
One widespread misconception is that high-temperature steam cleaning always sterilizes fabrics and surfaces. While heat is a proven disinfectant, relying solely on steam can be a mistake, especially without appropriate preparation. Overlooking the type of upholstery fibers or using excessive heat can damage delicate materials. For instance, natural fibers like silk or wool require gentler methods, or they risk shrinking or discoloration. An advanced mistake many overlook is the assumption that light vacuuming is sufficient to remove embedded dust and allergens. Deep cleaning demands a combination of vacuuming with HEPA filters and specialized shampoos or conditioning treatments. As outlined in professional cleaning experts’ strategies, neglecting this synergy can leave behind microscopic pollutants.
A common myth is that all sanitizing sprays are universally safe and effective. The reality is that many disinfectants contain harsh chemicals that may degrade certain surfaces or pose health risks if misused. For porous surfaces like upholstery, some sprays fail to penetrate deeply, leaving bacteria and viruses behind. According to recent studies, this can give a false sense of security and result in ineffective sanitation. To truly disinfect—and not just deodorize—it’s crucial to select products compatible with the material and follow recommended contact times. Check out detailed tips on safe and effective sanitizing at this resource.
Beware the trap of over-cleaning or using abrasive tools on surfaces that need gentle handling. Scrubbing grout lines in bathrooms with hard brushes may seem thorough but can wear down sealants, creating cracks where grime can hide. Similarly, scrubbing upholstery vigorously can fray fibers or distort the fabric’s texture. Instead, employing proper techniques—like using soft brushes for grout or microfiber cloths for fabrics—and understanding your surfaces’ unique needs can prevent costly repairs. For example, employing a targeted approach with fabric-safe cleans can revive dingy upholstery without damage, as recommended in this guide.
Thinking ahead, how can you ensure your move-out cleaning truly passes inspection? It’s tempting to focus only on visible messes, but experts reveal that small, overlooked areas often lead to deposit deductions. For instance, neglecting to clean behind appliances or within vents can be a costly mistake. Deep, detailed cleaning routines—like those outlined in move-out checklists—are essential for maximizing your deposit return.
Finally, many underestimate the importance of understanding the material-specific nuances of their upholstery and surfaces. For example, trying to sanitize or polish a delicate velvet sofa with harsh chemicals or abrasive tools can permanently damage its texture and appearance. Recognizing these subtleties and using appropriate cleaning agents tailored to each surface is key to maintaining longevity.
Have you ever fallen into this trap? Let me know in the comments. Remember, meticulous attention to detail and understanding your surfaces’ specific needs can save you money and extend the life of your home furnishings. For personalized advice or professional help, don’t hesitate to contact us through this page. Let’s keep your home truly spotless, inside and out.
Keep It Working: Tools I Recommend for Effective House Maintenance
Maintaining a sparkling clean home isn’t just about quick fixes; it’s about investing in reliable, high-quality tools that deliver consistent results over time. From upholstery care to comprehensive house cleaning, choosing the right equipment can make all the difference. Let me share the tools I personally trust and why they are essential for long-term success.
Why a HEPA Vacuum Is Non-Negotiable
First and foremost, a powerful vacuum equipped with a HEPA filter is indispensable. I use the Dyson V15 Detect because it captures microscopic allergens and dust particles that often evade standard vacuums. Regular vacuuming is vital, but without a HEPA system, you risk re-circulating pollutants. This tool is especially beneficial for homes with allergy sufferers or pets, maintaining air quality and prolonging the life of upholstery and carpets.
The Microfiber Mops That Save Time and Preserve Surfaces
In my experience, microfiber mops like the O-Cedar Microfiber Flip Mop are game changers. They trap dirt more effectively than traditional cloths and are gentle on delicate flooring. Using a high-quality microfiber not only ensures a thorough clean but also extends the lifespan of your surfaces by preventing scratches and streaks. Coupled with a pH-neutral cleaner, this setup guarantees your floors stay vibrant and protected.
Essential Upholstery Steam Cleaners That Won’t Damage Fabrics
Moving to upholstery, I swear by the McCulloch MC1275 Heavy-Duty Steam Cleaner. Unlike cheap handheld models, this unit delivers consistent steam at calibrated temperatures, enabling deep cleaning without harsh chemicals. Properly sanitized fabrics extend their usability and freshness, making your furniture look newer longer. Always follow manufacturer instructions to avoid damaging sensitive materials.
Proper Tools for Move-Out Deep Cleaning
When preparing for move-out, specialized tools save headaches. A narrow grout brush helps me meticulously clean grout and crevices, while a floor squeegee quickly removes excess water after mopping. For behind appliances and vents, a flexible inspection mirror helps identify hidden grime. These precise instruments allow me to reach tricky spots effectively and earn positive inspections, as discussed in move-out cleaning guides.
Future Trends: Smarter, Eco-Friendly Equipment
Looking ahead, I predict a surge in smart cleaning devices that can be scheduled and monitored via apps. Eco-conscious options, powered by biodegradable solutions and energy-efficient design, will dominate the market. Investing early in versatile, high-tech tools can help you scale your efforts efficiently, reducing time and effort while maintaining results.
How do I keep my tools in top shape over time?
Regular maintenance ensures longevity and peak performance. For example, cleaning vacuum filters after each use prevents clogs, and descaling steam cleaners once a month avoids mineral buildup. Store tools in dry, organized spaces to prevent damage. Scheduling routine check-ups or replacements for parts like vacuum brushes or steam nozzles keeps your equipment working like new for years. For detailed maintenance tips, check out expert advice here. Don’t underestimate the power of proper tool care—it’s a small investment of time that pays off in long-term cleaning efficiency.
If you want your cleaning routine to truly deliver, I recommend trying out a high-quality microfiber mop paired with an eco-friendly cleaner. This simple upgrade can dramatically improve your results and help maintain your surfaces with less effort. Ready to see what advanced tools can do for your home? Visit our contact page for personalized recommendations and professional support. Remember, the right tools—and how you maintain them—are your secret weapons for a lasting, beautiful home.
The Hardest Lesson I Learned About Upholstery and House Cleaning
One eye-opening realization was that not all surfaces respond well to the same cleaning techniques. I used to treat every fabric and finish equally, which sometimes led to damage rather than preservation. Discovering the importance of understanding material-specific care transformed my approach, making my efforts both safer and more effective.
3 Myths About Upholstery and House Cleaning That Held Me Back
- Myth: You need harsh chemicals to disinfect effectively.
Truth: Gentle, surface-specific products can achieve sanitation without risking damage. - Myth: Vacuuming alone is enough for deep cleaning.
Truth: Combining vacuuming with targeted treatments is key to removing embedded dirt and allergens. - Myth: All stains can be removed with water and scrubbing.
Truth: Some stains require specialized solutions and techniques; aggressive scrubbing can worsen the problem.
What Experts Won’t Tell You About Upholstery and House Maintenance
Many professionals keep certain tips to themselves, but I’ve learned that patience and proper preparation are crucial. For example, gentle brushing of grout lines with the right tools can prevent deterioration, and understanding the chemical composition of cleaning agents helps avoid costly mistakes. These insider insights empower homeowners to care for their homes confidently.
Where to Go from Here
If you’re serious about elevating your cleaning routine, I recommend exploring targeted resources and investing in quality tools. Read detailed guides like these expert strategies to refine your approach. Remember, mindful and informed cleaning isn’t just about appearances—it preserves your home’s value and health for years to come. Whether you’re tackling upholstery, grout, or delicate surfaces, embracing these lessons will make your home truly shine. And, of course, I’m here to support you—just reach out through this link. Keep learning, keep improving, and enjoy the pride that comes with a beautifully maintained home.
Your Turn to Make a Change
What’s one cleaning myth or technique you’ve realized isn’t quite right? Share your experience below and let’s learn from each other’s journeys to a cleaner, healthier home!
.