
I remember the exact moment I realized my laptop keyboard was gathering more germs than I ever imagined. I was just about to hop on a video call, but my hands and keyboard looked like they belonged to someone who hadn’t washed in days. Panic set in—how do I clean it safely without risking damage?
Understanding Why Safe Sanitizing Matters
Our laptops are like our digital companions, and they go everywhere with us. But in doing so, they accumulate dirt, dust, and—let’s be honest—more germs than we care to admit. Regular cleaning is essential, but it’s a delicate balance. Using harsh chemicals or aggressive scrubbing can harm your device. I learned this the hard way early on when I damage my keyboard trying to sanitize it with household bleach. That mistake taught me the importance of gentle, effective methods that protect both my health and my tech.
According to experts, improper cleaning can not only damage your device but also spread bacteria if not done correctly. For example, the CDC emphasizes the importance of using appropriate disinfectants that are safe for electronics. So, today, I’ll share the safe, proven ways I’ve adopted—methods that are gentle yet effective.
Now, if you’ve ever hesitated because you’re worried about damaging your laptop or just don’t know where to start, you’re not alone. Many people face this dilemma. Have you ever wondered if you’re doing more harm than good every time you attempt to clean your device? Well, you’re in the right place. We’ll explore practical, safe techniques that you can implement today.
Is Spraying Disinfectants on Your Laptop Actually Worth the Risk?
One common mistake I made early on was spraying disinfectant directly onto my keyboard. This may seem intuitive, but it’s risky. Liquids can seep into the device and cause long-term damage. Instead, I discovered that using a lightly damp microfiber cloth with just a few drops of alcohol-based cleaner is much safer—and still effective. If you want to see what works—and what doesn’t—check out effective sanitizing methods that won’t cause harm.
Prep Your Workspace for Safe Cleaning
Start by shutting down your laptop and unplugging it from any power source. Place a soft, clean microfiber cloth nearby. Think of this as preparing your kitchen before cooking; clear distractions and gather your tools for a smooth process. Remove any loose debris from the keyboard using compressed air, which acts like a gentle breeze clearing out the dust in a tight corner. Holding the can upright, carefully spray between keys for about 5 seconds to dislodge crumbs and dust lodged deep inside.
Use the Right Cleaning Solution
Mix 70% isopropyl alcohol with distilled water in a 1:1 ratio. This solution is like a germ-killing magic potion—strong enough to disinfect without damaging electronics. Never use harsh chemicals like bleach or household cleaners, which can eat away at your keyboard’s surface. Dab a corner of your microfiber cloth in the solution, ensuring it’s damp — not dripping. This soaked cloth will be your primary tool for sanitizing without risking excess liquid seeping into the device.
Wipe Gently, Don’t Scrub
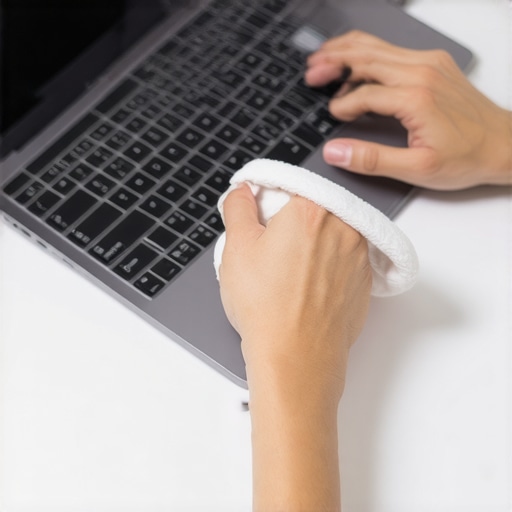
Wrap the damp cloth around your finger or a soft brush for precision. Gently wipe over the keys and surrounding surfaces, applying light pressure—think of it as petting your device with care. Focus on high-touch areas such as spacebar, Enter, and arrow keys, which are like the frequently touched handles of a toolbox. For stubborn spots, reapply a small amount of solution to the cloth and repeat. Remember, more pressure or harsh scrubbing is like scrubbing a stain with steel wool—likely to damage. That’s how I accidentally scratched my laptop’s surface last time, so take it slow.
Disinfect Hinges and Touchpoints
Don’t forget to wipe the laptop’s hinges and touchpoints like the trackpad and power button, which are high-contact zones. Use a cotton swab lightly dampened with the alcohol solution to reach tight corners or crevices—like cleaning the nooks of a gadget rather than just the surface. This preventive step ensures germs aren’t hiding in plain sight, much like removing lint from between cushions.
Let It Dry and Reassemble
After wiping, allow your laptop to air dry for at least 5 minutes. Alcohol evaporates quickly, leaving behind a clean, disinfected surface. During this time, avoid closing the display or plugging in the device, similar to letting paint dry before handling. When dry, reattach any removable keys or accessories, and your laptop is ready to face another day, germ-free and safe. For a comprehensive approach, consider following effective sanitizing methods that are safe for electronics, which you can explore here.
When it comes to keeping your home spotless and sanitized, many believe they’re following the best practices—but in reality, some widespread myths can lead you astray. One popular misconception is that the more chemical cleaners you use, the cleaner your home becomes. Actually, overusing harsh chemicals can damage fabrics and surfaces, and may even pose health risks. Instead, opting for effective, eco-friendly cleaning methods—like those discussed in expert-approved house cleaning secrets—ensures thorough cleanliness without harm.
Are All Upholstery Cleaning Products Created Equal
Many assume that heavy-duty sprays or traditional stain removers are the best choice. However, some of these products contain solvents that can weaken fabric fibers over time. For durable results, consider gentle yet effective techniques, such as proper upholstery brushing and targeted spot cleaning, outlined in ultimate upholstery care guide. Moreover, using improper tools or neglecting pre-treatment can embed dirt deeper, making stains worse. Beware of the trap where aggressive scrubbing or excessive moisture damages your furniture. External studies, like those from the National Institutes of Health, highlight how improper cleaning techniques can accelerate fabric deterioration.
How Can Move-Out Cleaning Go Wrong
Many tenants or movers underestimate the importance of detailed cleaning before vacating a property. A common mistake is rushing through the process, leaving behind stubborn grime in hidden spots such as behind appliances or under furniture. This oversight can cost not only deposit refunds but also invite disputes. Using a comprehensive move-out cleaning checklist—like the one available here—is essential. Also, relying solely on DIY efforts without understanding the nuances of professional-grade techniques can lead to incomplete sanitation, especially in high-traffic areas. Remember, areas like bathroom grout lines or kitchen vents require special attention and appropriate products to prevent long-term mold or bacteria buildup. External insights from sanitizing experts stress the importance of proper disinfection methods for move-out sanitation, which many overlook.
What Advanced Mistakes Are Most Common in House Cleaning
Even experienced cleaners often fall into the trap of neglecting certain details. For example, not cleaning air vents regularly can reduce air quality and redistribute dust. Using plain water or basic detergents on electronic surfaces without proper drying can cause damage and moisture buildup. Additionally, some forget that surface cleaning alone isn’t enough—deep cleaning of carpets, upholstery, and hidden corners makes a significant difference. Critical mistakes include ignoring manufacturer recommendations, which could lead to voiding warranties or damaging surfaces. External research from housekeeping scientists indicates that comprehensive routines, including sanitation of high-touch areas and proper tool use, are key to maintaining a truly clean home. Would you like to elevate your cleaning game? Check out advanced upholstery tips for lasting freshness, or reach us through our contact page to get personalized advice. Have you ever fallen into this trap? Let me know in the comments.Ensuring your upholstery and home surfaces remain clean and functional over time requires more than just occasional scrubbing. Investing in the right tools can make a significant difference in maintaining long-term results and simplifying your cleaning routine. For example, I swear by a high-quality steam cleaner like the Bissell SteamShot, which I use weekly to refresh upholstery, curtains, and even stubborn grout lines. Its steam reaches deep into fibers, killing bacteria and loosening dirt without introducing chemicals, aligning with the trend towards eco-friendly cleaning practices discussed in effective sanitizing methods.
Lessons From the Trenches of Home Hygiene
One of the most valuable lessons I learned is that overzealous scrubbing often does more harm than good. I used to believe that more chemicals meant cleaner homes, but I quickly discovered that gentle, targeted cleaning preserves surfaces and keeps my family safe. Tiny details, like properly drying after disinfecting, prevent moisture buildup that can lead to mold. These experiences have taught me to trust proven, science-backed methods instead of quick fixes. Additionally, I realized that understanding my specific home surfaces allows me to choose the right cleaning tools and solutions—saving money and extending the life of my furnishings.
The Gems I Keep Handy for Household Sanitizing
My go-to tools are a good-quality microfiber cloth, a precision steam cleaner, and alcohol-based disinfectants, which I trust because they’re effective yet gentle. The effective sanitizing methods they enable me to maintain cleanliness without risking damage. I also rely on detailed guides like the upholstery cleaning tips to keep my sofas and curtains fresh over time. For tackling stubborn stains or reach-in spots, I use tools like compressed air cans and small brushes, which make high-impact yet safe cleaning effortless. Trustworthy resources like these have truly transformed my approach to home hygiene.
Your Next Move Towards a Safer, Cleaner Living Space
Embracing these cleaning insights is about more than just appearance—it’s about protecting your loved ones and enhancing your quality of life. Remember, the right techniques and tools empower you to handle challenges confidently. Whether it’s a deep move-out clean or routine maintenance, I encourage you to start small, stay consistent, and keep learning. Don’t be afraid to experiment with eco-friendly options like steam cleaning or natural disinfectants, as they’re kinder to your surfaces and the environment. Your home’s cleanliness journey is ongoing, but with each effort, you build a healthier, happier space for yourself and those you care about. Ready to take the next step? Feel free to reach out via our contact page whenever you need personalized advice or support.