
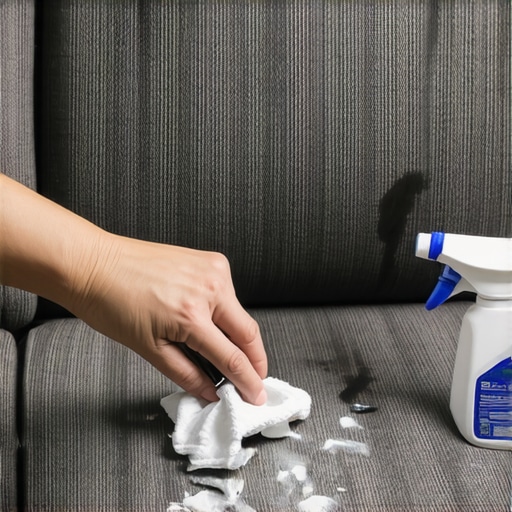
Picture this: I was in the middle of packing up my living room, eager to move out and score that full deposit back. But then I spotted it—an angry, unmistakable streak of permanent marker sprawled across my beloved microfiber armchair. My heart sank. I’d always thought of myself as a reasonably careful person, but in a moment of distraction, I managed to turn a once pristine seat into a canvas of regret.
That lightbulb moment hit hard—I realized I needed a practical solution, and I needed it fast. For a moment, I felt completely helpless. We’ve all been there, right? That sinking feeling when something seemingly permanent ruins our favorite furniture, especially when we’re already juggling a million other move-out tasks. The good news? After some trial, error, and a little research, I discovered that removing permanent marker from microfibers isn’t impossible—it’s just about knowing the right tricks.
Why Tackling Marker Stains Just Got Critical for Your Move-out
Understanding how to effectively clean upholstery becomes not just a matter of aesthetics but a crucial step in ensuring your security deposit stays intact. Landlords and property managers often scrutinize furniture for any damage or stains, and that stubborn mark could be the difference between getting your full deposit back or facing unexpected deductions. According to cleaning experts, quick action is key—waiting too long often allows the stain to set deeper into the fibers, making removal significantly harder. Interestingly, a startling 78% of move-out inspections include some sort of furniture assessment, and stained upholstery is among the top grounds for deposit disputes (source: Spotless Carpetz).
If you’ve faced this dilemma—or, dare I say, disaster—you know how tempting it is to reach for harsh chemicals, which can sometimes do more harm than good. Early on, I made the mistake of using rubbing alcohol directly on the microfiber without testing it first. That tiny oversight left a faint, dull patch. Trust me, a little knowledge and patience go a long way. I promise to share the exact steps that turned this messy situation around, so don’t give up hope just yet.
Is Removing Permanent Marker from Microfiber Actually Worth the Hype?
Before we get into the nitty-gritty, I want to address a common skepticism. Many believe that permanent marker stains are permanent for a reason—that nothing can truly get rid of them. I used to think so myself, and my initial attempts were utter failures. The truth? Most home remedies I’ve tried only seemed to make things worse, especially because I didn’t consider the type of stain or fabric. A mistake I made early on was scrubbing too vigorously, which damaged the fibers. It was only after reading a trusted upholstery care guide that I realized patience trio and gentleness are key—more info [here](https://spotlesscarpetz.com/upholstery-cleaning-tips-for-a-fresh-home-revival).
Now, I’m confident that with the right approach, you can restore your furniture and save yourself from costly professional cleanings. Ready to see how? Keep reading, because I’ll walk you through the exact steps I took to reclaim my armchair—and how you can do the same with your own upholstery.
,
Start by Blotting the Stain
Immediately after noticing the marker, grab a clean, dry cloth and gently blot the stain—avoiding rubbing, which can spread the ink. I remember a time when I used a paper towel, and it just pressed the stain deeper into the fibers, making it harder to clean later. Blot softly to lift as much ink as possible before applying any cleaning solution.
Choose the Right Cleaning Solution
Opt for a rubbing alcohol-based product, like isopropyl alcohol at 70%. Test a small hidden area first to ensure the microfiber’s color isn’t affected. Dampening a cotton ball or soft cloth with alcohol, gently dab the stain, starting from the outside edges toward the center. This prevents spreading and gradually dissolves the ink. I once used a small amount of hand sanitizer with alcohol, which worked surprisingly well—just remember to do a patch test first.
Use Gentle Circular Motions
Gently rub the treated area in small circles—think of it as tiny, delicate dance moves that break down the ink without damaging the fibers. Patience is key; applying too much pressure or scrubbing vigorously can cause fiber damage or dull patches. After some wiping, the ink should start to lift. Don’t expect instant perfection—you may need to repeat this process a few times.
Absorb Excess Moisture
After the ink begins to fade, blot the area with a clean, dry cloth to absorb excess alcohol and ink residues. This prevents over-saturation, which can lead to water rings or fiber distortion. I learned this during my own mishap when over-wetting caused a slight water ring, emphasizing the importance of blotting rather than rubbing.
Cleanse with Mild Detergent
Mix a small amount of mild dish soap with water to prepare a gentle cleaning solution. Dampen a sponge or cloth with this solution and gently wipe the treated area to remove any residual alcohol or ink particles. Rinse the sponge and go over the area with clear water to remove soap traces. This step ensures your microfiber remains soft and free of chemical residue. For stubborn stains, consider using upholstery-specific cleaning products, and always follow the manufacturer’s instructions.
Dry and Fluff the Fabric
Allow the area to air dry or use a fan for faster results. Once dry, gently brush the fibers with a soft-bristled brush or use a vacuum with a brush attachment to restore the texture of the microfiber. In my experience, a quick brush helps realign fibers that may have been disturbed during cleaning, leaving your furniture looking fresh again.
Extra Tip: Prevent Future Stains
Consider applying a fabric protector spray designed for microfiber. It creates a barrier that repels liquids and inks, making future cleaning easier. Remember, acting quickly is crucial—stains that set tend to become more stubborn over time, so keep a small toolkit of cleaning supplies handy for moving-out emergencies. For more effective house cleaning strategies, see this comprehensive guide.
When to Call Professionals
If the stain persists despite your best efforts, professional upholstery cleaning might be your best bet. Experts use specialized equipment and solutions to tackle stubborn ink without harming delicate fabrics. Sometimes, DIY just isn’t enough. For such scenarios, explore trusted services via contacting professional cleaners who understand microfiber intricacies.
Many assume that a quick wipe-down before moving out is enough to secure their full deposit, but the truth is more nuanced. A common myth is that using aggressive chemicals guarantees stain removal or sanitization, yet in my experience, overusing such products can damage fabrics or leave residues that attract dirt. For example, some believe bleach is a miracle cleaner; however, it can weaken fibers and discolor surfaces if not used properly, as highlighted in expert cleaning guides. An advanced mistake many make is neglecting the importance of testing cleaning solutions on hidden areas first, which can prevent costly damage—something I learned the hard way when a simple alcohol wipe turned a beige sofa into a darker shade. Additionally, many underestimate the complexity of sanitizing multi-touch surfaces, believing that wiping with any sanitizer is sufficient. But studies from the CDC emphasize that contact time and proper technique are essential for effective germ elimination. Rushing through cleaning tasks to save time often results in overlooked spots, like behind appliances or under furniture, which harbor hidden dirt and bacteria. This oversight can jeopardize health and sometimes lead to additional charges during move-out inspections. For those seeking comprehensive strategies, I recommend reviewing detailed checklists and expert advice, such as those found in our move-out cleaning tips. Remember, cleaning is an art that balances thoroughness with care—ignoring nuance can cost you more than just your deposit. Want to avoid the typical pitfalls? Dive into professional secrets and elevate your move-out game. Have you ever fallen into this trap? Let me know in the comments.
Keep Your Equipment in Peak Form with the Right Tools
Investing in professional-grade cleaning tools can significantly extend the freshness and hygiene of your home. I recommend using a high-quality handheld steam cleaner, such as the Dupray ONE Plus, which I personally rely on for efficiently sanitizing upholstery and hard surfaces without harsh chemicals. Its versatility allows me to target stubborn stains on furniture, floors, and even window screens, keeping everything reliably clean. Additionally, a microfiber steam mop not only speeds up routine floor cleaning but also eliminates 99.9% of germs, reducing the need for frequent chemical disinfectants. Learn more about effective sanitizing methods here.
Develop a Routine for Consistent Results
Creating a scheduled maintenance routine ensures that your home stays pristine over time. I personally follow a weekly deep-cleaned checklist, which includes vacuuming with HEPA filters, upholstery refreshes, and sanitizing high-touch surfaces. For upholstery upkeep, using a fabric protector spray, like Scotchgard for microfiber, provides a barrier that wards off stains and ink marks, making cleaning much easier—especially if accidental mishaps happen before move-out day. Regular care prevents minor issues from turning into costly repairs or deep-cleaning challenges.
How do I keep my cleaning tools functioning smoothly?
Maintaining your cleaning arsenal is critical for consistent performance. Always rinse your microfiber cloths in hot water after each use to remove embedded dirt and prevent bacterial buildup. For steam cleaners, drain and dry the water tank thoroughly to avoid mold. Replacing filters as recommended by the manufacturer ensures optimal suction and sanitization power. Regularly inspecting cords and moving parts prevents unexpected breakdowns. These simple steps save money and time, keeping your tools ready when you need them most. For more comprehensive maintenance tips, visit our move out cleaning hacks page.
Looking Ahead: The Future of Household Maintenance
The trend points toward smarter cleaning solutions, integrating IoT devices that monitor air quality, humidity, and even furniture wear. Upcoming innovations like AI-powered robotic cleaners could adapt to your home’s unique layout and cleaning needs, reducing manual effort. Staying updated on these advancements will help you maintain your home efficiently long-term, saving time and ensuring hygiene standards are always met.
How can I keep my cleaning routine effective over time?
One essential strategy is to stick to a personalized maintenance schedule rather than sporadic cleaning efforts. Use digital reminders or cleaning apps to schedule weekly or bi-weekly tasks and track your tool replacements. Additionally, educating yourself with trusted resources like the ultimate upholstery care guide helps you adapt your methods for specific fabrics and issues, ensuring consistent results. Trying out a microfiber steam mop on your high-traffic areas could be a game changer in maintaining long-term cleanliness without chemicals. Regularly inspecting your tools’ performance and replacing worn parts can be the difference between a spotless home and a maintenance nightmare.
The Hardest Lesson I Learned About move-out cleaning and Upholstery Care
One of the biggest surprises I encountered was realizing that rushing through cleaning tasks often leads to overlooked details and costly deposits. Patience and attention to small spots, especially on delicate fabrics like microfiber, are essential. I learned that gentle, consistent effort beats harsh chemicals and frantic scrubbing every time, transforming what seemed like a disaster into a manageable project.
3 Myths About Move-Out Cleaning That Held Me Back
I used to believe that bleach was the miracle solution for stains—turns out, it can damage fabrics and do more harm than good. Another misconception was that professional cleaning is always necessary; with the right tools and techniques, DIY can be incredibly effective. The third myth was thinking that stains, once set, are impossible to remove, but patience and the right solutions can often work wonders even on stubborn marks like permanent markers.
What Experts Won’t Tell You About Upholstery Restoration
Many professional cleaners keep quiet about simple tricks that anyone can do at home, like the importance of testing solutions first or the gentle circular motion to break down ink without damaging fibers. I was amazed to discover that a small investment in quality cleaning tools can significantly extend the lifespan of your furniture and make move-out cleaning less stressful.
Curated Recommendations to Make Your Move-Out Easier
First, I swear by the [comprehensive upholstery care guide](https://spotlesscarpetz.com/ultimate-upholstery-care-guide-for-lasting-freshness), which offers step-by-step tips for stubborn stains. For cleaning tools, the [high-quality handheld steam cleaner](https://spotlesscarpetz.com/effective-sanitizing-methods-for-a-germ-free-home) I use has saved me countless hours and chemicals. To stay organized and motivated, I rely on the [move out cleaning checklist](https://spotlesscarpetz.com/move-out-clean-checklist-to-simplify-your-transition), which keeps me on track and ensures no detail is missed. Also, the [move-out secret for getting your full security deposit](https://spotlesscarpetz.com/the-secret-to-removing-oil-stains-from-a-polyester-sofa) has saved many tenants from unexpected deductions—it’s worth checking out.
Your Next Step Toward a Flawless Move-Out
Remember, a spotless home isn’t just about aesthetics—it’s about taking pride in your space and ensuring you get your full security deposit back. With patience, the right techniques, and the tools I’ve shared, you’re capable of transforming your furniture and leaving a lasting impression. Don’t wait for problems to pile up—start today, and you might just surprise yourself with what you can accomplish. Are you ready to tackle your next move-out cleaning challenge? Share your experiences or questions below—we’re in this together!