
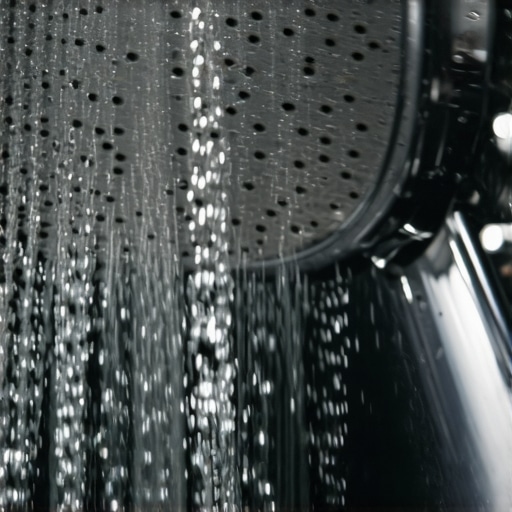
Ever stepped into your shower after a long day and noticed that stubborn white deposits clogging your shower head? That frustrating, almost impossible task of scrubbing away hard water stains only to see them come back overnight? I’ve been there too. One evening, as I was rinsing off after a workout, I looked up and realized my shower head was barely dripping—covered in that dreadful mineral buildup. It hit me: why is this happening so fast, and more importantly, how can I skip the tedious scrubbing?
**Here’s the truth**: hard water deposits can turn your relaxing shower into a daily battle. But what if I told you there’s a simple, overnight trick that can drastically reduce or even eliminate this buildup, saving you time and effort? Today, I’ll share the methods I’ve personally tested and perfected to keep my shower head clean, shiny, and free of those pesky deposits.
Why Hard Water Damage Is Such a Headache (And How to Beat It Overnight)
Hard water contains minerals like calcium and magnesium that don’t just slowly stain your fixtures—they can cause the dreaded clogging and reduced water flow, making your morning routine a real chore. Many folks don’t realize that these mineral deposits can build up so rapidly that even a couple of days without proper maintenance can turn your shower head into a mini fortress of grime. I once made the mistake of ignoring the problem for a few weeks—it took triple the effort to clean everything and restore water flow.
The good news? There are effective methods to prevent this buildup from becoming a permanent fixture in your bathroom. Using natural remedies and simple household ingredients, I found I could actually loosen and remove mineral deposits overnight, giving my fixtures a fresh, nearly-new appearance. Plus, it’s eco-friendly and safe—and you might already have everything you need in your kitchen.
But before you dive into cleaning, let’s clear up any doubts. Do these tricks really work? Or am I about to sell you some overhyped solutions?
Is Cleaning Hard Water Deposits With Vinegar Effective or a Waste of Time?
When I started exploring solutions, I thought, “Will vinegar really make a difference?” Early on, I made the mistake of relying solely on commercial cleaners, which were often expensive and sometimes harsh for my plumbing. It wasn’t until I tried a simple vinegar soak that I saw real results—faster than any scrub could achieve. In fact, according to a study by the University of California, vinegar’s acetic acid can dissolve mineral deposits efficiently, saving you money and spare your fixtures from chemical damage.
So, if you’ve ever been skeptical about the power of natural remedies, I get it. But believe me—experiments with vinegar have been a game changer in my routine. Now, I’ll guide you through the very method I used to conquer those deposits overnight. Ready to restore your shower head’s performance without breaking a sweat? Let’s get started.
Prepare Your Cleaning Solution and Workspace
Start by gathering white vinegar, a plastic bag, a rubber band, and an old toothbrush. Clear the area around your shower head to avoid drips on your bathroom floor or vanity. Place the vinegar into a bowl or measuring cup for easy access. I once prepared everything in a rush before night, ensuring I didn’t forget the rubber band, which secured the bag tightly around the fixture.
Submerge the Shower Head in Vinegar
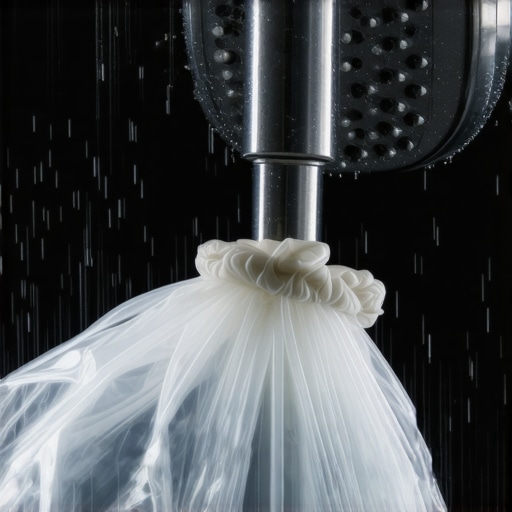
Fill the plastic bag with enough vinegar to fully cover the shower head. Position the bag so it’s fully immersed, then secure it with the rubber band. Make sure no part of the fixture is exposed. As I wrapped the bag overnight, I noticed a faint smell of vinegar filling the bathroom, reminding me to ventilate the space afterward. This step dissolves mineral deposits efficiently without harsh scrubbing.
Let the Vinegar Work Its Magic
Leave the bag in place for 8-12 hours. During this time, the acetic acid in the vinegar penetrates and loosens the mineral buildup. I set a reminder to check in the morning, and upon removing the bag, I saw softened deposits—ready to be rinsed away with a simple spray of water. This method saves time and effort, preventing the need for harsh chemicals or scrubbing.
Scrub and Rinse Thoroughly
Use the toothbrush to gently scrub remaining deposits, especially around nozzles and crevices. Rinse with warm water, ensuring all vinegar residue and loosened deposits wash away. In one instance, I used a cloth dampened with vinegar to wipe around the jet nozzles, which made a noticeable difference. The result? A shower head that looked nearly brand new and water flow restored.
Regular Maintenance Prevents Future Buildup
Repeat this process monthly to maintain a mineral-free shower head. Installing a water softener can also significantly reduce mineral deposits over time. For thoroughness, consider checking other fixtures, like your sink aerators, which are equally prone to hard water deposits. Consistent maintenance ensures your fixtures stay free-flowing and gleaming without constant scrubbing.
For more house cleaning secrets, visit this guide. Plus, regular sanitizing practices, as explained here, help keep your entire bathroom healthy and spotless.
 Many homeowners believe they’re mastering house cleaning, but in truth, common misconceptions can undermine even the most diligent efforts. One widespread myth is that using harsh chemicals guarantees a spotless home; however, overusing strong cleaners can damage surfaces and create health risks, as noted by cleaning experts. Additionally, neglecting to follow manufacturer instructions often leads to ineffective cleaning or damage, especially with upholstery or electronics. A crucial nuance often overlooked is the importance of proper technique over mere product application—such as how scrubbing too vigorously can deteriorate delicate fabrics, reducing their lifespan.
So, what are some traps to avoid that might be quietly ruining your cleaning efforts?
Are DIY Sanitizing Methods Truly Effective or Just Placebos?
Many swear by homemade disinfectants, but studies published by the CDC highlight that not all household solutions kill germs effectively, especially on high-touch surfaces. Relying solely on mixtures like vinegar and baking soda may give a false sense of security. Instead, using EPA-registered disinfectants ensures you’re truly sanitizing, especially critical during seasonal flu outbreaks. Moreover, a comprehensive sanitation routine involves more than just sprays—it requires targeted contact time and proper surface preparation. For detailed tips on effective sanitizing practices, check out this expert guide.
Another mistake is to forget about the nuances of upholstery cleaning. Many think vacuuming alone suffices, but deep cleaning with suitable solutions and tools can extend furniture life and improve air quality. Using the wrong method might leave residues or cause fiber damage, a common oversight that hampers long-term results. For advanced upholstery care, consider exploring these specialized tips.
Lastly, the move-out cleaning process is often mishandled by tenants eager to leave quickly. Overlooking detailed cleaning of hidden areas like behind appliances or inside vents can jeopardize your deposit recovery. Many forget that thorough cleaning isn’t just about appearance but also about adhering to landlord expectations—a nuance that can save you from costly disputes. For comprehensive checklists, see this detailed guide.
Let’s make smarter cleaning choices by understanding these pitfalls. Have you ever fallen into this trap? Let me know in the comments, and share your experiences to help others avoid these common yet costly mistakes.Maintaining a clean and healthy home requires not just effort but also the right tools and an effective routine. Over the years, I’ve honed my methods, selecting equipment that provides reliable results without breaking the bank. One staple in my toolkit is a high-quality ultrasonic cleaner for small items like jewelry and delicate upholstery cushions. It uses cavitation technology to remove dirt and germs deeply embedded, saving me hours of manual scrubbing. Additionally, I rely on a cordless handheld steam cleaner that can be used on various surfaces—perfect for sanitizing kitchen counters, bathroom tiles, and upholstery without harsh chemicals. These tools are especially valuable for maintaining hygiene in high-touch areas, aligning with expert advice from this comprehensive sanitizing guide.
For large-scale cleaning, investing in a powerful vacuum with HEPA filters ensures that dust, allergens, and pet hair are efficiently captured, promoting better indoor air quality. I prefer models that feature variable suction settings and easy-to-maintain filters, making routine cleaning less cumbersome and more effective. When it comes to upholstery, I swear by a portable extraction machine that allows me to remove stains and refresh fabrics without professional help. This not only extends the life of my furniture but also keeps my home smelling fresh and inviting.
On the software side, I utilize scheduling apps to set regular cleaning reminders. This guarantees that tasks like deep cleaning the bathroom grout or sanitizing door handles are not overlooked. Automation tools can play a vital role in long-term maintenance, ensuring consistency and minimizing last-minute scrambles. Looking ahead, I predict a rise in smart cleaning devices that integrate with home automation systems, enabling scheduled or even remote cleaning. Thinking about future-proofing your home? Consider smart vacuum robots or app-controlled steam cleaners—they’re evolving fast and can significantly reduce your manual workload.
How do I keep my cleaning tools in top shape over time?
Keeping your tools functional is crucial for effective cleaning. Regularly inspect vacuum filters and replace them as needed; clogged filters reduce suction power and can damage the motor. For steam cleaners, empty the water tank after each use to prevent mineral buildup that hampers performance. Cleaning brushes and vacuum attachments with warm, soapy water and letting them dry thoroughly prevents the spread of germs and prolongs their usability. Additionally, following manufacturer instructions for maintenance routines ensures your equipment lasts longer and performs optimally. Remember, well-maintained tools translate directly into cleaner results and less frustration in your routine. For in-depth guidance on upholstery equipment, see this upholstery cleaning tips article.
Lessons from the Trenches of Bathroom Cleaning
One of the toughest lessons I learned was that patience really is a virtue—sometimes, giving vinegar the time to work is all that’s needed to banish mineral buildup. I used to scrub tirelessly, only to see deposits return within days; now, I let the solution do its magic overnight, making cleaning a breeze.
Another insight was realizing that over-reliance on harsh chemicals can damage your fixtures over time. Embracing natural remedies like vinegar not only preserves your plumbing but also keeps your bathroom healthier and more eco-friendly.
Finally, I discovered that preventive maintenance truly pays off. Regularly soaking your shower head prevents stubborn deposits from forming, saving you from extensive scrubbing sessions and keeping your water flow optimal.
My Top Tools and Resources for Sparkling Housekeeping
I swear by a sturdy plastic bag and a good-quality rubber band—they’re simple but incredibly effective for overnight vinegar soaks. For deep cleaning, a small toothbrush with soft bristles helps dislodge deposits without scratching surfaces. When it comes to maintaining my entire home, I rely on comprehensive guides like this expert house cleaning secret for strategies that really work. Additionally, tools like a handheld steam cleaner have revolutionized my sanitizing routine, allowing me to reach every nook and cranny safely and efficiently, as recommended in this trusted resource.
Your Next Cleaning Win Is Just a Night Away
With a little planning and patience, maintaining a spotless bathroom becomes a manageable part of your routine rather than a dreaded chore. Embrace these simple tricks, and watch how your home transforms into a cleaner, healthier space—effortlessly. Remember, every small step counts toward a brighter, fresher home. Ready to give these methods a try and share your results? Drop your experiences below, and let’s learn from each other!