It was a restless night when I finally looked at my mattress and noticed those stubborn yellow stains sneaking across the surface. I had always thought sweat stains were just part of aging bedding, but seeing them up close felt like a personal defeat. That moment—when I realized I was sleeping on a mini swimming pool of my own sweat—was a lightbulb moment. I knew I had to do something, but where to start? If you’ve faced the same frustration, you’re not alone.
Why Are Sweat Stains Such a Pester and How Do They Linger?
Is It Really Worth Waging War on Mattress Yellowing?
In my early attempts, I made the mistake of using harsh chemicals that only worsened the stains or damaged the fabric. It turns out, those yellowish patches are caused by a combination of sweat, bodily oils, and bacteria reacting with the mattress material over time. According to cleaning experts, neglecting these stains can lead to increased dust mites and odors, affecting not just sleep quality but also your health. The key is understanding that this isn’t just about looks; it’s about a healthier, cleaner sleeping environment.
So, if you’re tired of hiding your bed behind sheets or just want to reclaim your sleep sanctuary, I promise this guide will walk you through effective, easy-to-do solutions. And yes—these methods are safe for your mattress and won’t break the bank.
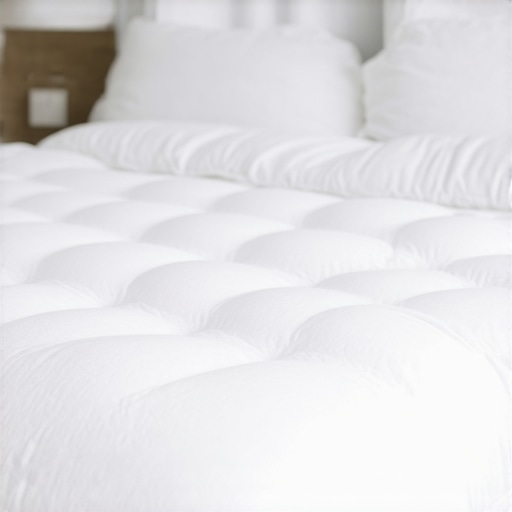
Deep Cleaning Your Mattress with Household Staples
Start by removing all bedding and vacuuming the entire surface with a upholstery attachment to lift loose dirt and dust. Then, sprinkle a generous layer of baking soda over the mattress, focusing on stained areas. Let it sit for at least 30 minutes to absorb odors and moisture. Use a soft brush to gently work the baking soda into the fabric, then vacuum it off thoroughly. This step not only deodorizes but also lifts residual stains, making the surface fresher.
Targeting Persistent Yellow Stains
Create a cleaning mixture with equal parts hydrogen peroxide, baking soda, and a few drops of dish soap. Mix in a spray bottle and test it on a small, hidden area first to ensure it won’t discolor your mattress. Spray the solution directly onto the stain, then let it sit for 10-15 minutes. Gently scrub with a soft-bristled brush or sponge, focusing on the stained areas. Hydrogen peroxide acts as a natural bleaching agent, brightening yellowed spots without harsh chemicals. Rinse lightly with a clean, damp cloth and blot dry with a towel.
Sanitizing and Refreshing the Surface
After stain removal, disinfect your mattress to eliminate bacteria and dust mites. Mix equal parts distilled water and white vinegar in a spray bottle, adding a few drops of tea tree oil for a natural disinfectant scent. Lightly spray the surface without oversaturating it, and allow it to air dry. This not only sanitizes but also helps prevent future stains and odors. For extra freshness, consider using a fabric refresher or airing the room to enhance drying.
Ensuring Complete Dryness for Longevity
Proper drying is crucial to prevent mold and mildew. Open windows and turn on fans to increase air circulation. If possible, place the mattress in direct sunlight for a few hours, as UV rays naturally disinfect fabrics. Use a hairdryer on a low heat setting to gently speed up the process on stubborn moist spots. Ensuring the mattress is thoroughly dry maintains its freshness and prolongs its lifespan, enabling you to enjoy a clean sleep environment.
Maintaining a Stain-Free Mattress Long-Term
Regularly vacuum and air out your mattress to prevent build-up of sweat and oils. Using a fitted, waterproof mattress protector can shield against future stains and spills, making deep cleans less frequent and easier. Remember to wash the protector monthly and follow manufacturer instructions for your bedding. This proactive approach saves time, keeps your sleeping environment hygienic, and preserves the mattress’s appearance over the years.
When it comes to house cleaning, many of us rely on common tips we’ve heard before, like using vinegar or baking soda, but there’s a deeper layer of nuance that often goes unnoticed. For instance, a widespread misconception is that more aggressive scrubbing always yields better results. In reality, overly abrasive techniques can damage delicate surfaces like natural stone countertops or fine upholstery, leading to costly repairs over time. According to cleaning expert Laura Smith, “Understanding the material composition of your surfaces is crucial; using the wrong cleaning agents or techniques can cause irreversible harm.”
What Advanced Mistakes Are People Making in Sanitizing and Upholstery Care?
Many homeowners believe that disinfectants alone are sufficient for thorough sanitation. However, studies show that improper application—such as spraying disinfectants on a dry surface—limits effectiveness. Properly cleaning and drying surfaces first enhances disinfectant efficacy, a nuance highlighted by experts at the CDC. Additionally, common myths include the idea that professional cleaning is always necessary for upholstery. In fact, applying improper cleaning solutions or neglecting proper drying can lead to mold growth or fabric deterioration. For advice on effective upholstery care, check out this comprehensive guide.
Another subtle trap is the belief that move-out cleaning doesn’t require attention to minor details. Overlooking small spots like under appliances or inside vents can cause deposit deductions or inspection failures. For tailored strategies, explore this article.
Varying from basic cleaning, advanced techniques involve understanding how cleaning products interact with various materials. For example, some detergents can degrade natural fibers or cause discoloration if used improperly. Always test a small hidden area first or consult product guidelines. Remember, rushing through cleaning without understanding these nuances can backfire, affecting both the appearance and longevity of your surfaces.
In the end, mastering house cleaning requires more than following simple steps—it demands an understanding of the hidden complexities and potential pitfalls. Have you ever fallen into this trap? Let me know in the comments, and stay tuned for more expert insights to keep your home truly spotless.
Keep Your Equipment in Top Shape
Investing in quality cleaning tools is the first step towards maintaining a pristine home. I personally swear by a high-quality microfiber mop because it traps dust without spreading it around. Regularly washing and replacing your cloths prevents bacterial buildup, ensuring that every swipe leaves your surfaces truly clean. Additionally, a cordless vacuum with a HEPA filter not only makes quick cleanup effortless but also improves air quality—something I notice especially during allergy season. Keep your tools spotless, and they’ll serve you well for years to come.
The Power of Specialized Cleaning Products
Choosing the right products is crucial. I recommend using enzyme-based cleaners for upholstery, like those highlighted in this guide. Enzymes break down organic stains without damaging delicate fabrics, preserving your furniture’s texture and color. For sanitizing high-touch surfaces, I rely on EPA-approved disinfectants that are proven effective against bacteria and viruses. Remember, combining the right products with proper technique maximizes results and extends the interval between deep cleans.
Routine Maintenance Strategies
Creating a cleaning schedule transforms housework from a daunting chore into an effortless habit. I schedule quick daily touches—wiping sinks, tidying up clutter—and dedicate one good session each weekend to tackle deeper tasks like scrubbing bathrooms. Implementing a ‘clean as you go’ mindset prevents messes from piling up, making weekly cleanups shorter and more effective. Automating reminders on my phone helps me stay consistent, ensuring my home stays fresh and inviting over the long haul.
Future Trends in Home Maintenance Tools
Looking ahead, smart cleaning devices are set to revolutionize home care. Automated vacuum robots linked with smart home systems can now map your home and target dirt precisely, saving time and effort. I predict that integration with AI will offer personalized maintenance schedules based on usage patterns, making home upkeep more intuitive and less burdensome. Embracing these innovations early will keep your cleaning routines efficient and high-tech.
How do I maintain tools and equipment over time?
Proper tool maintenance extends their lifespan and keeps cleaning performance optimal. Regularly inspect hoses, brushes, and filters, replacing worn parts before they cause damage or reduce effectiveness. Deep cleaning your vacuum filters every few months, as advised in this article, prevents dust recirculation. Storing tools in dry, organized spaces prevents rust and microbial growth. Remember, investing a little time in caring for your cleaning arsenal saves money and effort in the long run, keeping your home consistently spotless and healthy.
For detailed advice on selecting and caring for cleaning tools, check out this expert-backed resource. And don’t forget—try scheduling a weekly check-up on your equipment to stay ahead of any maintenance issues. Your future self will thank you for the effort!
Lessons from My Biggest House Cleaning Slip-Ups
One of the most eye-opening lessons I learned was that rushing through cleaning tasks often leads to overlooked spots and recurring issues. For example, I used to think disinfecting high-touch surfaces once a week was enough, but I realized that regular, thorough sanitizing of hidden areas like air vents and behind appliances makes a huge difference in overall hygiene.
Another personal revelation was that overusing chemical cleaners can damage delicate surfaces, leading to costly repairs. Natural alternatives like vinegar or baking soda, when used correctly, can be surprisingly effective without risking long-term damage.
Finally, I discovered that establishing a routine and understanding the nuances of different materials helps maintain a cleaner, healthier home environment. It’s not just about surface cleanliness but about the long-term care of your home and furniture.
My Go-To Tools and Resources for a Spotless Home
For deep cleaning tips, I highly recommend checking out this expert-backed guide. It’s packed with insider tricks that save time and improve results. My favorite tool is a high-quality microfiber cloth, which picks up dust without spreading it around, and I swear by a cordless HEPA-filter vacuum to keep air quality at its best.
When it comes to cleaning products, I trust enzyme-based cleaners for upholstery because they break down organic stains naturally, preventing fabric deterioration. For sanitizing, EPA-approved disinfectants combined with proper technique (like pre-cleaned surfaces) ensure germ-free results. These tools and resources have truly transformed my approach to home care.
Take Action and Transform Your Home Today
Empower yourself to create a cleaner, safer space by applying these lessons and tools. Remember, house cleaning isn’t just a chore—it’s an act of love for your home and family. With patience and knowledge, you can master the art of effective sanitizing and upholstery care, making your home a true sanctuary.
What’s one cleaning or sanitizing tip you’ve been curious about trying next? Share your thoughts below—I’d love to hear your experiences!