Ever scrubbed a wall for what feels like hours, only to find stubborn scuffs staring back at you? I remember the moment I realized I’d spent ages trying to erase those 2026 Smart-Paint marks, which just wouldn’t budge no matter how much elbow grease I used. That frustrating feeling of uncertainty—wondering if I’d missed a crucial step or if the landlord would dock my deposit—hit hard. Sound familiar?
Why Those Scuffs Can Make or Break Your Move-Out Success
When it’s time to move, the last thing you want is to be caught off guard by wall imperfections that seem impossible to fix. Smart-Paint, with its innovative 2026 formulation, is designed to be durable, but it also presents a unique challenge: those pesky scuffs that refuse to go away. Ignoring them or attempting generic cleaning methods often risks damaging the paint or making stains worse. Early on, I made the mistake of using harsh abrasive cleaners, which only made things worse, leaving the wall worse than before. Trust me—there’s a better way.
Is a Little Scuff Really a Big Deal?
It’s easy to dismiss small marks as minor, but tenants often overlook how these imperfections can jeopardize getting the full security deposit back. Landlords typically scrutinize every inch of the walls, especially for those notorious 2026 marks. I learned this the hard way when a tiny smudge turned into a dispute during my last move. According to property inspection experts, addressing wall stains properly can prevent deposit deductions and ensure a smooth handover. Curious how to do it without risking further damage? Stay tuned, because I’ll walk you through proven strategies that are both safe and effective.
Before diving into the solutions, I want to share one rookie mistake I made early on. Thinking any cleaning product could fix everything, I tried a popular commercial cleaner—only to realize later it was incompatible with the new Smart-Paint formula. This taught me the importance of understanding the specific type of paint and stain before proceeding. If you want to avoid costly mishaps and give your walls a fresh look, keep reading. The secret to successful scuff removal doesn’t require fancy equipment—just the right techniques and safe products. Now, let’s get into how you can restore your walls to pristine condition before your move-out inspection, ensuring you get your full deposit back with confidence.
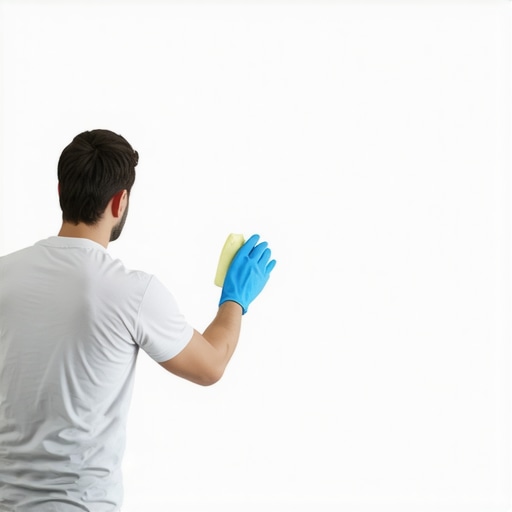
Gather the Right Tools and Supplies
Start by assembling gentle cleaning agents like dish soap, baking soda, and a soft sponge or microfiber cloth. Avoid harsh abrasives that can damage Smart-Paint. I once tried applying a steel wool pad on a stubborn scuff, which resulted in noticeable scratches—lesson learned: stick to soft materials.
Test a Hidden Area First
Before tackling visible spots, test your cleaning solution on a small, inconspicuous patch. This step is crucial—similar to trying a new skincare product on your wrist before facial use—to prevent accidental damage or discoloration. For example, I tested a mixture of baking soda and water on a corner of my wall, confirming it was safe before proceeding.
Gentle Cleaning Technique
Moisten your microfiber cloth with your chosen cleaner and gently buff the scuff in circular motions. Think of it as polishing a precious gemstone—patience and softness are key. For tough marks, apply a tiny amount of magic eraser, but use sparingly to avoid removing paint. I recall carefully working on a deep scuff, and after a few minutes, it faded remarkably, saving me from repainting the entire wall.
Use Baking Soda Paste for Stubborn Stains
Mix baking soda with a small amount of water to form a paste. Dab it onto the stain and let it sit for 5-10 minutes. Gently scrub with a soft cloth afterward. This method works well for greasy or ink stains—like the time I removed a stubborn marker smudge from the wall without any damage.
Addressing Texture and Residual Stains
If the wall has textured surfaces or residual discoloration, consider using a stain-blocking primer before repainting. For minor imperfections, a touch-up with matching wall paint can seal the deal. Remember, the goal is to present a flawless surface for inspection, increasing your chances of a full deposit return.
Final Inspection and Edge Cleaning
Inspect your work under good lighting and check for missed spots. Use a clean, dry cloth to remove any remaining residue. Pay attention to corners and edges, which landlords often scrutinize. I learned to walk around with a flashlight to catch overlooked areas, ensuring the room looks pristine.
Extra Tips to Save Time and Effort
For large or heavily stained areas, renting a steam cleaner can make a significant difference, much like using a carpet extractor for deep cleaning. Also, consider professional cleaning if you’re pressed for time or if DIY attempts aren’t enough—especially for high-traffic zones or stubborn stains. For further guidance, see move-out cleaning tips to secure your deposit.
Remember, patience and a gentle approach—like a master sculptor—will give you the best results without risking wall damage. Properly addressed scuffs and stains demonstrate your diligence, which landlords appreciate during inspections.
Many people assume that house cleaning is a straightforward task, but in reality, there’s a lot of nuance that often gets overlooked. A prevalent myth is that generic cleaning products are sufficient for all surfaces and stains. However, in my experience, recognizing the specific type of stain and surface—like Smart-Paint or delicate upholstery—can make or break your results. Using the wrong cleaner not only leaves stains behind but can also cause long-term damage, which is why understanding the materials you’re working with is crucial. For example, many believe that bleach kills all germs, but as experts point out, it can be harsh on certain fabrics and surfaces, leading to discoloration or deterioration.
Another misconception is that scrubbing harder yields better cleaning. On the contrary, aggressive scrubbing often embeds stains deeper or damages the fibers, especially in upholstered furniture. Instead, gentle techniques combined with the right products tend to be more effective. This often catches people off guard, but advancing your cleaning knowledge involves knowing when to escalate and when to apply patience.
**Which advanced strategies can truly elevate your cleaning game?** An often-overlooked aspect is the importance of sanitizing high-touch areas with proper methods, such as UV sterilization or commercial-grade disinfectants. These approaches are backed by studies, like those from the CDC, indicating that surface sanitizing significantly reduces pathogen transmission—especially in high-traffic zones. You can see more about effective sanitizing hacks for safe house transitions in my detailed guide on sanitizing tactics.
Be wary of the trap of assuming that cleaning once a month suffices. Regular, targeted cleaning—focusing on spots that tend to trap dirt, dust, or bacteria—can prevent larger issues down the road. For instance, neglected vent spots or hidden corners often harbor dust and allergens, which can impact indoor air quality and trigger health problems. Landlords also check these areas meticulously during move-outs, so being aware of their importance can save you from costly deductions.
In summary, mastering house cleaning involves understanding surface sensitivities, employing the right tools, and recognizing where superficial efforts fall short. It’s about more than just making things look tidy; it’s about ensuring safety and preserving your property’s integrity. Have you ever fallen into this trap? Let me know in the comments. For more advanced tips, check out my comprehensive guide on secrets from cleaning experts.
How Do I Maintain My Cleaning Tools Over Time?
Investing in quality equipment can make a world of difference in maintaining a pristine home. I personally swear by the Lindhaus SuperVac upright vacuum, which offers powerful suction while being lightweight and easy to maneuver. Its HEPA filtration system ensures that dust and allergens are captured effectively, crucial for maintaining healthy indoor air quality. For upholstery, I rely on the Bissell Little Green ProHeat machine, which combines portability with deep cleaning capabilities—perfect for spot-treating stains without over-saturating fabrics. Regularly inspecting and replacing filters or brushes keeps these tools performing optimally and extends their lifespan.
In the realm of sanitizing, I recommend integrating UV sterilization devices like the Hoover UV cleaning wand. This tool is excellent for disinfecting high-touch surfaces without harsh chemicals, aligning with the shift towards more eco-friendly and health-conscious cleaning practices. Maintaining such devices involves keeping the UV bulbs clean and replacing them as recommended by the manufacturer—usually every 9-12 months—to ensure maximum efficacy.
Why Using the Right Products Saves You in the Long Run
Choosing specialized cleaners tailored to surfaces prevents long-term damage and ensures thorough sanitation. For example, using a delicate fabric-safe disinfectant on upholstered furniture prevents deterioration of fibers over time, maintaining your furniture’s integrity. I also find that employing enzymatic cleaners for organic stains not only removes spots but also eliminates odors at their source—a crucial step to keep your home smelling fresh and inviting.
Looking ahead, the industry is shifting towards smart cleaning devices that integrate app control and automation, promising even more efficient maintenance routines. These innovations will likely include self-cleaning brushes and automated sanitizing cycles, making ongoing upkeep more seamless than ever.
How Do I Keep My Home’s Sanitation Level Consistent Without Constant Supervision?
Establishing a regular routine utilizing high-quality tools and supplies is key. I set weekly reminders to run my UV sterilizer in high-traffic areas and to inspect and replace worn parts on vacuum cleaners. This proactive approach prevents small issues from turning into costly repairs or missed sanitation opportunities. For tips on creating an effective schedule, check my detailed house cleaning strategy guide.
By selecting the right tools and maintaining them diligently, you’ll enjoy long-term cleanliness and peace of mind. Don’t underestimate the power of proper equipment care—it’s the foundation of an effortless, healthy home environment. For more advanced cleaning insights, explore my article on hidden spots landlords inspect during move-outs. Try implementing a weekly UV sanitizing routine with your device, and notice how it elevates your home’s overall hygiene and freshness. Remember, consistency and quality tools are your best allies in achieving lasting cleanliness.
What I Wish I Knew About Wall Repairs Before My First Move-Out
One of the toughest lessons I learned was the importance of patience and attention to detail when tackling wall scuffs, especially with Smart-Paint surfaces. Rushing through or relying solely on harsh cleaning agents often led to more damage, costing me extra repainting and risking deposit deductions. The lightbulb moment came when I realized that gentle, surface-specific techniques could save both time and money—transforming a frustrating chore into a manageable task.
Tools and strategies that truly made a difference
Over time, I curated a toolkit that includes soft microfiber cloths, baking soda paste, and carefully chosen cleaning products designed for delicate surfaces. These aren’t just random items; they’re proven to preserve wall integrity while effectively removing stubborn scuffs. Learning to test cleaning solutions on hidden areas beforehand was a game-changer, ensuring I avoided surprises and achieved a flawless finish. For a comprehensive list and detailed guidance, check out my expert cleaning secrets.
The real value of knowledge that isn’t in the manuals
The biggest insight wasn’t just about products, but about understanding the surface you’re working with. Knowing that Smart-Paint reacts differently to various cleaners, or that textured walls require specific attention, helped me prevent costly mistakes. I also discovered that spot cleaning meticulously shows landlords you’re diligent, making them more likely to return your full deposit. This lesson emphasized that a gentle approach, combined with the right tools, can make all the difference in leaving walls looking pristine.
Turning these insights into your own success story
Implementing these lessons means you’ll approach move-out cleaning with confidence and precision. Remember, the difference between a partial refund and getting your full deposit back often hinges on the tiny details—like properly removing those stubborn scuffs. Take the time to evaluate your tools, test solutions first, and approach each stain with care. Your apartment’s walls will thank you, and so will your wallet.
Your Journey Starts Now
Don’t wait for the next move to start mastering the art of wall cleaning. With the right knowledge and tools, you can turn a challenging task into an opportunity to shine. Ready to elevate your move-out game and secure your full deposit? Dive into my detailed guide and start transforming your space today.
What’s been your biggest challenge in cleaning walls before a move-out? Share your story below—I’d love to hear how you handled it!