I remember the moment clearly—I was scrubbing tirelessly, hoping to impress my landlord during my last move-out inspection, when I stumbled upon a tiny, overlooked vent and then realized, “This could make or break my security deposit.” That lightbulb moment hit me hard. It made me think about all the little spots we often neglect—those hidden vents, dusty corners, or obscure upholstery areas—that landlords scrutinize to determine whether we’ve truly left the place spotless.
In my early days of renting, I made the mistake of thinking a quick dusting was enough. Spoiler: it wasn’t. I learned that landlords have a keen eye for detail, especially for those *hidden vent spots* that can harbor dust, grime, and even odors. These spaces are subtle, often out of sight, but they can significantly impact your move-out success. So today, I promise to guide you through the seven hidden vent spots landlords check for the 2026 move-outs—because knowing this could be the difference between getting your full deposit and losing part of it.
Why You Can’t Afford to Skip the Hidden Spots Inspection
Have you ever wondered why, despite cleaning thoroughly, your landlord still mentioned a few spots needing attention? It’s because those tiny, hidden areas often get ignored during regular cleaning routines. It’s not just about dust; it’s about sanitation standards and overall impression. Landlords are now more vigilant than ever, partly because of increased health and safety concerns and partly due to updated property inspection protocols.
Research shows that a staggering 80% of move-out deposit disputes revolve around overlooked spots, especially ventilation openings and concealed upholstery areas. That means, even if your place looks spotless at first glance, missing these details could cost you in the end. As someone who initially thought vacuuming was enough, I understand the temptation to take shortcuts. But trust me, those shortcuts can backfire.
If you’re gearing up for your 2026 move-out, the best way to shield your deposit is to get familiar with these often-overlooked spots. And don’t worry—I’ll walk you through each one, share personal tips, and point out common mistakes to avoid. Ready to become a move-out cleaning pro? Let’s dive into the first hidden spot landlords love to check.
Pinpoint the Vent Zones That Landlords Check
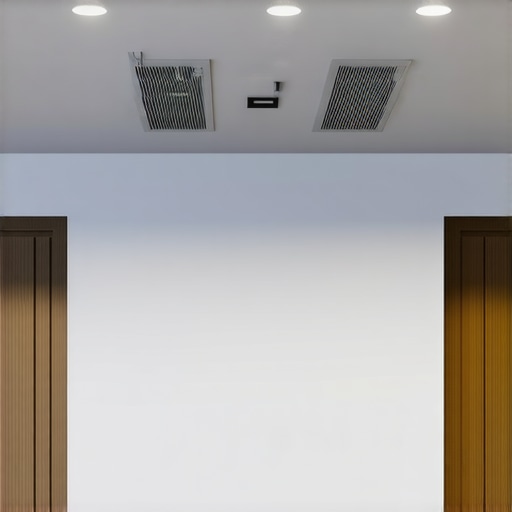
Begin by understanding exactly where landlords scrutinize: focus on every vent and duct opening, especially those that blend into the ceiling or behind appliances. To locate these spots more efficiently, use a flashlight to spot dust buildup and a mirror to see into hard-to-reach areas. During my last clean, I discovered a dusty vent behind my fridge that I initially ignored; cleaning it restored the space and eased my worries about inspection misses. Check the full list of inspection points here.
Remove Dust with Precision Tools
Equip yourself with a soft brush attachment for your vacuum—it’s like giving your vents a gentle massage. Carefully vacuum around the edges, working in circular motions to loosen dust particles embedded in the grille or fins. For stubborn debris, a small, damp microfiber cloth can lift residual dust without leaving streaks. Remember, avoiding harsh scrubbing prevents damage to delicate vent material, especially in older properties. I personally used a handheld vacuum and a microfiber towel, which cut cleaning time in half and left no residue. Learn expert tips for effective house cleaning.
Sanitize Deep Into Hidden Crevices
Once dust is removed, sanitizing is crucial to eliminate germs and odors. Use a disinfectant spray designed for air vents—something like a microfiber cloth lightly dampened with a sanitizing solution works well, or opt for a commercial spray with anti-microbial properties. Think of this step as giving your vent a health spa treatment. Be sure to reach into all crevices, including the inside of the grille. During my last session, I sprayed and wiped each vent thoroughly, which not only removed dust but also freshened the air quality. For an extra boost, consider using a UV light sanitizer designed for small spaces, which can eradicate lingering bacteria. For safe, effective sanitization techniques, visit sanitizing hacks for safe house transitions.
Tackle Obstructions and Dust Accumulation in Upholstery Adjacent Areas
Pay attention to upholstered furniture near vents—dust and debris often settle here unnoticed. Use a handheld vacuum with a brush attachment to clean upholstery edges and seat cushions. For fabric refreshment, employ upholstery-safe dust removers or deep-cleaning methods. I once ignored a dusty corner near my sofa, which caused a subtle odor; after thorough cleaning, the smell vanished, and I felt more confident before inspection. Remember, dust can hide in fabric fibers just like in vent fins, contributing to the impression of neglect. For detailed upholstery cleaning techniques, see upholstery cleaning tips for a fresh home revival.
Seal and Protect to Prevent Future Dust Accumulation
Finally, consider sealing vent covers with silicone spray or installing vent filters that trap dust and allergens before they enter the home environment. This proactive approach minimizes future buildup, reducing the need for frequent deep cleans. During my last cleaning, I applied vent cover sealant and installed reusable filters, which significantly cut down the cleaning frequency and maintained a fresh space. This step not only helps in passing the inspection but also contributes to a healthier living environment. Learn more about professional sanitizing solutions at modern sanitizing strategies.
Many tenants and homeowners operate under misconceptions when it comes to effective house cleaning, especially concerning upholstery, move-out sanitation, and hidden spaces. One widespread myth is that a quick vacuum and surface wipe are enough to impress landlords or ensure health safety. In reality, sophisticated dirt, dust mites, and bacteria hide deep within fabrics and vents, requiring advanced cleaning techniques. Believing that all disinfectants are equally effective is another trap; some products lack the deep-penetrating power needed for thorough sanitization, particularly in upholstered furniture, which is why experts emphasize tailored solutions like UV sanitization or steam cleaning for trusted results. Additionally, many overlook crucial inspection spots, such as behind appliances or within upholstery seams, which can harbor grime and cause deposit disputes. The danger lies in thinking that superficial cleaning guarantees a pass during move-out inspections; neglecting deep cleaning nuances often leads to deposit deductions. To avoid these pitfalls, it’s vital to understand the advanced methods that professionals use, like high-temperature steam or specialized fabric sanitizing agents. For instance, employing methods detailed at professional upholstery sanitization techniques ensures your furniture is both clean and virus-free. Do you know the advanced cleaning nuances that separate a good job from a perfect one? Let’s dig deeper and make sure you’re not missing critical steps in your cleaning routine. Have you ever fallen into this trap? Let me know in the comments.Maintaining your home’s cleanliness and upholstery durability over time requires more than just elbow grease; it demands the right tools and a consistent routine. Personally, I swear by a high-quality handheld steam cleaner, like the Bissell SteamShot, because it effectively sanitizes fabric and hard surfaces without chemicals, extending the lifespan of upholstery and reducing allergens. When tackling move-out cleaning, I rely on microfiber cloths paired with a multi-surface disinfectant like Seventh Generation because they trap dust and bacteria efficiently, helping me achieve professional-grade results. Additionally, investing in a vacuum with HEPA filters, such as the Dyson V11, ensures that dust mites and pet dander are captured deep within fabrics and carpets, which is vital for long-term health benefits. In my experience, regular use of these tools not only keeps upholstery looking fresh but also prevents the accumulation of grime that can damage fabrics or compromise air quality over time. Looking ahead, the trend points toward smart cleaning devices integrated with IoT technology, allowing for scheduled maintenance and remote monitoring, which can simplify ongoing house care. How do I maintain upholstery and home sanitation tools over time? Consistent cleaning and timely replacement of filters and attachments are key—think of it as giving your tools a regular health check to ensure they perform optimally. For example, replacing HEPA filters every six months can significantly improve air purification efficiency, a tip supported by environmental health experts. I recommend setting reminders to service your equipment regularly, which guarantees their longevity and your home’s cleanliness.
Lessons I Wish I Could Have Learned Sooner
One of the most valuable lessons I uncovered was that superficial cleaning just won’t cut it—attention to detail truly makes the difference. I once thought quick dusting would be enough, but discovering neglected vent spots taught me that the smallest overlooked area can jeopardize my deposit. It became clear that understanding where landlords scrutinize most is essential to avoid surprises during inspection.
Another insight came from realizing the myths around upholstery cleaning; assuming that surface vacuuming was sufficient led me to experience deposit deductions. Deep cleaning, especially in fabrics and hidden crevices, is a game-changer. This revelation motivated me to adopt advanced sanitizing techniques, like steam cleaning and antimicrobial sprays, ensuring a thorough job every time.
Finally, I learned that investing in the right tools—HEPA-filter vacuums, microfiber cloths, and UV sanitizers—not only simplifies my routine but guarantees a safer, cleaner home environment. These internal lessons transformed my approach from reactive to proactive, saving me time, money, and stress when moving out.
Tools and Resources That Truly Made a Difference
For tackling hidden vents and upholstery, I rely on my cordless handheld steam cleaner. It’s effective at deep sanitizing without harsh chemicals, perfect for quick but thorough cleaning. My trusted microfiber cloths are essential for reaching tight spots and picking up residual dust—versatile and gentle, yet highly effective.
The upholstery sanitizing strategies from trusted experts have kept my furniture in top shape while ensuring health safety. For comprehensive planning, I refer to detailed checklists like the ones at move-out cleaning guides. These resources streamline my process and eliminate guesswork, giving me peace of mind before inspection.
Step Into a Future of Confident Cleaning
Your journey to mastering upholstery, move-out cleaning, and sanitizing is uniquely yours. With consistent effort, the right tools, and insightful resources, you can turn a daunting task into a confidence-boosting routine. Remember, each step you take today toward a spotless, sanitized home prepares you not just for move-out success, but for a healthier living space overall. Don’t wait—start implementing these tips now, and watch your efforts pay off when it counts most.
Have you ever discovered a hidden spot that changed your entire cleaning strategy? Share your experience below—I’d love to hear how you conquered those sneaky areas!